
DIY and Crafts
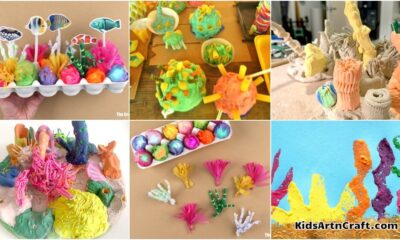
Easy Rakhi Making Ideas for Kids – Raksha Bandhan Crafts

Easy Rakhi Making ideas for Kids to make at school rakhi-making competitions and at home to celebrate the festival of love and bonding between brother and sister!
Raksha Bandhan is a special occasion that reminds us of the beautiful bond between brothers and sisters. With Raksha Bandhan around the corner, we all want to tie the best rakhis to our brothers and wish them long lives. So in the article, you will learn to make some really easy rakhi ideas for kids that can be made at home or school. Teachers can organize DIY rakhi activities or competitions to celebrate the bonding of brothers and sisters during the festival.
Simple Handmade Rakhi Making Ideas for Kids to Celebrate Raksha Bandhan
Read More: How to Make Handmade Rakhi Designs for Rakshabandhan
Woolen and Foam Rakhi Making for Kindergarten Kids
Materials:
- Woolen
- Foam Sheet
- Stone
- Ribbon
- Glue
- Pencil
- Scissor
Procedure:
- Take a woolen thread of your choice and wrap it around your four fingers, making sure to keep rolling it for some time.
- Remove the wrapped thread from your fingers and secure the middle part with the same thread.
- Cut out the bow-shaped structure and carefully cut the two loops to release the threads.
- Shape the end of the thread to form a perfect circle using a pair of scissors.
- Take red and yellow glitter paper and cut out two circles, with the red one slightly larger than the yellow one.
- Use red shimmer paper to draw a circle with the same dimensions as the woolen circle, then cut it out with scissors.
- Take an orange-colored ribbon and glue the red shimmer paper onto it.
- Place a red stone on the yellow glitter paper.
- Paste the woolen circle onto the base, and then attach the red and yellow shimmer paper cuts, respectively.
- Allow the rakhi to dry, and your beautiful rakhi is ready to be used!
By following these steps, kindergarten kids will create a lovely rakhi using woolen thread, glitter paper, shimmer paper, ribbon, and a stone.
Silk Thread Rakhi Making
Materials:
- Silk Thread
- Ganesha Idol Sticker
- Sticky Tape
- Glue
- Scissor
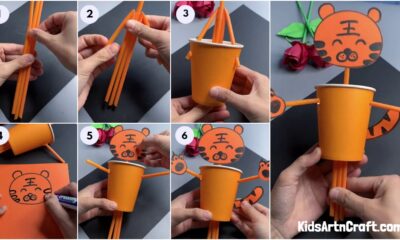
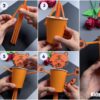
Procedure:
- Take a silk thread of your choice and wrap it around two fingers of your hand, rolling it for some time.
- Remove it from your fingers and secure the middle part with the same thread.
- Cut out the bow-shaped structure, and carefully cut the two loops to release the threads.
- Shape the end of the thread into a perfect circle using a pair of scissors.
- Take three silk threads and secure the top tips of all of them together using sticky tape. Pleat the threads in a regular pattern and secure the end with two knots.
- Stitch the circular base to the band created using the silk threads, and cut off any extra thread.
- For the final touch, paste a Ganesha idol at the center of the rakhi using glue.
By following these steps, you will create a beautiful rakhi using silk thread, featuring a circular base, a pleated band, and a Ganesha idol as the centerpiece. You can also use peacocks or flower stickers instead of Ganesh’s idol.
Satin Flower Rakhi Making at Home
Materials:
- Satin ribbon of different colors
- Glue, scissors, and decorative articles
Procedure:
- Take approx 12 small cut-outs of satin strips of 10 cm each of the thin satin ribbon.
- Fold the 10cm ribbon into half mark a center point fold both ends towards the center and stick them as shown in the video.
- Repeat this process with all 12 cut-outs and allow them to dry.
- Now take all the ribbons and stick them in the pattern shown in the video.
- Once the flower is ready, stick it over a different colored satin ribbon in the center.
- Now add a decorative diamond over the flower or you can also add a single pearl in the center and your delicate flower rakhi is ready.
DIY Paper Rakhi Craft Ideas for Kids
Materials:
- Colorful papers, 3d glitter outliner scissors, and glue.
- Satin ribbon, double tape, and decoration materials.
Procedure:
- Cut at least 4-5 squares of different colored paper and keep them ready.
- Now take a 3d glitter outliner and draw patterns over the squares according to your choice or you can follow the steps as shown in the video.
- Allow all the cutouts to dry and now take another satin ribbon and stick one square over it as shown in the video.
- Now cut a small piece of double tape and start sticking other squares in a cross pattern, one above the other in a color combination pattern
- Once all the squares are in place, decorate the top-most square with a crystal and 3d glitter outliner, and finally, your paper rakhi is ready.
Quilling Rakhi Making – Eco-Friendly Paper Rakhi
Materials:
- Quilling strips of different colors
- Quilling needle, tray, and satin ribbon
- Scissors, glue, and decorative articles
Procedure:
- Take a quilling strip and start rolling it and attach different color strips at every interval to make the circle big and colorful.
- Make two similar circles from quilling strips and let them dry.
- Now take any three shades of quilling strips and roll them as shown in the video.
- You will need at least 8 such tri-colored rolls, once they are ready; shape them into petal shapes as shown in the video.
- Now take a satin ribbon and stick the two bigger circles next to each other and then stick those petals shapes, four on each side as shown in the video.
- Allow them to dry and now decorate them with small pearls (moti) if you want and your eco-friendly quilling rakhi is finally ready.
Read More: Beautiful Button Turtle Crafts for Kids
Easy Rakhi Bracelet – Learn How to Make Rakhi With Paper
Materials:
- Satin ribbon, 3mm quilling strips, and needle.
- Decorative mirrors, paper, scissors, and glue.
Procedure:
- Cut a 2 cm radius circle from the paper and keep it ready to make a base.
- Now take the quilling strips in a combination of two shades join 8 strips together and roll them.
- Take the circle cutouts and glue them over both sides of the satin ribbon.
- Now stick the quilling circle over the white circle cut out as shown in the video.
- Now make small tight rolls from different colors of quilling strips and stick them around the main circle in a combination pattern.
- Once all the rolls are done, decorate the rakhi with small mirrors and diamond stickers as required, and finally the rakhi is ready!
Foam Sheet Rakhi
Materials:
- Foam sheet, satin ribbon
- Glue and scissors
Procedure:
- Cut a circle from a foam sheet with the help of design scissors
- Now cut another small circle to the previous one in the same pattern
- Take the big circle and make two cut-outs by folding it in half, such that the satin ribbon can pass through it.
- Now pass the satin ribbon through the big circle and stick the small circle on top of the big circle.
- Now stick the smallest glitter circle in the center and add some glitter around the circle as shown in the video and your rakhi is ready.
Superman Rakhi Making for Kindergarten
Materials:
1- Foam sheet – one matt and one glitter
2- Scissors, glue, and satin ribbon
Procedure:
- Take the matt foam sheet draw the shape of the Superman logo on it and cut it out.
- Now take the glitter foam sheet and draw the letter “S” on it as shown in the video and cut according to the instructions given in the video.
- Now stick both the matt foam and the glitter cut out together.
- Take the satin ribbon mark the center and stick the Superman logo on it.
- Now cut small stars or heart shapes and stick them on the sides of the main logo.
And finally, your superhero rakhi for your superhero brother is ready for kindergarten kids.
Flower Shape Rakhi
Materials:
- Colourful papers
- Satin ribbon, glue, and scissors.
Procedure:
- Take one strip of 0.75*12″, a second strip of 1.0*12″, and a third strip of 1.5*12” for this rakhi.
- Take the strip with measurement 1.5*12” and start marking at every quarter inch and now fold it in the front-back pattern.
- Repeat the same process with the remaining two strips.
- Once all three strips are ready, form a circle from the big strip but flatten it and stick both ends.
- Place the strips in order the broadest strip at the base, then the medium, and the smallest.
- Stick them over a circle cut out and later one above the other and then stick the entire thing on the satin ribbon, and add a smiley face
- Cut out the topmost circle or you can also add diamonds and pearls in the center.
- Finally, the flower-shaped rakhi is ready.
Ninja Star Rakhi
Materials:
- Card papers, quilling strips, and quilling tool
- Scissors, glue, and satin ribbon
- Decorative articles
Procedure:
- Take a square-shaped paper fold it in half and cut it
- Replace the second half with another color.
- Now fold the half paper into another half breadth-wise and later length-wise (refer to video)
- Now take one end of the paper and twist it sideways, and another end in the opposite direction to the previous one.
- Fold the remaining edges inward as shown in the video forming an “s” shape.
- Repeat this with the red paper as well and now merge both the paper by folding together as shown in the video. ( Please carefully watch the folding part)
- Stick the open edge, make a tight circle from the quilling strip, and stick it at the center of the star.
- Now stick the star over the satin ribbon, and finally, the rakhi is ready.
Read More: Fairies in Jar Craft Ideas for Kids
Quilling and Pearls Rakhi Making
Materials:
- Quilling Paper
- Slotted tool
- Quilling Board
- Cardboard
- Pearls
- Pencil
- Scissor
- Ribbon
- Glue
Procedure:
- Take thin strips of pink and white quilling paper and join them together using glue. Use a slotted tool to bind the strips, shaping them into a quilling pearl. Repeat this step to create multiple quilling pearls.
- Use more colorful strips of quilling paper to create a slightly larger, multicolored quilling pearl.
- Cut out a circle from colored paper. Outline the circle on another colored paper and cut it out to match the dimensions of the first circle.
- Glue the multicolored quilling pearl in the center of the first circle. Arrange the pink and white quilling pearls around the multicolored one in a circular pattern, covering it completely. Use glue to secure them in place.
- Take a long, thin yellow quilling paper and bind the entire floral structure together by wrapping it around the outer edge. Secure the end with glue.
- Take an orange-colored ribbon and glue it between the two circular sheets of paper using glue.
- Paste the floral quilling pearl structure onto the circular base. To complete the look, stick a row of white pearl-like structures along the outline.
Jute and Stone Rakhi Making
Materials:
- Jute rope
- Stone
- Circular object
- Thick paper
- Color Spray
- Pencil
- Scissor
Procedure:
- Take a red shimmer paper and use a marker and a circular object to draw two circles. Cut out the circles.
- Take a jute rope and stick the tip of it in the center of one of the circles. Begin winding the rope in a circular pattern, gluing it along the way to secure the folds.
- Take another jute rope and roll it in your hand to create a smaller circle. Glue the end of the rope and paste this smaller jute circle in the center of the larger jute circle.
- Cut equal small pieces from another jute rope. Take a bunch of four tiny strings and paste them on the four sides of the larger jute circle.
- Cover the remaining blank part with a U-shaped jute structure and secure it with glue.
- Take some more small jute threads and fold them into small loops. Secure the loops with glue and repeat the same process on the other three sides of the rakhi.
- Cut a long piece of jute rope in half and paste it in the middle of the blank red shimmer paper, using the paper as the base. Then, paste the jute rope design on top of the paper.
- Tie knots on both ends of the jute rope to secure it, and then decorate the rakhi with red stones as shown.
- For the final touch, add some white stones to enhance the beauty of the rakhi.
By following these steps, you will create a beautiful rakhi using red shimmer paper and jute rope, adorned with jute designs and stones.
So these were some rakhi designs and ideas that can be easily made at home or school with the help of tutorials and also they give a more personal touch to the bond you share with your brother. I hope you like them; please share your views and experiences in the comment section. Happy Raksha Bandhan in advance.
You may like these:
Wood and thread bracelet
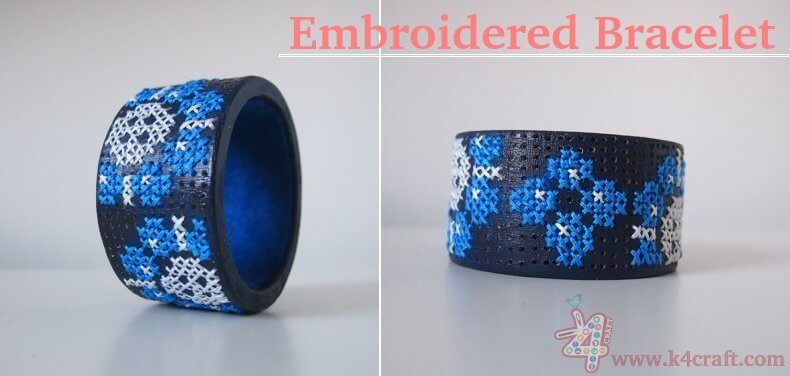
Cut a wooden bead strand, thread colorful embroidery floss through, and tie secure knots. Add patterns or charms for flair. A rustic, handmade accessory that’s easy to create and perfect for gifting or personal style.
Cardboard photo frame
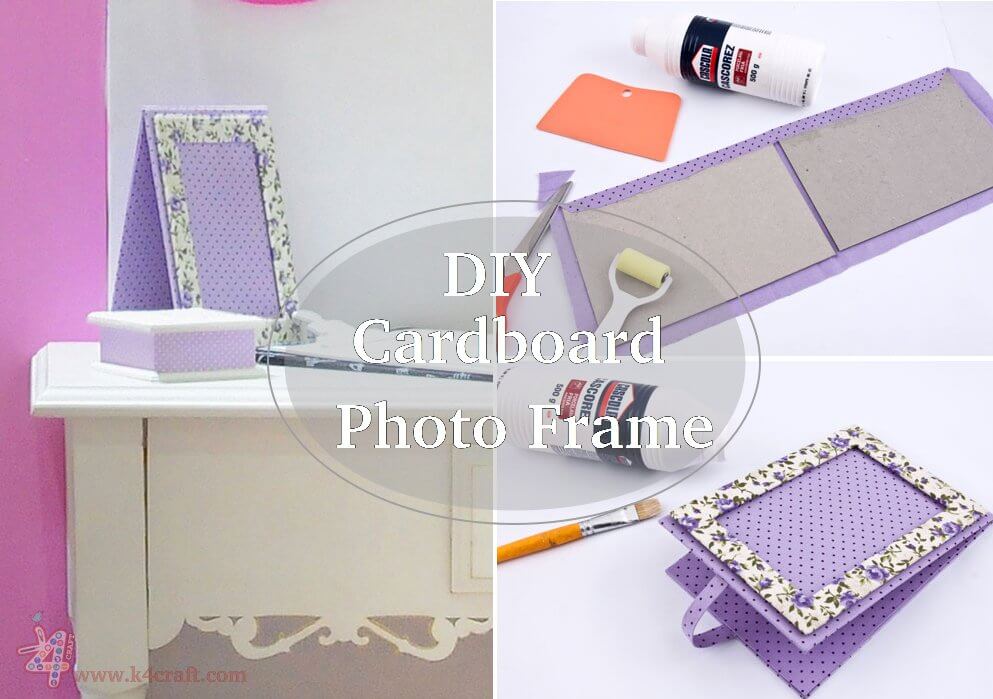
Cut cardboard into a frame shape, decorate with paint, fabric, or buttons, and glue a photo inside. Add a stand or magnet for display. A quick, eco-friendly way to showcase memories creatively.
Cool gift wrapping
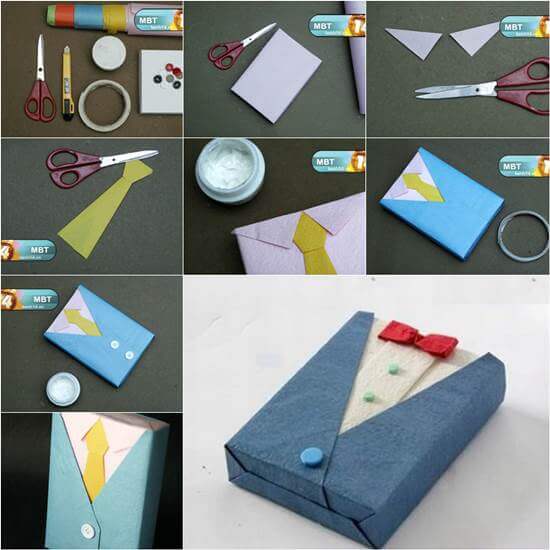
Use fabric scraps, maps, or comic pages as wrap. Add dried flowers, personalized tags, or reusable bags. Tie with twine or ribbon for a unique, eco-conscious touch that makes gifts stand out.
Father’s Day gifts

Create a custom mug, photo collage, or tool organizer. Make a coupon book for chores or write a heartfelt letter. Simple, thoughtful, and handmade gifts to show Dad he’s appreciated.
Pretty henna designs
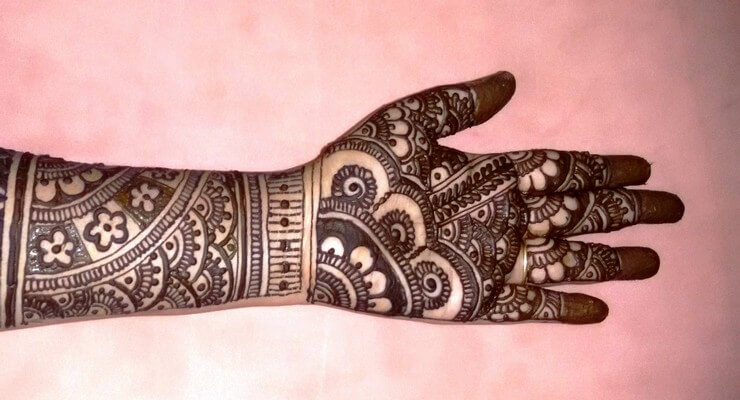
Try floral patterns, mandalas, or paisley motifs for hands and feet. Use stencils or freehand for intricate details. Perfect for celebrations, weddings, or just adding a touch of artistry to your style.