Recycled Crafts
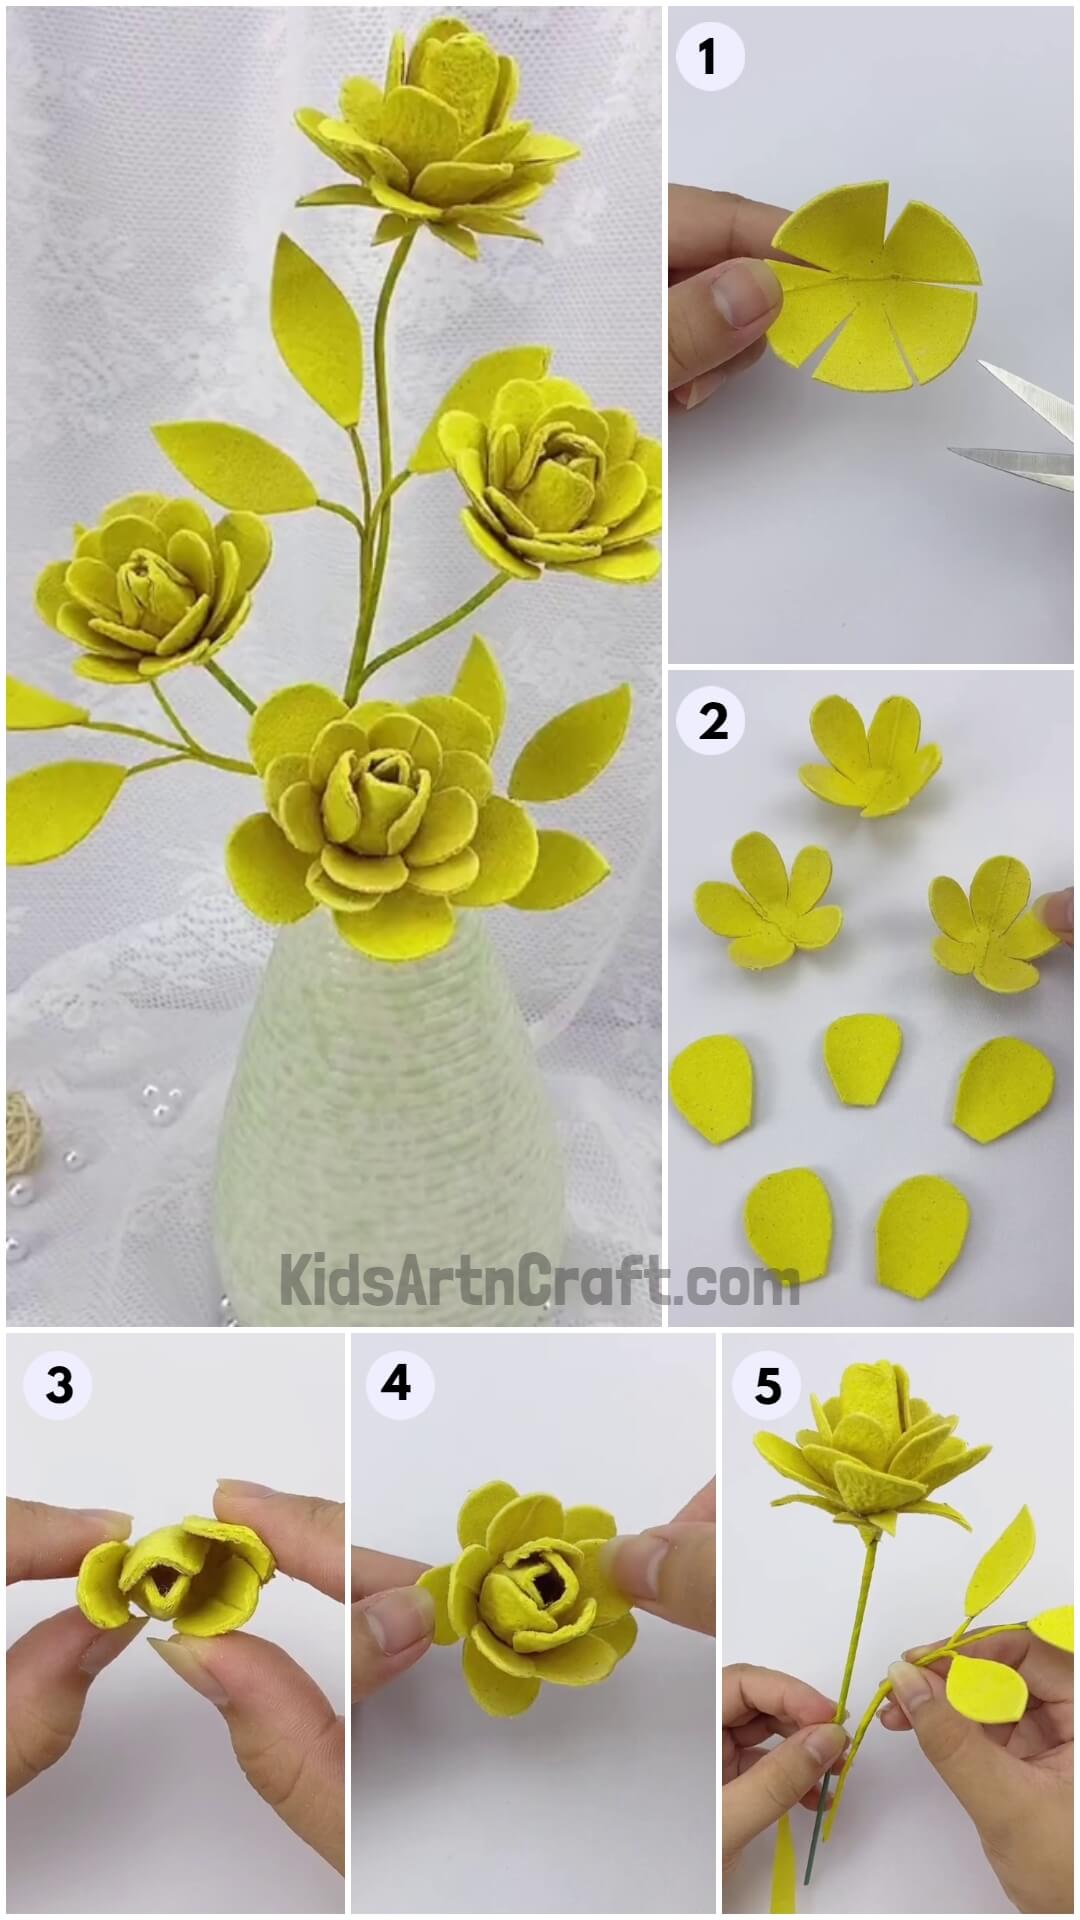
Pretty Roses Craft From The Egg Cartoon Tutorial For Kids

In this enjoyable lesson, children can learn how to make a beautiful art piece using egg holders! By using paint and some basic materials, kids can make a wonderful display of lovely roses that look great as a centerpiece or decoration.
We all see flowers almost every day, be it in our gardens, parks, or small pots, they always add life and color to their surroundings and perhaps, the most widely admired of them all are roses. They come in multiple different colors and smell just wonderful. Today, we will be creating some through craft and the material used to do that is an egg holder carton. Grab all the material required to make this craft and let’s go.
DIY Pretty Roses Craft From The Egg Holder

Read More: How to Make a Flower Out of a Paper Cup For Kids
Materials Required
- Cardboard Egg holder tray
- A pair of Scissors
- Liquid glue
- Yellow paint
- A Vase
- Yellow sheet of paper
Procedure
Step 1: Painting The Egg Holder Tray
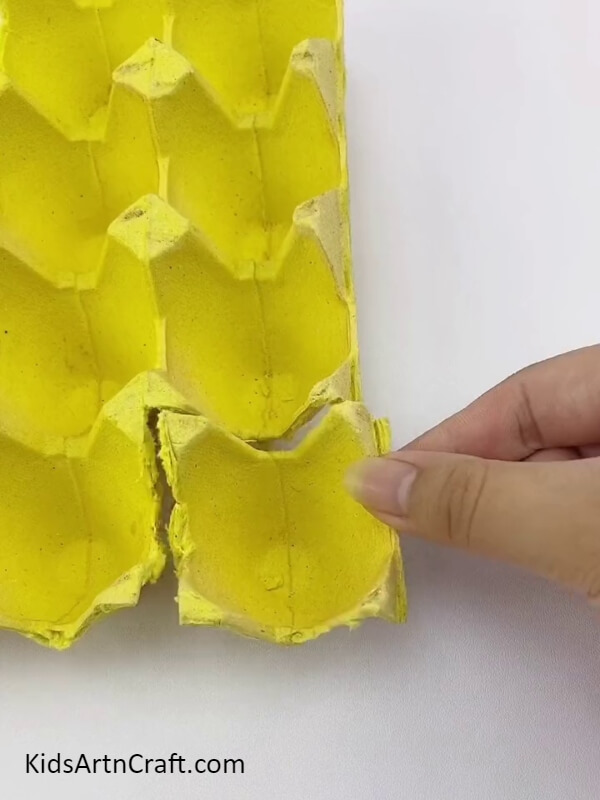

Place the tray on the table and dip a paintbrush in some yellow paint, stroke the brush onto the carton tray coloring both sides of the tray yellow. Allow the paint to dry completely before cutting one cone out of the tray using a pair of scissors. Cut the edges off to shape the cone better. Look at the picture below as a resource.
Step 2: Making Cuts On The Sides Of The Cone
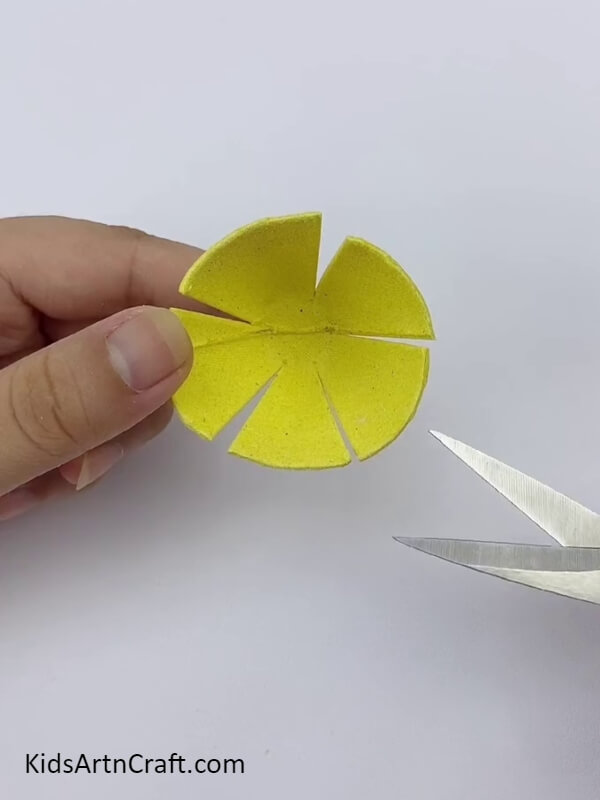
Make five cuts on the slopes of this cone as done in the image below.
Step 3: Making Small Flowers
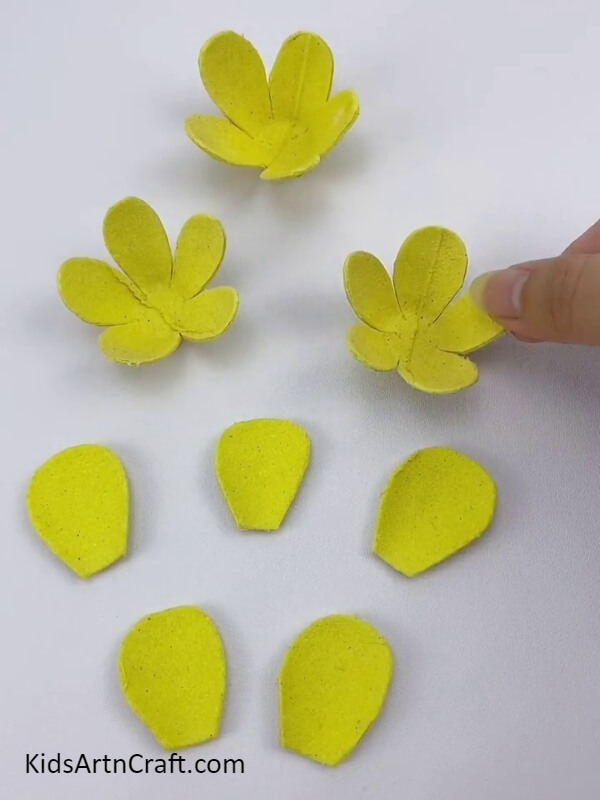
Make the edges of the cuts that you just make, more round shaping them like petals. It should now look like a small flower with five petals. Repeating the same steps make two more such floral shapes. Now, cut out five petal shapes bigger in size from the same egg tray. Have a look at the picture below to understand the shapes.
Step 4: Folding The Petals
Fold two opposite petals by pinching them between your fingers. Check the picture below to understand the process.
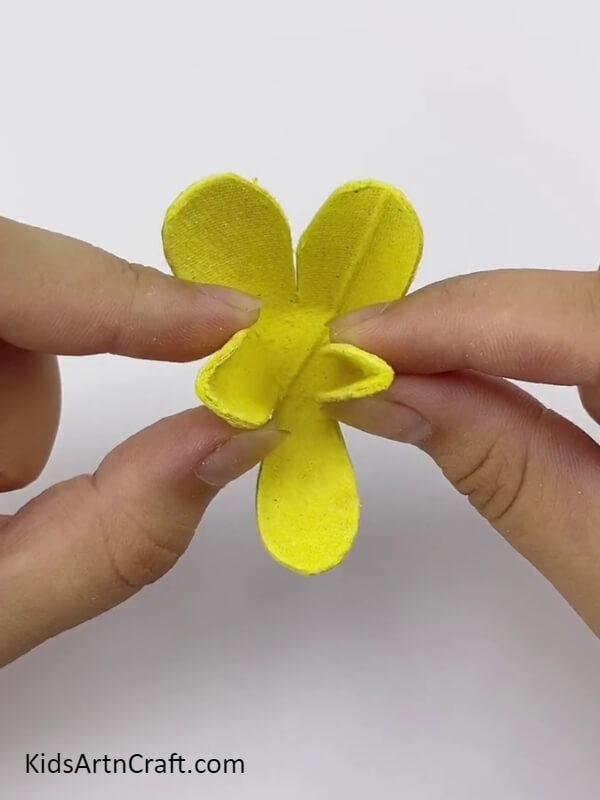
Step 5: Folding The Rest Of The Petals
Fold the rest of the petals in as well and use some liquid glue to seal the shape. Observe the image below for a better understanding of the procedure.
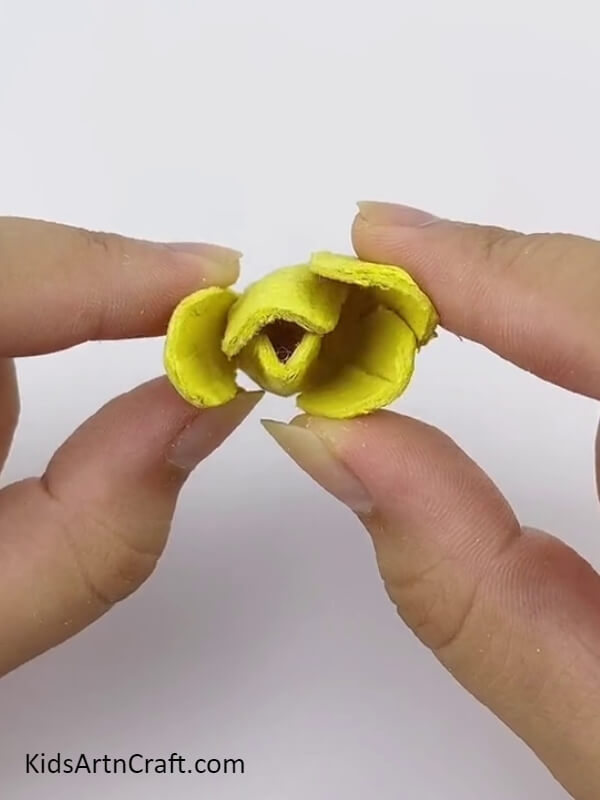
Step 6: Pasting The Other Two Floral Shapes As Well
Paste the other two floral shapes at the base of this flower one after the other. Adjust the petals to assort the arrangement of the rose. See the flower in the image below for reference.
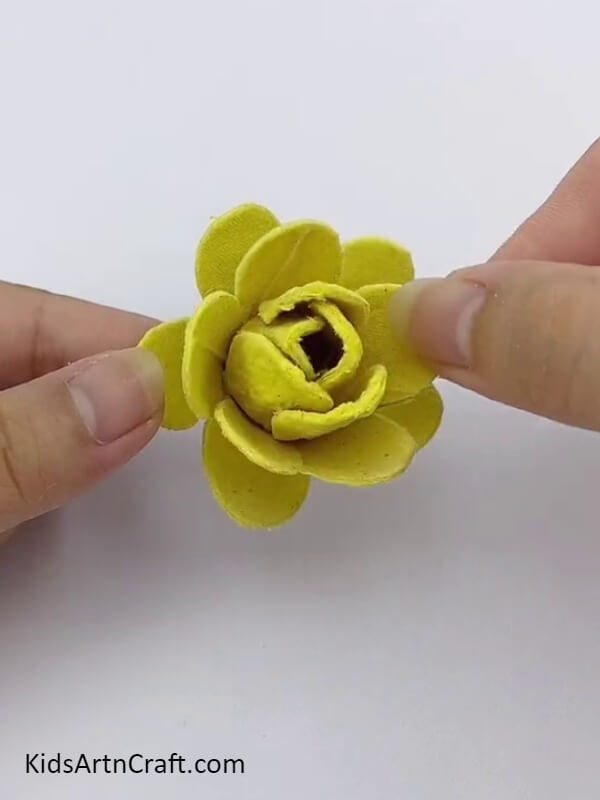
Step 7: Pasting The Bigger Petal Shapes
Paste one of the five big petals on the side of the entire rose flower arrangement as depicted in the picture below.
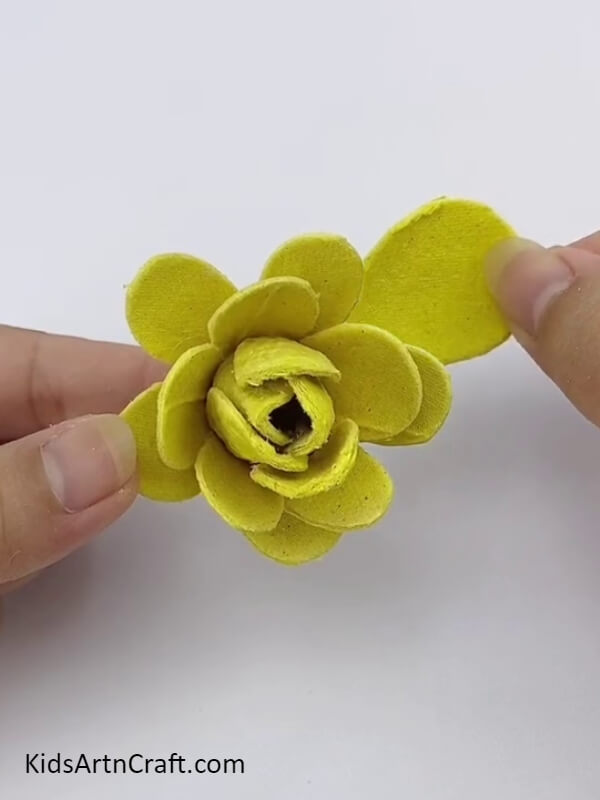
Step 8: Pasting All The Other Big Petals
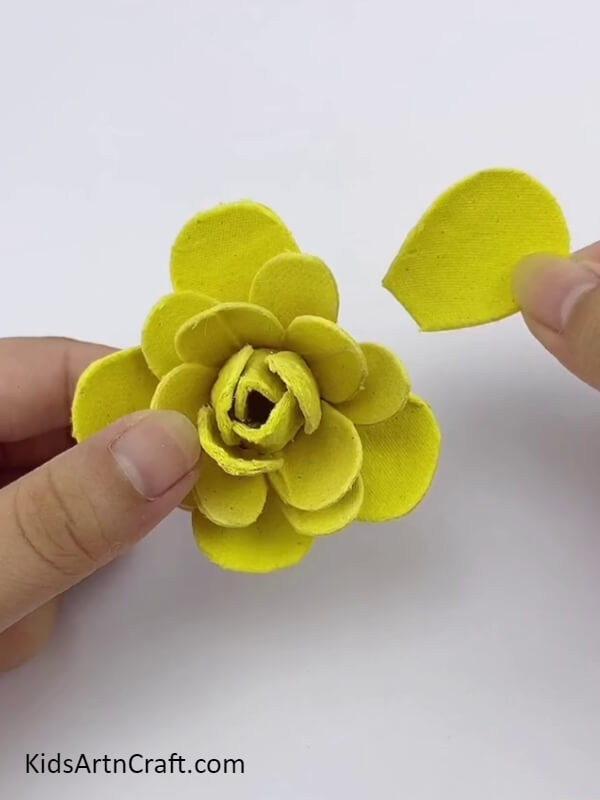
Paste the rest of the big petals on the sides of the flower arrangement to complete the rose.
Step 9: Making The Stem And The Leaves
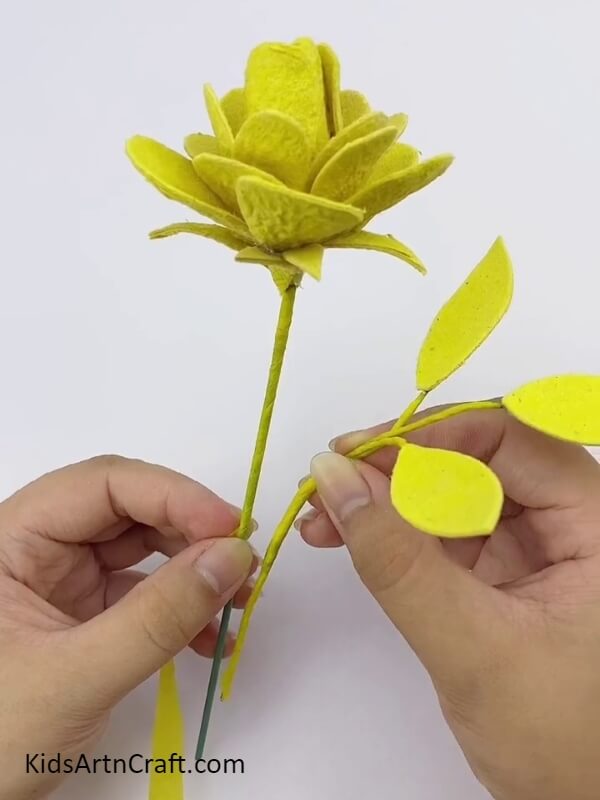
Take a yellow sheet of paper and roll it into a thin stick pasting its ends to seal the shape. Repeat the process on another yellow sheet. Cut some small leaves out of the tray and paste three to the ends of the rolled sheet. Now, cut out a shape resembling the base of a rose flower and paste it to the end of the other rolled sheet. Now paste this base to the bottom of the rose as can be seen in the image below.
Step 10: Pasting The Stem Holding The Leaves
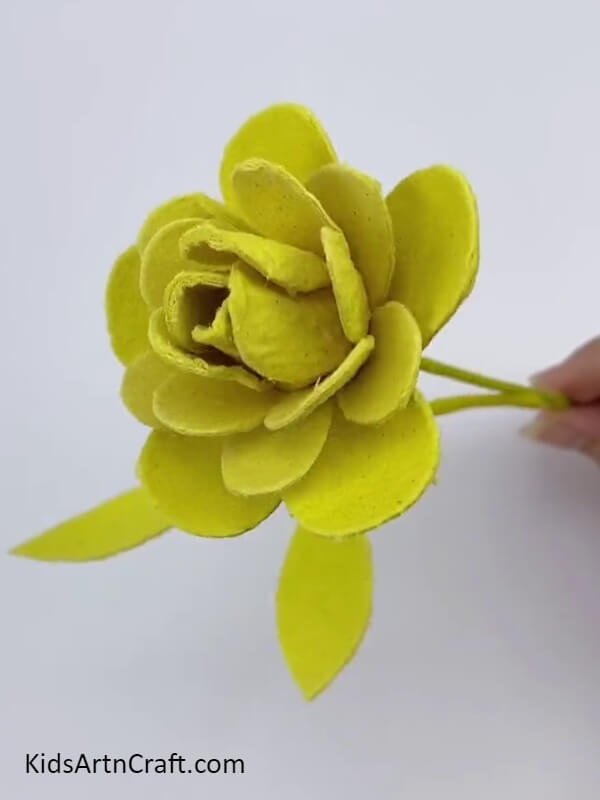
Paste the other rolled sheet holding the leaves to the rolled sheet already attached to the flower.
Placing The Flowers In A Vase
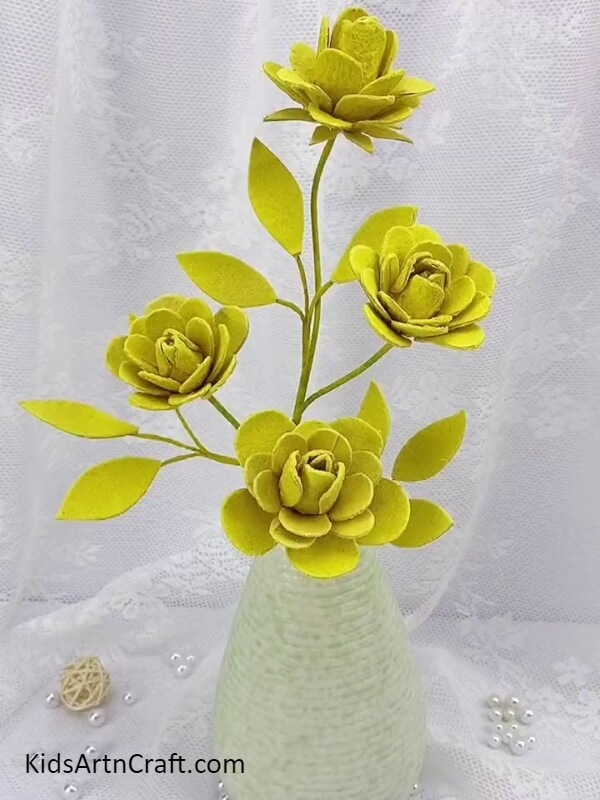
Make more such rose flowers and place them in the vase to complete the process. Have a look at the image below for a good understanding.
Some More Flower Craft Tutorial
Simple Origami Rose Craft For Little Ones

Image Source/Tutorial: Kids Art & Craft
This simple origami rose craft is perfect for little ones. It’s an easy craft that will bring a lot of joy and satisfaction. It also makes a great decoration for any room in the home. It also doubles as a fun activity to do with family or friends.
You learned great cutting, arranging, and assembling skills in this tutorial. You can use the craft as home decor and the flowers will never need changing as they will never wither. Invent new ideas to experiment with these techniques and keep growing with your art and craft.
See you again in another fun tutorial. Goodbye.
Thank you for visiting the website.
Follow us on Youtube for art and craft tutorials and much more.
More Articles from Kids Art & Craft
- How to Make Paper Sheep With Step By Step Tutorial
- How to Make Paper Cup Fish Craft
- DIY Flower Basket Step by Step Tutorials for Kids
- How to make Sunflower From Paper Cup Craft
- How to Make a Paper Cup Flower Easy Tutorial for Kids