DIY and Crafts
Cute Elephant Water Dispenser From Plastic Bottle Tutorial For Kids

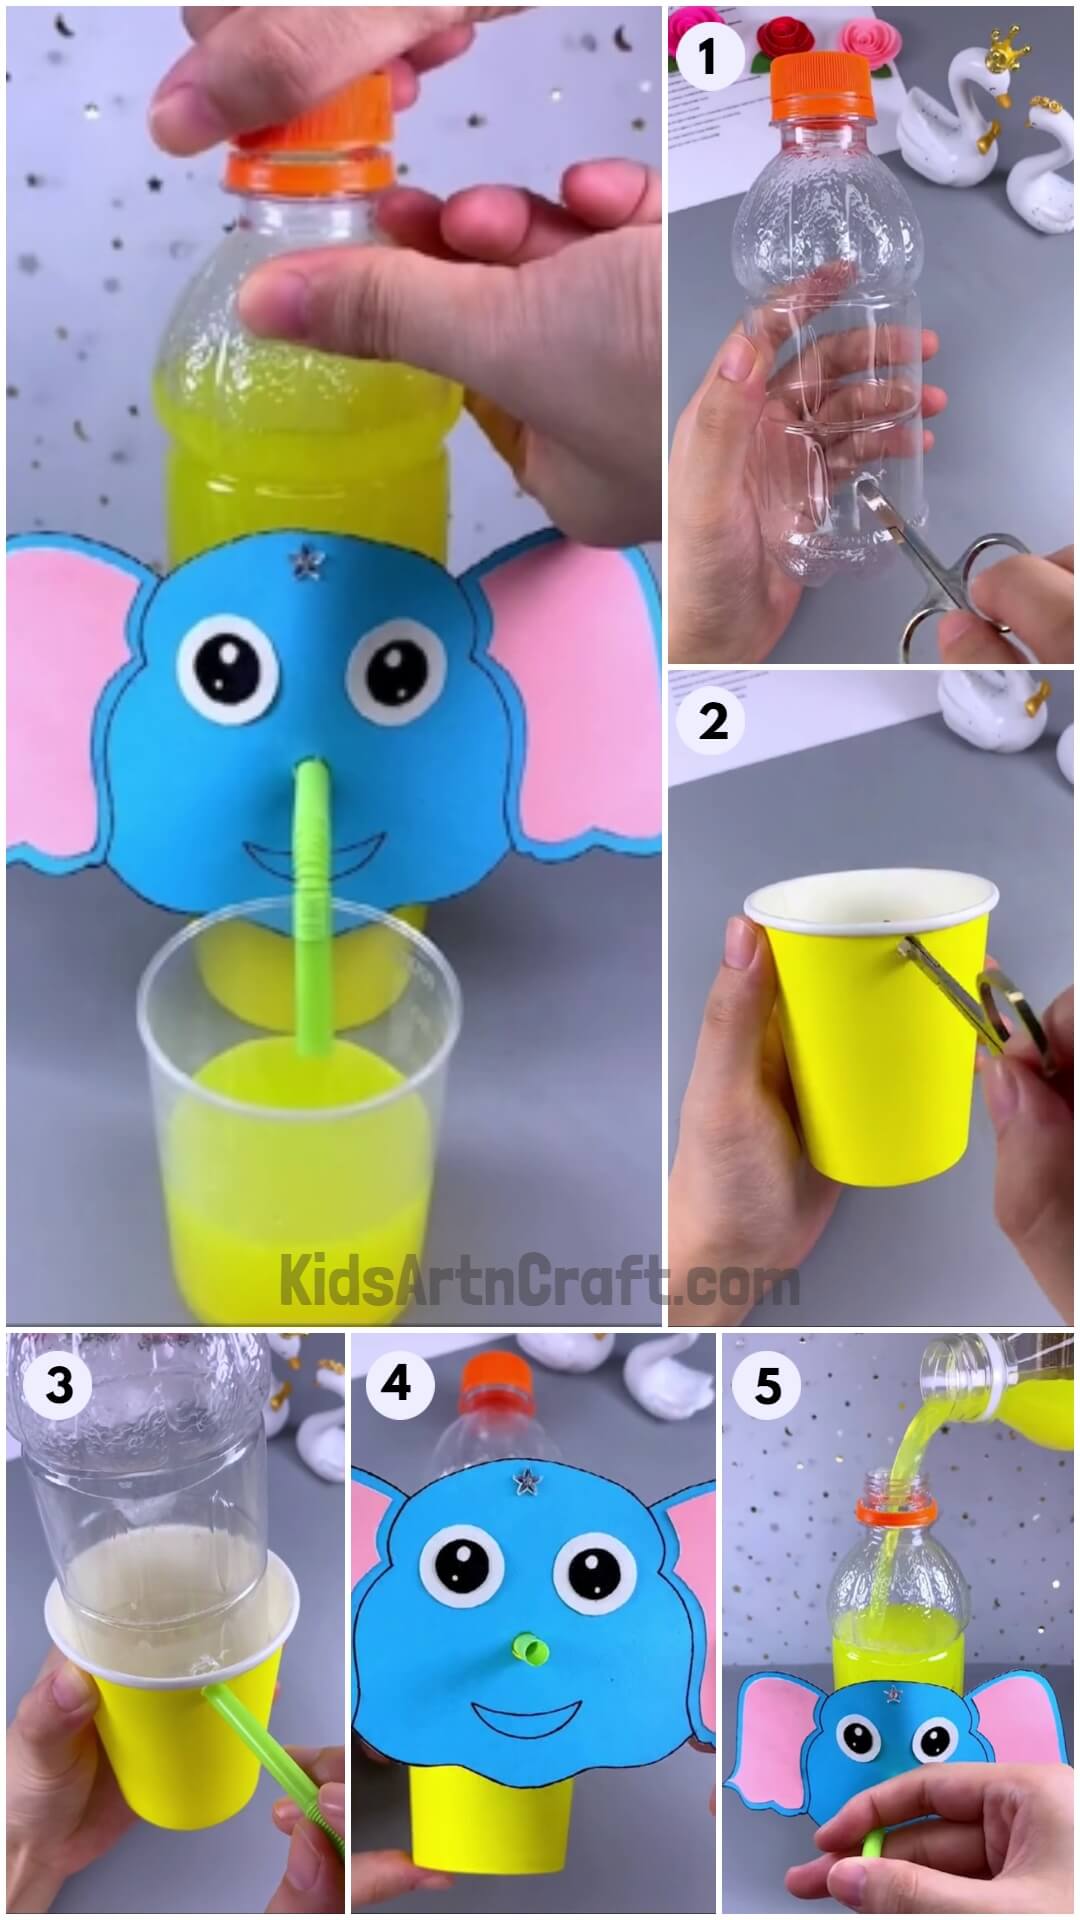
This guide will show children how to make a nice elephant water dispenser out of a plastic bottle. It is easy to do with the included directions and pictures. Your kids will be sure to be delighted with this practical and fun water dispenser.
This tutorial brings to you a very unique and useful craft which you can utilize in your day to day life, a water dispenser. In hot summer days, you can store water or juice in this dispenser and keep it in your room for all day water supply or even to be used during night. You can also keep it in your kitchen as a water dispenser to be used by your family. Also, its not just any dispenser but an elephant shaped dispenser. Isn’t that something! So, collect all the material required and let’s start making this craft.
Cute Elephant Water Dispenser Crafts For Kids
Read More: How to make Sunflower From Paper Cup Craft
Materials Required
- An empty plastic juice bottle with cap
- A plastic drinking straw
- A paper cup
- A pair of scissors
- A blue, a pink, a black and a white sheet of paper
- A black sketch pen
Procedure
Step 1: Starting With The Plastic Bottle
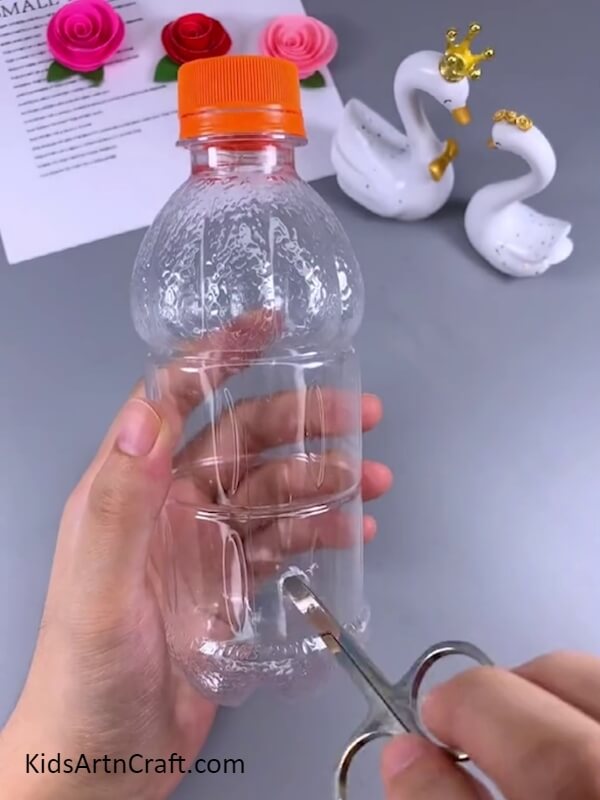
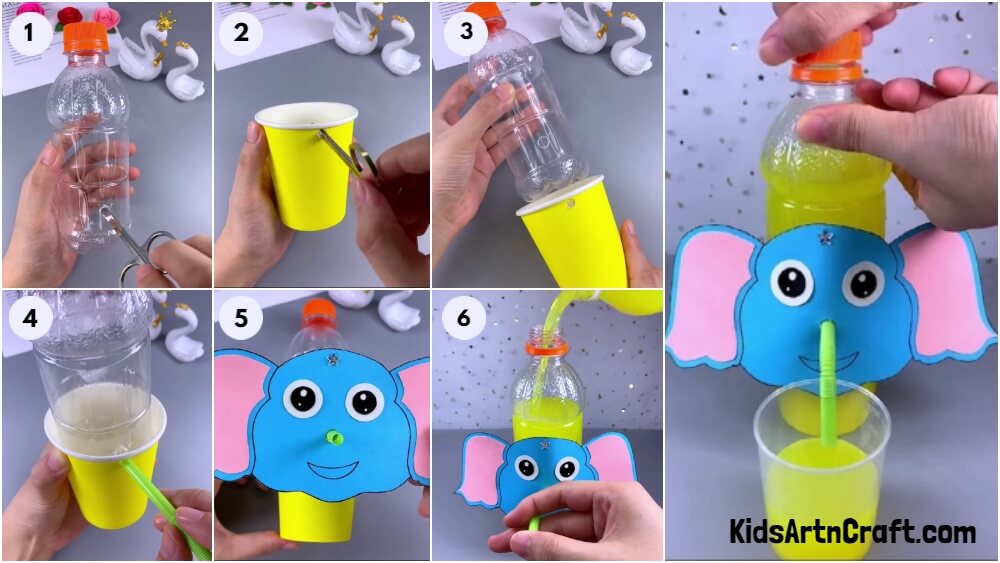
Take an empty plastic bottle and dividing it into three parts in your mind, make a hole at the point where the last division starts from using a pair of nail kit scissors. See the picture below for reference.
Step 2: Making A Similar Hole In The Cup
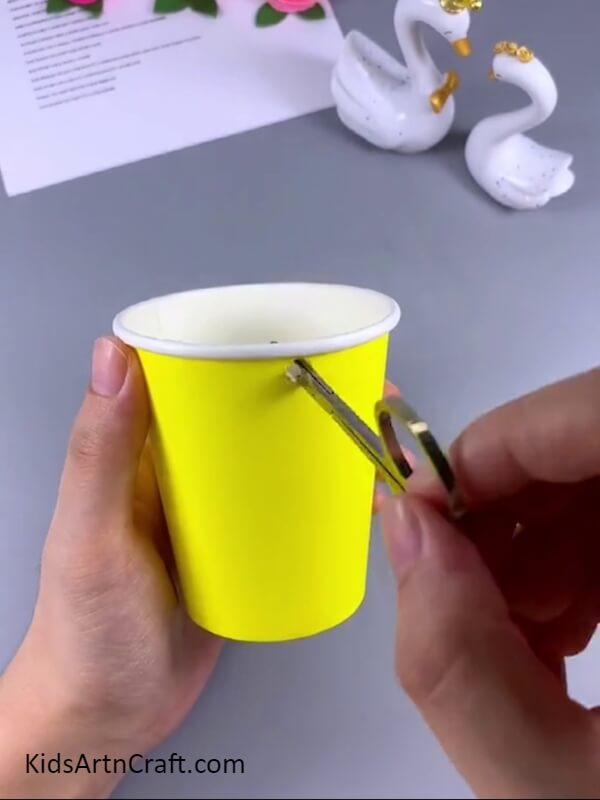
Now, take the paper cup and make a similar hot at its top end using the same tool. See the picture below for reference.
Step 3: Fitting The Two Objects Together
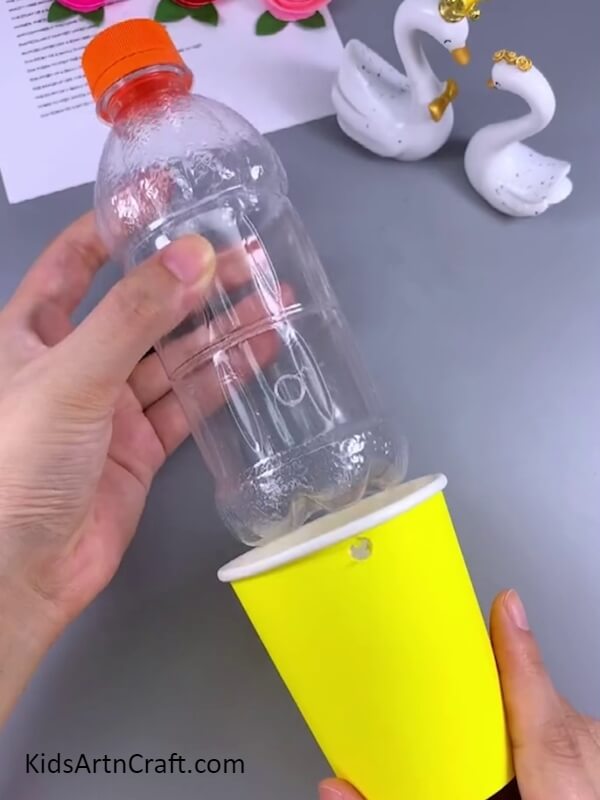
Take the bottle and insert it in the cup up to the point where both the holes align with each other as shown in the picture below.
Step 4: Inserting The Straw In The Holes
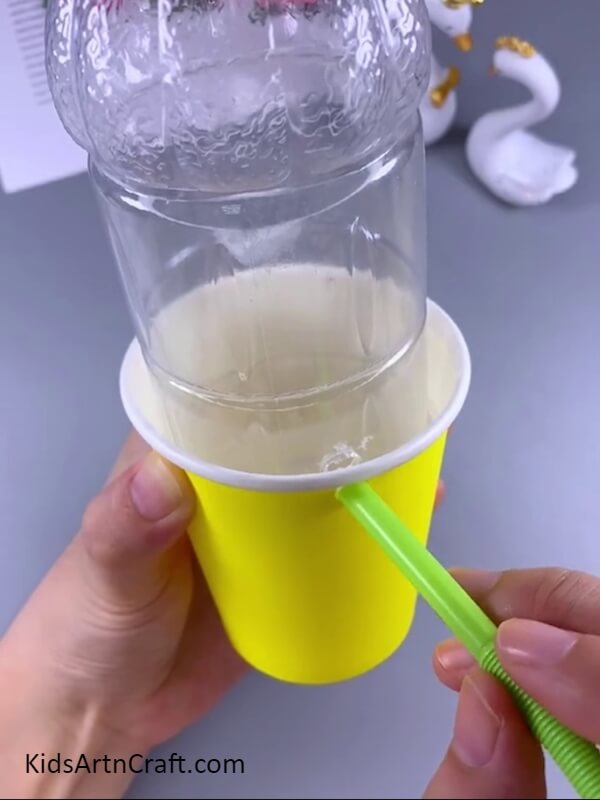
Take a drinking straw and cut the longer part into a half. Now, pass its straight cut side through the two holes inserting it in the bottle and seal the straw just at the entry point of the bottle using a glue gun as shown in the picture below.
Step 5: Making The Elephant Face
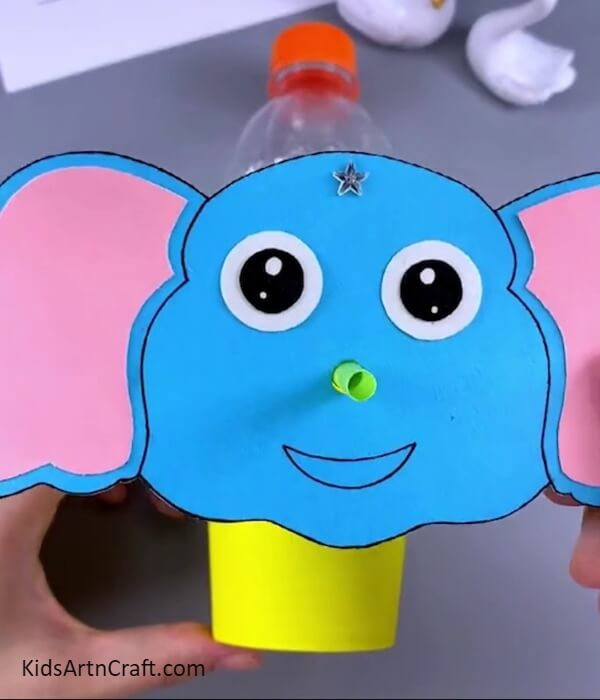
Take a blue sheet of paper and draw the outline of an elephant’s head on it including its big flappy ears. Now, cut the shape out and outline it with black sketch pen. Make some outlines on the sides of its face as well to differentiate it from the ears. Then, taking a pink sheet of paper draw two shapes resembling the ears of the elephant. These shapes should replicate the ears of the blue elephant but should be a little smaller than them as well. Paste the pink ears in the middle of the blue ears of the elephant as shown in the picture below. Now, make the eyes using the white and the black sheets of paper and cutting them into circles before pasting them on the face of the elephant. Finally, make a small hole in the spot of the nose and a smiling mouth below. See the picture below for reference.
Your Craft Is Ready!!
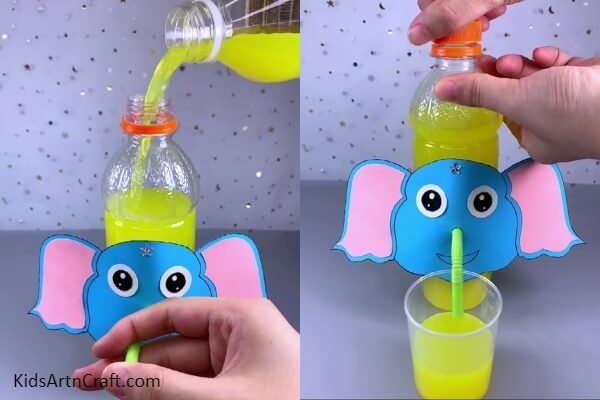
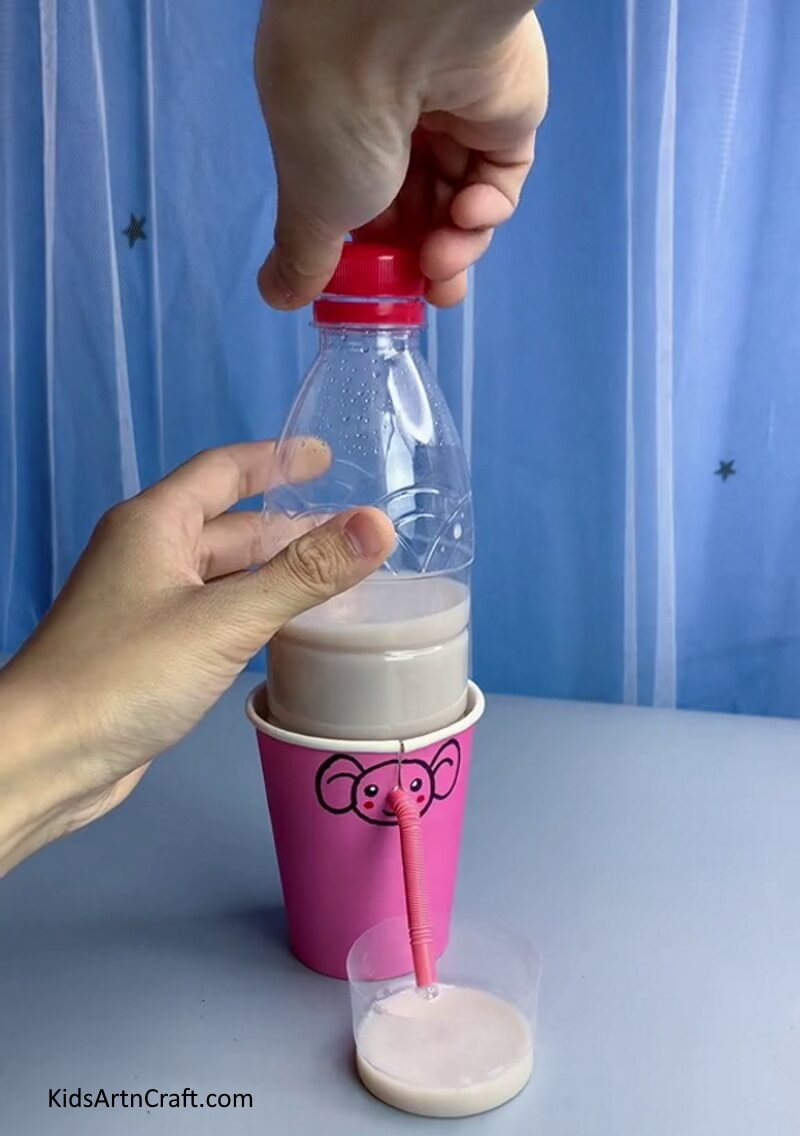
Take the elephant face in your hands and fit the hole in the middle through the straw attached to the bottle. Take the straw out completely by bending the stretchable part down. Paste the elephant face to the bottle using liquid glue. Now, open the bottle and pour in some juice and block the open end of these straw using your finger while doing that. Close the bottle by putting the cap back. Place a small glass beneath the straw and open the lid to allow the juice to gush out of the dispenser. You will notice that the liquid only comes out when the lid is open not when it is shut. See the picture below for reference.
This completes the process of making this dispenser and I would classify it as a perfect blend of a craft and science activity. You learned to make an elephant face and to work with bottles, straws and cups in creating craft. Think of more such unique activities and skills to experiment and widen your range of art and craft. See you in many more tutorials to come. Till then, good luck and good bye.
Some More Recycled Plastic Bottle Craft Tutorial
Easy To Make Drinking Fountain Craft For Kids
This easy-to-make drinking fountain craft for kids is an ideal activity for a summer day. Kids can make their own drinking fountain with a few simple materials and have fun creating a unique design. This craft is sure to be a hit with the little ones.
Follow us on Youtube for art and craft tutorials and much more.
More Articles from Kids Art & Craft
- DIY Easy Paper Cup Octopus Craft For Kids
- Easy to Make Snowman by Bottle Craft Tutorial
- Easy Paper Cup Fish Craft In Simple Steps
- Easy Peanut Shells Giraffe Art and Craft For Kids
- DIY Cow Craft From Fruit Foam Net


