


Recycled Crafts
DIY Recycled Sticks And Bottle Caps Ferris Wheel Craft Tutorial For Kids

Let’s make a Ferris wheel using recycled materials! This step-by-step tutorial will serve as an easy guide with instruction for making it!
We all get excited when we see a Ferris wheel, it is just so fun to ride on! And if you are crazy about Ferris wheel rides, then this craft is for you! Welcome to this tutorial for making a DIY Ferris wheel using up recycled materials! This craft is budget-friendly and will only need the materials that you already have at your home! The resulting Ferris wheel model will be a replica of the original one and surely kids would be excited to see it! This model craft can also be a fun toy for younger kids and preschoolers! Read on to roll on!
Simple Recycled Sticks And Bottle Caps Ferris Wheel Craft
Read More: Plastic Bottle Bee Craft For Kids
Materials Required
- Popsicle Sticks
- Hot Glue Gun
- Wooden Sticks
- Bottle Caps
- Thread
- Scissors
- White Paper Sheet
Procedure
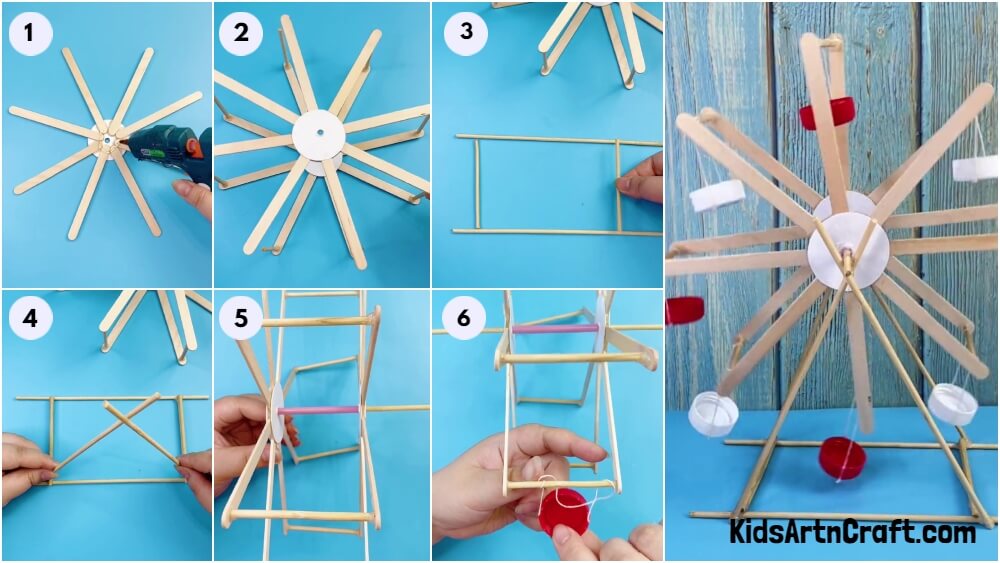
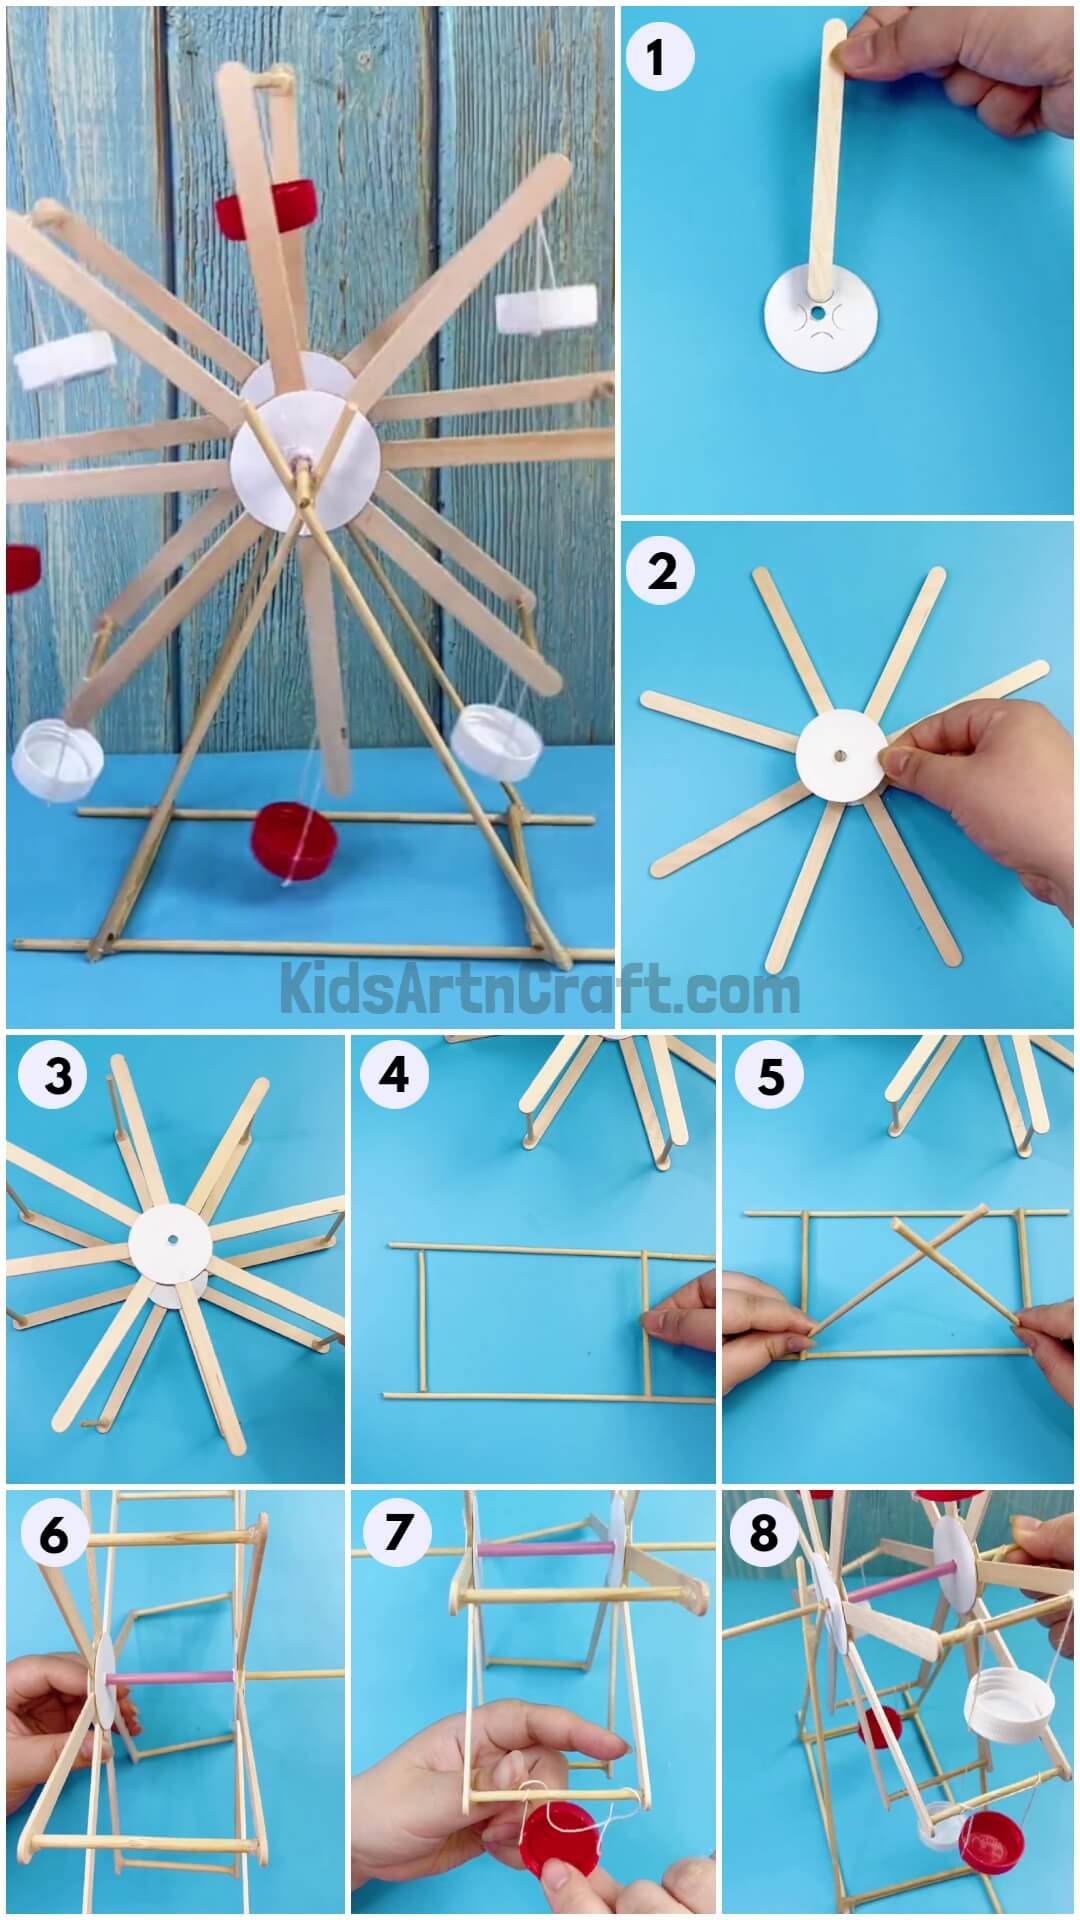
Step 1: Cutting Out A Circle With A Hole
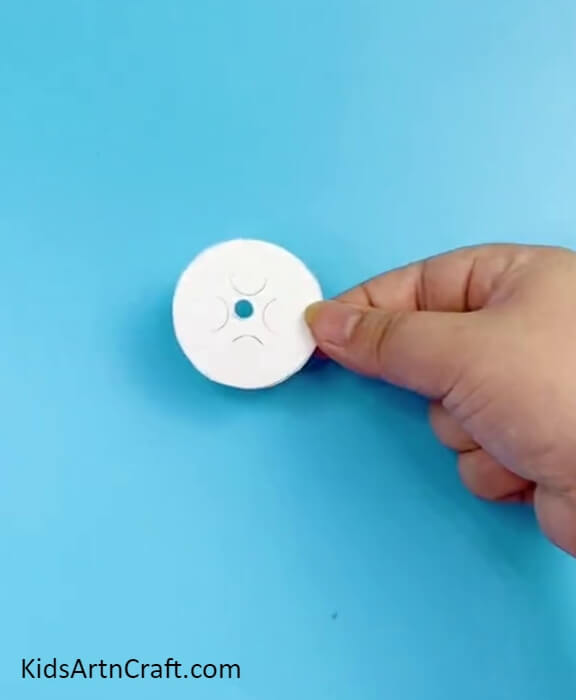
To begin this craft, take a white paper sheet and scissors. Using the scissors, cut out a small circle of the sheet and also make a tiny hole in its center as shown in the image.
Step 2: Pasting A Popsicle Stick Over Circle
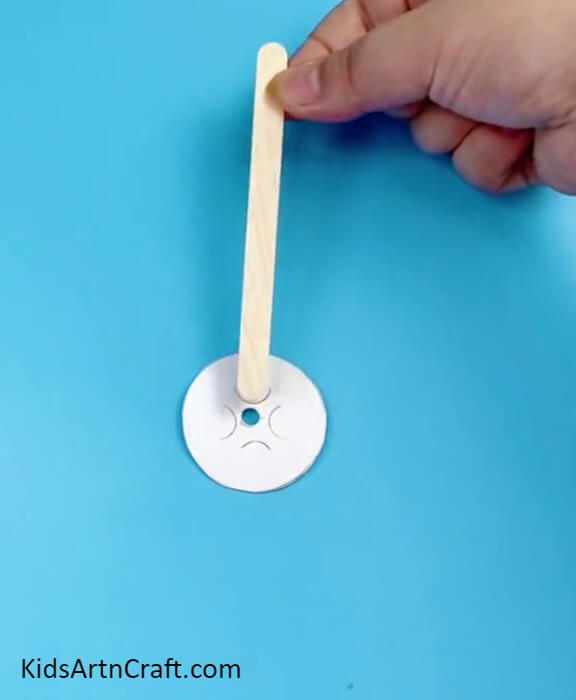
Paste a popsicle stick over the circle a little away from the hole using hot glue.
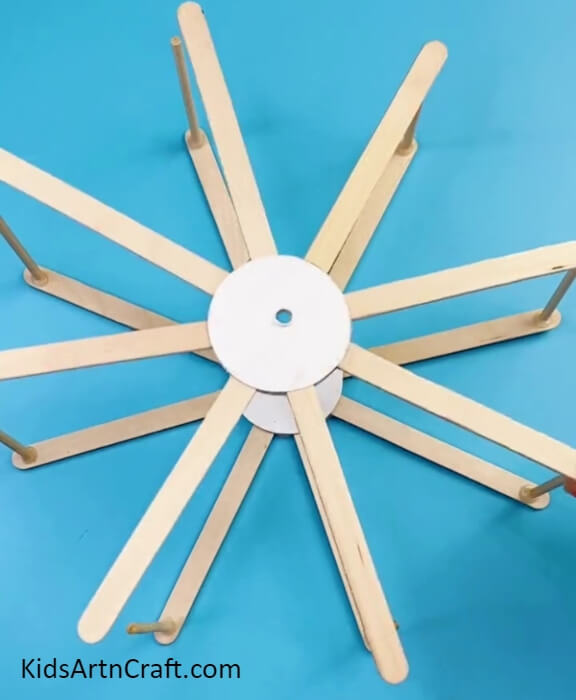
Step 3: Pasting 7 More Popsicle Sticks
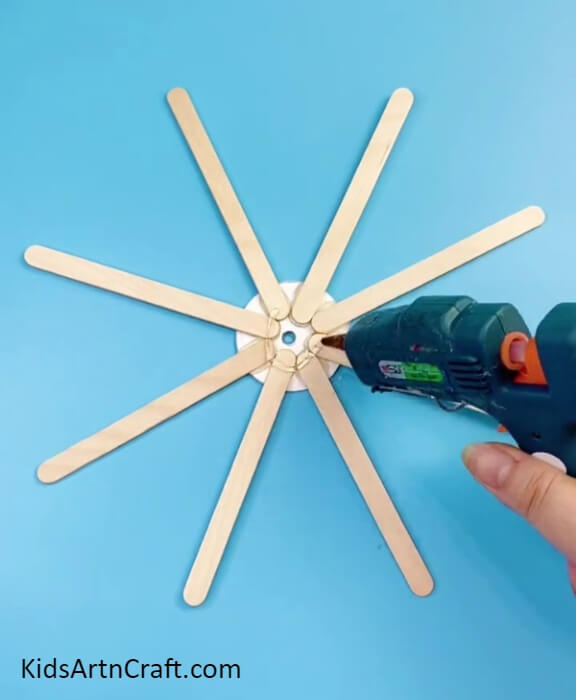
Paste 7 more popsicle sticks over the circle around the hole using hot glue to keep them at a similar distance and form a wheel. Also, apply hot glue over the sticks in the circle.
Step 4: Pasting Another Circle
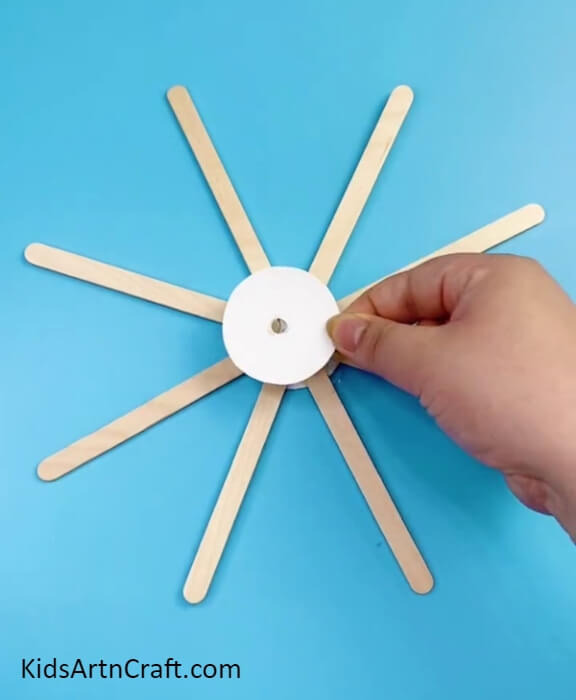
Create another circle with a hole the same way you created before and stick it over the hot glue to overlap the first circle. This completes the 1st wheel of your Ferris wheel.
Step 5: Applying Glue To The End Of Popsicle Stick
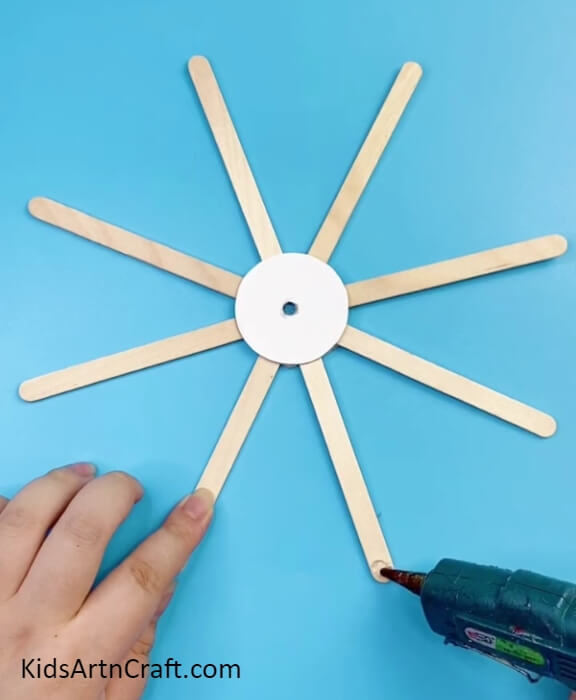
Apply a drop of hot glue over the end of one popsicle stick of your wheel.
Step 6: Pasting A Stick Piece Perpendicularly
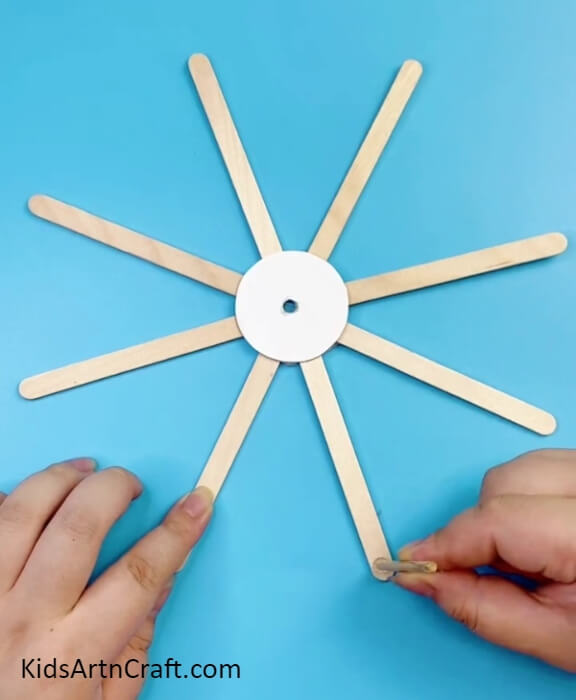
Take a piece of a wooden stick and paste it over the hot glue perpendicular to the popsicle stick.
Step 7: Pasting More Sticks And Another Wheel
Apply glue to all the ends of the popsicle sticks and paste wooden stick pieces over them of the same length. Now, create another wheel following the same previous steps and paste it over the wooden sticks to overlap it with the first wheel using hot glue.
Step 8: Taking A Wooden Stick
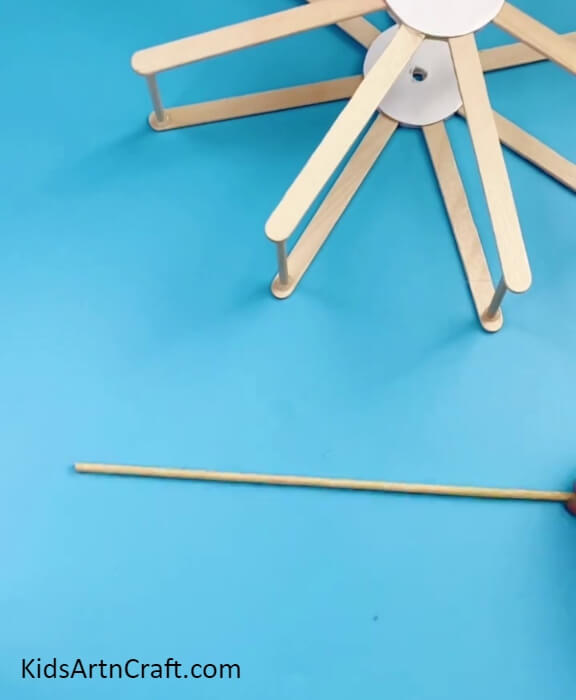
For the stand of the Ferris wheel, take a wooden stick of length long enough to support your Ferris wheel.
Step 9: Making 2-Step Ladders
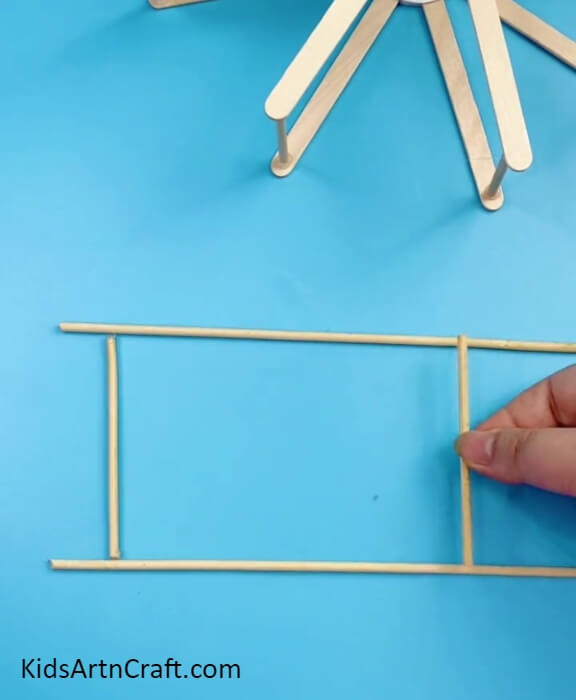
Take another wooden stick of the same length as the 1st one and 2 other small pieces of sticks of length bigger than the breadth of your Ferris wheel. Paste the small sticks between the longer ones to make a 2-step ladder using hot glue.
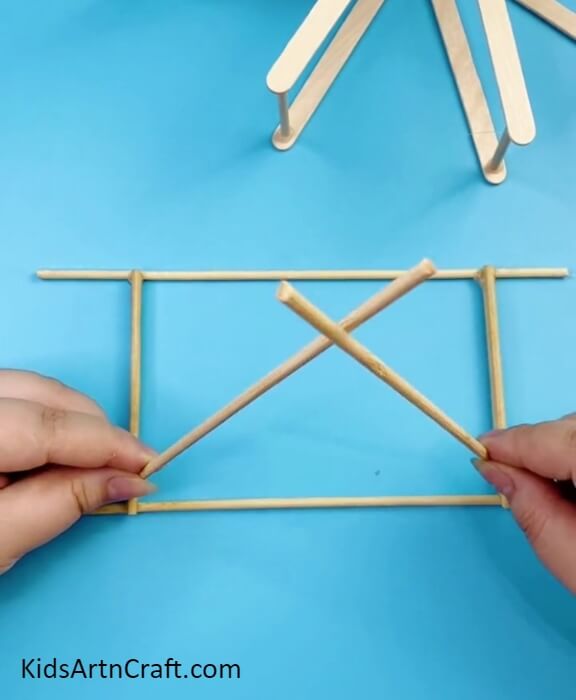
Step 10: Pasting 2 Sticks In An Uneven Cross
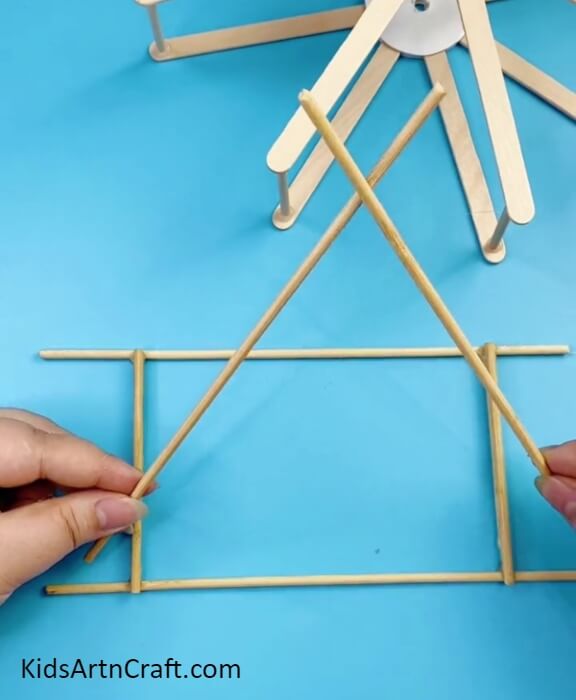
Take 2 long wooden sticks and paste one over the other in an uneven cross using hot glue as shown in the image.
Step 11: Pasting The Cross To The 2-step Ladder
Paste the longer ends of the cross to the side of the 2-step ladder using hot glue.
Step 12: Inserting A Straw And Stick In The Holes Of Circles
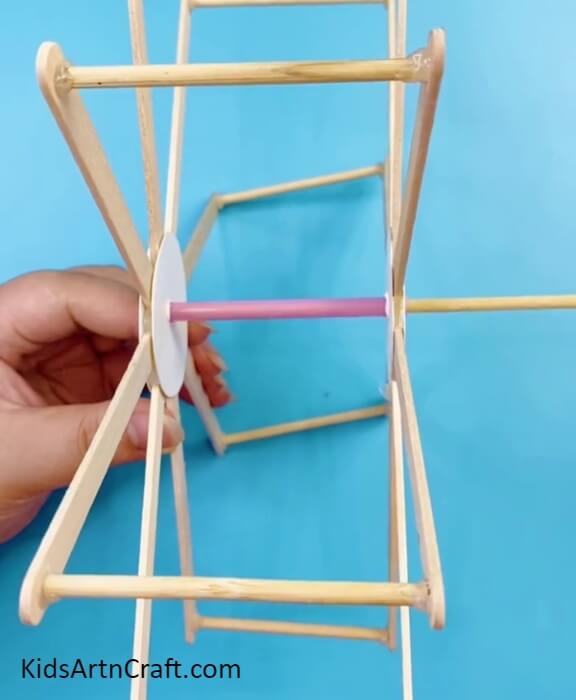
Paste a piece of straw in between the Ferris wheel from the holes of the circles using hot glue. Then, insert a piece of wooden stick in the straw.
Step 13: Tieing Bottle Cap Over Ferris Wheel From Thread
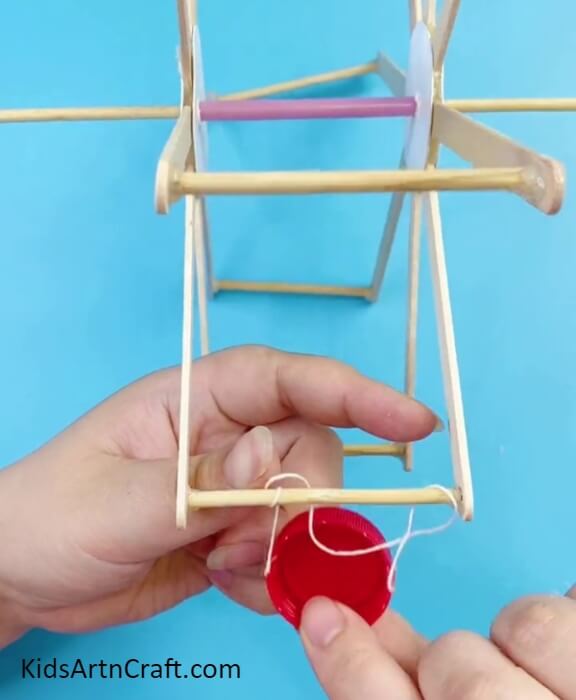
Paste a thread over a bottle cap from the outer part. Now, tie the thread over the wooden stick of the Ferris wheel to hang the bottle cap over it.
Step 14: Hanging All The Bottle Caps And Put Wheel Over The Stand
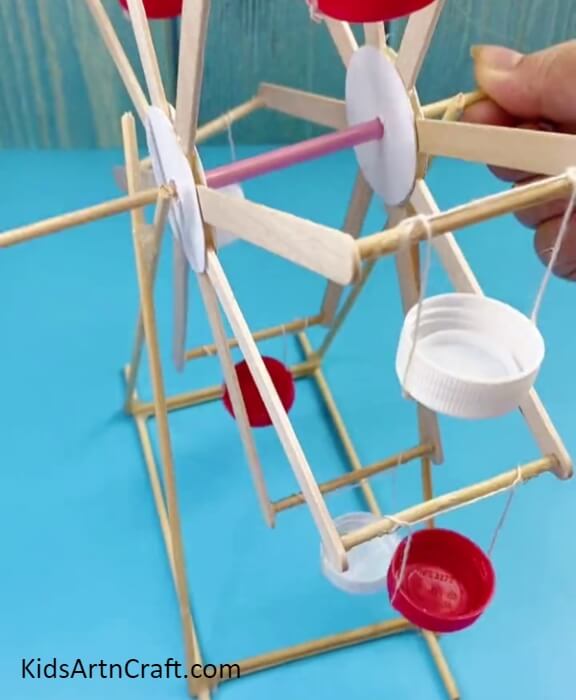
In the same way, hang all the bottle caps over each and every wooden stick of the Ferris wheel. This competes with your Ferris wheel. Then, put the middle stick of the Ferris wheel onto the stand cross.
The Final Look Of Your Ferris Wheel!
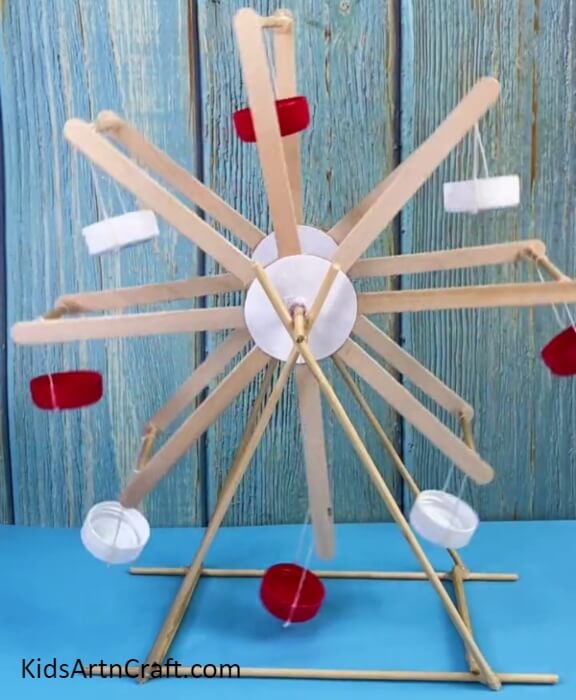
Give a hit to one of the bottle cap wooden sticks and see your ferris wheel rotating!
Congratulations! You have finally accomplished creating your Ferris wheel model craft!
This craft model surely looks fun and exciting and the kiddos will love to play with it! Show your creation to your family and friends and let them admire your crafty and innovative skills! You can also flaunt your skills in front of them by teaching them to make it too! This craft also be a fun science project for younger kids! Let the class be envious of your project!
Follow us on Youtube for art and craft tutorials and much more.
More Articles from Kids Art & Craft
- Recycled Egg Tray Mushroom & Flower Craft – Step by Step Tutorial
- Easy to Make Doll with Yarn and Tissue Paper
- How to Make Apple Craft Step-by-Step Tutorial for Kids
- DIY Foam Net Home Craft For Kids
- Learn To Make Recycled Bottle Butterfly Tutorial


