


Painting
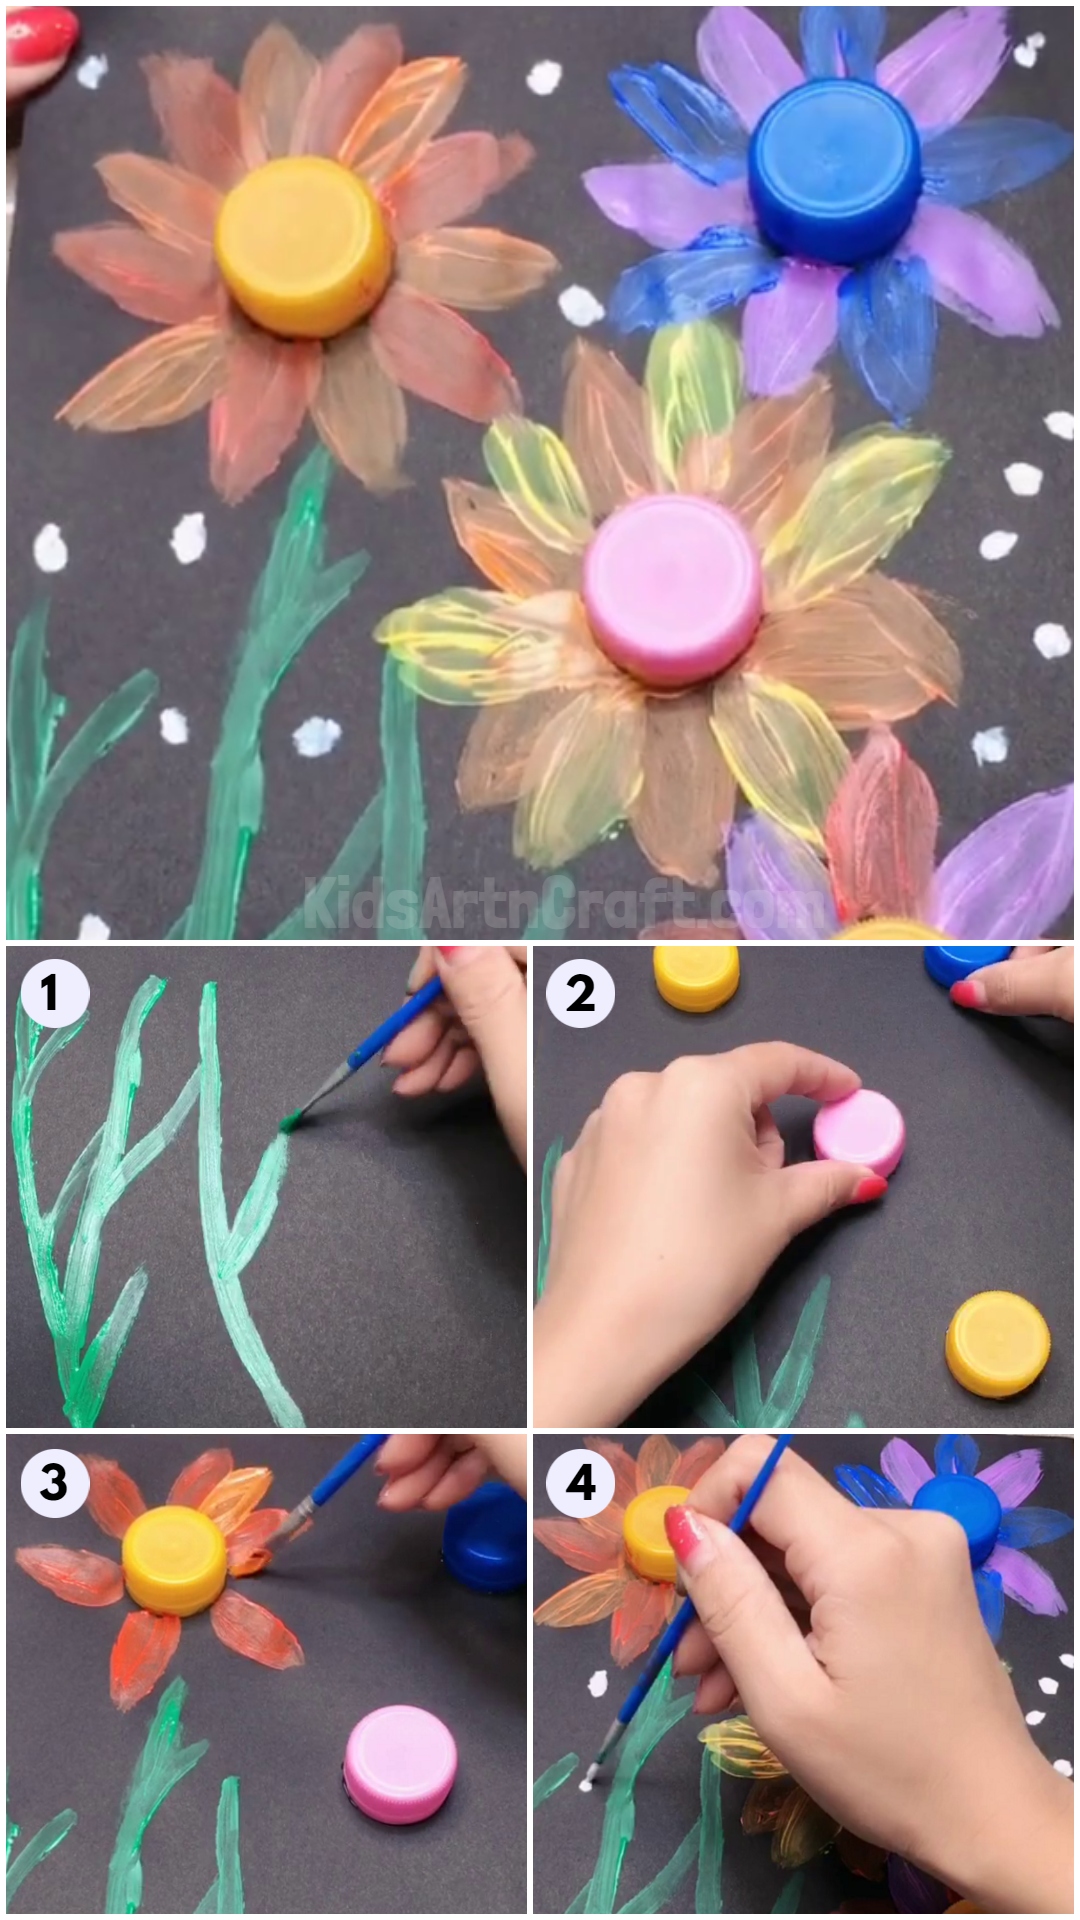
Flower Painting Tutorial Using Plastic Bottle Cap

Learn how to create a beautiful and unique flower painting using a plastic bottle cap and acrylic paint. This easy tutorial will help you create a unique and vibrant flower painting that you can hang in your home or give as a gift.
Welcome to this flower painting tutorial using a plastic bottle cap! Painting is a great way to express creativity and relax, and this tutorial will show you how to create beautiful flowers with a simple plastic bottle cap. With just a few materials and some time, you’ll be able to make your own flower paintings in no time. So grab your supplies and let’s get started!
How To Make Flower Painting Tutorial Using Plastic Bottle Cap For Kids
Read More: Super Simple Pine Cone Crafts For Kids
Material Used:
- Water Colors
- Paint Brushes
- Bottle Caps
- Black Chart Paper
Instructions:-
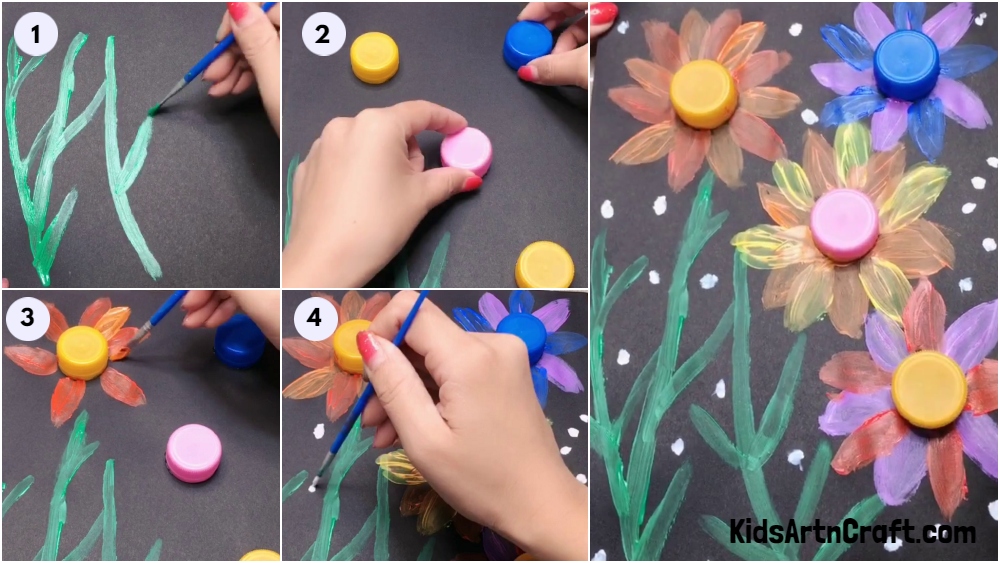
Step 1: Starting By Making The Stem And Branches With Green Water Color And Brush On Black Chart Paper
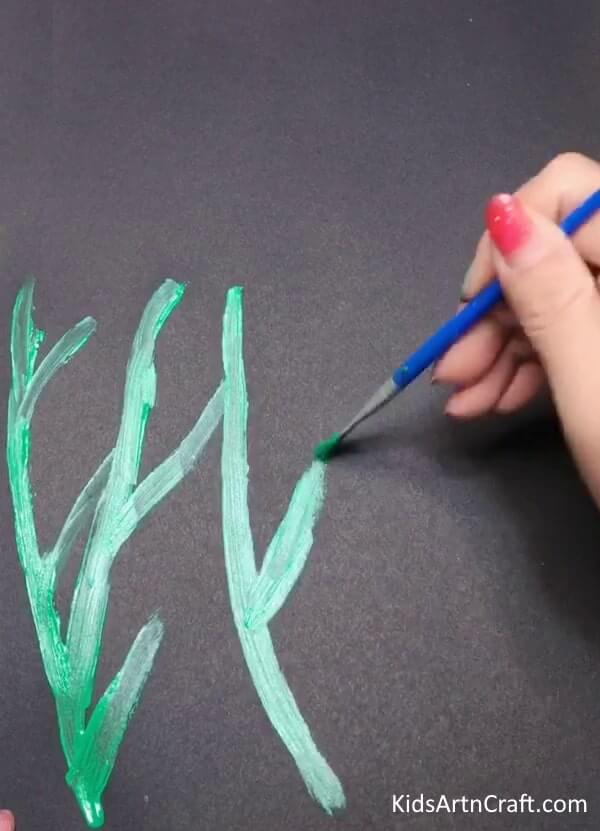
To start with our Flower bunch painting, start by dipping the paintbrush in green watercolor and start making stems and branches on the black chart paper. Make two stems close to each other and overlapping
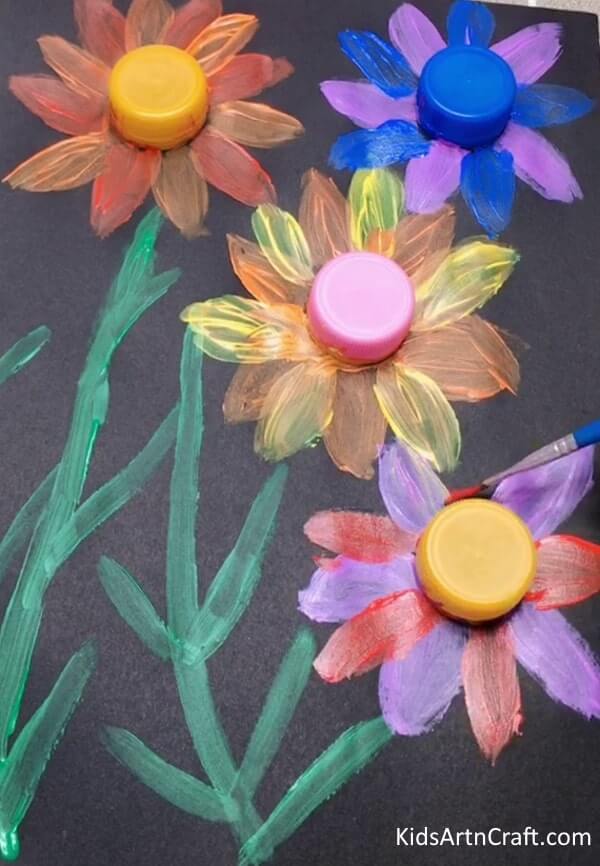
Step 2: Starting Making The Flower By Sticking The Bottle Caps On The Black Chart Paper
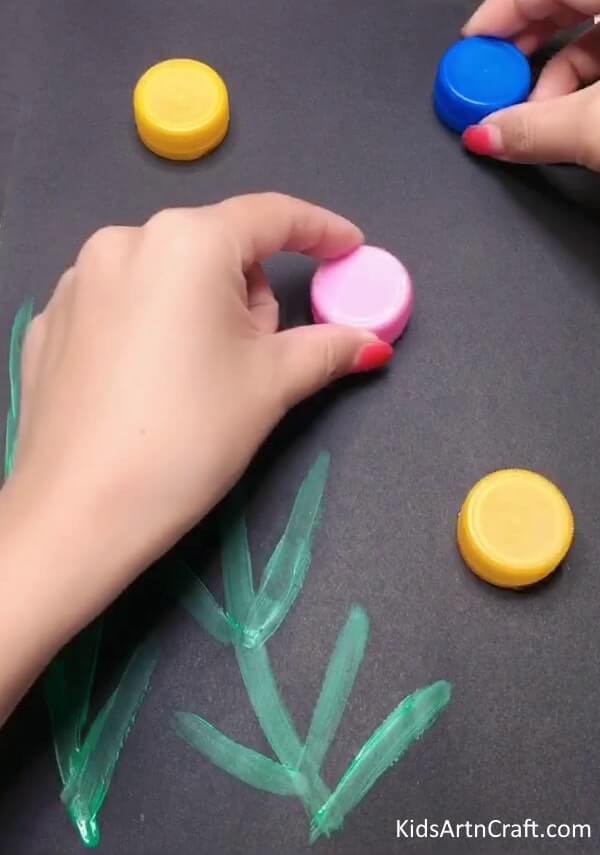
Take some colorful bottle caps- pink, yellow, and blue and stick them on the black chart as shown in the image.
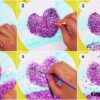
Step 3: Making The Red And Orange Flower With Eater Color And Brush
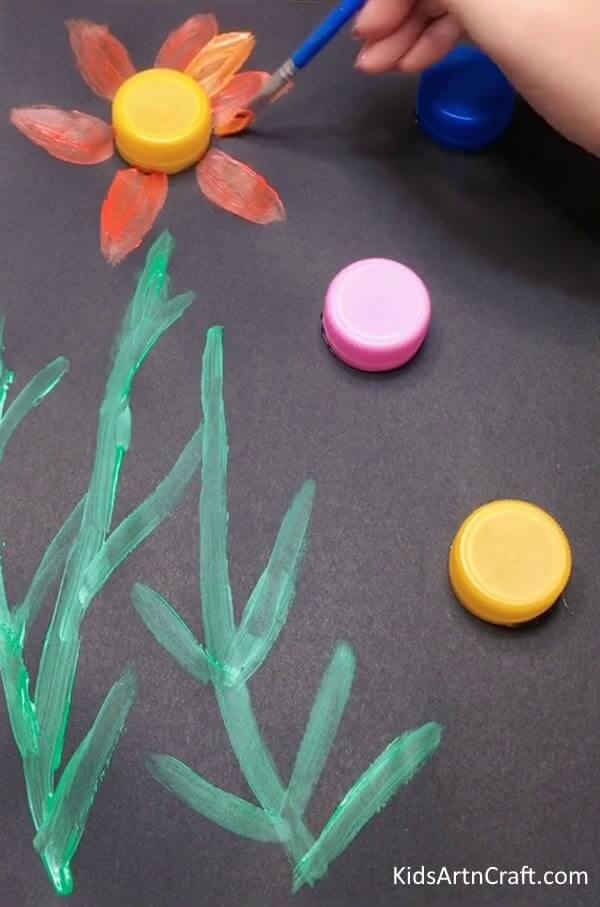
Let’s make the flower, Dip the brush in red watercolor and start making petals around the yellow cap on the top left corner.
Make 6 petals from the red color leaving a space of one petal between the two. Now dip the brush in orange watercolor and start making petals around the cap on the left-out spaces.
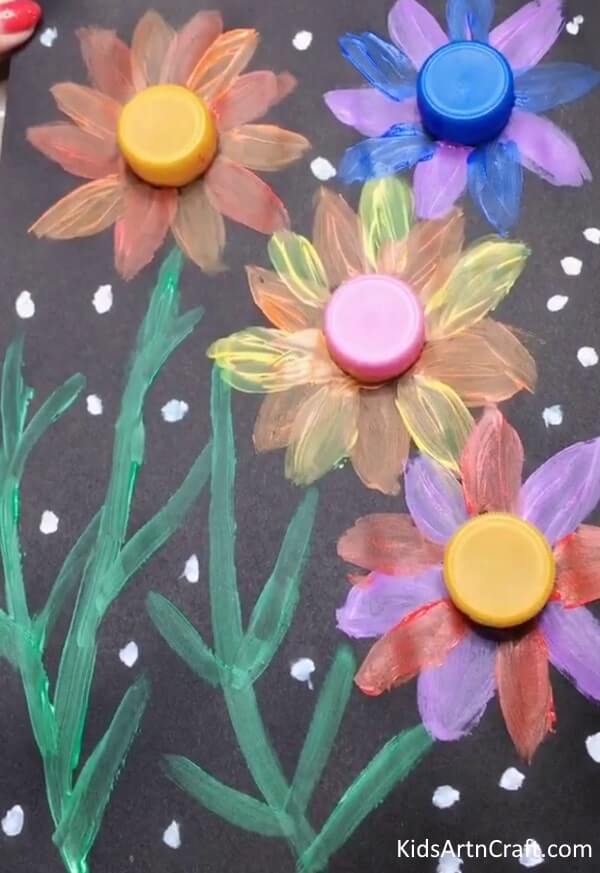
Step 4: Completing The Other Flower With Blue, Pink, Red, Orange, And Yellow Water Colors
Now following the same step, we did for the red and orange flowers make the other flowers. Use orange and yellow watercolors for making the petals around the pink cap in the middle. Use Blue and pink watercolors for making the flower petals around the blue cap on the top right corner. For the bottom right corner cap use pink and red colors for making the flower petals around the caps.
Step 5: Adding Final Details With White Paint
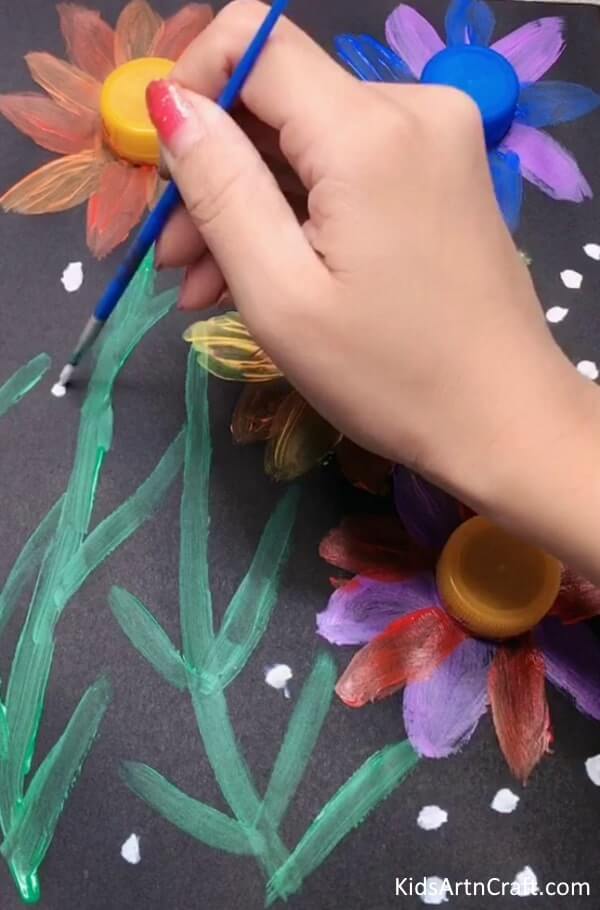
Now dip the brush into white watercolor and make random dots around the flowers to add some more creativity to our painting.
Final Step: “DIY Flower Painting With Plastic Bottle Caps: Encouraging Creativity And Recycling In Kids”
Yay! The “DIY Flower Painting with Plastic Bottle Caps” is ready. This DIY flower painting tutorial using plastic bottle caps is a fantastic way to encourage kids to explore their creativity and imagination, while also teaching them about the importance of upcycling and repurposing materials. By following these simple steps, they can create stunning floral artwork that they can proudly display in their home or give as a thoughtful gift to someone special. So next time you’re looking for a fun and engaging activity to do with your kids, grab some paint, bottle caps, and let their imagination come out on the paper. With a little bit of effort, they can turn simple everyday items into beautiful works of art. Creativity is not just about the end result, it’s about the joy of the process itself. So go ahead and grab the material required and start making this craft.
FAQs
What materials do I need for a flower painting tutorial using a plastic bottle cap?
To complete this flower painting tutorial, you will need a plastic bottle cap, acrylic paints, a paintbrush, a piece of paper, and a pencil.
How should I prepare the plastic bottle cap before I begin painting?
Before painting, you should wash the bottle cap to make sure it is free of dirt and debris. Then, you can use a pencil to draw the outline of your flower onto the cap.
What kind of paint should I use for this project?
Acrylic paints are best for this project because they have a thicker consistency and can easily be blended to create beautiful colors.
How do I make sure my painting is even and consistent?
You can use a paintbrush to blend and mix the colors together. This will help ensure that your painting looks even and consistent.
How do I make sure the colors don’t run?
You can use a small amount of water to thin out the paint and make sure the colors don’t run.
This flower painting tutorial using a plastic bottle cap is an easy and creative way to create beautiful artwork.
Follow us on Youtube for art and craft tutorials and much more.
More Articles from Kids Art & Craft
- World Parrot Day Coloring Pages For Kids – Free Printables
- Poppy Coloring Pages For Kids – Free Printables
- Lion Drawing & Sketches for Kids
- Crumpled Paper Animal Crafts for Kids
- Meditation Coloring Pages For Kids – Free Printables