


Painting
Love Cherry Blossom Tree Painting Tutorial For Kids

Create a heart-shaped cherry blossom that will leave you in awe! This step-by-step tutorial will guide you to make this pretty tree!
Do you know? Cherry blossoms are one of the most beautiful flowers in the world! Well, you can deny it, they are literally so pretty, I wish I could see them every time! Well, this artwork will be a hack for the same! You can create this beautiful cherry blossom artwork and decorate it over your room’s wall to gaze at it anytime you want! In this tutorial, we will guide you through each and every step of making this painting! To make the cherry blossom a little more beautiful we made it in the shape of a heart and this definitely looks stunning!
Simple To Make Cherry Blossom Tree Painting
Read More: Easy Art And Crafts Activities Video Tutorial for All
Materials Required
- Sky-Patterned Paper Sheet
- Scissors
- Thin Rounded Paintbrush
- Paint Colors (Violet, Pink, White, And Black)
- Cotton Buds
- Black Marker
Procedure
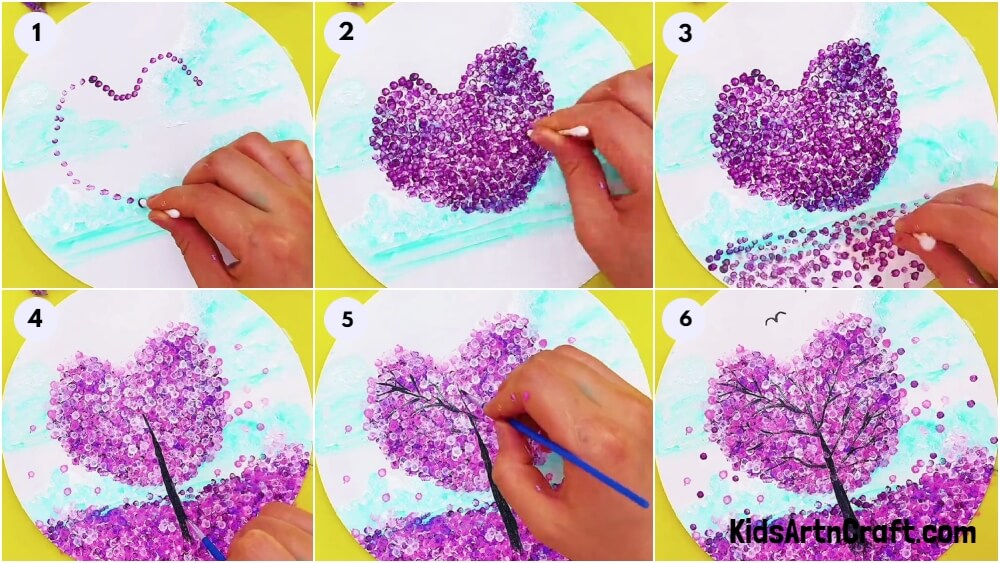
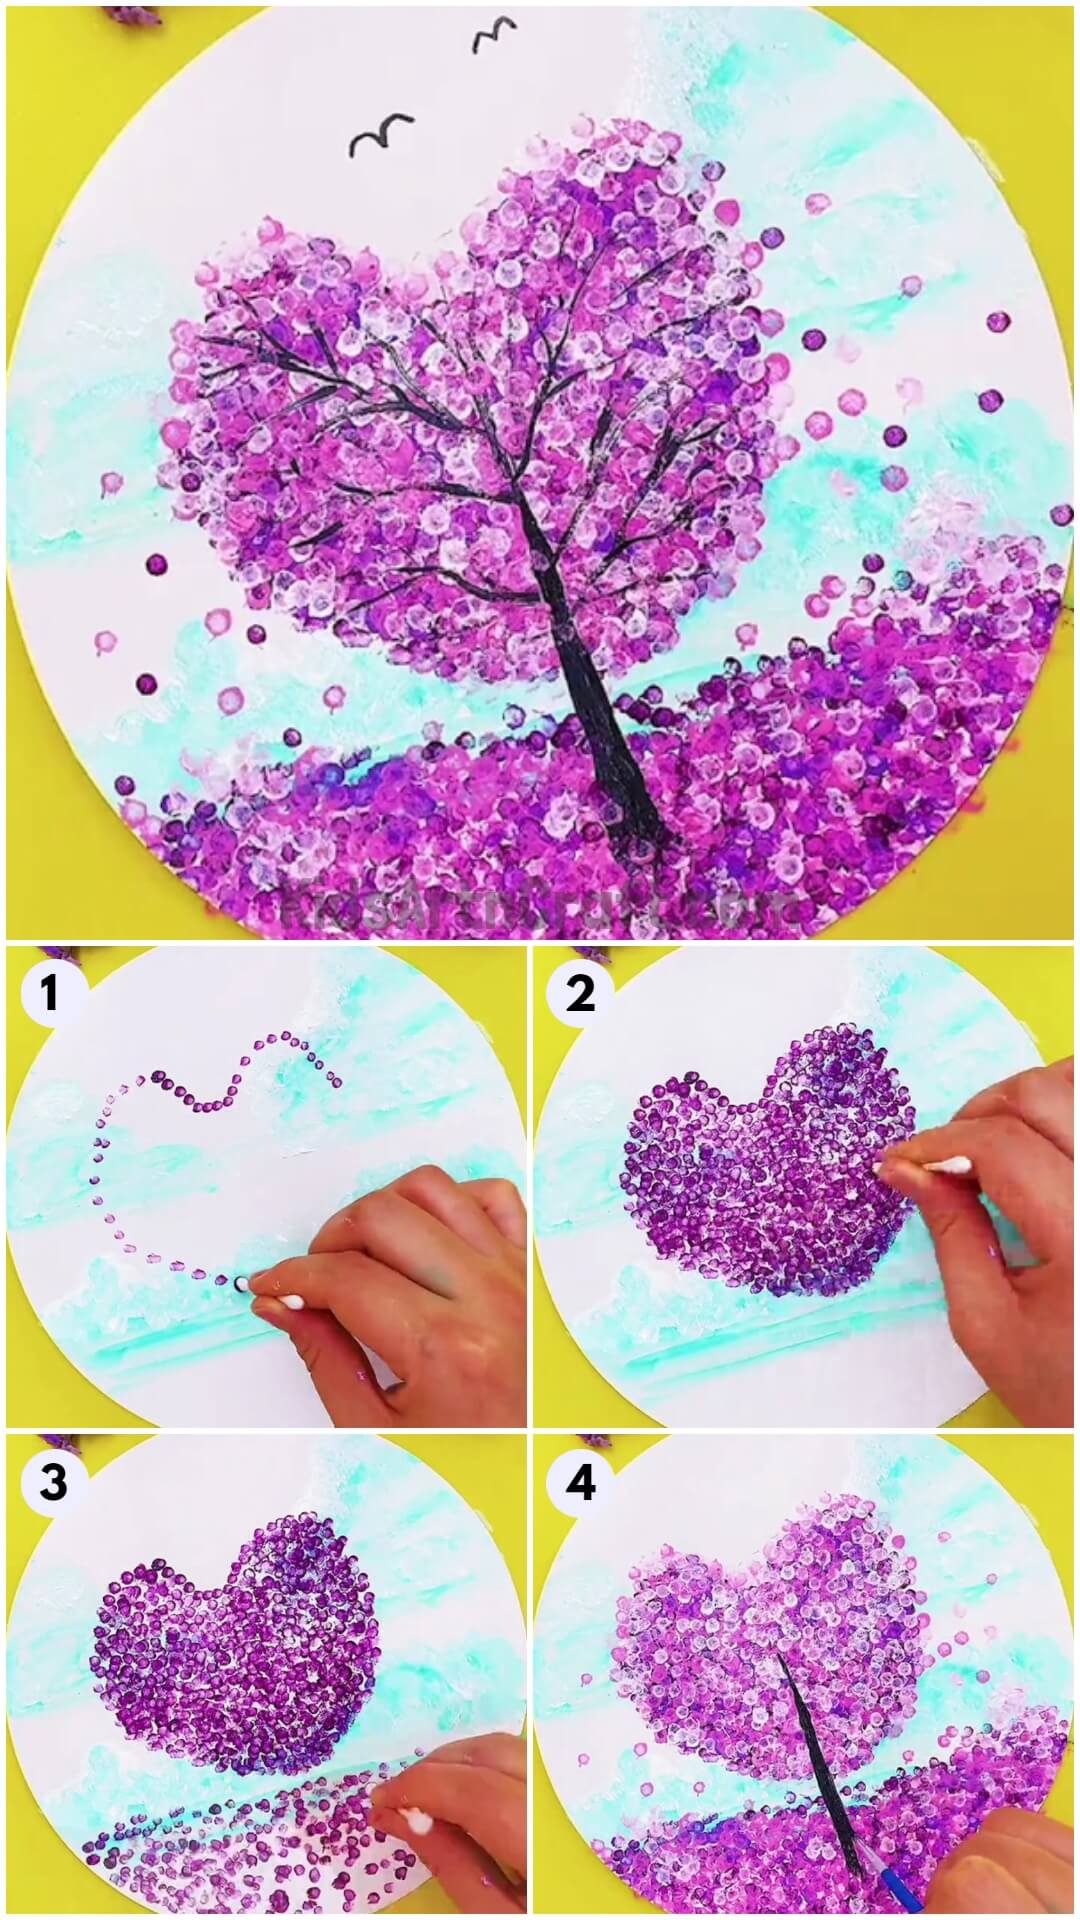
Step 1: Making Tree Outline
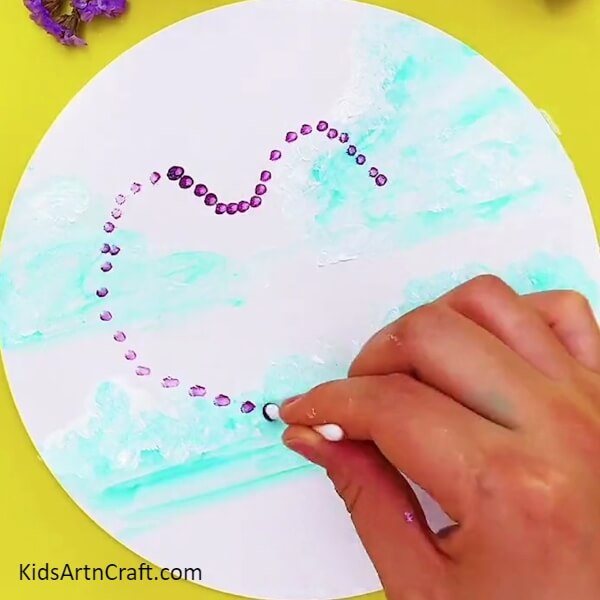
Start this craft by taking a sky-patterned paper sheet and using scissors, cut it down into a circle to make the base of the craft. Now, dip a cotton earbud into violet paint and start to dab it over the base to make a curvy heart outline for the tree.
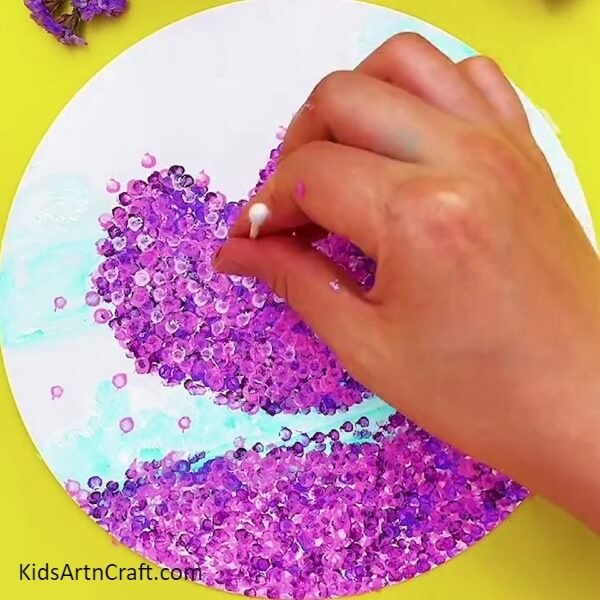
Step 2: Filling Out The Tree Outline
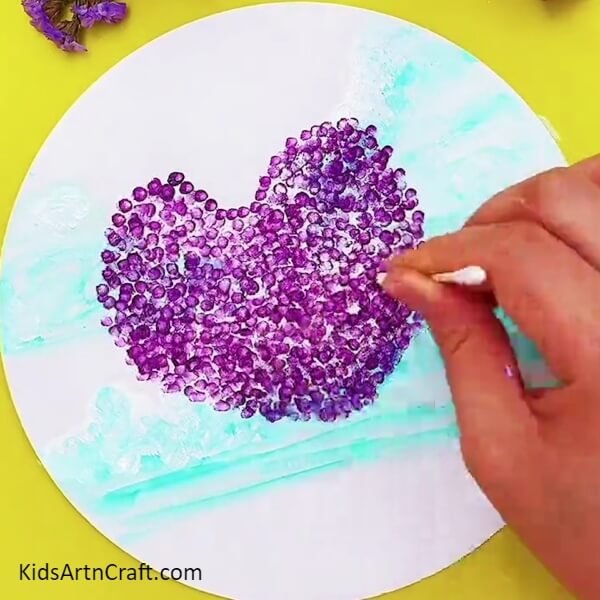
Continue to dab the violet-painted cotton bud into the heart outline to fill out the outline totally. These will be the leaves of the tree.
Step 3: Making Fallen Leaves

Now, dab the painted bud on the end of the base beneath the tree to make them look like fallen leaves over the ground.
Step 4: Adding Pink And White Leaves
Dip the bud into pink paint and dab over the tree and ground randomly to add pink leaves to the artwork. Again, dip the bud into white paint and add some white leaves too. Also, make some white and pink leaves over the base to make them look like some leaves flying in the sky.
Step 5: Making Tree Trunk
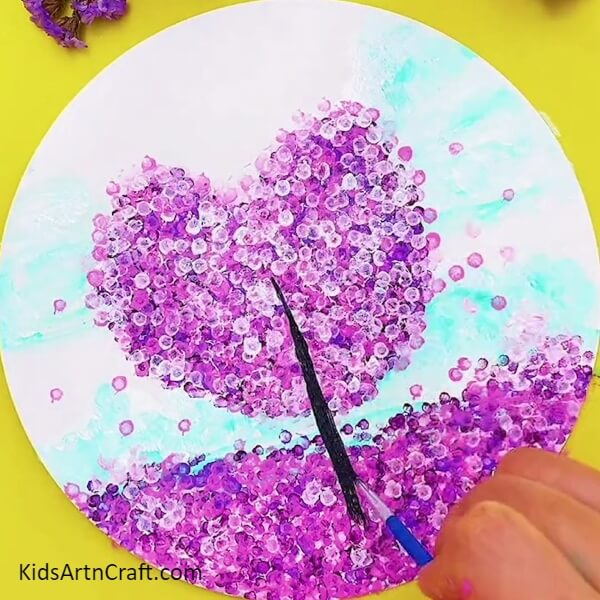
Using a thin rounded paintbrush draw a straight black tree trunk from the middle of the heart leaves to the middle of the ground. Make sure to keep the trunk thin from the top and gradually thick to the bottom.
Step 6: Making Tree Branches
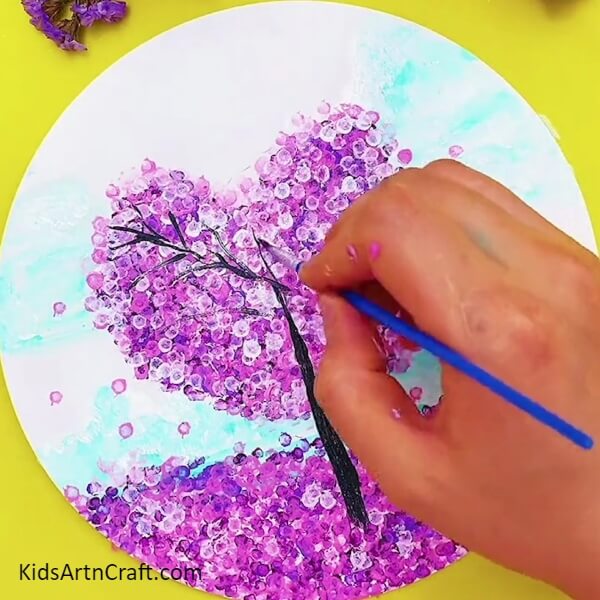
Using the paintbrush, make black-colored thin branches on the left side of the trunk slantingly stretched over the tree leaves.
Step 7: Completing Making Branches
Make branches to cover the whole tree leaves on each side.
Step 8: Making Birds
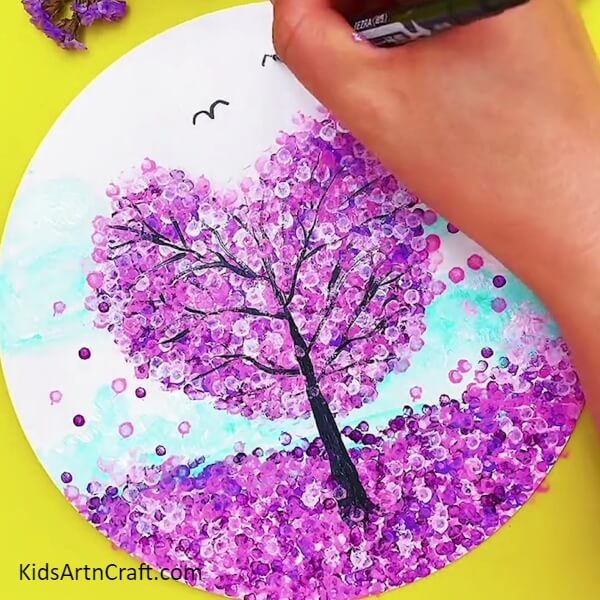
Using a black marker, make 2 classic curved birds over the base above the tree to make them look like flying in the sky.
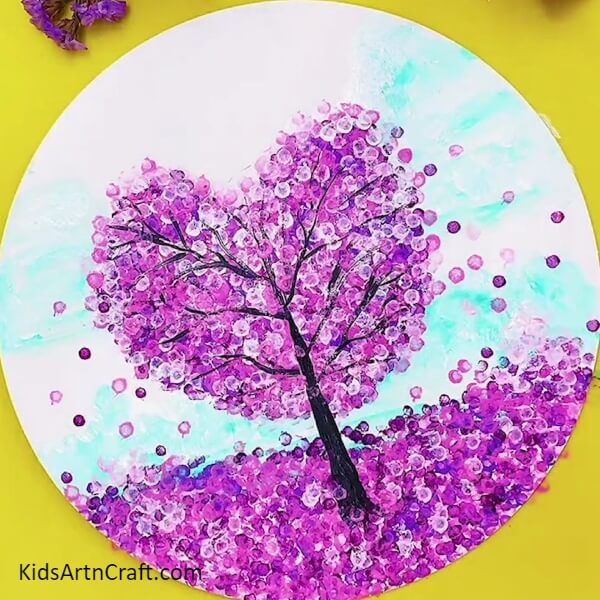
The Final Look Of Your Heart-Tree Landscape!
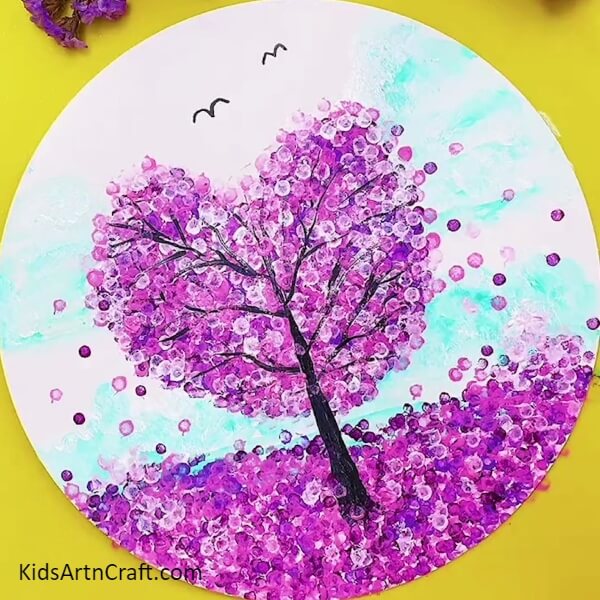
Wow! Are you stunned by the astonishing results too!? This is the final look of your cherry blossom!
You can now rush to show this artwork to your friends and family and I’m sure they will be stunned too and will admire your pretty creation! You can also gift this artwork to your loved one as the heart-shaped cherry blossom will serve as a perfect fit, and cherry blossoms are considered the symbol of love, prosperity, and good luck! They will definitely love the idea of gifting it!
Some More Painting Tutorial
Quick And Easy Tree Painting Using EarBuds For Kids
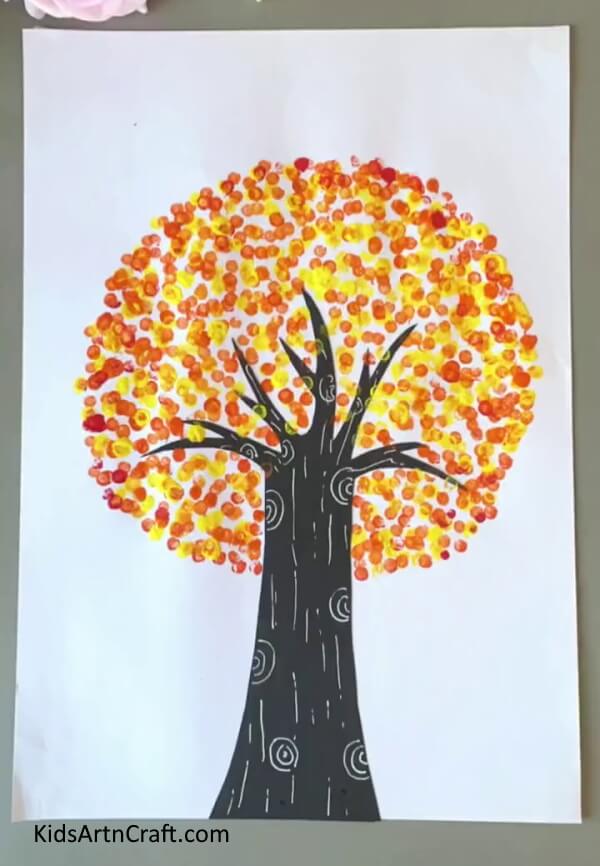
Image Source/Tutorial: Kids Art & Craft
This article is perfect for kids who want to get creative with painting trees. It provides an easy and quick way to paint trees using ear buds. Kids will love the fun and unique technique this article provides.
Follow us on Youtube for art and craft tutorials and much more.
More Articles from Kids Art & Craft
- Realistic Tree Landscape Stamp Painting Using Fruit foam
- Beautiful Way To Make Tree & Bird Paste Painting With Peanut Sells
- Pretty Tree Landscape Sketchpen Painting Art Idea For Kids
- Beautiful Tree Painting Using Leaf Impression Step-by-step Tutorial For Kids
- Easy Flower Stump Painting Art Tutorial for Kids