


Recycled Crafts
DIY Wash Sponge Teddy Craft Step By Step Tutorial For Kids

Looking for a teddy craft? We got you covered on this! This step-by-step tutorial will guide you to make a 3D teddy using a dish wash sponge!
This can be your craft of the day! Today, we brought you an amazing craft that will definitely blow everybody’s mind! A Teddy! Yes, you heard it right! We will guide you to make a realistic 3D teddy just like the ones you have at home or can find in the market! And if you are a teddy lover then this craft is a must for you to try out! With just some easily accessible supplies you can create this craft in no time and even like a pro! This teddy craft will be a hit collection in your crafts!
Simple Wash Sponge Teddy Craft For Kids
Read More: Fruit Foam Net Pineapple Craft Idea for Kids
Materials Required
- Dish Wash Sponge
- Plastic Rubber Bands
- Scissors
- Glue
- Whitener
- Black Marker
- Colored Sheets (Black, White, And Red)
- Yellow Glitter Sheet
- Sticky Craft Pearls
- Silk Craft Bow
Procedure
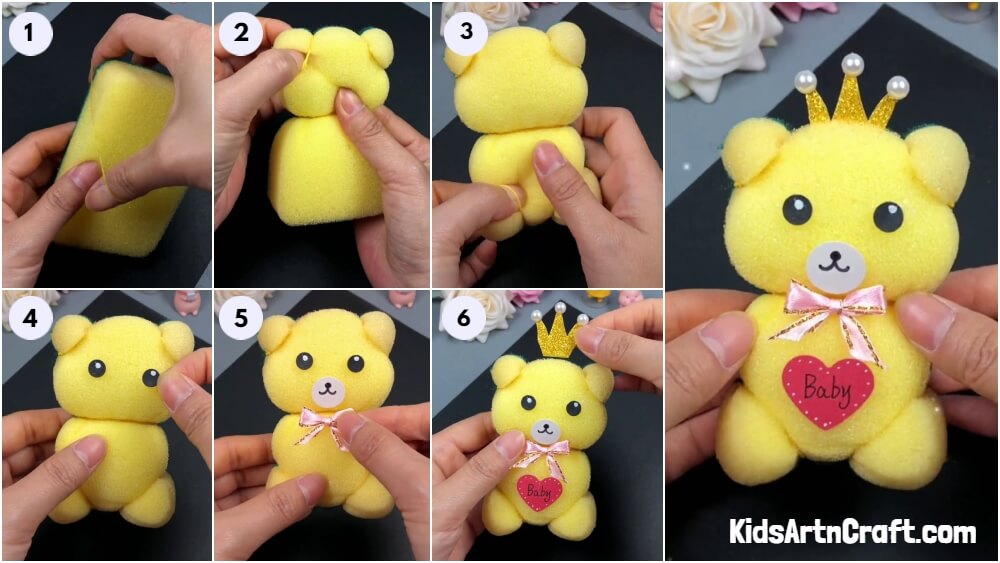
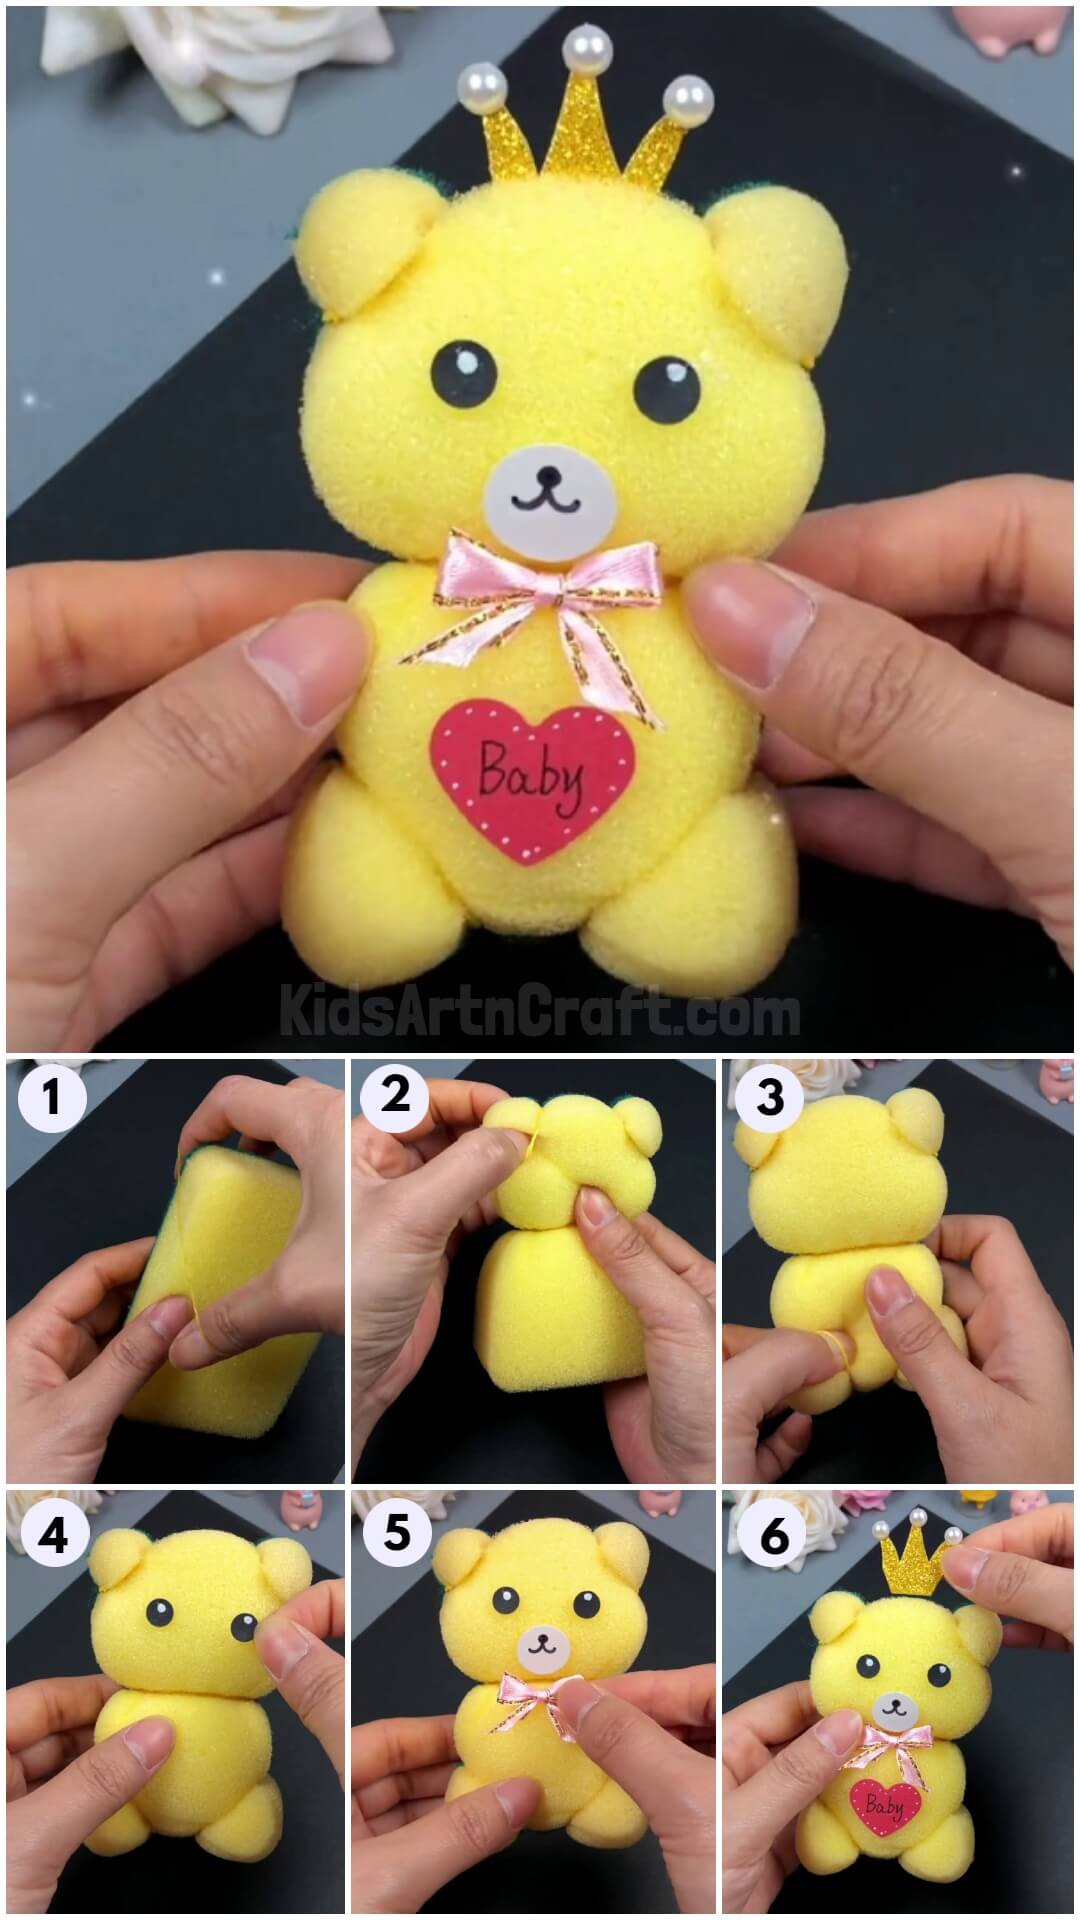
Step 1: Applying A Rubber Band In The Middle Of A Wash Sponge

To begin this craft, take a dish wash sponge and a plastic rubber band. Apply the rubber band in the middle of the longer part of the sponge to distinguish the head and the body of your teddy.
Step 2: Making The Ears Of Teddy
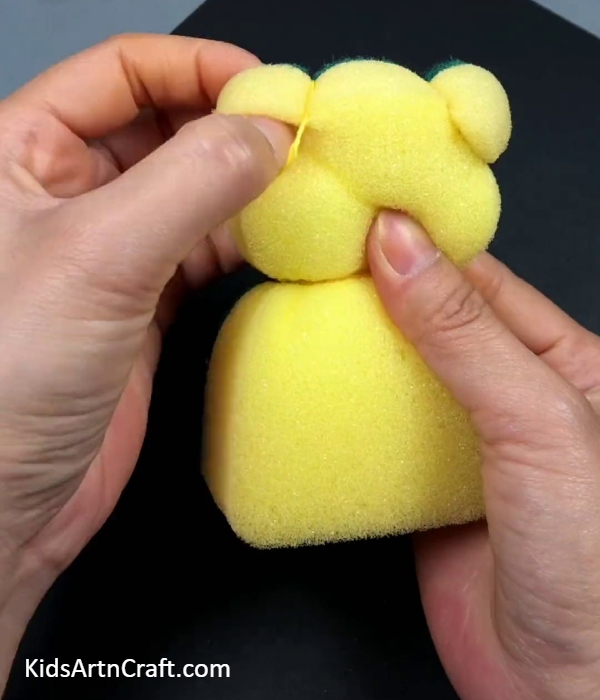
Take 2 more plastic rubber bad and apply them onto each corner of the head of your teddy to make the ears as shown in the image.
Step 3: Making Legs Of The Teddy
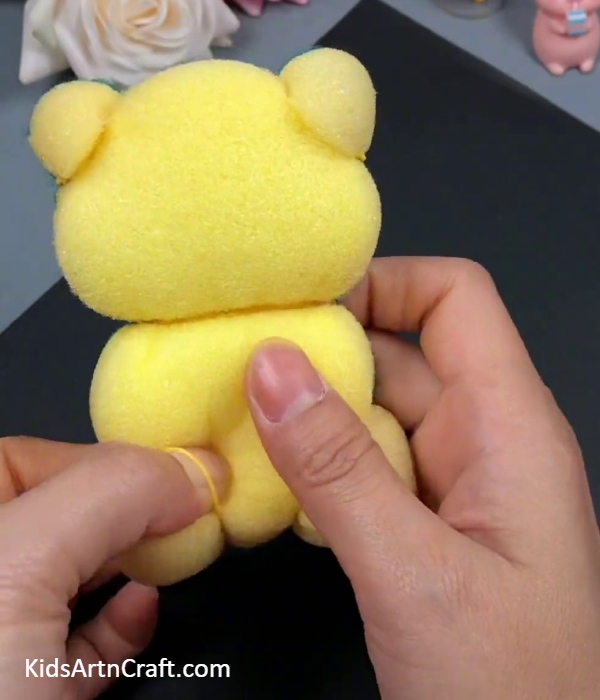
As you made the ears, make the legs of the teddy but this time make sure to cover a slightly larger part of the sponge corner for the legs.
Step 4: Pasting An Eye Of The Teddy
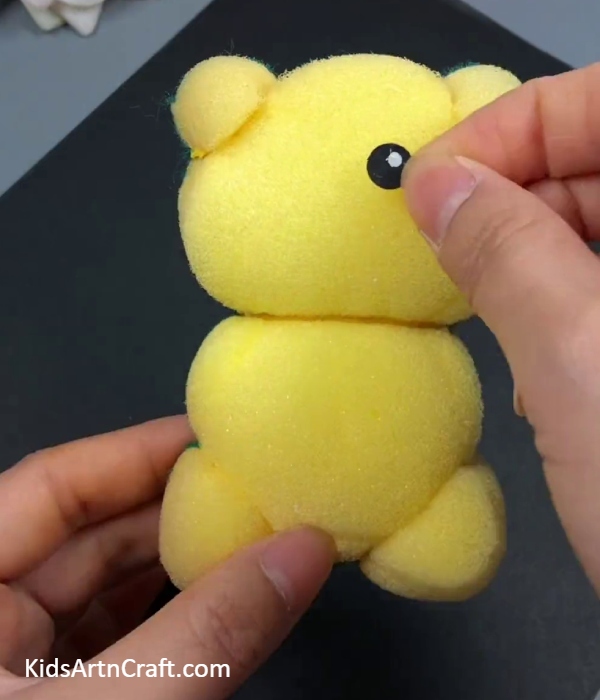
Cut out circles from a black paper sheet using scissors and using a whitener make a dot over it to make it look like the shine of the eye. Paste this eye over the face of the teddy on the left using glue.
Step 5: Making Another Eye Of The Teddy
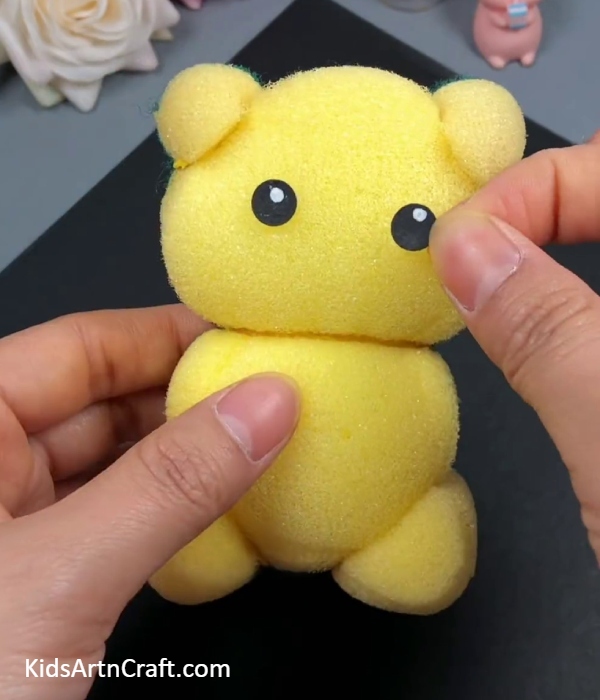
Following the same as the previous step, make another eye of the teddy and paste it beside the previously pasted eye using glue.
Step 6: Making Mouth Of The Teddy
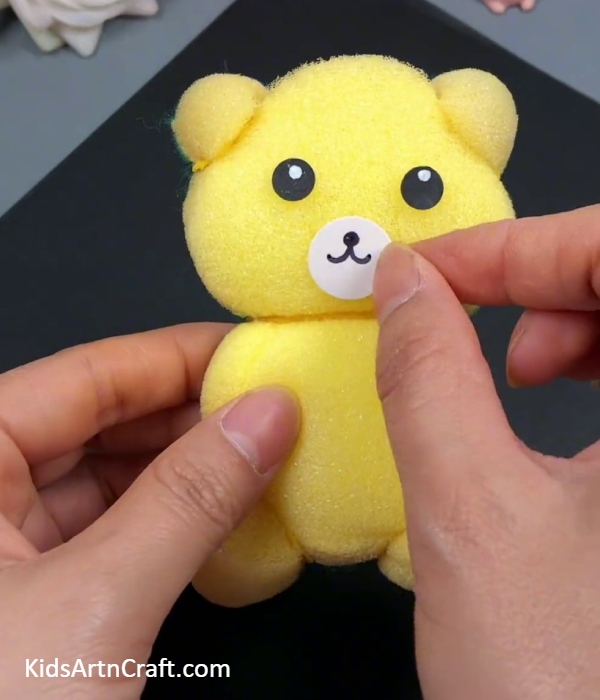
Using scissors, cut out a bigger circle from a white paper sheet, and using a black marker draw a circular nose over it with a curvy smile and paste this mouth below the eyes in the middle using glue.
Step 7: Adding A Bow To Your Teddy
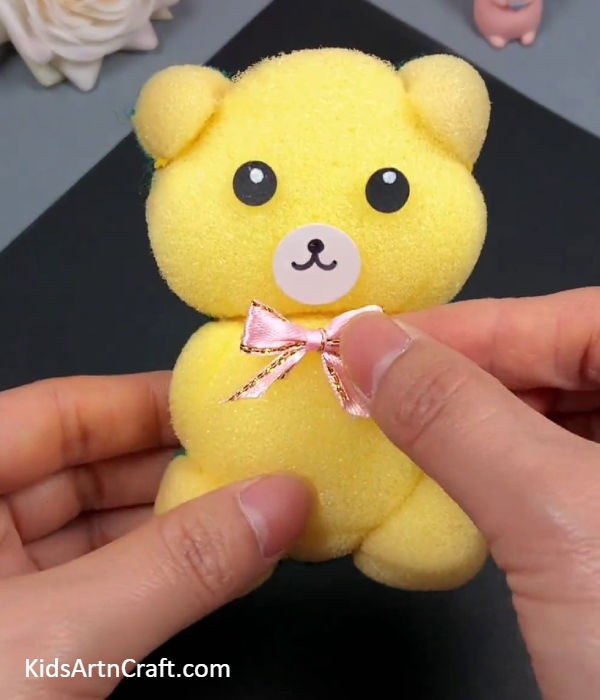
Paste a silk craft bow over the neckline of your teddy below the mouth using glue.
Step 8: Decorating The Teddy
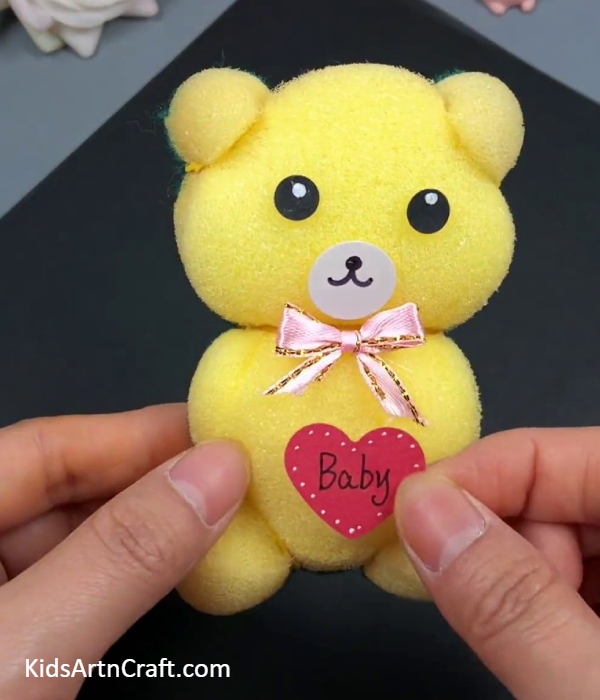
Cut out a heart from a red paper sheet and using the black marker write over it “Baby”. Using a whitener make dots on the boundary of the heart. Now, paste this heart over the body of your teddy in the middle using glue to decorate it.
Step 9: Adding A Crown To Your Teddy
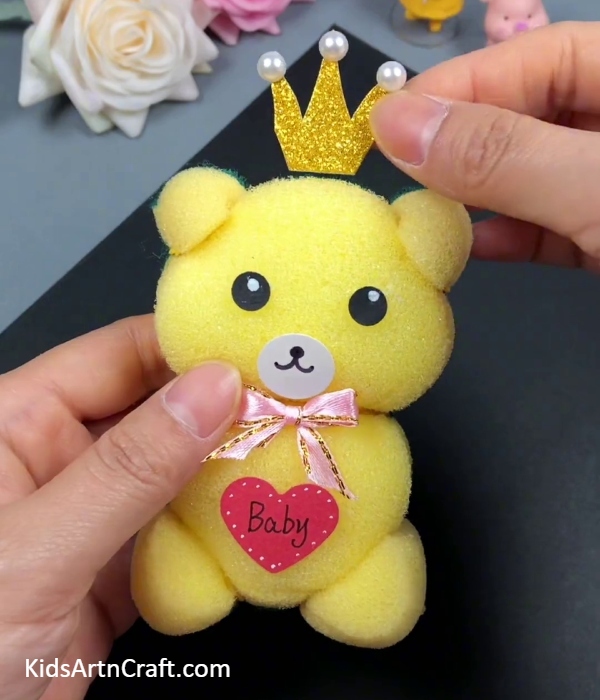
From a yellow glitter sheet, cut out a crown using scissors and paste 3 sticky craft pearls over the top crown. Now, paste this crown from the back of your teddy using glue on the top.
This Is The Final Look Of Your Cutest Teddy!
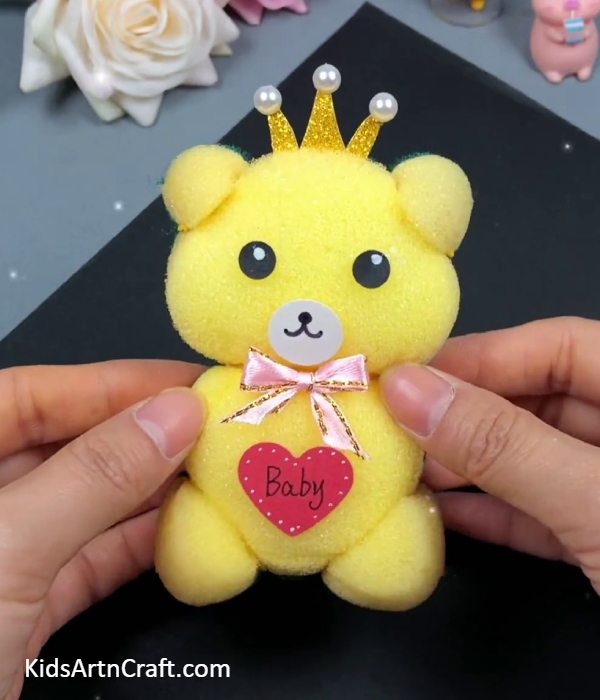
Woah! Look at the amazing results! Your cutest teddy is ready in no time!
This teddy looks just like the one we get from the market! You can make a bunch of these teddies in various colors by using different colored sponges! You can also add up more decorations to it to make it as unique as you are! This teddy can also be used as a gift for your loved one, and I’m sure this will definitely bring a smile to their faces! You can make this teddy with minimal supplies and can make it anywhere! This will literally take like just minutes and the results will be the apple of the eye for anyone who looks at it!
We hope you loved this craft idea and the tutorial for it! Give it a like and share it with your friends to make teddies altogether! Also, let us know your feedback in the comments section below! We would love to hear from you!
Follow us on Youtube for art and craft tutorials and much more.
More Articles from Kids Art & Craft
- Cycle Making From Paper Cup And Plastic Straw
- Recycled Egg Tray Mushroom & Flower Craft – Step by Step Tutorial
- DIY Foam Net Home Craft For Kids
- Water Bottle Airplane Tutorial for Kids
- Easy Leaf Art and Craft Step by Step Tutorial For Kids


