


Drawing
Easy Lotus Drawing Hack Tutorial For Kids

Learn to draw a lotus drawing like a pro! This step-by-step tutorial has brought you an amazing hack that will make it even easier to draw!
This step-by-step is for you to make a lotus drawing with a hack that will make this whole drawing artwork even easier to make and you will be able to get flawless results! With just some basic art materials and the stationery materials that you already have at home, you will be making this drawing! This drawing is suitable for kids who need help and supervision for making a drawing like a pro! This drawing is full of motor skills as well and will manipulate the kiddos to unleash their creative selves with their interest involved!
Simple Lotus Drawing Hack Tutorial
Read More: Sharks Underwater Drawing Step by Step Tutorial
Materials Required
- Cello Tape Roll
- White Circular Paper Sheet
- Black Marker
- Sketch Pens
Procedure
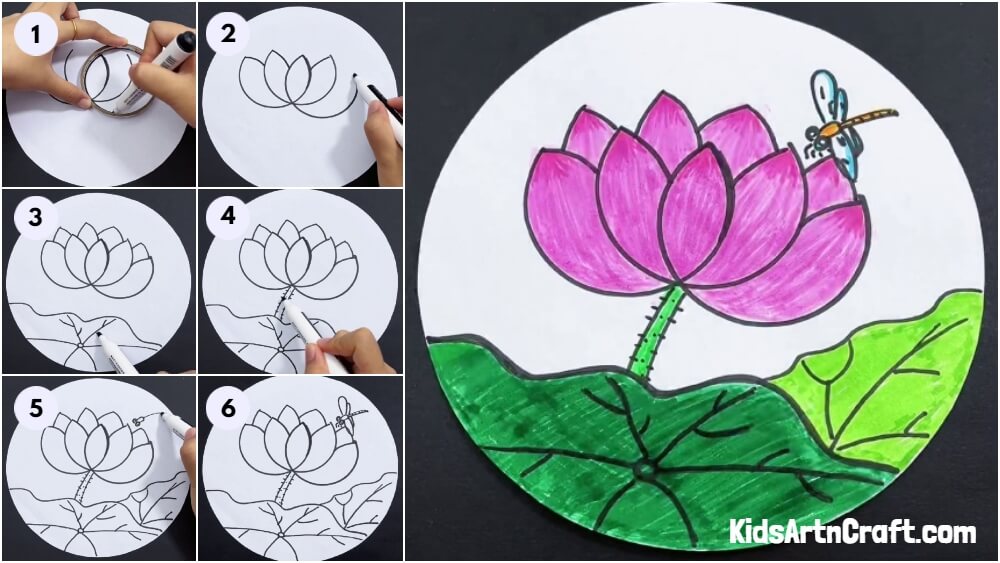
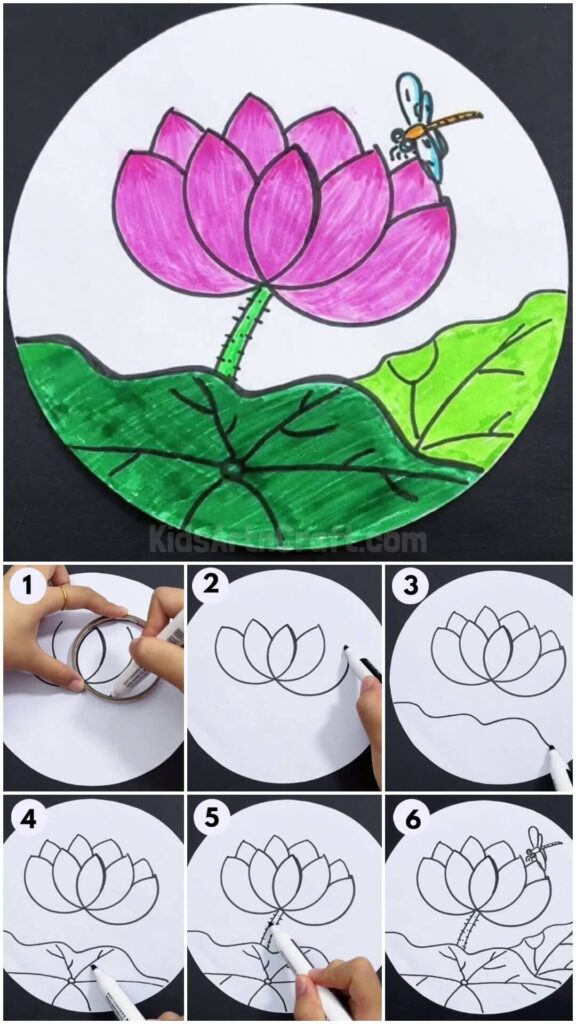
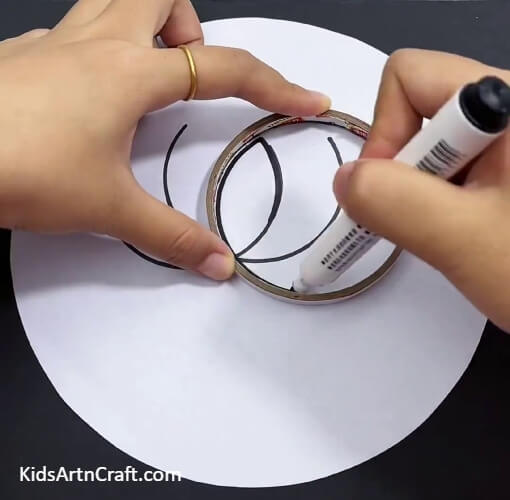
Step 1: Outlining The Inner Part Of A Tape

To begin this craft, take a white circular paper sheet as the base for your artwork, a cello tape roll, and a black marker. Place the tape roll in the center of the base and use a marker to outline the inner side of the tape but make sure to only outline a little more than the bottom half of it to make a curve over the paper.
Step 2: Making More Curves
Shift your tape roll to the left side but keep the bottom center as the previous one. Now, in the same way, make another curve by outlining more than half of the inner part of the roll but his time keeping the bottom the same as the bottom of the previous one.
Again, shift your tape roll now to the right of the center curve in the same way you did for the left one and make another curve following the same step as the previous one.
You will see the left and right curves together forming an enclosed petal of lotus in the center.
Step 3: Making A Lotus
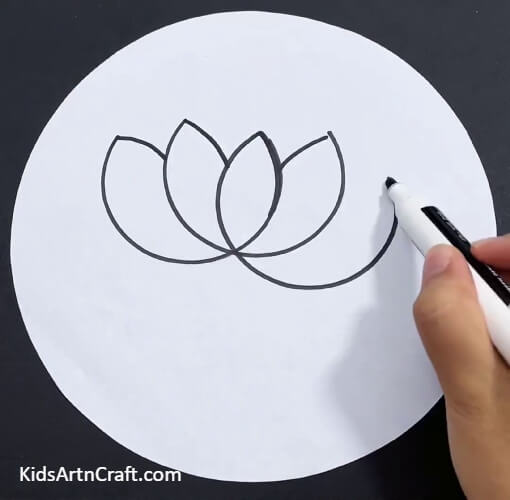
Using the marker, now, make curvy lines to enclose the open curve end to the other as shown in the image to form a lotus.
Step 4: Completing The Lotus And Making Lotus Leaf
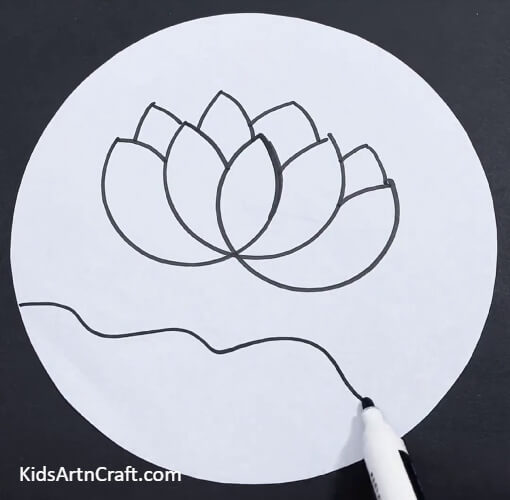
Using the marker, make more half-lotus leaves at the top of the gaps of the lotus and also make a wavy one beneath the lotus at the end of the base.
Step 5: Making Veins Of The Lotus Leaf
Using the marker, draw a small circle between the lotus leaf and make 6 curvy veins from the circle to over the leaf. Furthermore, make small lines from the veins to complete the veins.
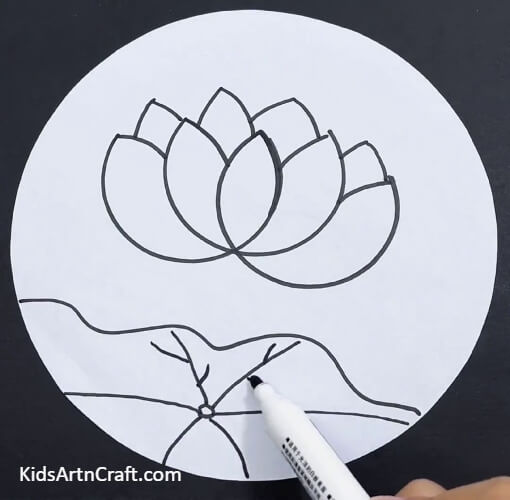
Step 6: Making Lotus Stem
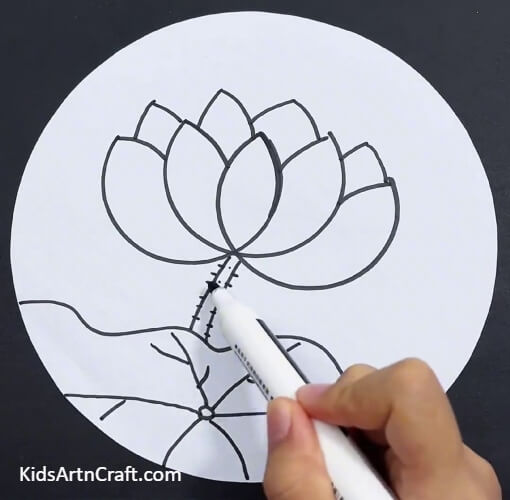
Draw a stem from the bottom center of the lotus to the leaf boundary and make very tiny horizontal lines over the boundary of the stem and some dots over the stem to detail it.
Step 7: Making A Dragonfly And Another Leaf
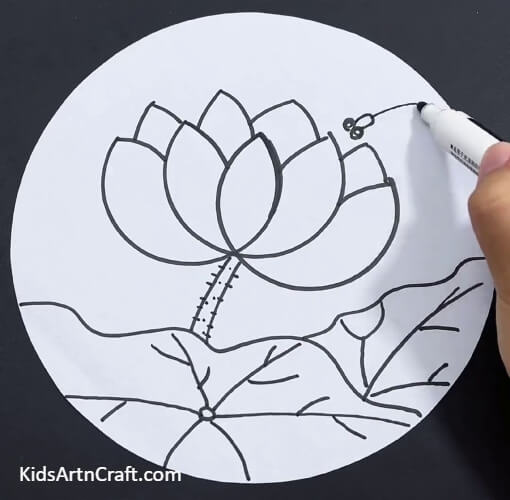
Draw another leaf on the right of the previous one as shown in the image. Now, make a dragonfly over the lotus on the right by making 2 closely attached circles and a curvy body in the middle back then a long thin tail behind the back as shown in the image.
Step 8: Making The Dragonfly Wings
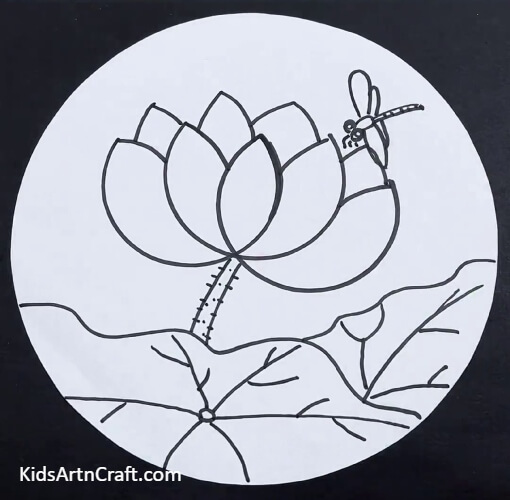
Draw the curvy wings of the dragonfly on each side with the other 2 less than half below the full 2 wings to make them look like beneath them.
This Is The Final Look Of Your Lotus Drawing!
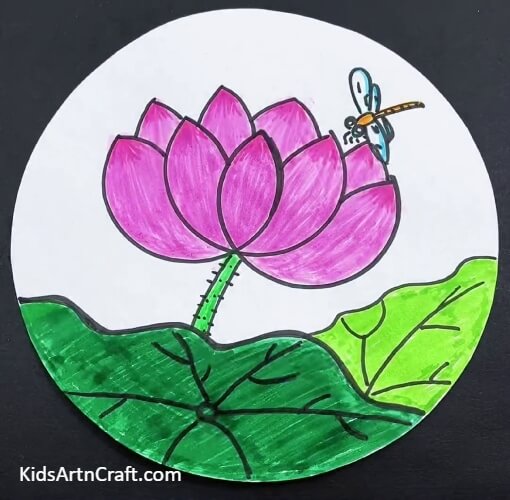
For the last step, color out the drawing with sketch pens just like the way, shown in the image. For the shading above the top of the lotus, you just have to make curvy strokes again after coloring the whole lotus, in this way, you will able to give it a shade.
Voila! You have finally succeeded to make your lotus drawing artwork with the tape roll hack!
You can now decorate this drawing in your room to admire your creation anytime you want and flaunt it off in front of everyone! This drawing can also be a classroom art activity to have a smooth drawing class without the kiddos needing the teacher’s help every minute! This artwork will be the perfect addition to your art and drawing collection! You can even make a whole scenery using this tutorial by adding the lake and many more lotuses!
We hope you liked the article and do give it a like and share with your friends! Also, tell us your drawing journey with us in the comments section below!
Follow us on Youtube for art and craft tutorials and much more.
More Articles from Kids Art & Craft
- Watercolor Drawing Of Flowers And A Butterfly For Kids
- Creative Cactus Drawing From Hand Outline Idea For Kids
- How to Draw Worm Easy Drawing for Kids
- Planting a Tree Easy Drawing For Environment Day
- How To Make Ostrich Easy Tutorial For Kids