Kids Activities
How to Make a DIY Paper Moving Spider

Hi guys! Today, you are going to make an insect that scares somebody, and somebody feels interested in. You must be guessing what it might be. So let’s reveal. It’s a spider. Some of you might be huge Spider-Man fans, so for you guys, this insect is not a matter to freak out, right? Some of you find this insect scary and disgusting. Still, you will be fascinated to know some interesting things about this insect that are unknown to most people.
These insects have blue blood. They can also fart, likely humans, and they can also swim. These tiny creatures are almost like humans! These facts might attract your attention, right? And the most interesting fact about making this craft is moving the spiders. So, let’s not waste any time and time making a cute spider.
How to Make a DIY Paper Moving Spider
Materials:
- Two black paper circles.
- A small grey circle.
- A small white piece of paper.
- Four long black coloured paper strips.
- A long bamboo stick.
- A black marker pen.
- A red sketch pen.
- A glue stick.
- Scissors.
Procedure:
- Take a black coloured paper circle and a glue stick, and apply glue to the circle.
- Take four long black coloured paper strips of the same size, paste the strips into the middle of the circle in a criss-cross way.
- To understand the process more properly, you can see the reference video.
- Grab a bamboo stick and paste it on the bottom-middle side of the circle.
- Grab a black colour paper circle, the same size as the previous circle.
- Apply glue to the circle with the glue stick.
- Paste the circle over the previous bamboo stick added circle.
- Take a small grey colour circle and a white piece of paper.
- Cut out two small circles of the same size from the white paper with scissors.
- Grab a black marker pen, draw two cute eyeballs on the circles as the spider’s eyes.
- Apply glue on the eyes with the glue stick and paste it on the grey circle.
- Grab a red sketch pen, draw a smile on the bottom of the grey circle.
- Apply glue on the top of the previous black circle with the glue stick.
- Attach the grey circle to the top of the glued black circle.
- Fold the paper strips inside the circle.
- Fold the strips outside of the circle.
- Fold the middle of each strip or the spider’s legs.
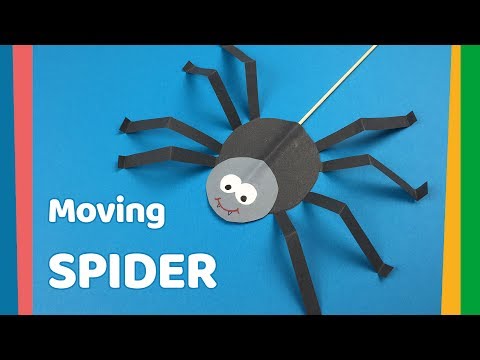
- Your cute paper spider will be ready!
How cool, right! You can move the spider with the stick so easily. It will look so real! And also, this process is so easy to make. You just need a few materials and give the paper a fascinating shape. Make them and play with your friends. You can also make them at your craft class, your teachers are gonna love them. But don’t scare your spider-phobic friends. Gift your spider-loving friends this. They are gonna love them. So, grab your stationery and make a cute DIY moving spider.
Educational Benefits of This Spider Craft Activity
Making a moving paper spider offers several learning benefits for children:
- Improves fine motor skills through cutting and folding
- Encourages creativity and imagination
- Develops patience and concentration
- Helps kids follow step-by-step instructions
- Introduces basic motion and movement concepts
- Supports hands-on STEM learning through simple mechanics
Craft-based learning activities are widely used in early childhood education because they encourage active participation and problem-solving.
Easy Materials Needed for the Craft
Parents and teachers can easily create this DIY moving spider using affordable craft supplies available at home or school:
- Black craft paper or colored paper
- Glue stick
- Child-safe scissors
- String or thread
- Googly eyes
- Markers or crayons
- Tape
Using simple materials makes this project budget-friendly and ideal for classroom group activities.
Tips to Make Your Paper Spider More Creative
Kids can personalize their moving spider craft with fun decorations and creative designs. Try adding:
- Glitter for shiny spider legs
- Colorful patterns on the spider’s body
- Funny cartoon-style eyes
- Glow-in-the-dark stickers
- Halloween-themed backgrounds
- Spider webs made from white thread
These extra decorations make the craft more exciting and encourage artistic expression.
Safety Tips for Kids During Craft Time
Adult supervision is recommended when younger children use scissors or small craft supplies. Always use child-safe materials and encourage kids to work carefully while cutting and gluing paper pieces. Keeping the workspace clean and organized helps children enjoy crafting safely.
Why Kids Love This Moving Spider Craft
This DIY paper moving spider craft is a fun and interactive activity that combines creativity with motion. Children enjoy watching the spider move while learning how simple paper mechanisms work. Moving paper crafts help make learning more exciting because kids can play with the finished project after creating it.
Interactive paper crafts are excellent for keeping children engaged during classroom activities, holiday crafting sessions, and weekend creative play at home. Similar moving spider craft activities are popular among kids because they combine simple materials with hands-on fun.
FAQs on How to Make a DIY Paper Moving Spider
Q1. What materials do I need to make a DIY paper moving spider?
Answer: You will need a printer, paper, scissors, glue, and a pencil.
Q2. How do I assemble the spider?
Answer: Print out the template and cut out the pieces. Fold the legs and body and glue them together. Attach the legs to the body and use a pencil to draw the face.
Q3. What type of paper should I use?
Answer A: Heavy cardstock or thick paper works best.
Q4. How long will it take to make the spider?
Answer: It should take about 15-20 minutes to assemble the spider.
Q5. How do I make the spider move?
Answer: You can make the spider move by attaching a small motor or battery to the body.
Q6. What type of motor do I need?
Answer: You will need a small DC motor or servo motor.
Q7. Can I use other materials to make the spider?
Answer: Yes, you can use other materials like foam, fabric, or other craft supplies to make the spider more unique.
Q8. How do I make sure the spider moves smoothly?
Answer: Make sure the motor is securely attached, and the spider is balanced properly.
Q9. How do I make the spider more realistic?
Answer: You can add details like eyes and fur to make the spider more realistic.
Q10. Where can I find the template for the spider?
Answer: You can find the template for the spider online or in craft stores.
This DIY paper moving spider craft is a fun, creative, and educational activity that kids will love making and playing with. It helps children improve important motor and artistic skills while introducing simple movement concepts through hands-on crafting. Whether used for Halloween fun, classroom learning, or weekend activities, this easy paper spider project offers an enjoyable screen-free experience for kids of all ages.
Encourage creativity and learning with colorful crafts, hands-on DIYs, and engaging kids’ activities. Stay connected with us on Telegram , YouTube & Facebook.
Read More:
- 24 Beautiful Stained Glass Art Projects for Kids
- 24 Crazy Monster Crafts for Kids
- 24 DIY Creative Washi Tape Projects for Kids
- 24 DIY Plastic Bottle Craft Ideas for Kids
- 24 Easy Christmas Ornaments Crafts for Children