Paper Crafts
How to Make Paper Butterfly Step by Step Instructions Easy Tutorial

Let’s learn how to make a paper butterfly step by step using an easy method. Put on your thinking caps as we immerse ourselves in yet another quirky art form. You will follow some basic cutting and folding with the fewest possible materials to complete the task. The things needed are: A4-sized sheet, Colors, a pencil, and a pair of Scissors, that’s all. Let us hop on to yet another journey!
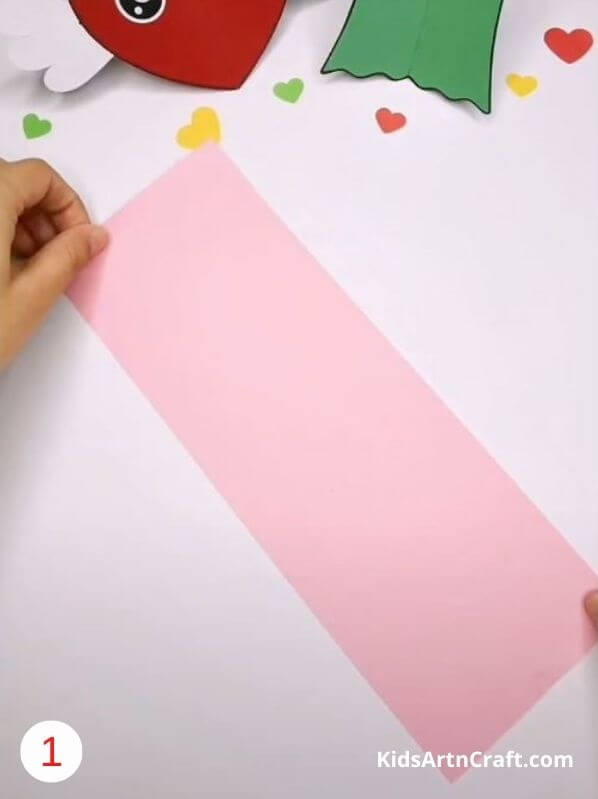

- Cut the A4-sized sheet in half. We are going to use this to initiate our task.
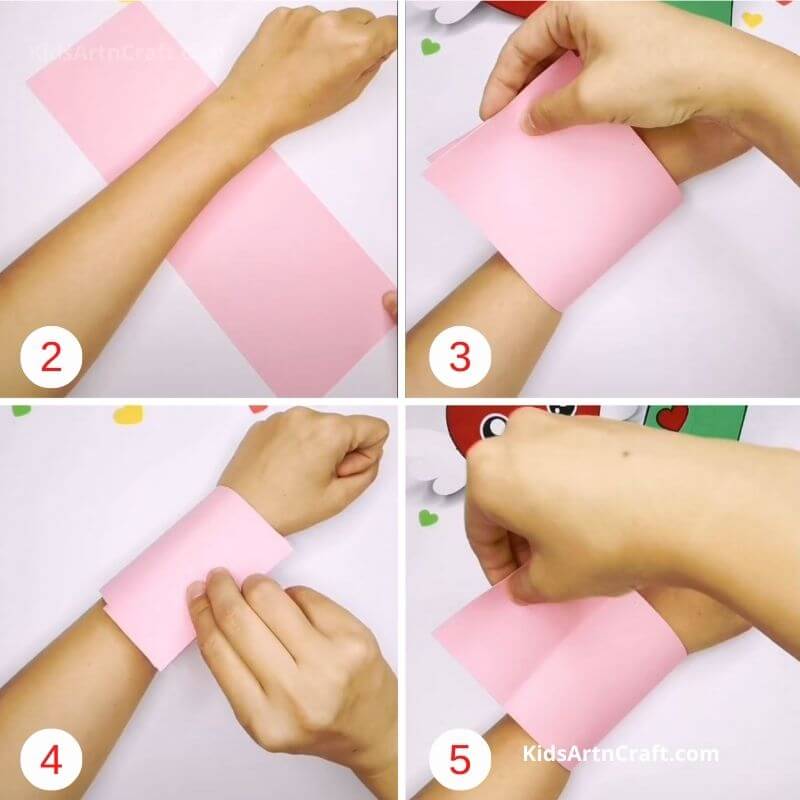

2. Place your wrist on the sheet of paper at its horizontal axis perpendicularly at the center.
3. Wrap one half first on your wrist.
4. Using your thumb to keep it in place, wrap the other portion over it.
5. Now mark the overlapped part on both ends, which will be around 5cm.
6. Unwrap it and straighten it on your table.
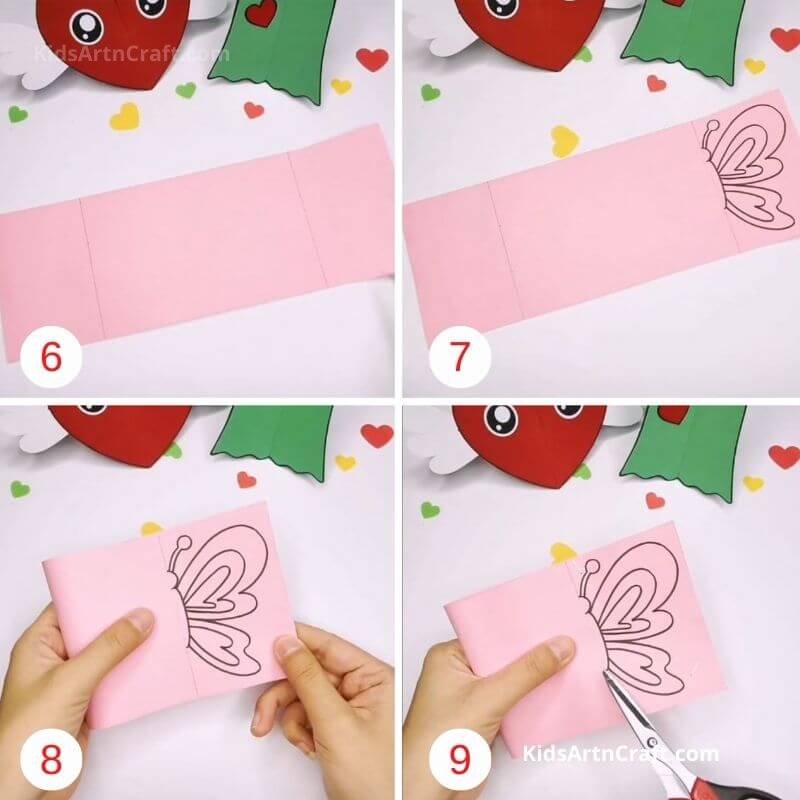
7. Draw lines on both ends where you recently marked.
8. Sketch out exactly half of the butterfly. Include its wing and half the body. Leave some distance from the border to make cutting easy.
9. Fold the opposite edge till the line drawn. Mark a cut till the bottom of the butterfly’s body and start cutting.
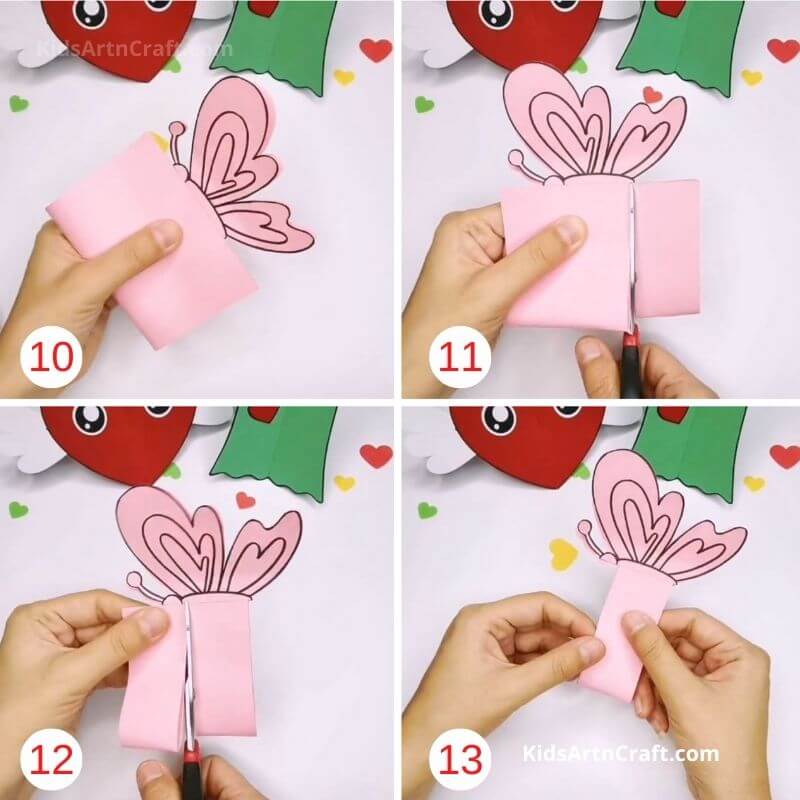
10. Cut through the edges of the wing’s shape.
11. Now, rotate the sheet perpendicularly, and cut the flipped part from the height of its body.
12. Do the same to the upper portion as well.
13. Remove the excess part.
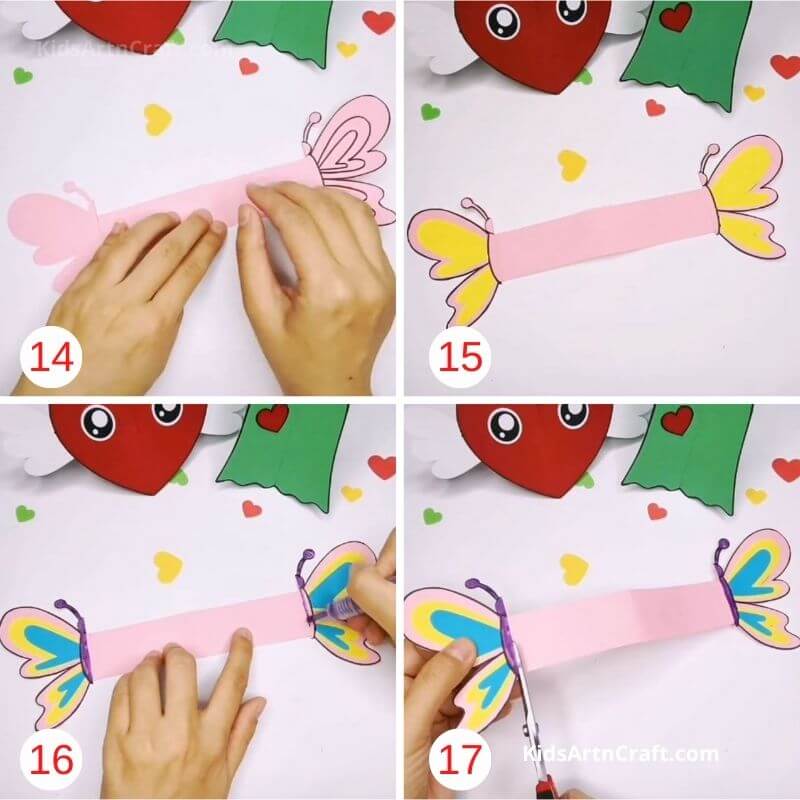
14. Now open the sheet. You’ll see the same cutout of the other wing, but separated by a strip.
15. Fill colors in the wings of your choice.
16. Color its body as well. Don’t color the excess strip left between.
17. Cut half the length of the slit from the bottom of the symmetry axis.
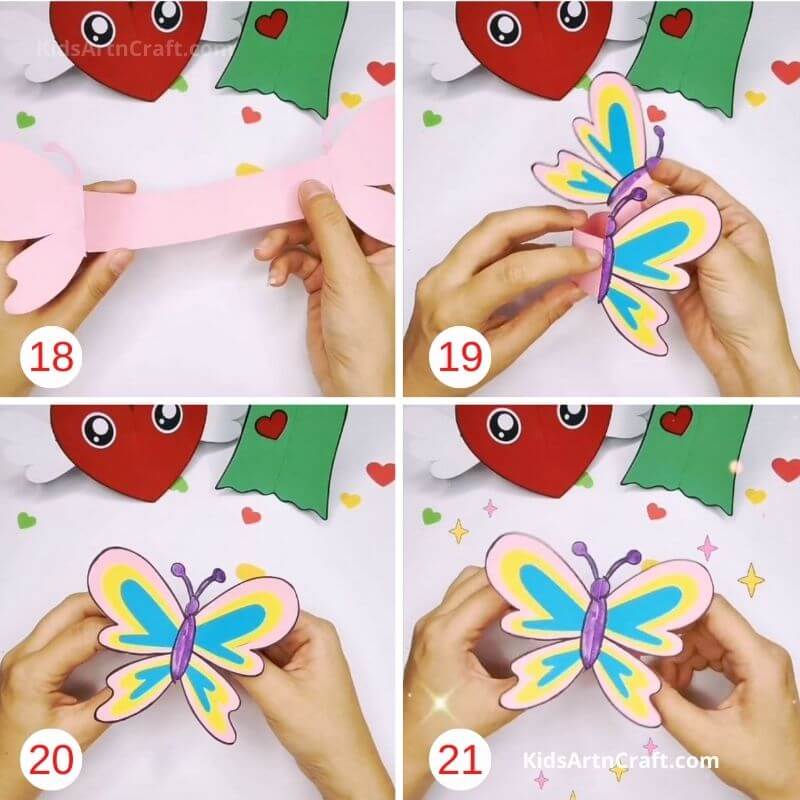
18. Invert the sheet and hold both ends with your thumb.
19. Using your fingers, carefully fold the right part backwards towards the other portion.
20. Insert the folded line of the edge into the slit you made previously, such that the excess strip is now invisible from the top view.
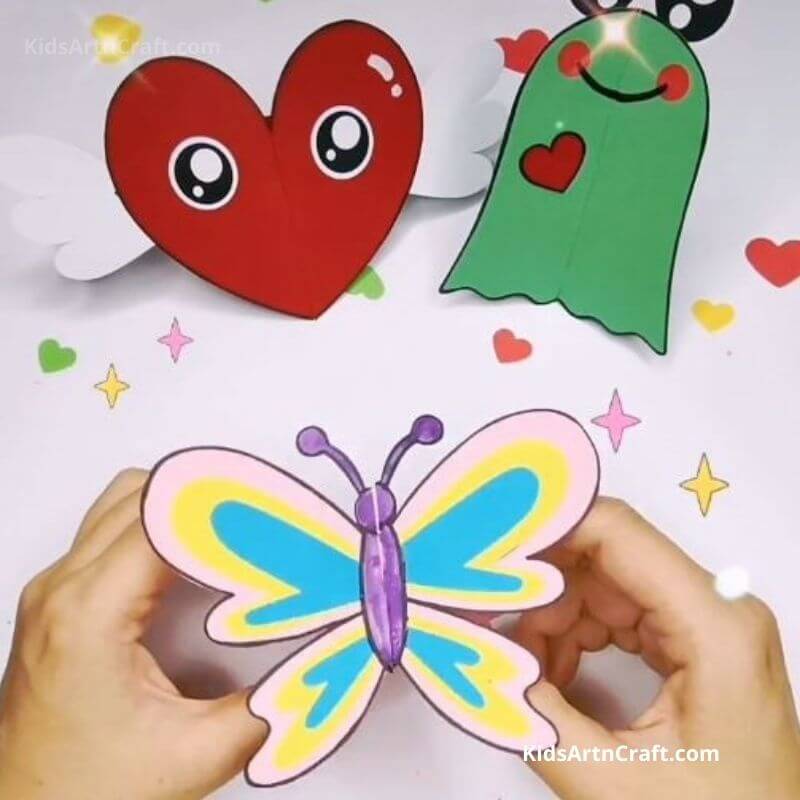
Your paper butterfly is ready in just a few steps! You can make the butterfly flap its wings since your new craft is 3D in nature!
- You can use different colored sheets, which may differ in size as well.
- Create your own butterfly field with butterflies of all species!
- Though the word ‘Butterfly’ itself brings an aesthetic imagination, the most beautiful species of butterflies are:
- 1.Monarch Butterfly
- 2. Glasswing Butterfly
- 3. Orange Oakleaf
- 4. Ulysses Butterfly
- 5. Diaethria clymena and many more
- You can search for their images and imitate their wing illustration to create some immensely pretty showpieces to set at home.
- Do you know a very interesting fact about butterflies? Assuming that you don’t, the wings of butterflies are actually made of tiny scales throughout, which radiate different colors when light falls on them. This is the reason butterflies are literally the most colorful and beautiful members of the insect kingdom.
- Some of the butterfly species, for instance, the glasswing butterflies, have transparent wings, which gives them a look of glass.
- The maximum speed of a butterfly is 12 miles per hour!
Easy Paper Butterfly Craft Step-by-Step Tutorial
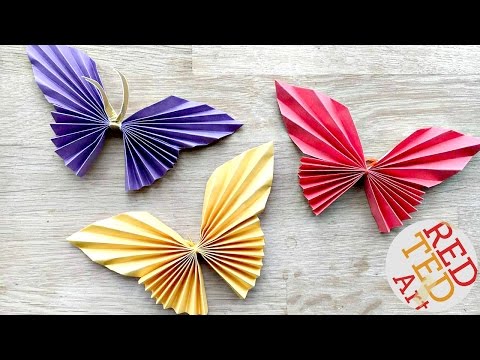
Learn how to make a beautiful paper butterfly with this easy step-by-step tutorial. This DIY paper butterfly craft is perfect for kids, school projects, and home decoration. Using simple materials like colored paper, scissors, and glue, you can quickly create a colorful butterfly craft and enjoy a fun, creative activity.
Read More:
- How to Make Paper Sun Toy Step-by-Step Instructions Easy Tutorial
- How to Make a Paper Butterfly Card for Sister: Step-by-Step Instructions Easy Tutorial
- How to Make Paper Aquarium Fish Step-by-Step Instructions Easy Tutorial
- How to Make a Paper Rabbit – Step-by-Step Instructions
- How to Make a Paper Dog