

Kids Activities
How to Make a Paper Dog


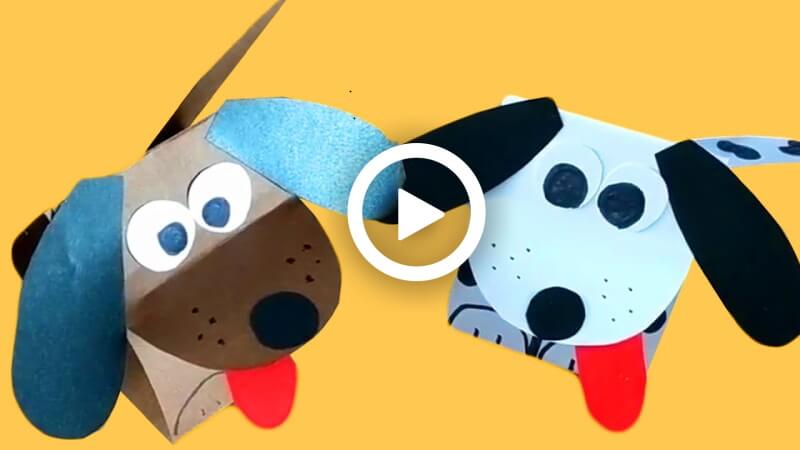
Hello readers! There must be all of you who love Dogs. Why not !! They called man’s best friend for their faithfulness and bravery. But not only does this adorable creature bring happiness to sad, full lives, but it also brings joy everywhere. Kids love to play with dogs. So they will find the origami dog very interesting. Without wasting any time, let’s make a new friend!
How to Make a Paper Dog Toy
Materials:
- A4 colour paper.
- A colour paper strip of the same colour as the A4 paper.
- A black paper.
- A white paper.
- A red paper.
- A glue stick.
- Black marker pen.
- Scissors.
Procedure:
- Take a long A4 paper strip of 80 gsm, fold it in half to make a middle fold line.
- Follow the middle fold line, a nd make two small rectangles into the fold line on both sides.
- We will get a total 4 fold rectangles shape on the strip.
- Unfold the strip and look.
- All sizes of the rectangles should be the same.
- Fold the right side end square’s tip part by making a wide rectangular shape. Fold it up and down.
- This part should pop out 3D-like.
- Unfold the part.
- Cut the tip of this part roundly by making a head-like shape with scissors.
- Apply glue under the 3D part and attach the other portion around it with a glue stick. To make a ring.
- The round pop-out part should be under the side of the ring. The pop-out part would be the mouth portion of the dog.
- Take a white paper, draw two circles with a pencil.
- Take a black marker and draw two eyeballs with it inside the white circles.
- Cut out the eyes of the dog with scissors.
- Attach the eyes over the pop-out half-circle area with the glue stick.
- Take a black piece of paper, cut out two pieces of the same size, and some small pieces with scissors.
- Cut the tips of the two strips roundly. It will be the dog’s ears.
- After the cutting is done, attach the two ears on both sides of the dog’s face.
- Cut out the areas after attaching them with scissors to properly shape the ears.
- Take a piece of red paper, cut out a wide and a small rectangular strip with scissors.
- Cut the side tips of the strips roundly. It will be the dog’s tongue.
- After the cutting is done, attach the tongue under the pop-out half-circle shape with a glue stick.
- Take a black piece of paper, and cut out a small circle. It will be the dog’s nose.
- Attach the circle to the tip of the dog’s pop-out half-circle shape with a glue stick.
- Take a strip of the same colour as the dog’s skin; the strip should be long, narrow, and rectangular.
- Cut the sides and edges of the strip roundly. It will be the tail of the dog.
- Attach the tail to the back of the dog with the glue stick.
- Grab a black marker, make small paws under the ring and small holes in the dog’s mouth to give it a detailed look.
- Your cute paper dog will be ready!
Read More:
- How to Make A Moving Paper Toy- An Elephant
- How to Make a Paper Swinging Horse
- How to Make a Flying Butterfly Craft
- Easy Paper Craft Ideas for Kids – Video Tutorial
- How to Make A Paper Rabbit