Paper Crafts
How to Make Paper Bunny Step by Step Instructions Easy Tutorial

Learn how to make a paper bunny with this easy step-by-step tutorial! All you need is paper and a few simple supplies to make this cute Easter bunny craft. Perfect for kids of all ages.
HOPPING TO A PAPER BUNNY!
Bunnies are another name for rabbits. They are one of the cutest animals ever. They belong to the Leporidae family. Everyone loves a bunny rabbit because it is so cute and harmless. The best feature of a bunny is its ears, as it’s very long. Their favourite food is the carrot. Bunnies have always been a part of our childhood stories and memories. Let’s go and dig out our memories and create a cute paper bunny!
Crafting together also creates memorable bonding moments between children and adults while encouraging screen-free learning activities.
Easy Paper Animal Craft Tutorial
Material Required
- Pink sheet
- Plain paper/surface
- Pencil
- Eraser
- Black, pink, and red sketch pen
- Scissors
- Red sheet
- White sheet
- Small orange sheet
- Small black sheet
- Yellow sheet
Instructions:
Let’s make a paper bunny!
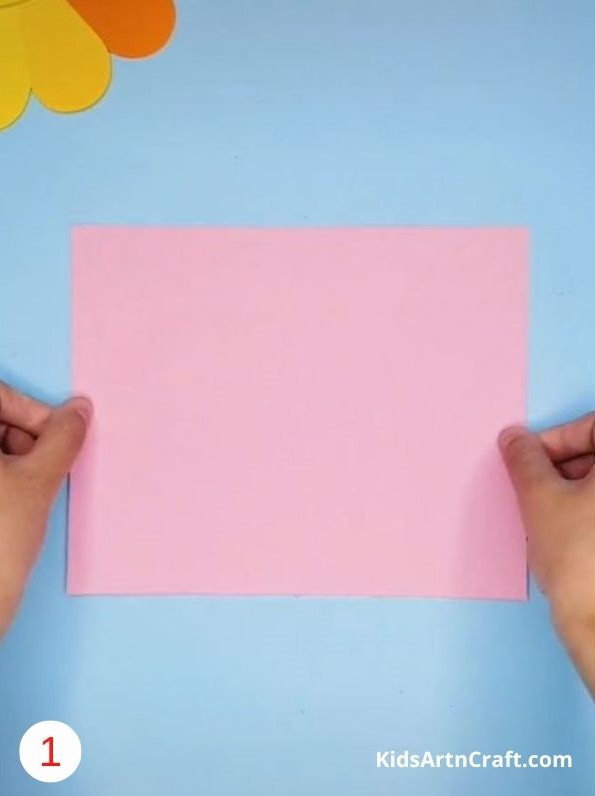

STEP 1 – PINK SHEET
Place the pink sheet on the plain surface.
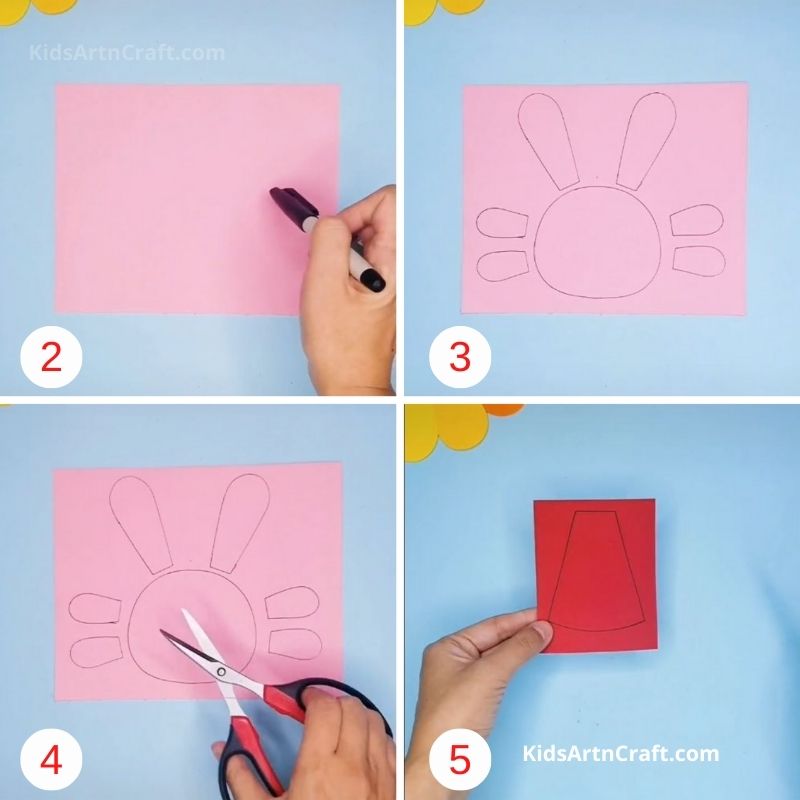

STEP 2 – OUTLINE
Using the pencil, outline the bunny. Draw a circle for the face; the bottom of the circle has to be a little flat. Then draw the hand and legs for the bunny, along with the two long ears.
STEP 3 – MARK
Once you’ve outlined it, highlight it with the black sketch pen.
STEP 4 – CUT
Cut out the face and the rest of the features. Be careful while handling the scissors.
STEP 5 – DRESS
Using the red sheet, outline the dress.
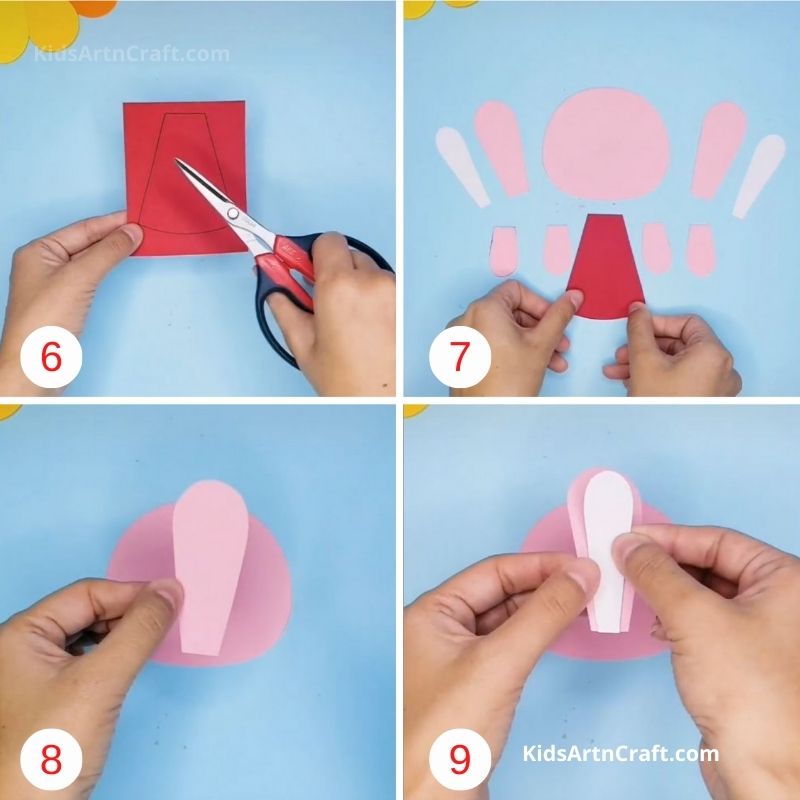
STEP 6 – CUT
Cut out the outline of the dress.
STEP 7 – ASSEMBLE
Assemble all the parts. Along with that, take a cut-out for the inner ears with the white sheet.
STEP 8 – EAR
Take one ear and keep it ready.
STEP 9 – INNER EAR
Now, take the inner ear and stick it exactly on the outer ear.
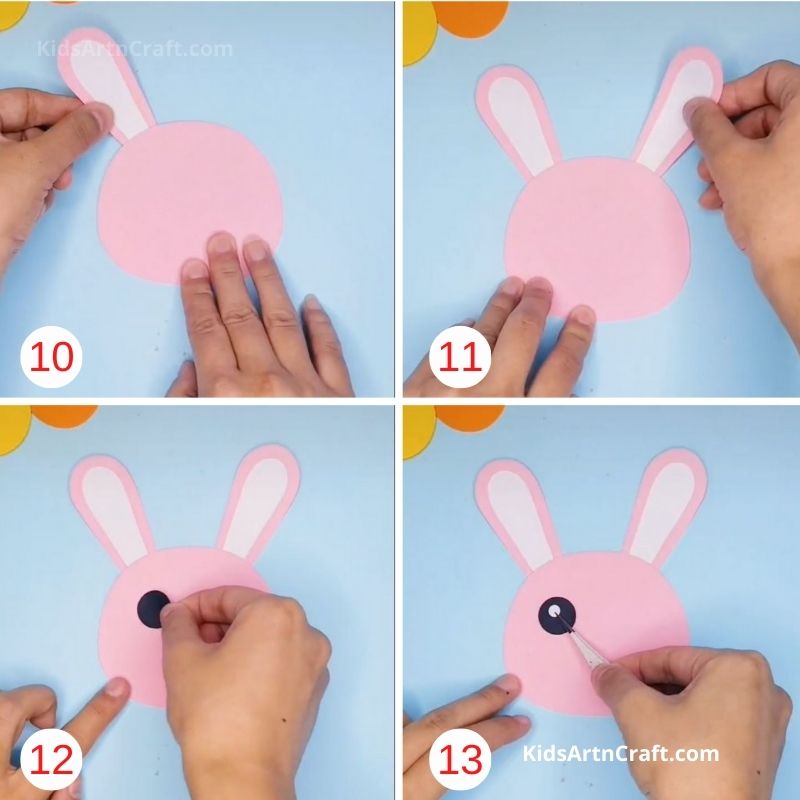
STEP 10 – STICK EAR
Now, stick the entire ear right behind the face.
STEP 11 – REPEAT
Similarly, stick the other ear as well.
STEP 12 – EYE
Take a small black circular cut-out for the eye and stick it on the face.
STICK 13 – EYEBALL
Stick a smaller white circle inside the eye.
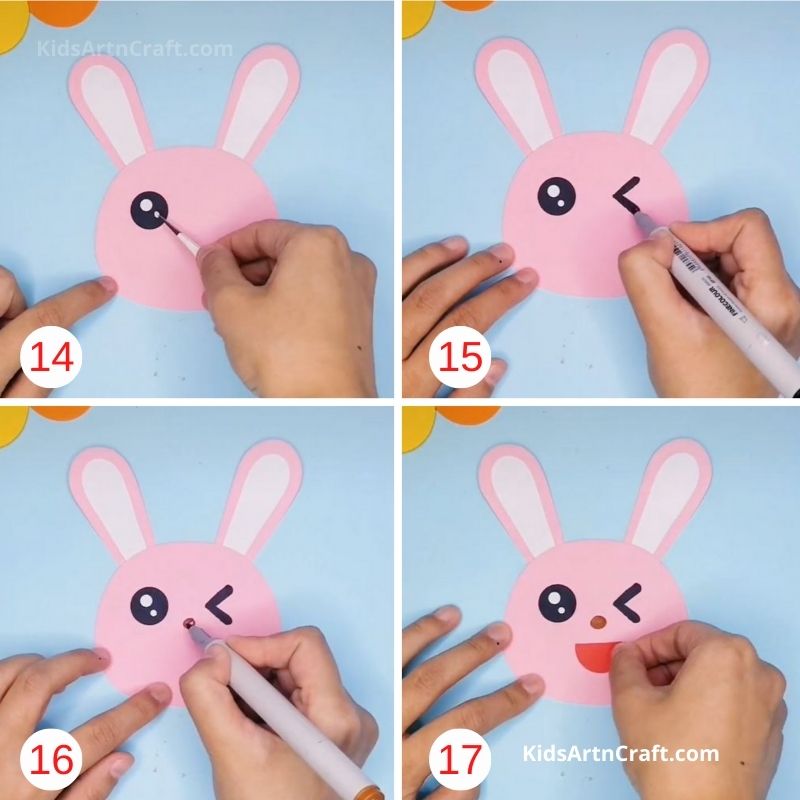
STEP 14 – INNER EYE
Stick an even smaller white circle below the previous one.
STEP 15 – WINK
For the other eye, you can draw a wink to make it fun and creative.
STEP 16 – NOSE
Draw and colour the nose on the face using the red sketch pen.
STEP 17 – MOUTH
Take a cut-out of the mouth using the small orange sheet.
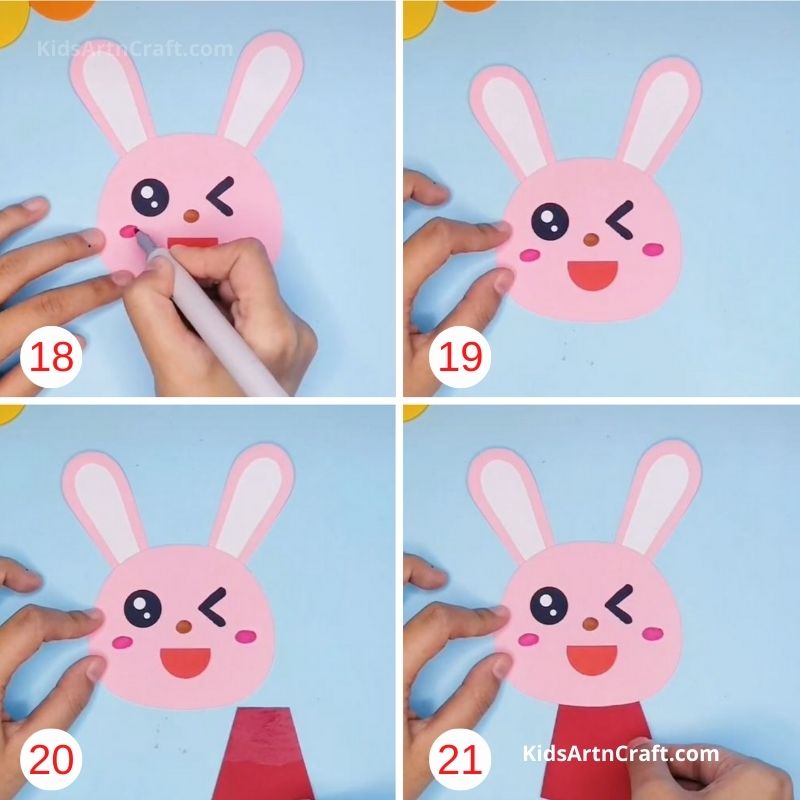
STEP 18 – CHEEK
Using the pink sketch pen, draw and colour the cheeks.
STEP 19 – REPEAT
Similarly, do the other cheek.
STEP 20 – DRESS
Take the cut-out of the dress and keep it ready.
STEP 21 – STICK
Stick the dress to the back of the face.
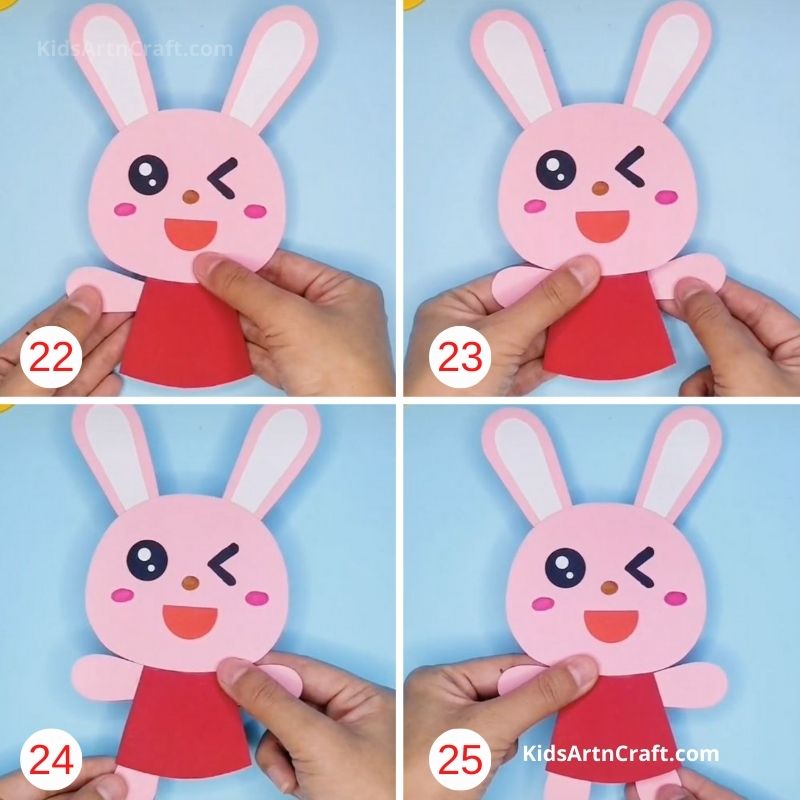
STEP 22 – HAND
Stick the hand from behind the dress.
STEP 23 – REPEAT
Repeat step 22 with the other hand.
STEP 24 – LEG
Stick the leg from behind the dress.
STEP 25 – REPEAT
Repeat step 24 with the other leg.
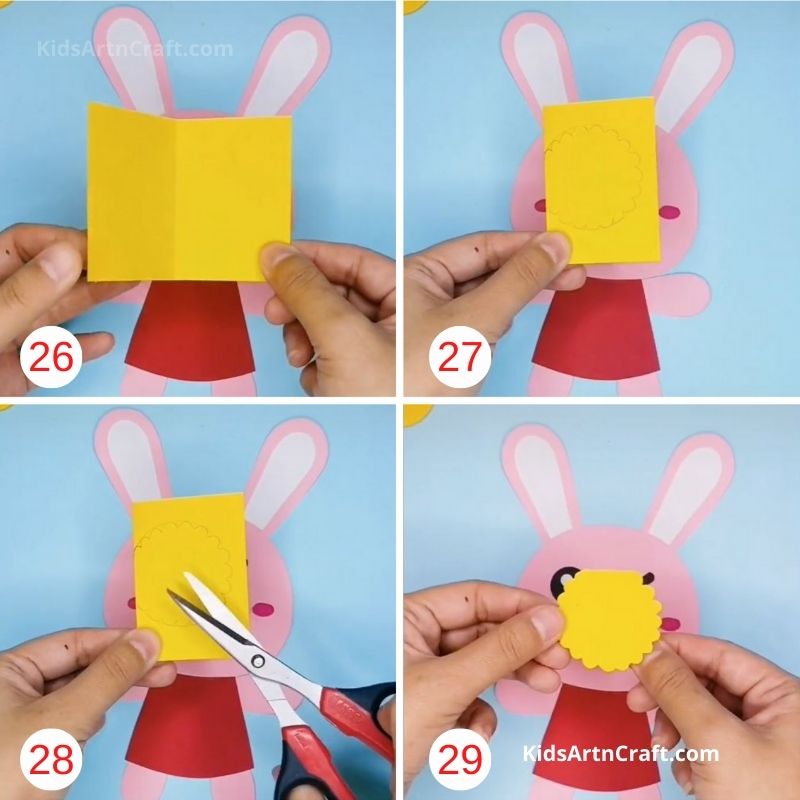
STEP 26 – CARD
Take the yellow sheet and fold it in half.
STEP 27 – DRAW
Draw a cloud-like structure at the folding of the card.
STEP 28 – CUT
Cut out the cloud-like structure along with the folding.
STEP 29 – CLOUD
After cutting, it will look like a cloud.
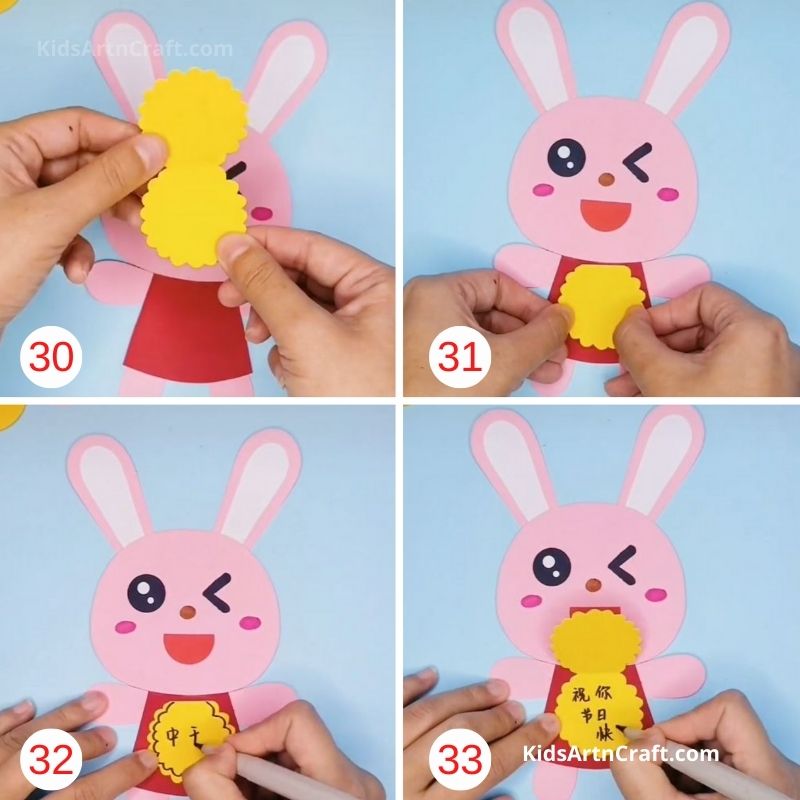
STEP 30 – CARD
When you unfold it, it’ll look like a card.
STEP 31 – STICK
Stick one side of the card to the dress, so it will look like a card that will open.
STEP 32 – DRAW
Outline with the black sketch pen. You can also write something on it.
STEP 33 – WRITE
Write a cute message inside. You can either gift this to someone or you can write something of your choice.
The paper bunny is ready!
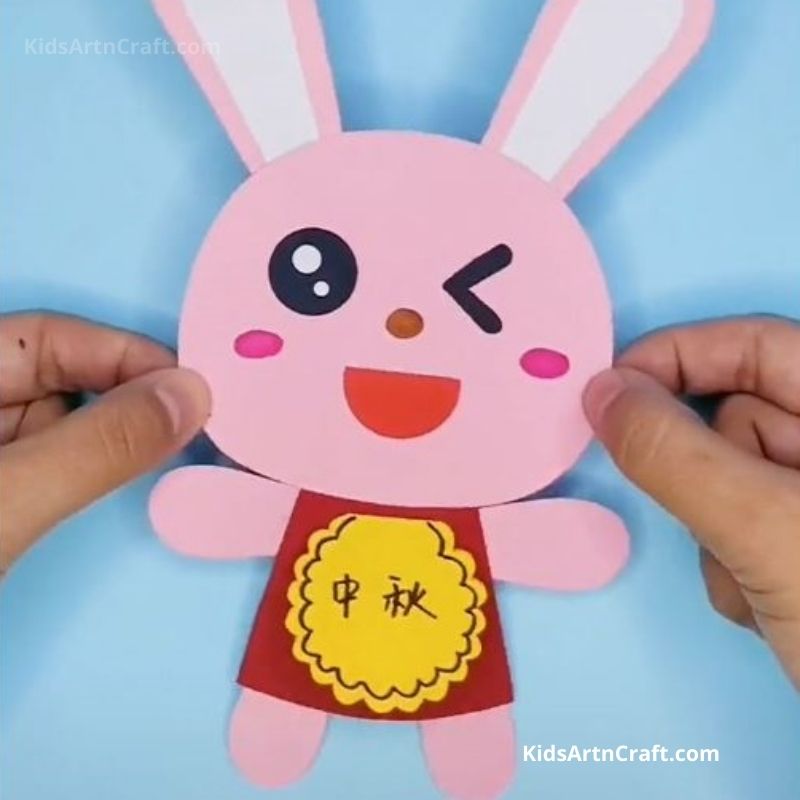
This cute little paper bunny with a message is ready! You can send this as a personalized message to someone, or you can keep it as a secret message for yourself. You can keep this as a decorative piece in your room, or you can even hang it from the ceiling. This is a fun and creative way to engage your kids.
Some More Bunny Craft Tutorial
How To Make a Paper Bunny Craft For Kids

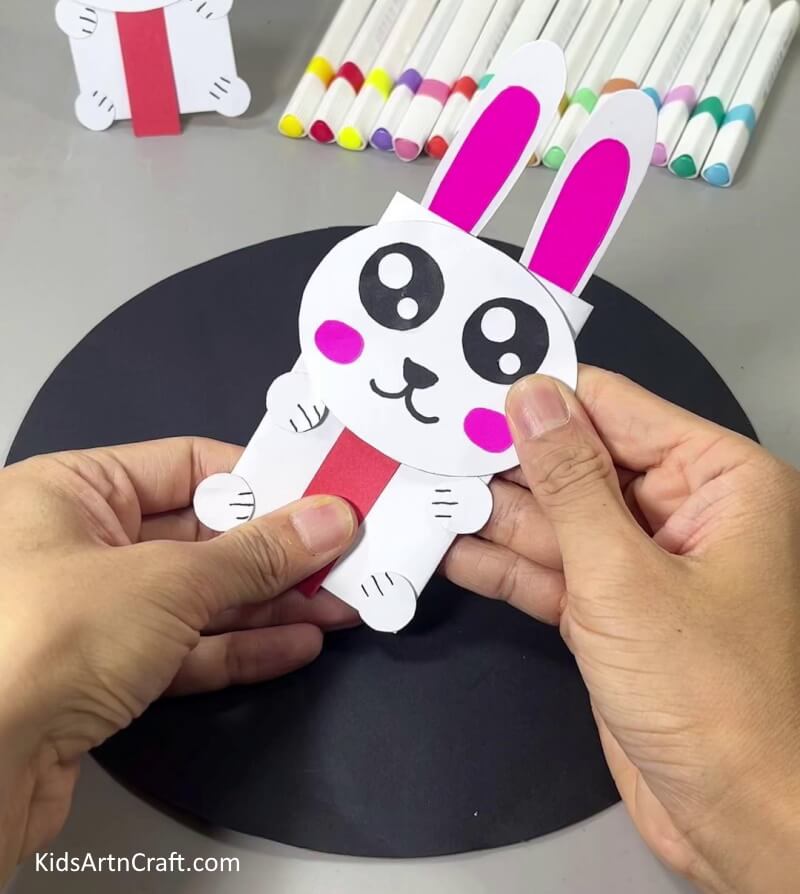
Image Source/Tutorial: Kids Art & Craft
Making a paper bunny craft is a perfect activity for kids. All you need is paper, scissors, glue, and markers to create a cute paper bunny. With a few simple steps, kids can enjoy making their own bunnies and have fun with their creative projects.
Learn to Make a Paper Cup Bunny Craft for Kids

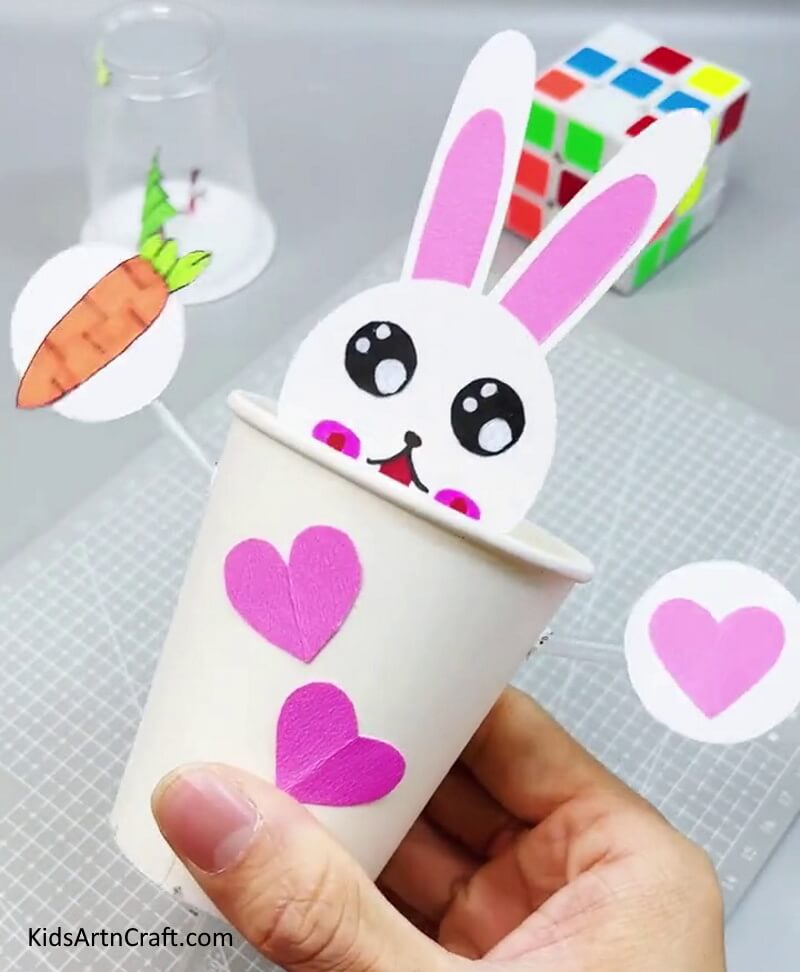
Image Source/Tutorial: Kids Art & Craft
This fun paper cup bunny craft is a perfect activity for kids. It’s simple and requires minimal supplies, making it easy to create with whatever materials you have on hand. Let your kids have fun making their own bunnies and express their creativityStep-by-Stepep How to Make a Paper Bunny Tutorial – Easy DIY Paper Bunny Craft for Kids

Learn how to make a cute paper bunny with this step-by-step tutorial! This video shows an easy DIY paper bunny craft using simple materials like colored paper, scissors, and glue. Perfect for kids, beginners, and school projects. Create adorable bunny crafts and enjoy fun, creative learning with easy paper craft ideas today.
Fun Facts About Bunnies:
- A baby rabbit is called a kit, a female rabbit is called a doe, and a male rabbit is called a buck.
- They are very social animals and live in groups.
- A rabbit’s teeth never stop growing.
- They are extremely athletic when they’re happy, and it’s called ‘binky’.
- Just like cats, rabbits purr when they’re relaxed.
- They can turn their ears up to 180 degrees.
- Their ears can grow up to 10 centimetres.
- They are effective baby-makers. They can give birth to about 14 bunnies in one go.
- They are extremely affectionate and bonded with their owners.
- Most rabbits have a ‘sweet tooth,’ and they love fruits.
Why Paper Bunny Crafts Are Great for Kids
Paper bunny crafts are a fun and educational activity that helps children improve creativity, hand-eye coordination, and fine motor skills. Cutting, folding, coloring, and gluing paper pieces encourages patience and focus while allowing kids to express their imagination. These bunny crafts are especially popular during spring and Easter celebrations because they are simple, affordable, and enjoyable for children of all ages.
Parents and teachers can use paper bunny activities for:
- Easter classroom decorations
- Preschool art sessions
- Spring-themed learning activities
- Holiday craft competitions
- Weekend DIY fun at home
- Fine motor skill practice for toddlers
FAQs
Q1. What materials do I need to make a paper bunny?
Answer: You will need paper, scissors, glue, and a black marker.
Q2. How long does it take to make a paper bunny?
Answer: It should take approximately 30 minutes to complete the project.
Q3. Is it easy to make a paper bunny?
Answer: Yes, it is easy to make a paper bunny. With the step-by-step instructions, it should be easy to follow along.
Q4. Is there a specific type of paper I need to use?
Answer: You can use any type of paper you prefer. However, thicker paper, such as cardstock, will provide a better result.
Q5. Do I need any other tools to make a paper bunny?
Answer: No, you do not need any other tools. Just the materials listed above are enough.
Q6. What age group is this project suitable for?
Answer: This project is suitable for all ages.
Q7. Are there any safety precautions I need to take?
Answer: Please take caution when using scissors and other sharp tools.
Q8. Do I need any other supplies to complete this project?
Answer: No, you do not need any other supplies.
Q9. Is there a video tutorial for making a paper bunny?
Answer: Yes, there are several video tutorials available online that provide step-by-step instructions.
Q10. What type of glue should I use?
Answer: Any type of glue that is suitable for paper is fine to use.
Paper bunny crafts are one of the easiest and most enjoyable DIY activities for kids. Whether used for Easter celebrations, classroom art projects, or fun weekend activities, these bunny crafts encourage creativity, learning, and hands-on play. With simple materials and endless customization ideas, children can create adorable bunny decorations while developing important skills in a fun and engaging way.
Bring more creativity into your child’s day with amazing crafts, DIY fun, and educational activities. Stay connected through our Telegram group, YouTube & Facebook.
Reviewed By Rachit Gupta
Read More:
- How to Make a Paper Dinosaur – Step-by-Step Instructions
- How to Make a Paper Flower Bouquet – Step-by-Step Instructions
- How to Make Paper Reindeer – Step-by-Step Instructions
- How to Make a Paper Rabbit – Step-by-Step Instructions
- How to Make Paper Sun Toy Step-by-Step Instructions Easy Tutorial