


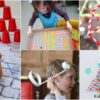
Paper Crafts
How to Make Paper Reindeer – Step by Step Instructions

Reindeer truly are a fun crafting idea during December; they are just right to get you into the Christmas mood.
Today in this craft tutorial we will be learning to make a cute reindeer; Children should be engaged in performing craft as this will enhance their co-curricular skills and will help to build concentration and will grade them up in their perfection and other creative skills.
How to Make Paper Reindeer – Step-by-Step Instructions
Let us get into making a creative craft, which is to make a paper reindeer. For performing this craft, we will be requiring some basic stationery requirements:
- Orange-colored paper
- Brown-colored paper
- Black-colored paper
- White-colored paper
- Red-colored paper
- A pair of scissors
- A glue stick
- A pencil
- A black marker
- A red marker
- A white marker
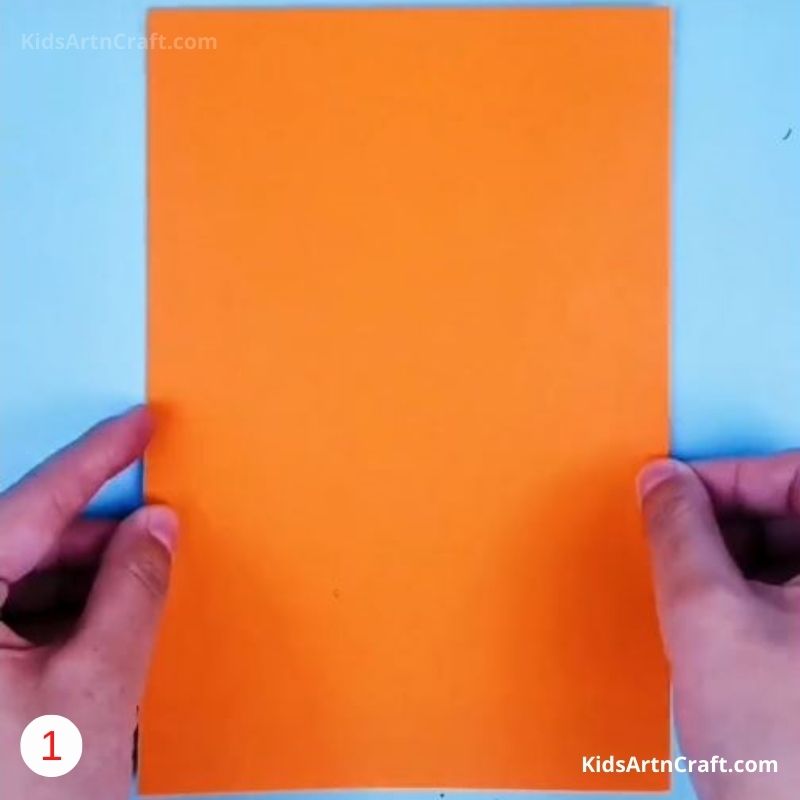
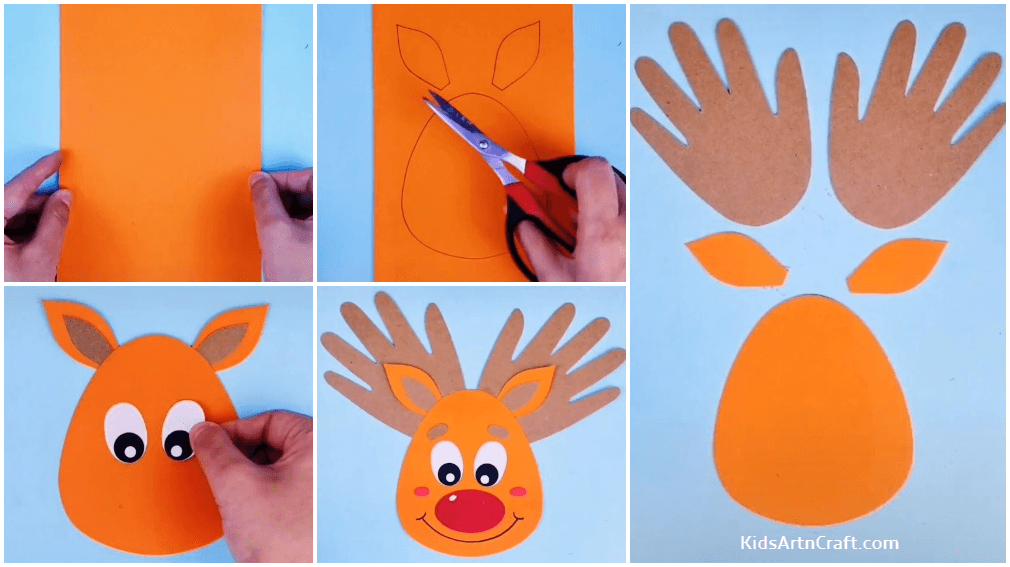
Step-1: Paper Selection
- Select a paper of any shade of orange according to your preference.
- Select the size of the sheet according to the size of the reindeer that you want to make.
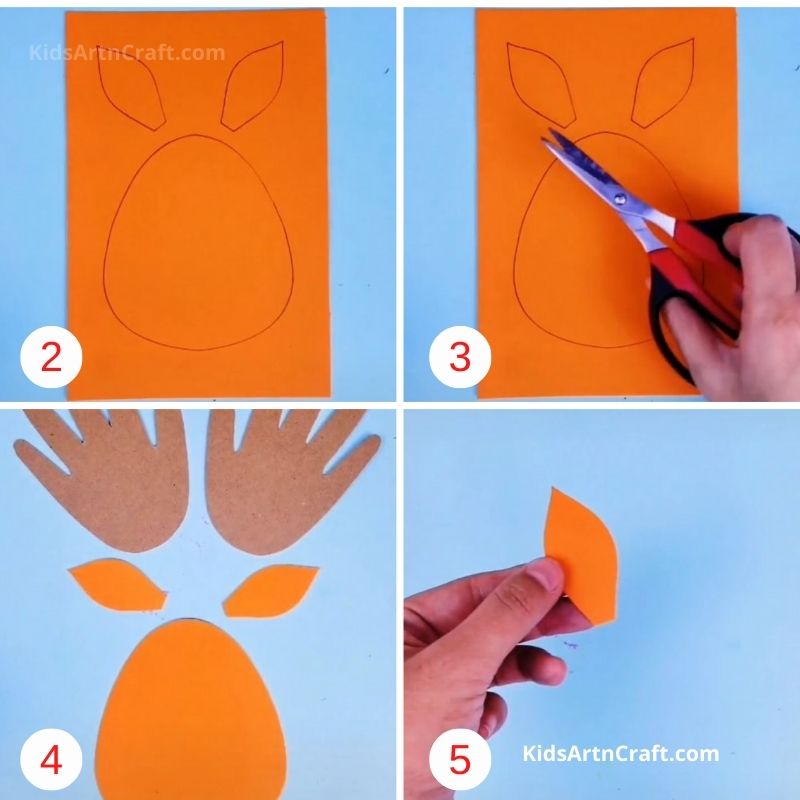
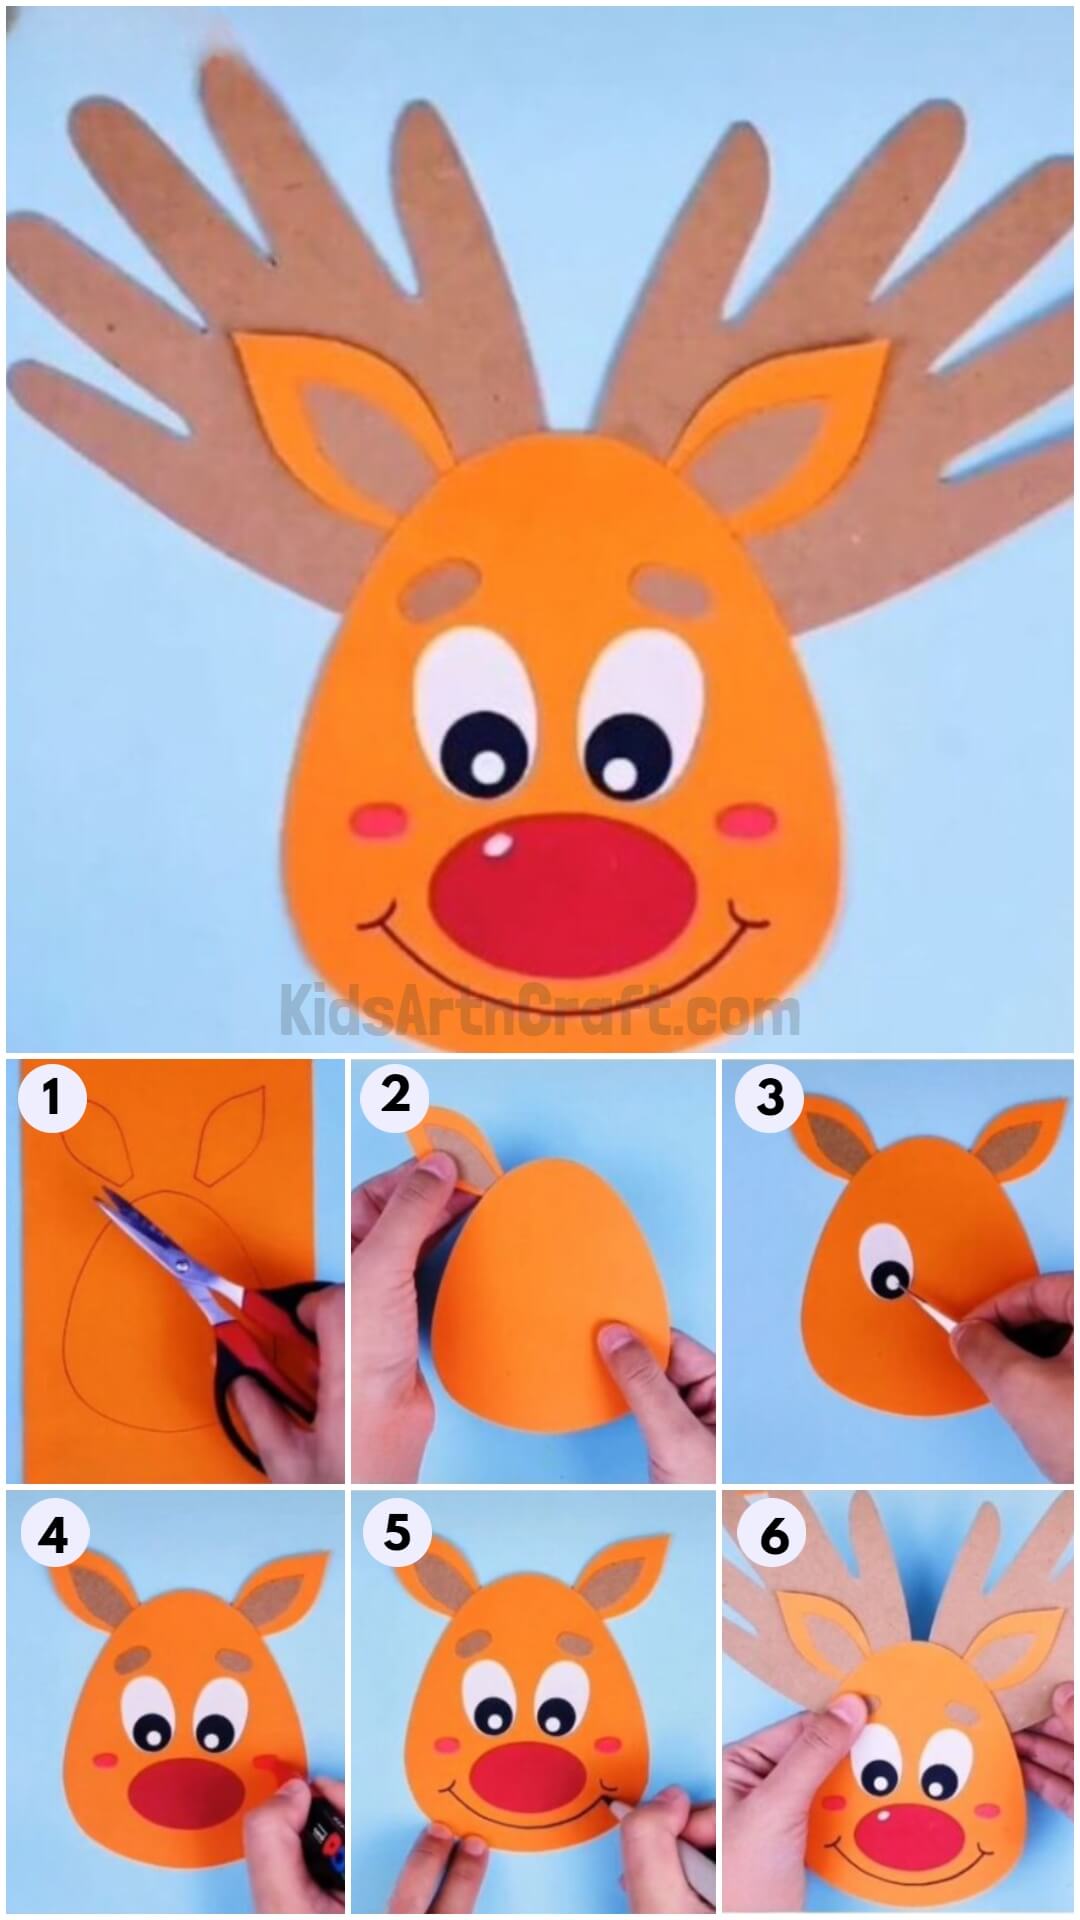
Step-2: Drawing The Structure
- Draw the facial structure of the reindeer as shown with the help of a pencil.
- Make sure that the structure drawn is symmetrical.
Step-3: Cut
- Using a pair of scissors, cut out the basic face shape along with the ear-shaped structures.
Step-4: Cutouts
- Once you get the cutouts, make sure that they are even; if not, use a pair of scissors to make them even.
- Make sure that the ear structures are equal and identical.
- Using brown-colored paper, cut out two hand-shaped structures to use for the antlers.
Step-5: The Sub-ear Structure
- Using the brown sheet of paper, cut two smaller ear-like structures as done previously with the orange sheet.
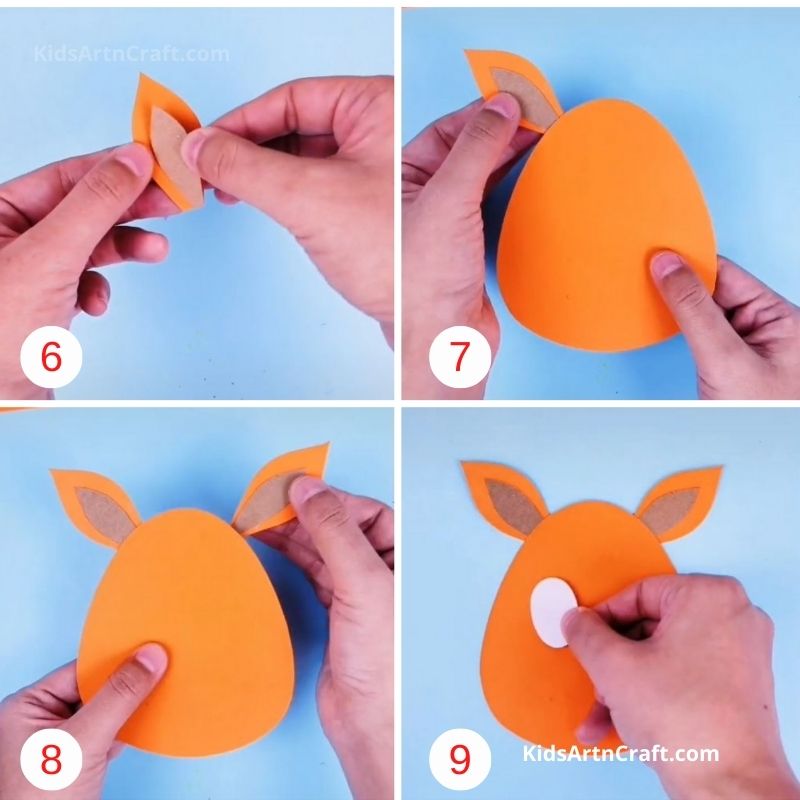
Step-6: Assembling The Ear
- Paste the smaller brown ear cutout on the orange ear cutout using a glue stick.
- Make sure that you paste the structures, maintaining the symmetry.
Step-7: Assembling The Face-I
- Paste the assembled ear on one side of the facial structure using a glue stick.
Step-8: Assembling The Face-II
- Paste the assembled ear on the other side of the facial structure using a glue stick.
Step-9: Working On The Eyes
- Take a white sheet of paper and cut it into an oval shape using a pair of scissors.
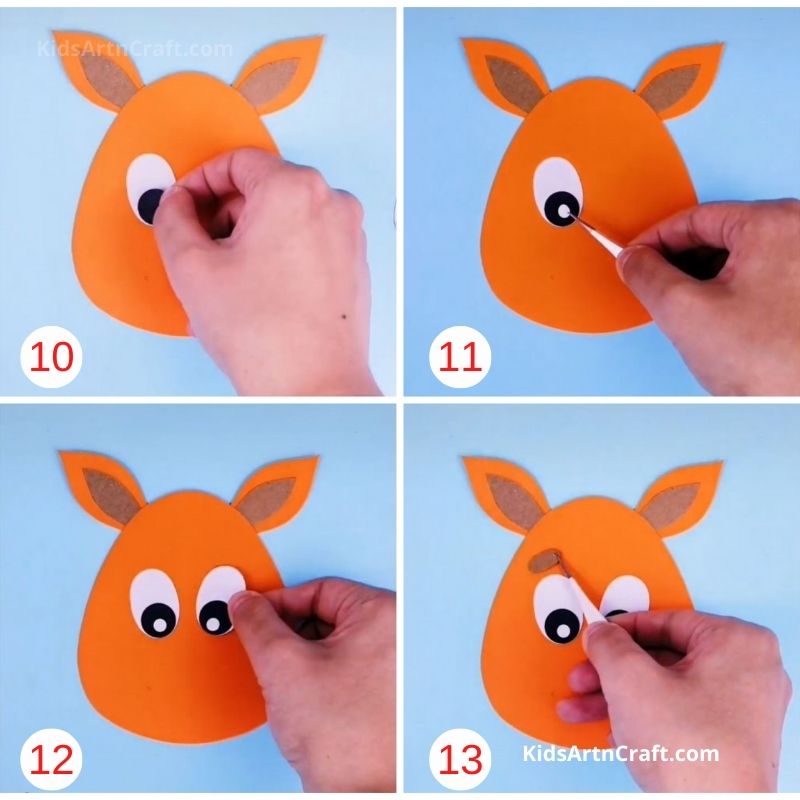
Step-10: The Black Portion Of The Eye
- Cut out two circular black balls and paste them inside the white oval-shaped cutout.
Step-11: The White Eye Ball
- Cut out two smaller circular white balls and paste them inside the black circular-shaped cutout.
Step-12: Pasting The Assembled Eye Structure
- Paste the assembled eye structure into the facial structure in the appropriate place.
Step-13: Making The Eyebrows
- Draw a pair of eyebrows on the brown paper with the help of a pencil.
- Now cut it out using a pair of scissors.
- Followed by pasting them over the eyes using a glue stick.
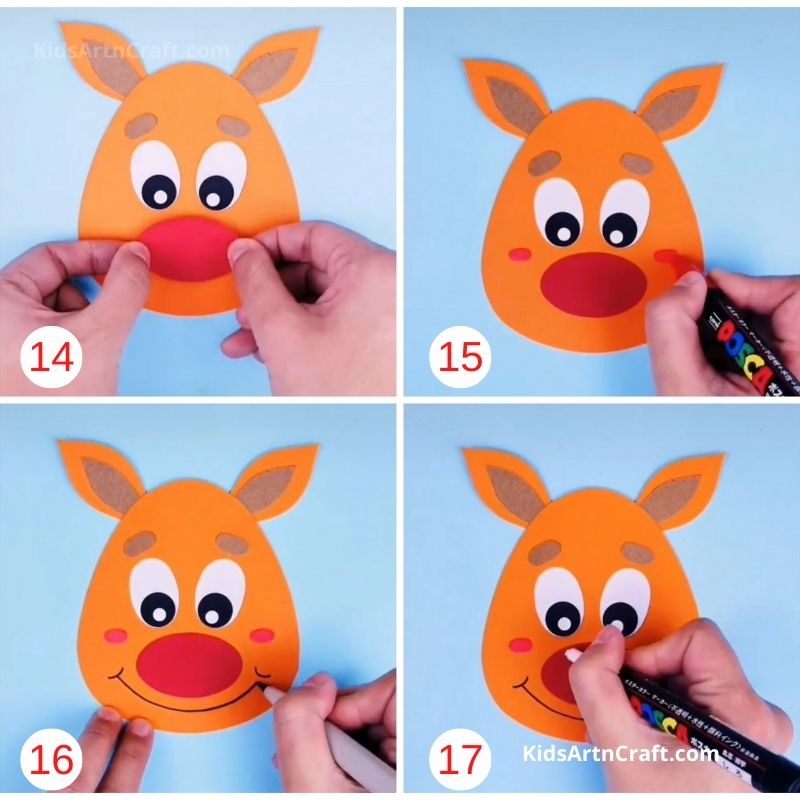
Step-14: Designing The Nose
- Draw a big oval-shaped nose on a red sheet of paper using a pencil.
- Cut it out using a pair of scissors.
- Followed by pasting it using a glue stick.
Step-15: Drawing Blush
- Use a red watercolor pen to draw some blush in the cheek area of the reindeer.
Step-16: Drawing The Mouth
- With the help of a pencil, draw a wide mouth of the reindeer.
- Outline the same with a black marker.
Step-17: Drawing The Nose Highlight
- Use a white marker to mark a highlighting point on the red nose.
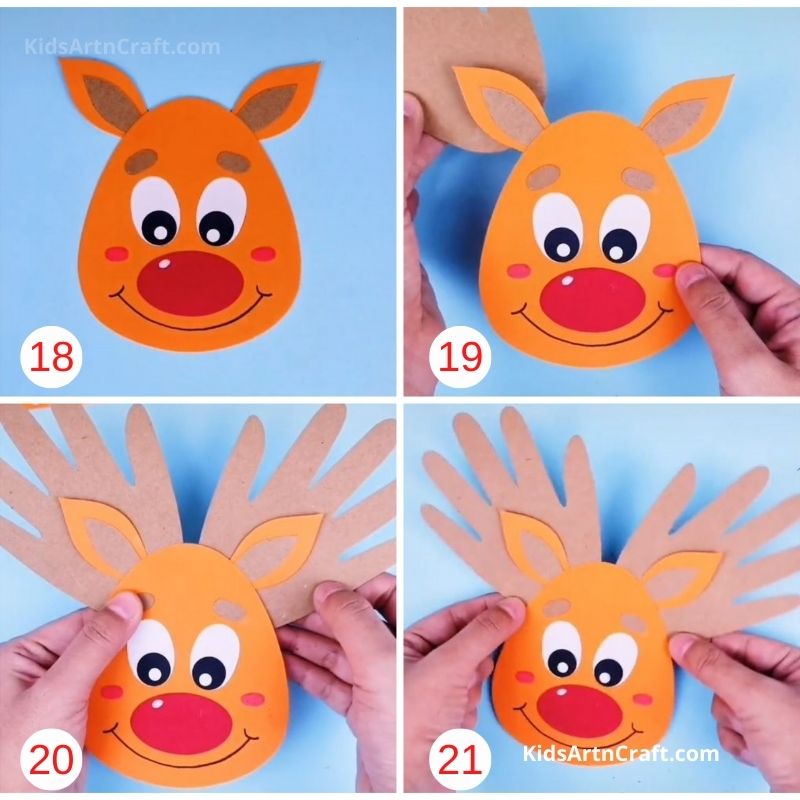
Step-18: Visualizing The Ficial Structure
- Visualize the facial structure with all the facial attributes right in place.
Step-19: Securing The Pasting
- Examine the pasting and paste the parts properly if not done so.
Step-20: Pasting The Antlers
- Using a glue stick, paste both the hand-shaped antlers behind the ears of the reindeer.
Step-21: Hold To Secure The Fold
- As the antlers are a bit bigger in size, hold them in place for some time to secure the pasting.
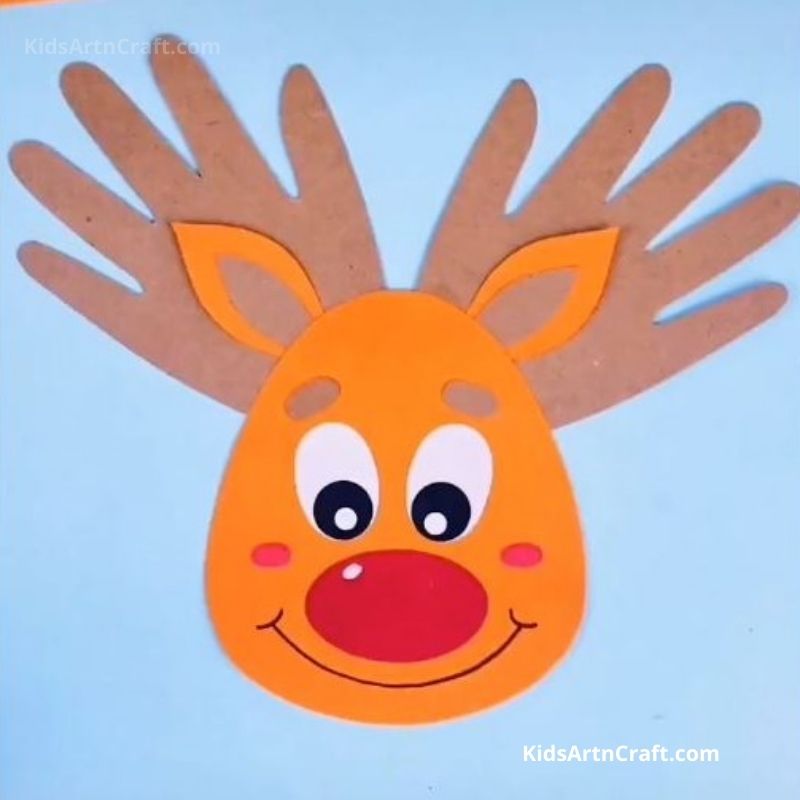
The Paper Reindeer!!
Interesting Facts About Reindeer
- Reindeers are one of the most interesting polar animals residing in the ice caps.
- Reindeer comes from the family of deer and is a species of the same. The scientific name of this species of deer is Rangifer tarandus. These species are mostly found in the Arctic as well as the northern part of North America.
- Unlike the other species of deer, this specific one has both female and male species that grow antlers. They use their antlers to remove snow and soil, which helps them to search for food. Also, they use the same to defend themselves in times of need.
- Another important significance of Reindeer is that these animals are seen to drive the cart of none other than the famous Santa Claus, around whom the entire Christmas festival revolves. So, reindeer are an important element of Christmas, and they are even decorated beautifully during the festival.
Easy Origami Paper Reindeer Step-by-Step Tutorial
Learn how to make a cute origami paper reindeer with this easy step-by-step tutorial. This DIY Christmas paper craft is perfect for kids, beginners, and holiday decorations. Follow simple folding instructions to create a fun reindeer using just paper. Great for classroom crafts, winter activities, and festive DIY projects.
Benefits of Making Paper Reindeer Crafts With Kids
Paper reindeer crafts are a fun and educational activity for children during the Christmas season. Crafting activities help improve fine motor skills, hand-eye coordination, focus, and creativity. Kids also learn how to follow step-by-step instructions while exploring shapes, colors, and design patterns.
Making Christmas-themed crafts like paper reindeer also encourages imaginative play and storytelling. Children can use their handmade reindeer for holiday decorations, classroom displays, greeting cards, puppet shows, or festive school projects. These easy paper crafts are ideal for preschoolers, kindergarten students, and elementary school kids.
Educational Value of Reindeer Craft Activities
Reindeer craft activities can be used as part of winter learning and Christmas classroom themes. Parents and teachers can combine this craft with lessons about Arctic animals, winter habitats, Christmas traditions, and animal characteristics.
Children can also learn interesting facts about reindeer, such as:
- Reindeer are also called caribou in North America.
- Both male and female reindeer can grow antlers.
- Reindeer are well adapted to snowy and cold environments.
- Reindeer are commonly associated with Santa Claus and Christmas folklore.
Adding educational elements to craft activities makes learning more interactive and enjoyable for children.
Tips for Making Your Paper Reindeer Craft More Creative
You can make your paper reindeer craft even more fun by adding decorative materials and creative details. Try these simple ideas:
- Use glitter paper for shiny antlers.
- Add googly eyes for a playful expression.
- Use cotton for fluffy ears or snow effects.
- Decorate the background with snowflakes and stars.
- Attach a thread to turn the reindeer into a Christmas ornament.
- Add bells, stickers, or pom-poms for festive decoration.
These simple additions help children personalize their artwork and improve creative thinking skills.
Best Occasions to Use Paper Reindeer Crafts
This easy paper reindeer craft is perfect for many holiday activities and school events, including:
- Christmas classroom craft sessions
- Winter holiday art activities
- Preschool animal craft projects
- DIY Christmas decorations
- Handmade Christmas cards
- Holiday party activities for kids
- Homeschool winter learning projects
This festive paper craft can also be used for bulletin board decoration and Christmas-themed storytelling activities.
Safety Tips for Kids During Paper Craft Activities
Adult supervision is recommended while children use scissors, glue, or other craft tools. Use child-safe scissors and non-toxic glue for younger kids. Encourage children to work on a clean and organized table to avoid losing small craft materials.
Parents and teachers should also help younger children with cutting difficult shapes like antlers or ears.
Simple Variations of Paper Reindeer Crafts
You can create different versions of this reindeer craft using simple materials available at home:
- Paper plate reindeer craft
- Toilet paper roll reindeer
- Handprint reindeer craft
- Accordion leg reindeer craft
- Reindeer party hat craft
- Reindeer bookmark craft
- Popsicle stick reindeer ornament
Trying different variations keeps children engaged and encourages creativity during holiday craft time.
FAQ on How to Make Paper Reindeer – Step-by-Step Instructions
1. What materials do I need to make a paper reindeer?
Answer: You will need cardstock, scissors, glue, a pencil, and a black marker.
2. How do I draw the reindeer shape?
Answer: You can use a template or draw your own shape, but the basic shape should be a circle for the head and two ovals for the body and legs.
3. How do I make the antlers?
Answer: Cut out small triangles from cardstock and glue them to the head of the reindeer.
4. How do I make the eyes?
Answer: Use a black marker to draw eyes onto the reindeer’s face.
5. What color should I make my reindeer?
Answer: You can make your reindeer any color you like!
6. How do I make the ears?
Answer: Cut out two small triangles from cardstock and glue them to the sides of the head.
7. How do I make the nose?
Answer: Cut out a triangle from cardstock and glue it to the center of the reindeer’s face.
8. How do I make the legs?
Answer: Cut out four ovals from cardstock and glue them to the body of the reindeer.
9. How do I make the tail?
Answer: Cut out a small triangle from cardstock and glue it to the back of the reindeer.
10. How do I put it all together?
Answer: Glue all the pieces together to form the reindeer shape.
Your cute paper reindeer is ready! This is a perfect craft for Christmas décor, or you can even use the same in your scrapbook or to decorate the favorite wall of your room. This is an engaging yet enjoyable craft, so hurry up and try your hand at it and enjoy!
Stay connected for endless creativity and fun! Join our Telegram group to get the latest updates, and follow us on YouTube & Facebook for amazing DIY crafts, educational projects, fun activities, and creative ideas specially for kids.
Reviewed By Rachit Gupta
Read More:
- How to Make a Paper Dinosaur – Step-by-Step Instructions
- How to Make a Bear Face with Paper and Flower Petals
- How to Make a Paper Bunny Step-by-Step Instructions Easy Tutorial
- Paper Bag Crafts & Activities for Christmas
- How to Make a Paper Rabbit – Step-by-Step Instructions


