Recycled Crafts
DIY Paper Cup Octopus Craft Easy Tutorial for kids

Create an adorable paper cup octopus craft with your kids. This easy DIY tutorial will show you how to make a cute octopus with simple materials. Perfect for a fun and creative activity for kids of all ages.
Let’s create an easy octopus craft toy for kids! Kiddos love to play with toys but they can be a little expensive so we brought you this craft for making a budget-friendly craft toy! Toddlers will love to play with it and kids can make it too with our easy step-by-step instructions! You can also use this craftwork to teach the kiddos about octopuses! This can further be the perfect classroom activity! So many advantages to just one craft! So grab your supplies and let’s make it with us!
Easy Paper Cup Octopus Craft For Kids


Read More: Easy to Make Doll with Yarn and Tissue Paper
Materials Required
- 2 Yellow Paper Cups
- Scissors
- Colored Sheets (Orange, Red, Black, And White)
- Glue
- Pencil
Procedure
Step 1: Cutting The Legs Of The Octopus
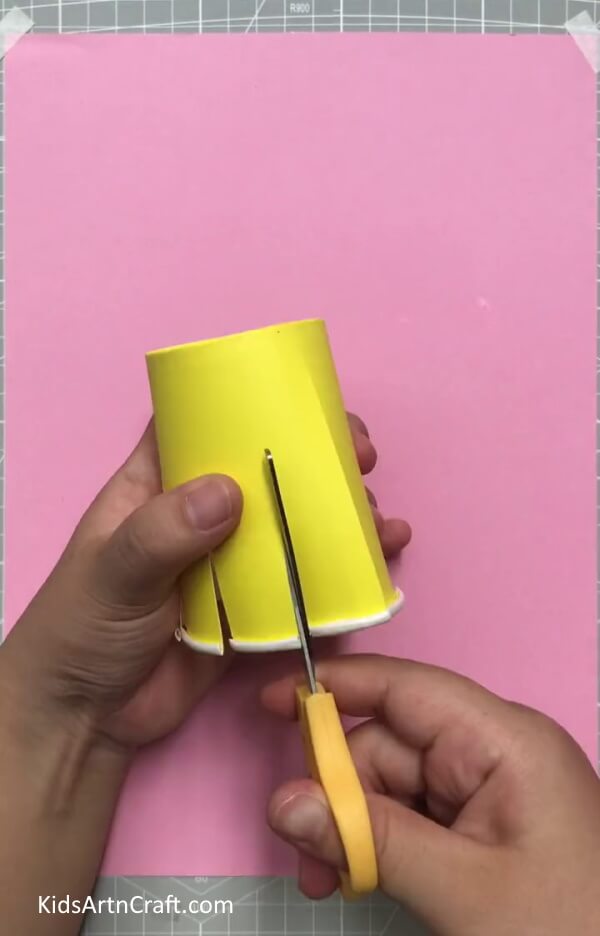

Begin with this craft by taking a yellow-colored paper cup. Using scissors, make 8 strips from the top end of the cup to its middle, for making the 8 legs of the octopus.
Step 2: Shaping The Legs
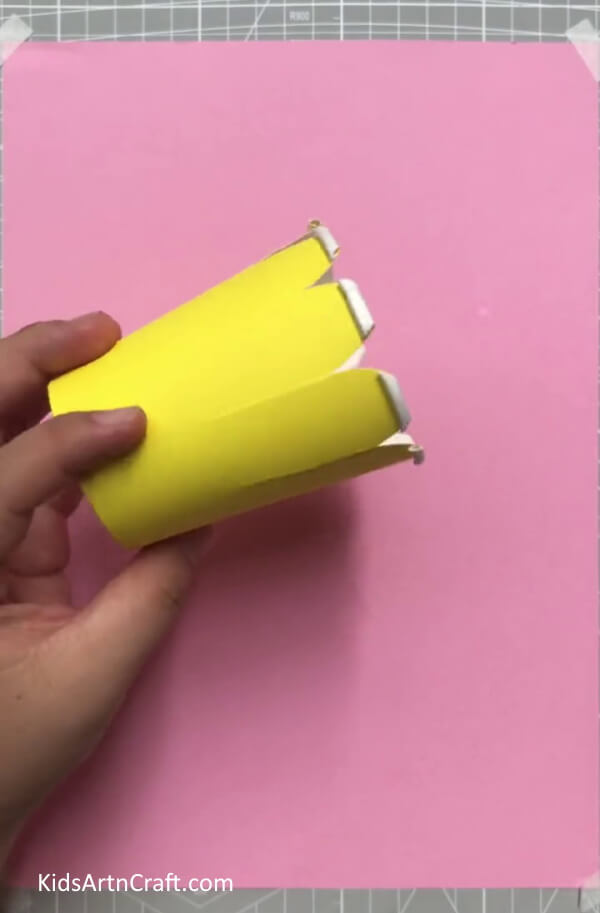

Cut and curve the sharp edges of the strips/legs with scissors.
Step 3: Curling The Legs
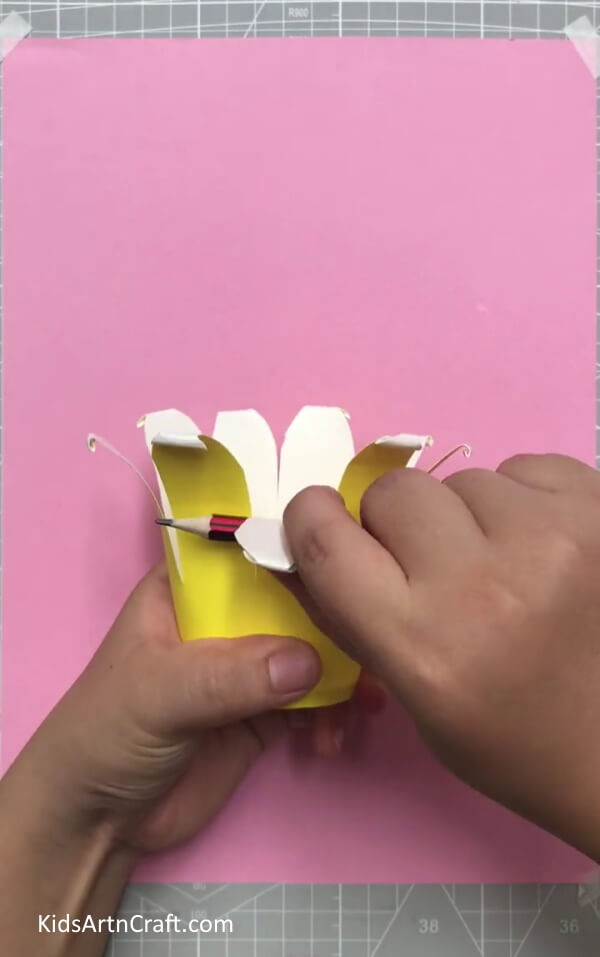

Curl each strip over a pencil to curve the legs of the octopus.
Step 4: Cutting Another Paper Cup
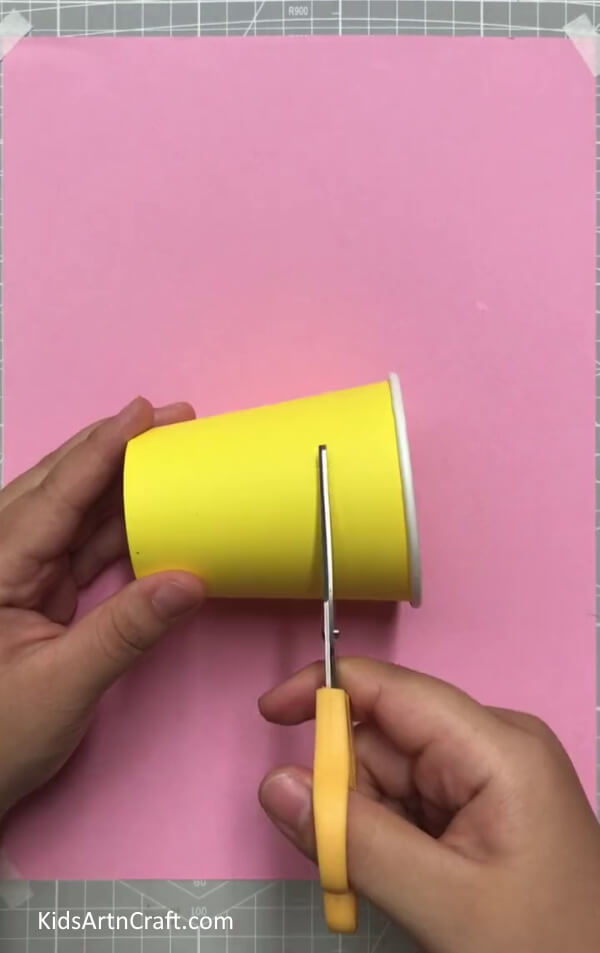

Take another paper cup and cut out a thick outer boundary of the cup for making the octopus’s face.
Step 5: Making Eyes
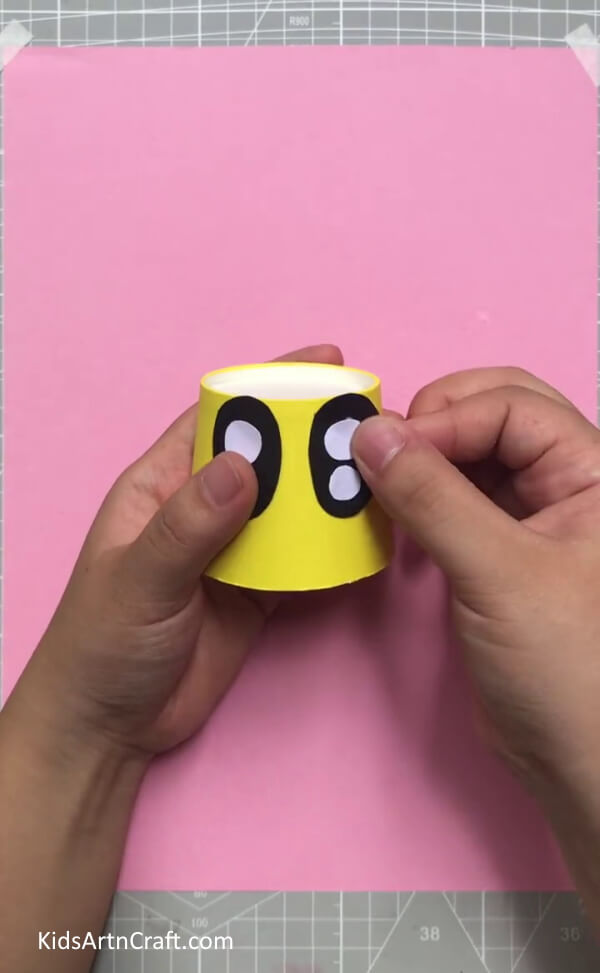

Cut out oval-shaped eyes from a black sheet and for making it look shiny paste 2-2 small white circles for each eye. Paste the eyes over the face using glue.
Step 6: Making Mouth
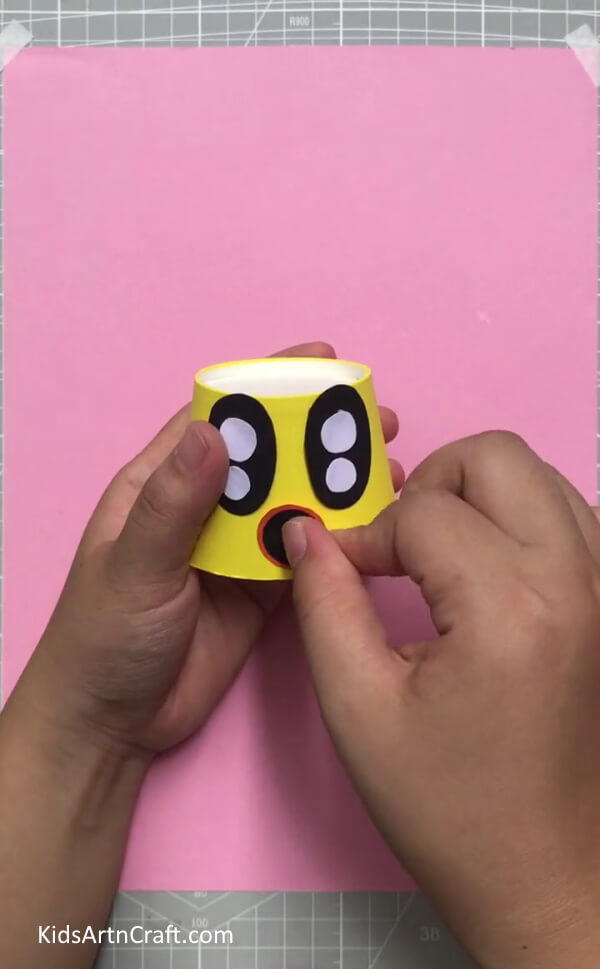

Cut out an orange and a black circle, make sure the orange one should be slightly larger than the back one. Paste the black one over the orange one to make the mouth and then paste the mouth below the eyes using glue.
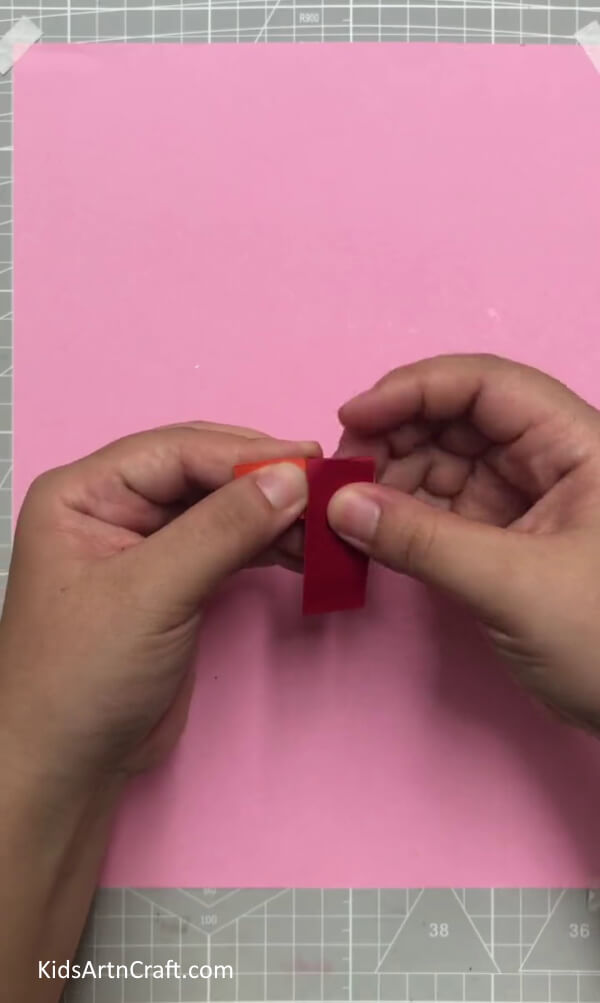
Step 7: Cutting Out 2 Strips
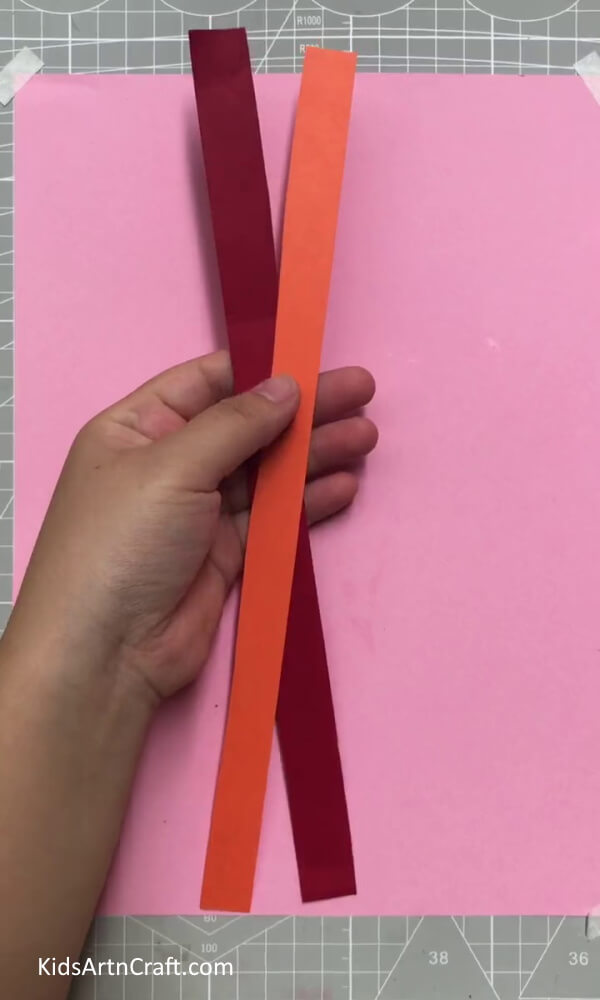

Cut out strips from a red and an orange sheet.
Step 8: Pasting The Strips Adjacently
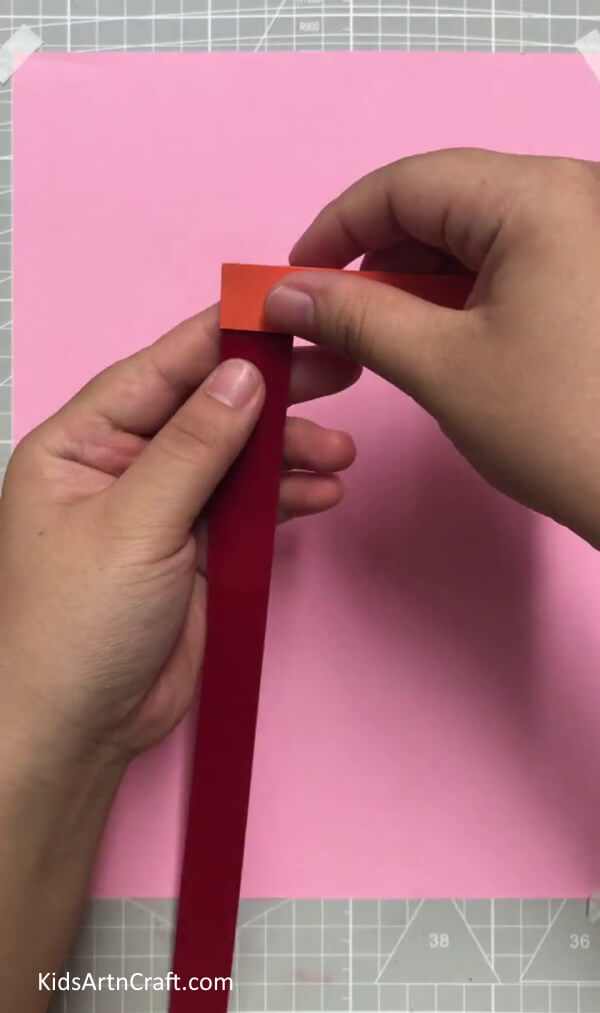

Paste the orange strip over the red one in a way to make them adjacent using glue.
Step 9: Folding the Strips Over Each Other

Start folding the strips over each other one by one.
Step 10: Forming A Zigzag Strip
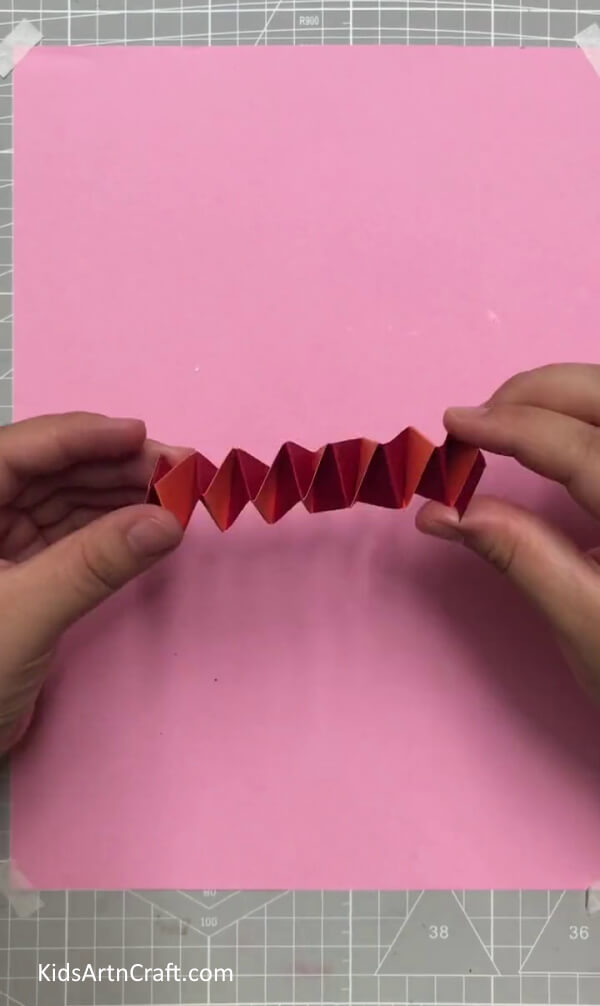

After completing folding, paste the ends of the strips over each other to form a zigzag strip.
Step 11: Pasting The ZigZag Strip


Paste the zigzag strip from one corner on the top of the leg’s cup.
Step 12: Pasting Face To The Strip
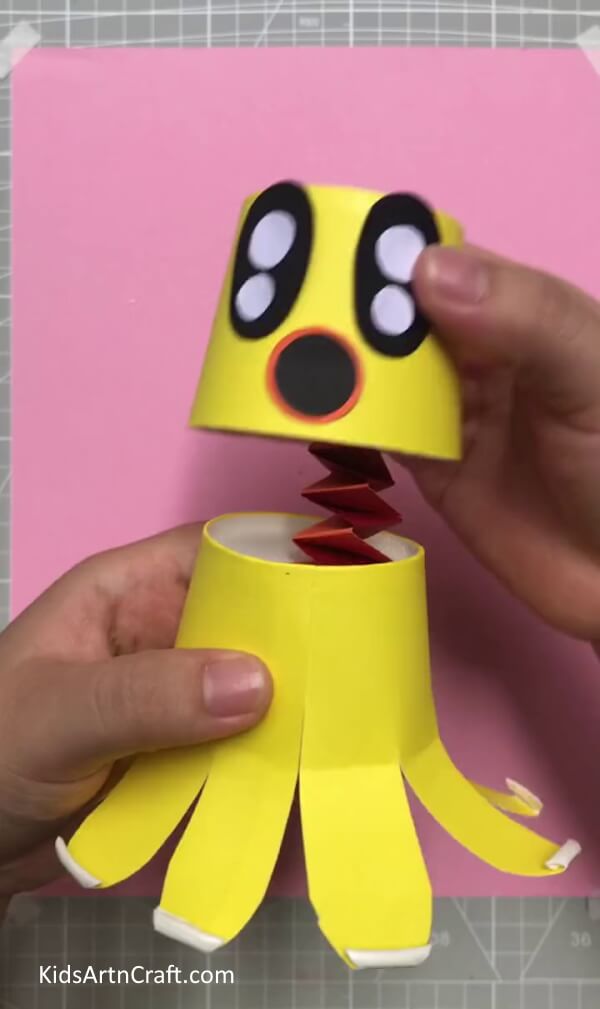

Paste the zigzag strip from the inside top of the face, to attach it with the legs.
Your Paper Cup Octopus Is Ready!
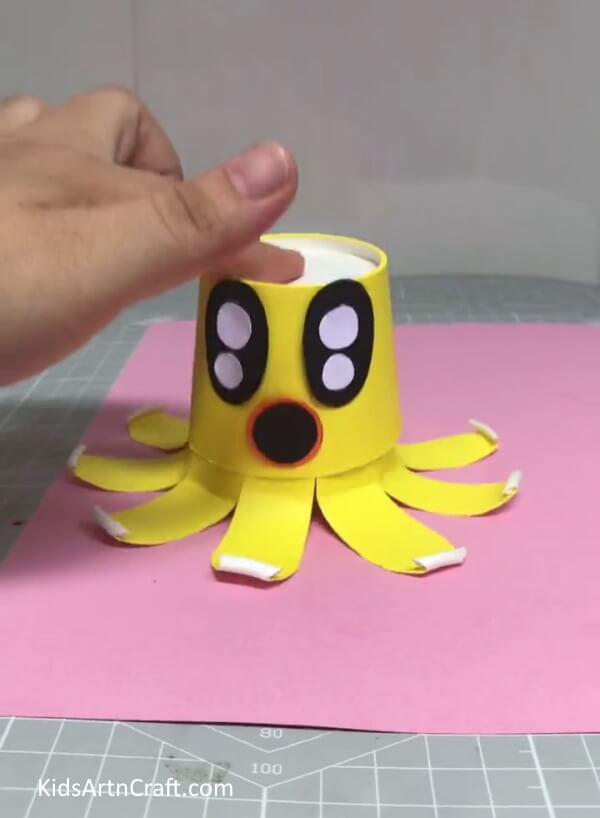

Play with this craft by pushing the face down and watching it jump over, woohoo! So much fun!
Some More Octopus Craft Tutorial
A simple Paper Cup Octopus With Crown craft for children

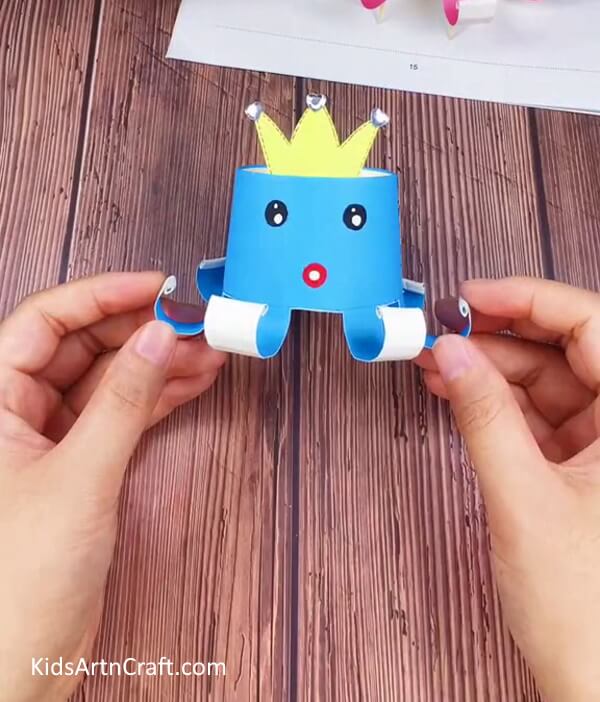
Image Source/Tutorial: Kids Art & Craft
This craft is perfect for children, as it is easy to make and allows them to be creative. All you need is some paper cups, a crown, and some paint to create a fun octopus with a crown. It’s a great way to bring out a child’s imagination and give them something to be proud of.
An Easy Octopus Craft with Paper Cup for Youngsters


Image Source/Tutorial: Kids Art & Craft
This easy octopus craft is perfect for young kids! It requires just a few items like a paper cup, paint, and other materials, making it an easy and fun project for the whole family. With the step-by-step instructions, it’s easy to create a cute and colorful octopus.
The kids will surely love this craftwork toy! They will also be proud of their creation and show it off to their friends! You can also customize this craft toy in different animals and colors!
Follow us on Youtube for art and craft tutorials and much more.