Paper Crafts
Innovative Flower Vase Painting Craft Step-by-step Instructions

This guide will show you how to make a beautiful flower vase! Gather your supplies and follow the instructions to create a unique piece to display your flowers. Use your creativity and make something special.
Grab your tools and dive into this fun and creative activity with these step-by-step instructions today. We will be making a Flower Vase with simple materials that you can easily find at home. Add your own touch of creative uniqueness, natural elegance and artistic flair to this innovative craft. Let’s try this activity today!
Simple Flower Vase Craft For Kids

Read More: How to make Paper Butterfly Easy Tutorial For Kids
Materials Required
- Cardboard base
- Cotton buds
- Craft sheet (many colours)
- White paint,
- Scissors
- Glue
- Green and Black sketch pen
Procedure
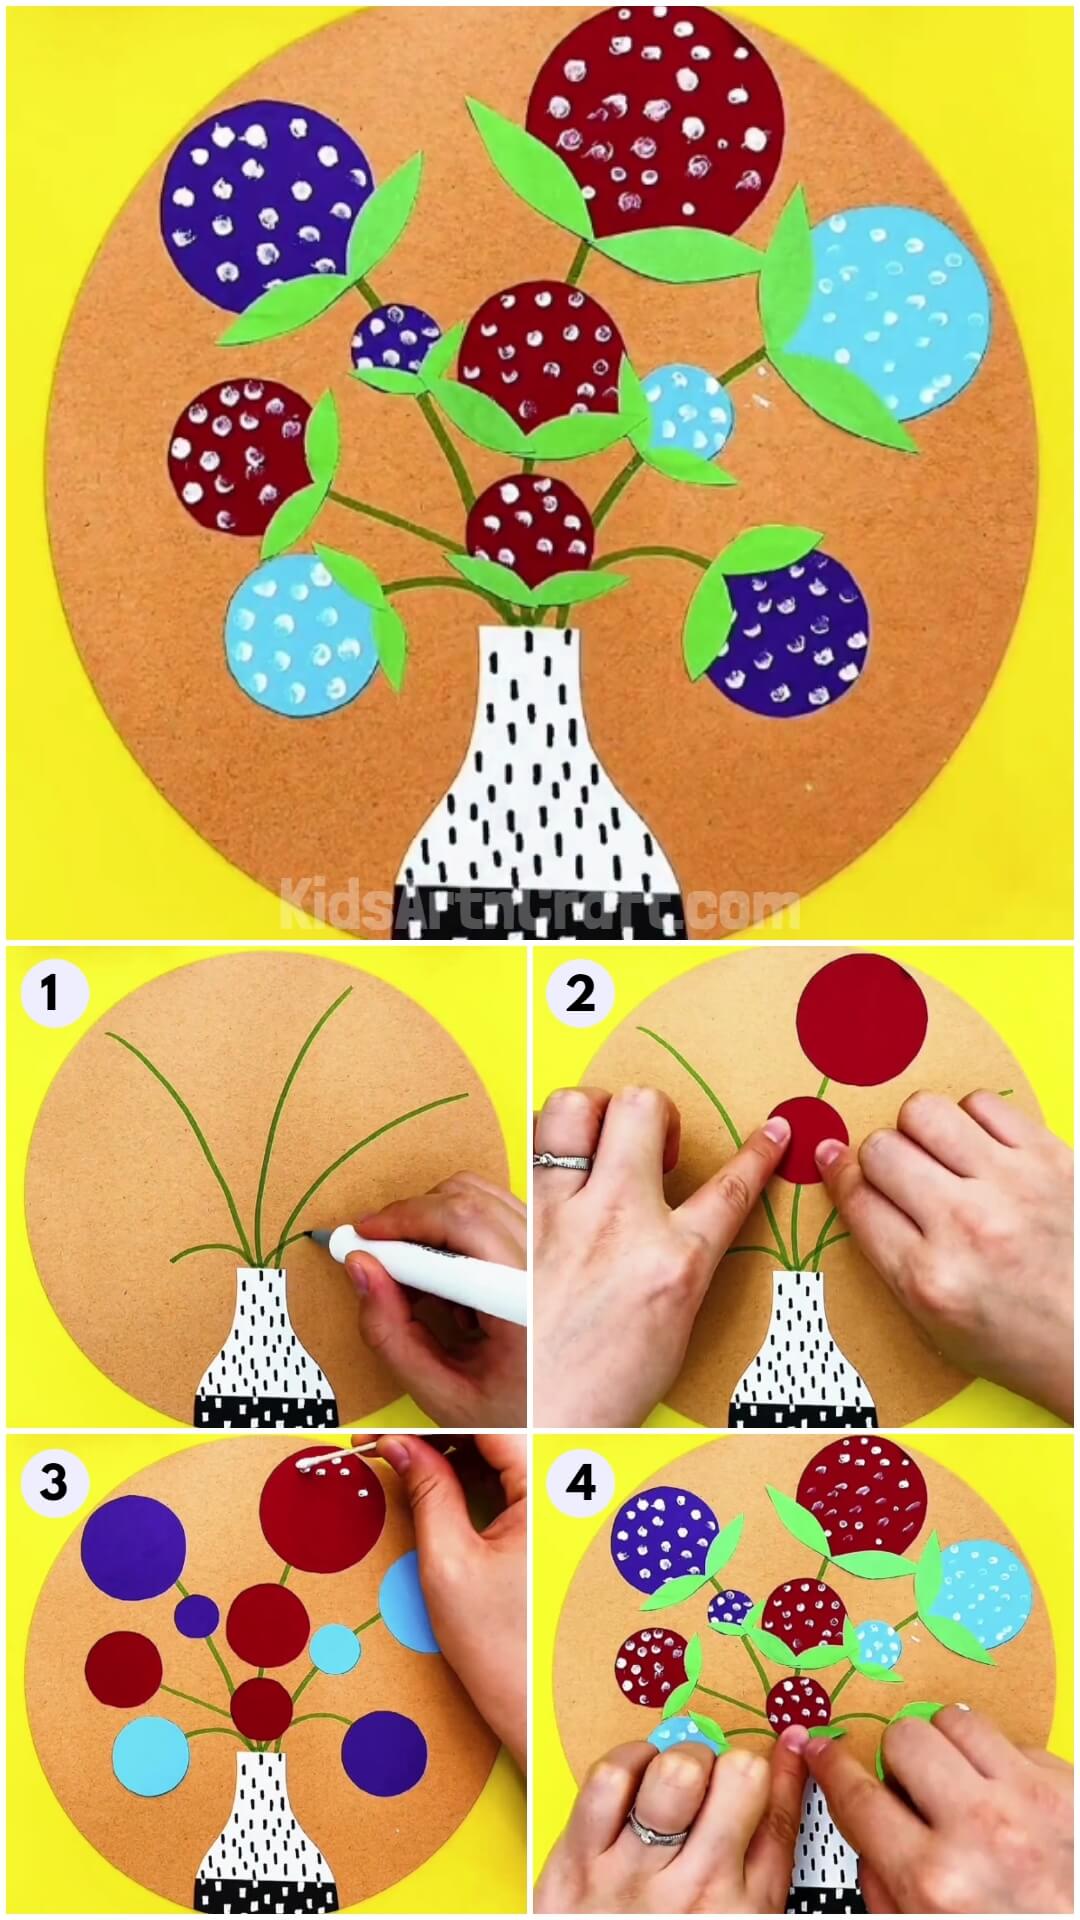
Step 1: Pasting The Vase Onto The Cardboard Base
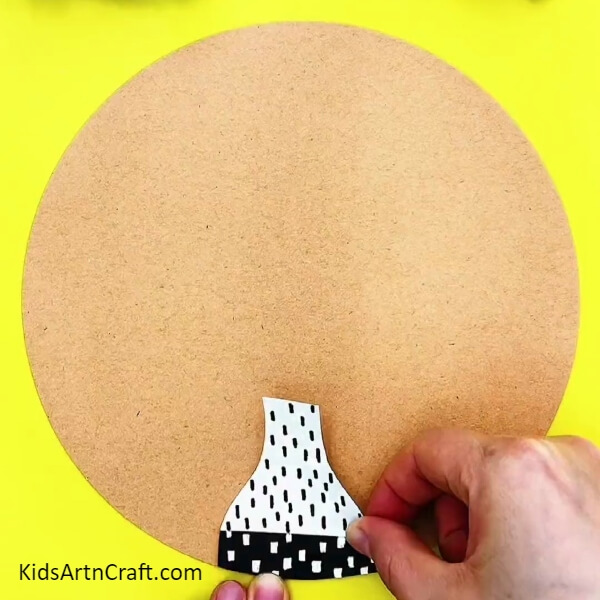

Take white coloured paper and cut it into the shape of a vase. Let the height be one-third the size of the cardboard. Design it to your heart’s content using sketch pens. After designing it, paste it onto the lower half of the cardboard.
Step 2: Drawing The Flower Branches
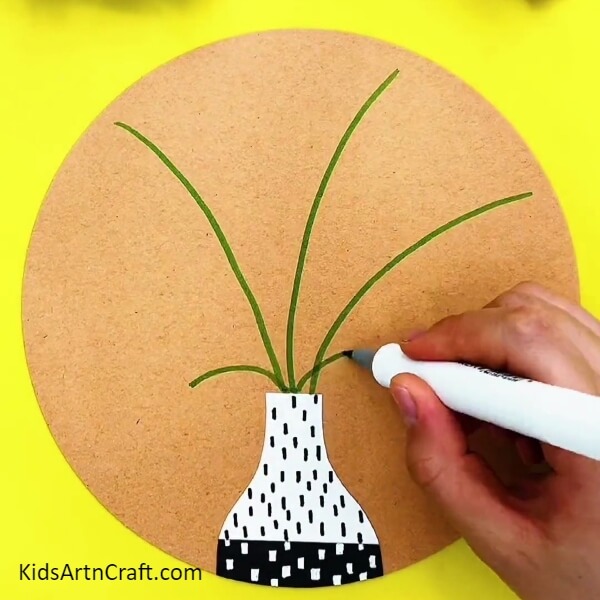
Take a green sketch pen and draw the flower branches extending from the vase. Make them vary in length and angle to create a natural and diverse arrangement.
Step 3: Pasting The Flower Circles Of Different Sizes
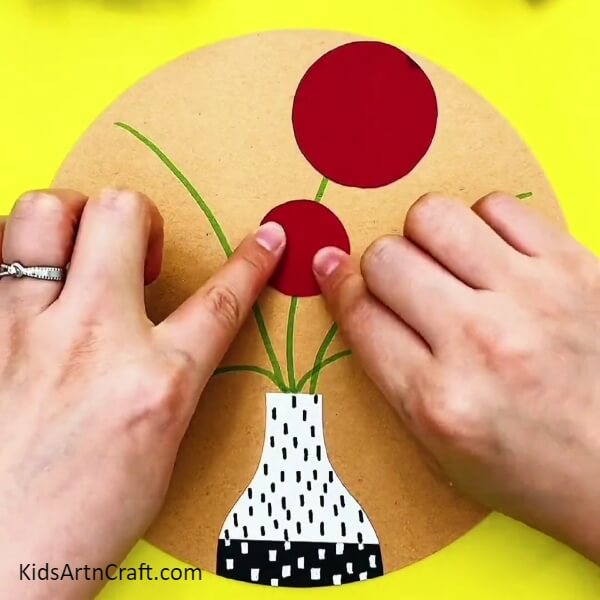
Take a craft sheet with the colour of your choice to be your first flower. Cut circles of different sizes from the craft sheet and paste them onto the edge of the branches.
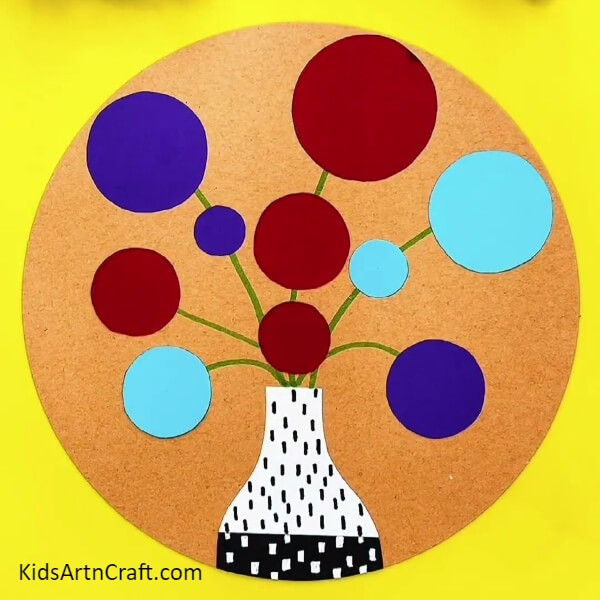
Step 4: Adding On More Flowers In Diverse Colours
Pick more coloured craft sheets and cut circles of different sizes from them. Paste them onto the branches as shown in the picture.
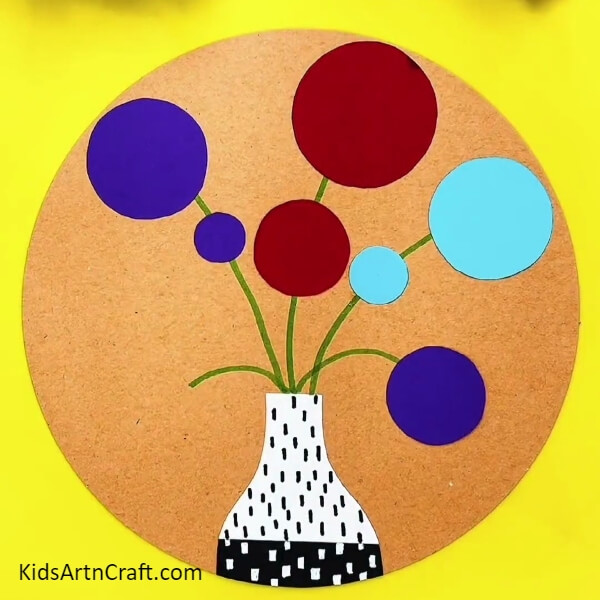
Step 5: Finishing Pasting All The Flowers
Finish pasting the multicoloured flowers on all the branches of the plant.
Step 6: Dabbing On Some White Pollen On The Flowers
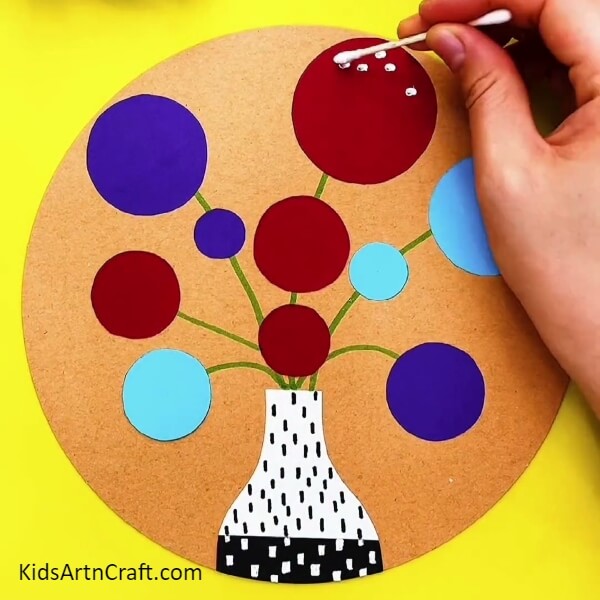
Add a touch of realism by dabbing some white pollen onto the flower buds. For convenience’s sake, use a cotton swab dipped in white paint to dab the pollen onto the flower.
Step 7: Painting More White Pollen With Cotton Swab
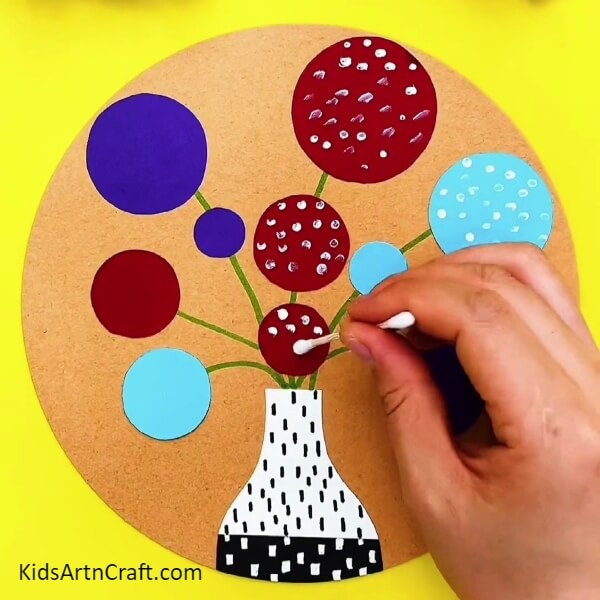
Paint white pollen dots on each flower until they are fully covered in white dots.
Step 8: Finishing Painting All The Flowers
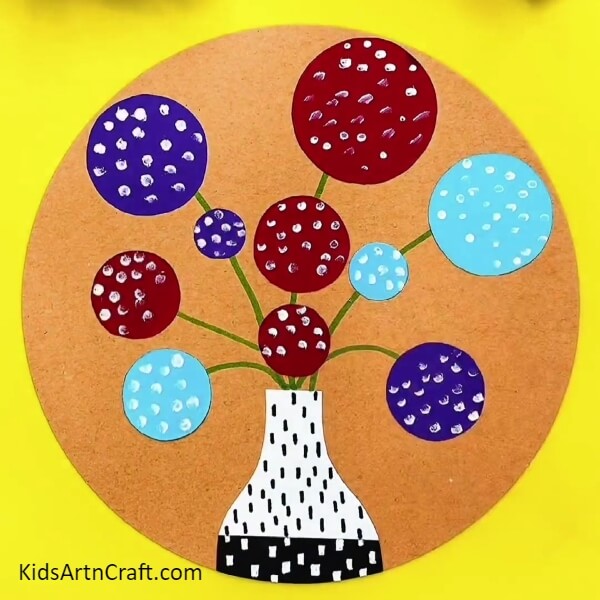
Finish covering each flower with white pollen dots. Your flower is ready to attract pollinators.
Step 9: Adding Green Leaves To Each Flower
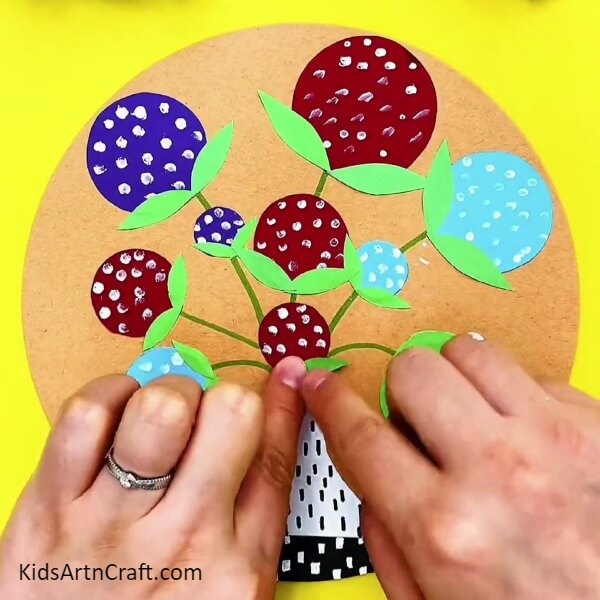
Doesn’t a plant look naked without its leaves? Add a scarf of green leaves to your well-dressed, elegant flowers by cutting leaf shapes from green craft paper. Paste them in the exact intersection point between the stem and the flower for maximum beauty enhancement.
Taking A Step Back And Look At Your Finished Craft!
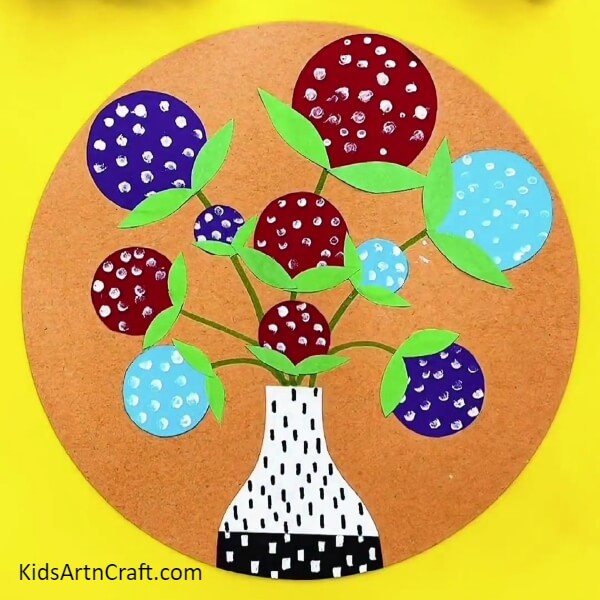
With this final step, your beautiful Flower Vase craft is finished! All you have left to do is to hang your finished craft on your walls and let the words of admiration flow in!
We hope you liked this step-by-step tutorial on how to make a Flower Vase craft. If you did, share the link with your young ones, near and dear ones so they can also try out this innovative craft. Leave your suggestions and feedback in the comments below. Feel free to check out the other craft ideas on our website!
Thank you for visiting our website.
Follow us on Youtube for art and craft tutorials and much more.
More Articles from Kids Art & Craft
- Learn to Make Paper Hair Clips Step-by-Step Tutorial
- Pretty Birds Singing Leaf Craft Tutorial For Kids
- Easy Paper Flower Toy Craft Tutorial For Kids
- Learn To Make Easy Heart Shaped Paper Mouse Craft
- How to Make a Paper Fall Leaf for Kids