Paper Crafts
Easy Paper Gun Toy Craft For Kids Tutorial

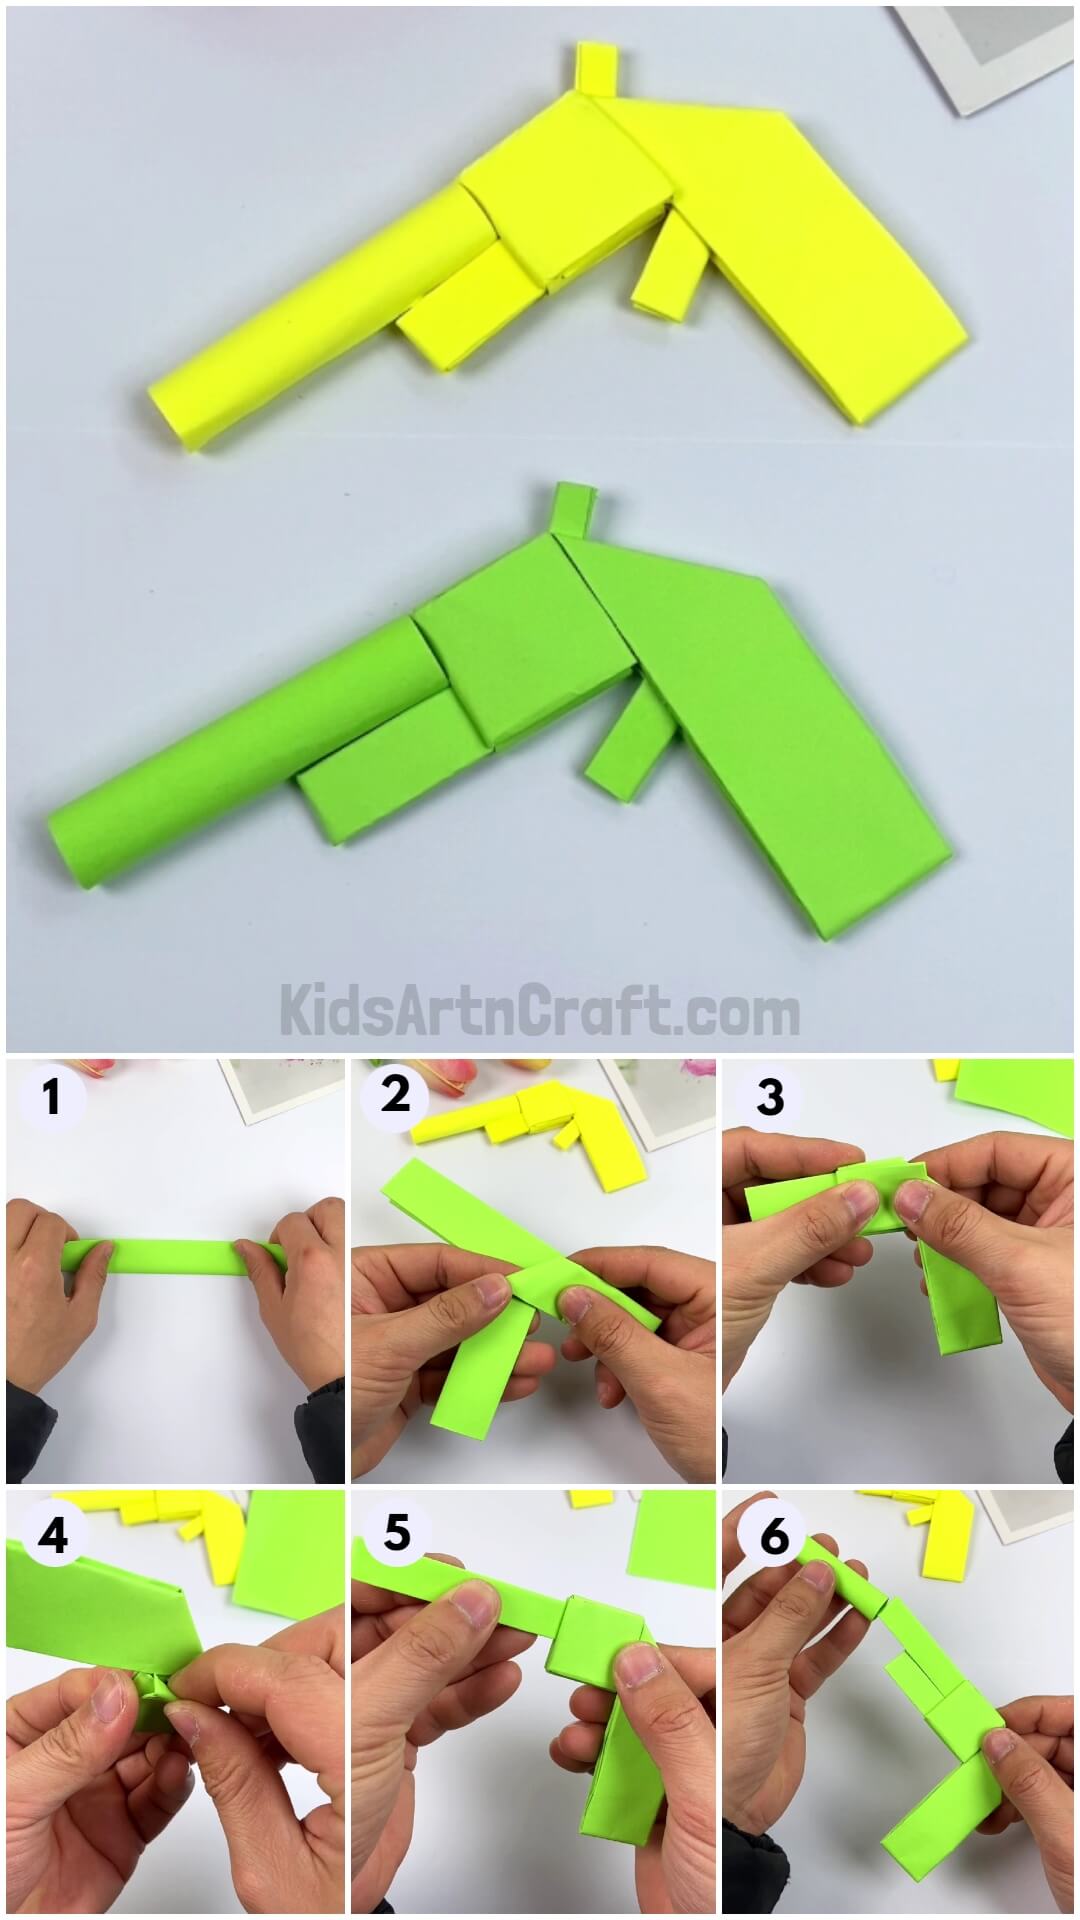
Have a blast playing with your own made paper guns! This step-by-step tutorial will help you to create the paper gun toy in no time!
Dive into the world of your imagination and play with those handmade paper guns! Kids are fond of guns at a younger age but purchasing gun toys every time a new one camera up can be expensive. Don’t worry we got your back! Engage your kids in creating their own paper gun toys that will be loved by them and they will surely be keen to play with them as you know kids admire what they create! This step-by-step easy tutorial will serve as a guide for your little ones to help them create these guns! So, let’s begin!
Simple Paper Gun Toy Craft For Kids

Read More: How To Make Easy Frog Using Paper Crafts
Materials Required
- 2 A4 Sized Green Papers
- Marker
Procedure
Step 1: Making A Horizontal Crease
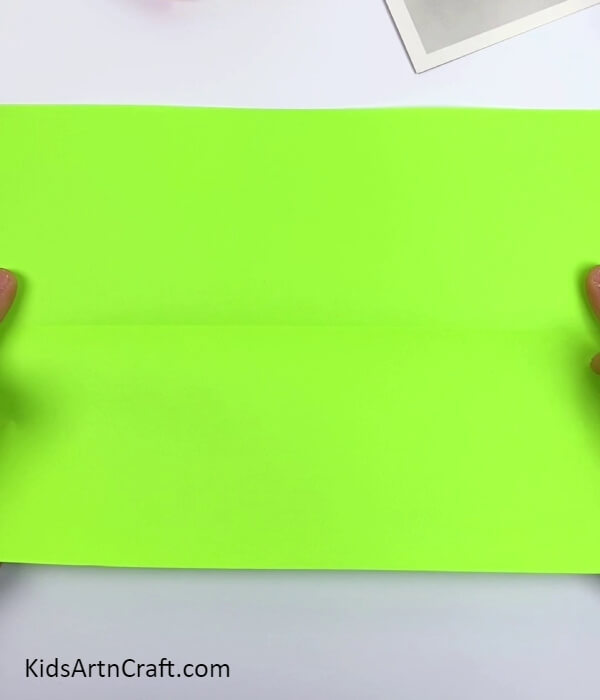

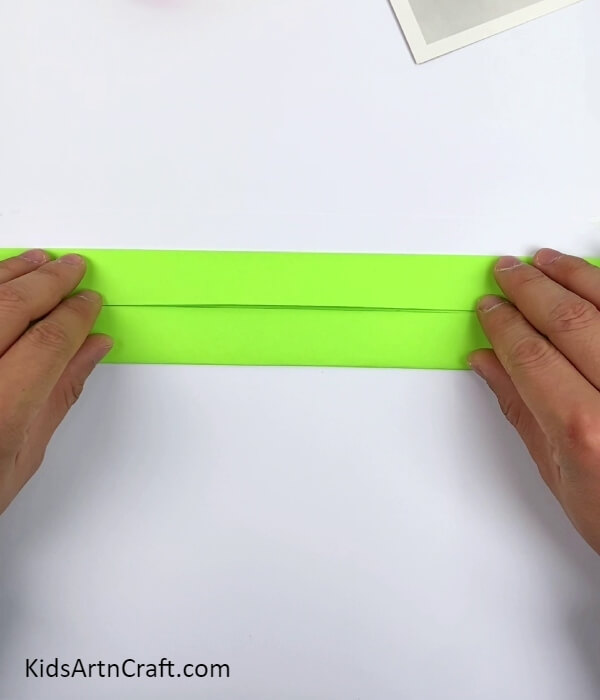
To begin this craft, take an A4 size green paper and fold it into half from the longer side to form a horizontal crease, and unfold it again.
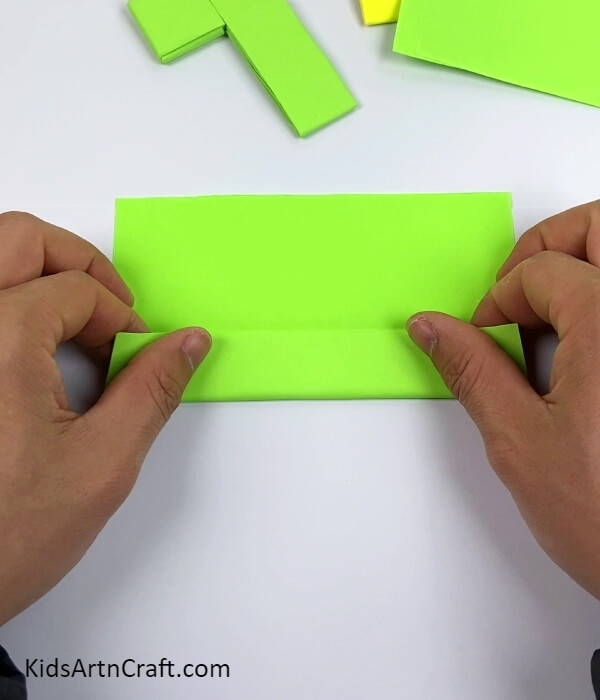
Step 2: Folding The Bottom Side To The Crease
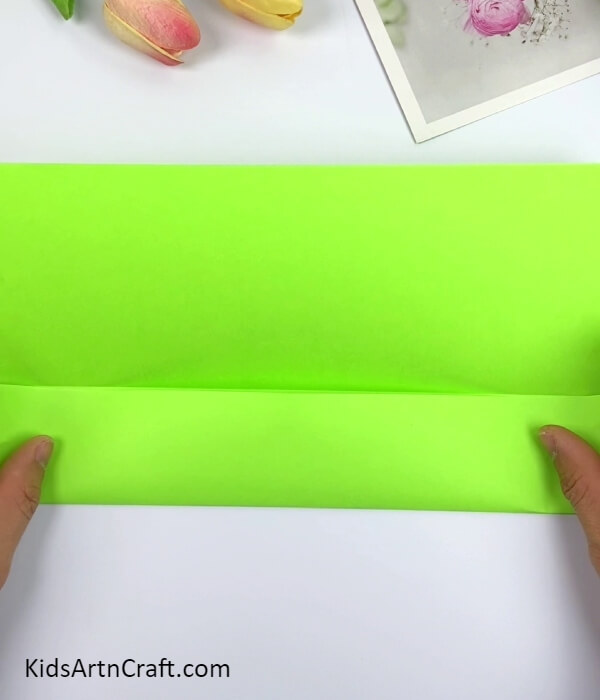
Fold the bottom side of the paper to the crease.
Step 3: Folding The Upper Side To The Crease
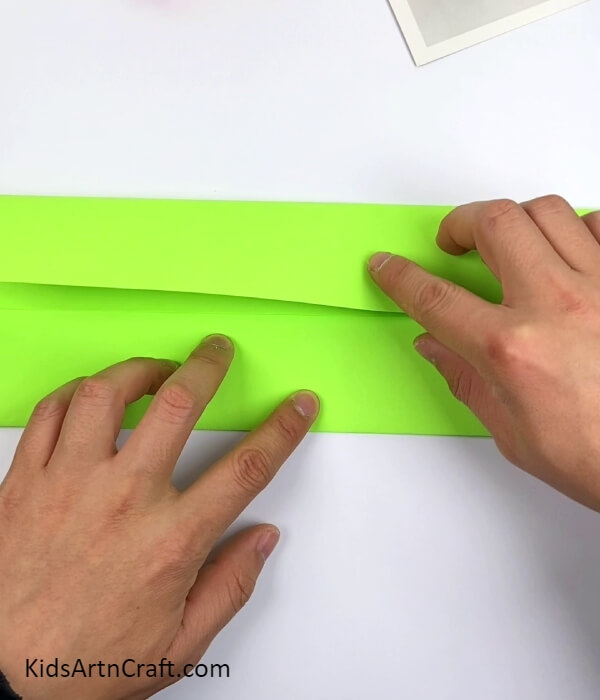
Fold the upper side of the paper to the crease.
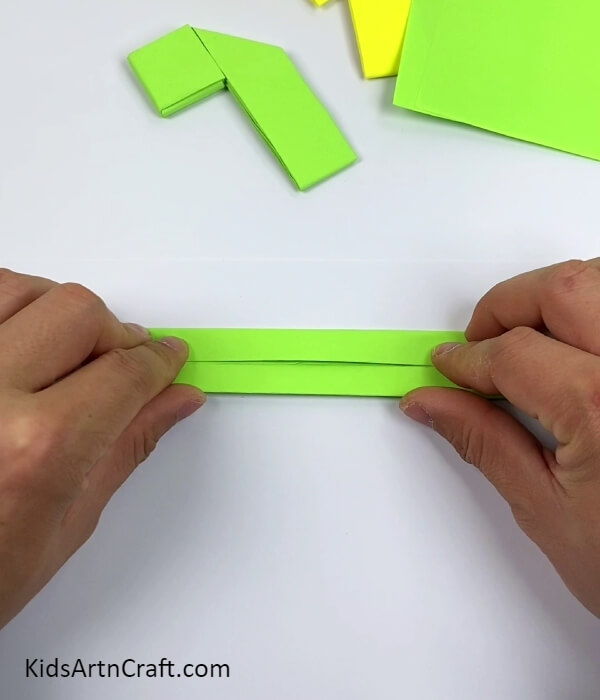
Step 4: Again Folding The Sides To The Crease
Fold the folded sides again to the crease.
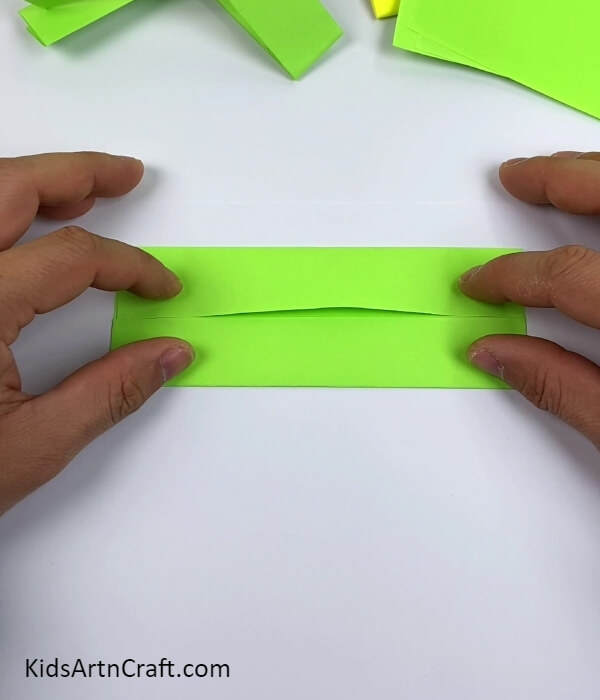
Step 5: Folding Along The Crease
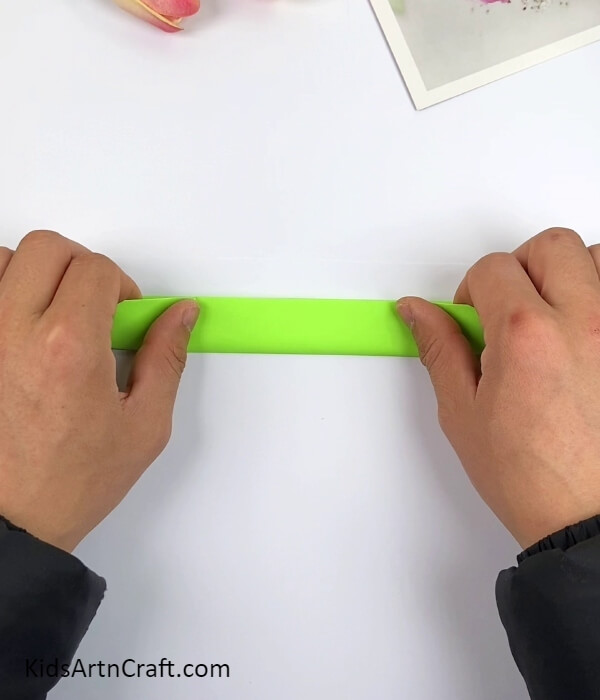
Fold the paper along the crease to make a thin strip.
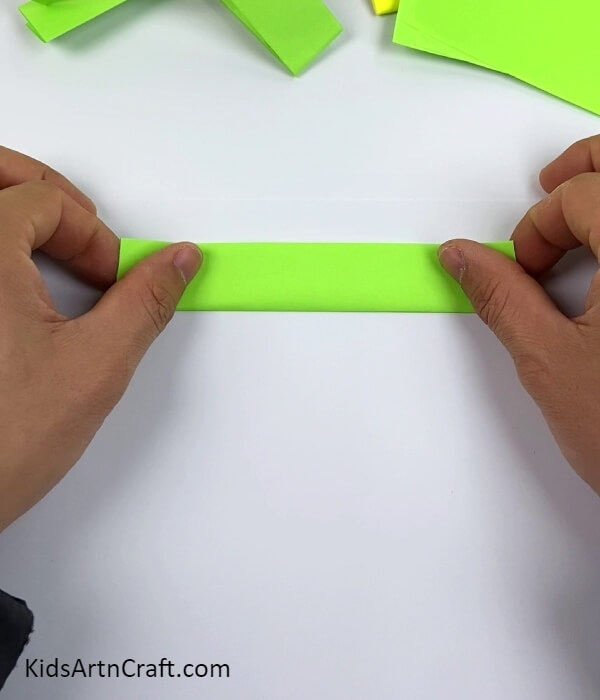
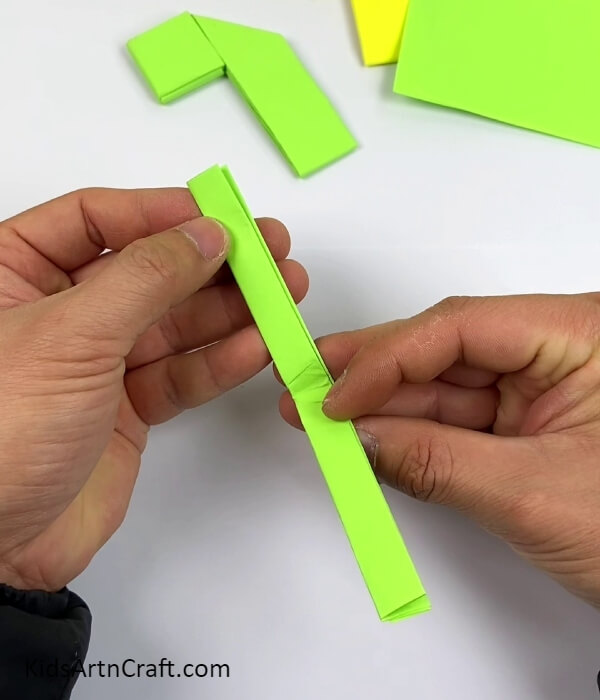
Step 6: Folding The Strip Into Half
Fold the strip into half and make a crease.
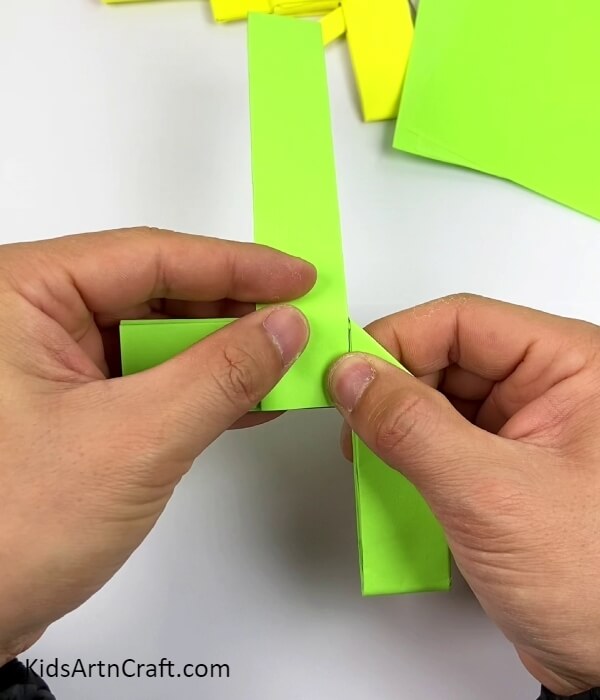
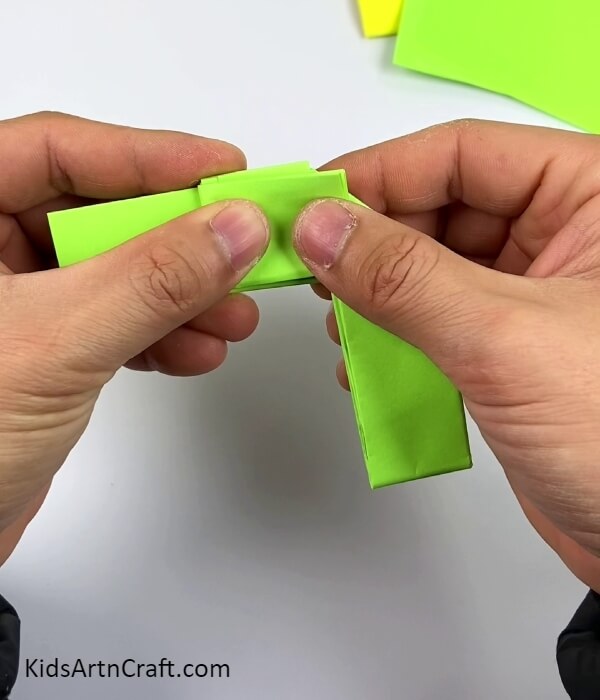
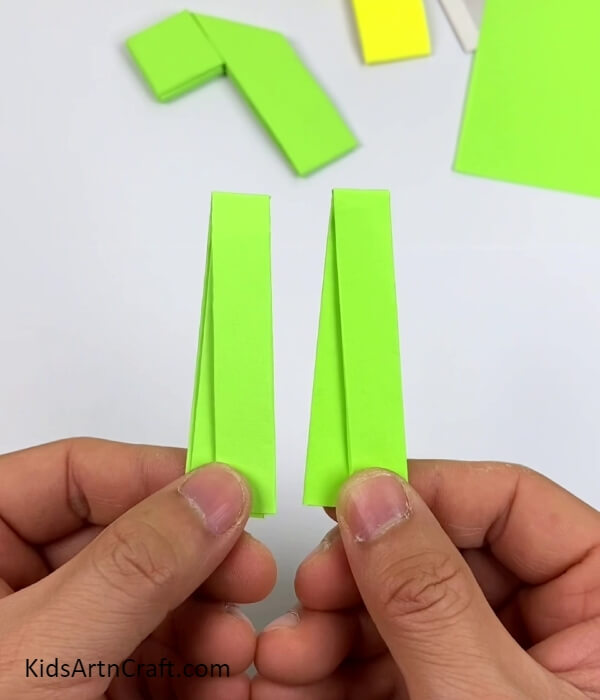
Step 7: Making The Strip Perpendicular To The Other
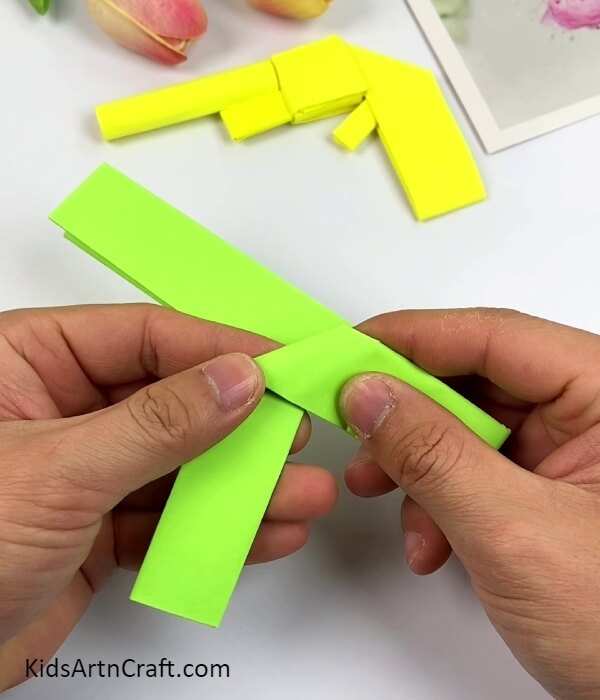
Take the upper folded half strip and fold it from inwards and below to make it perpendicular to the other half strip in the middle.
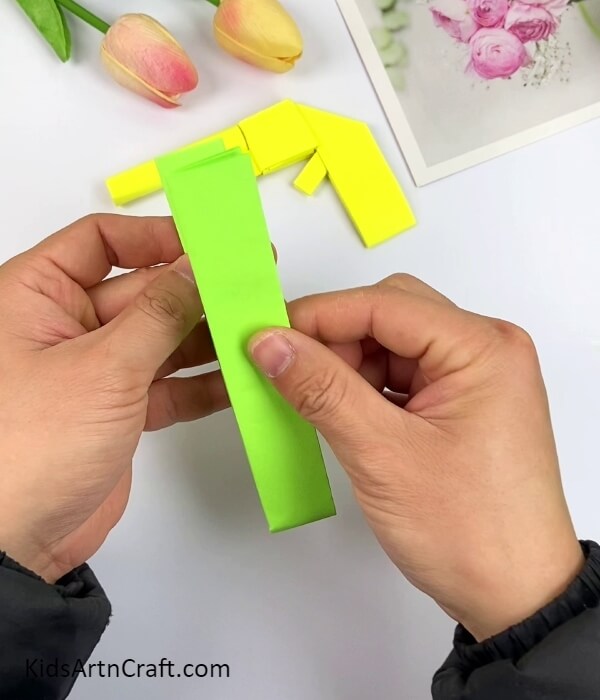
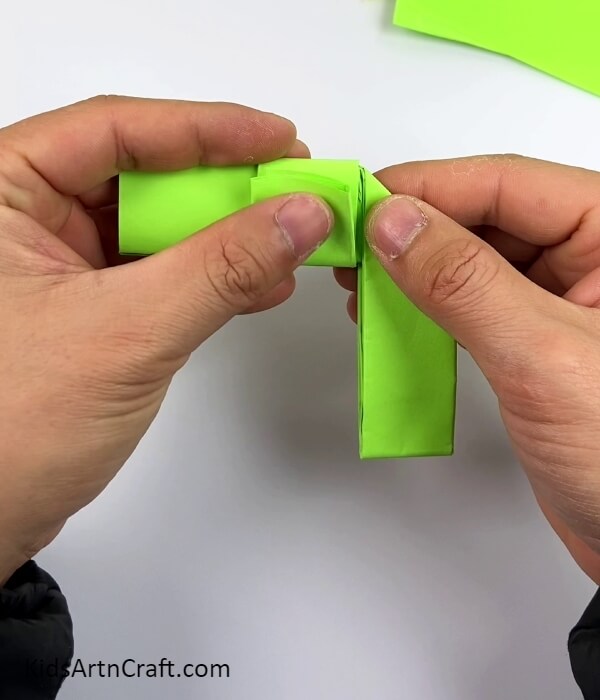
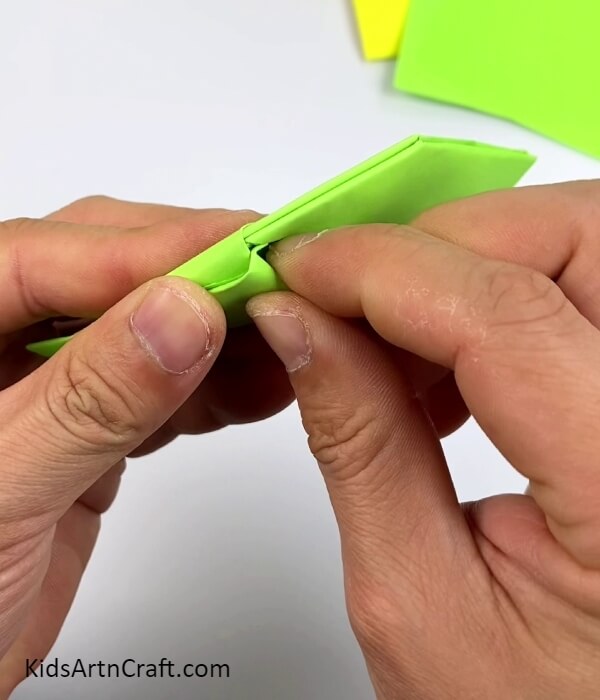
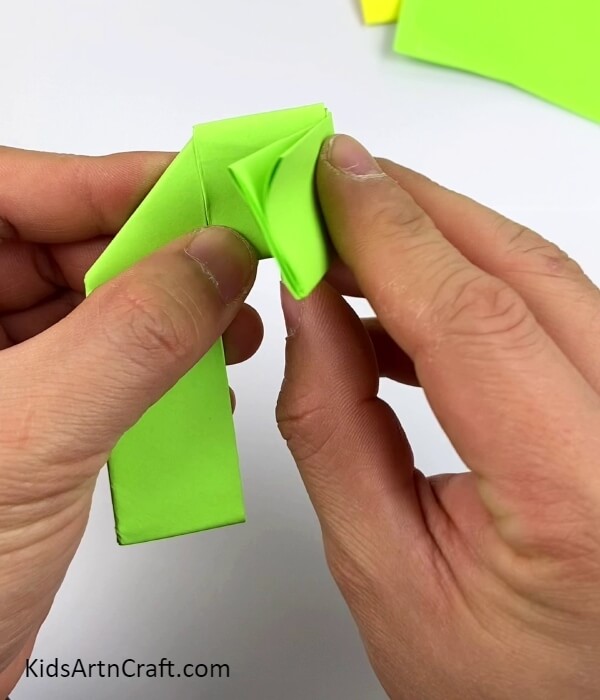
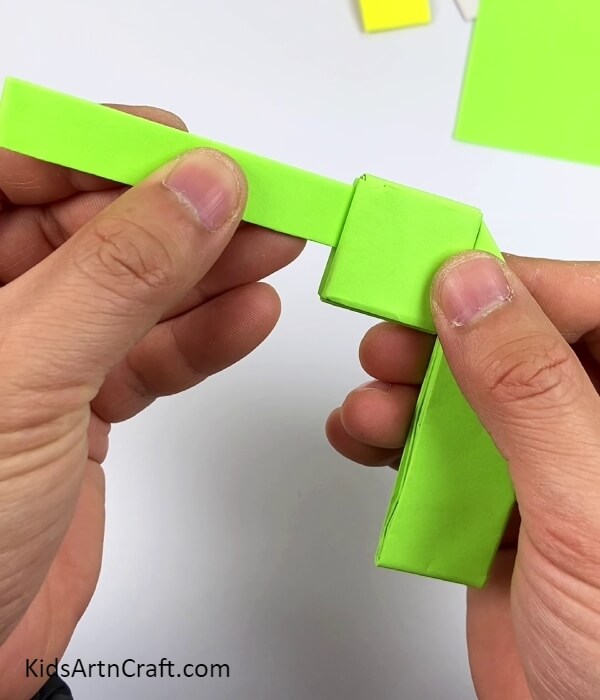
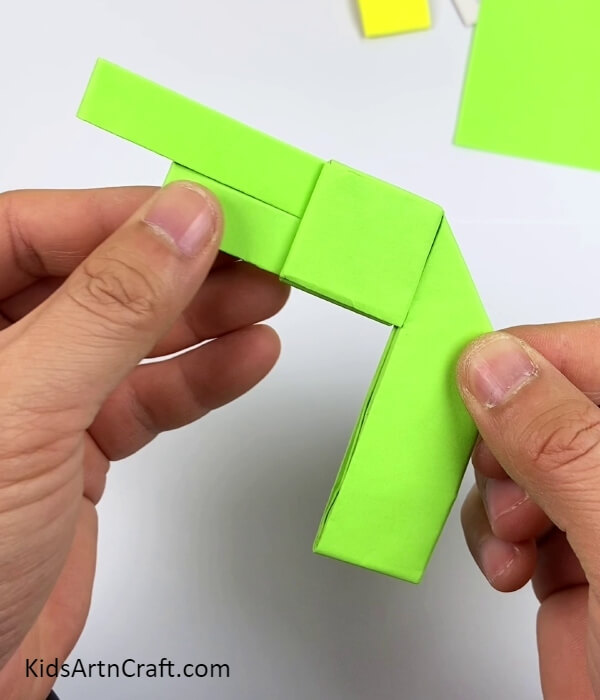
Step 8: Folding The Other Half Strip
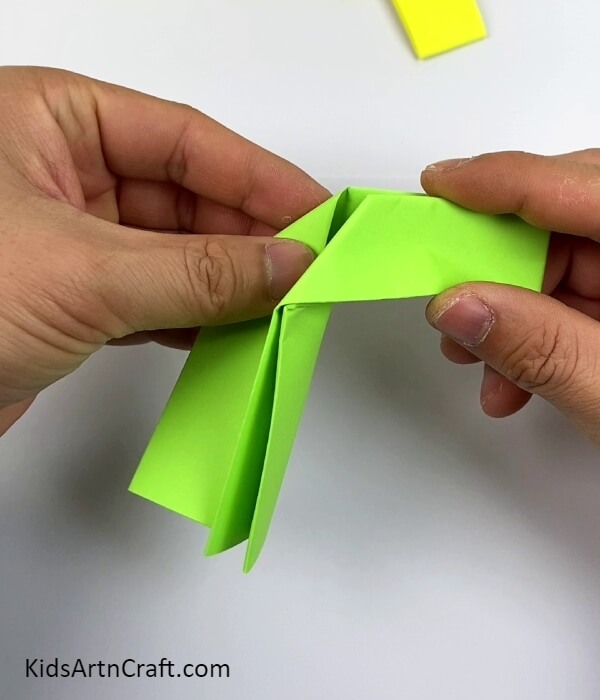
Fold the other half strip, the same way, to make look overlapped with the first folded strip. This makes your gun base.
Step 9: Making ‘+’ Creases On Another Sheet
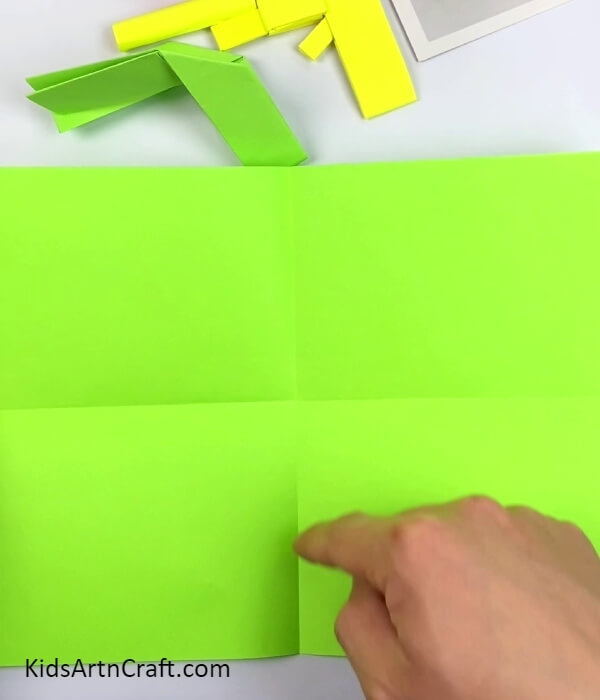
Take another A4 size green paper and fold it in half and again in half to make ‘+’ creases over the paper.
Step 10: Cutting Out The Papers
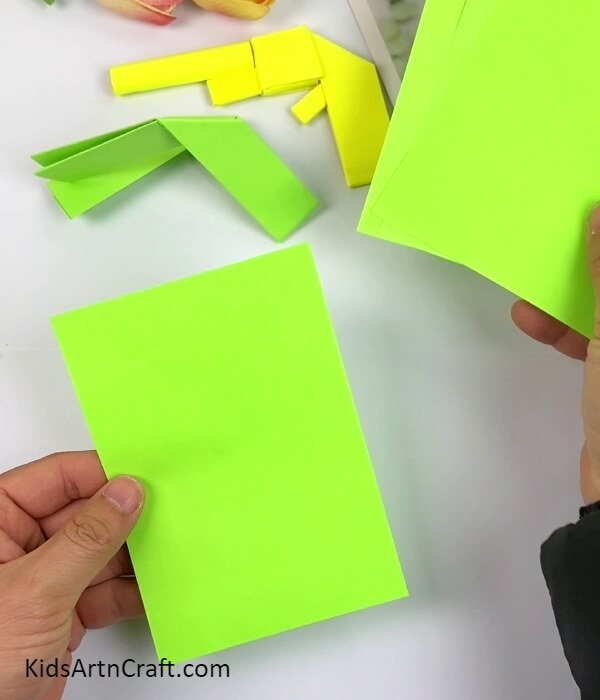
Tear the paper along the ‘+’ crease to make 4 pieces.
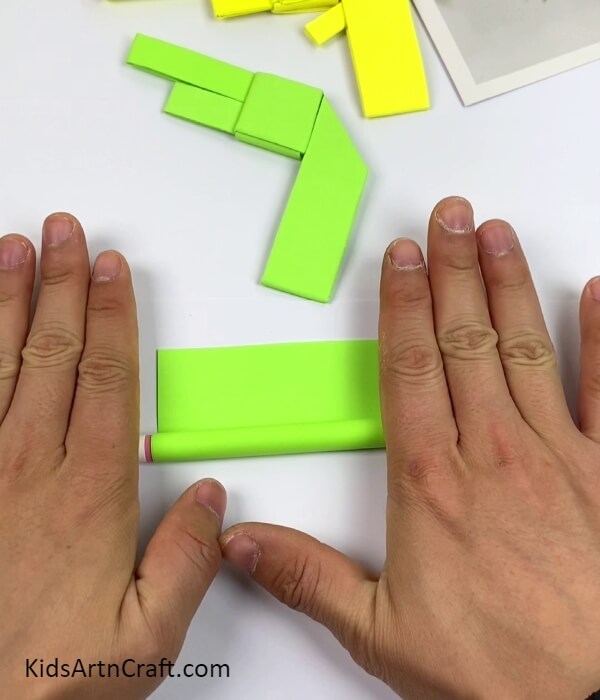
Step 11: Folding The Paper Into Half
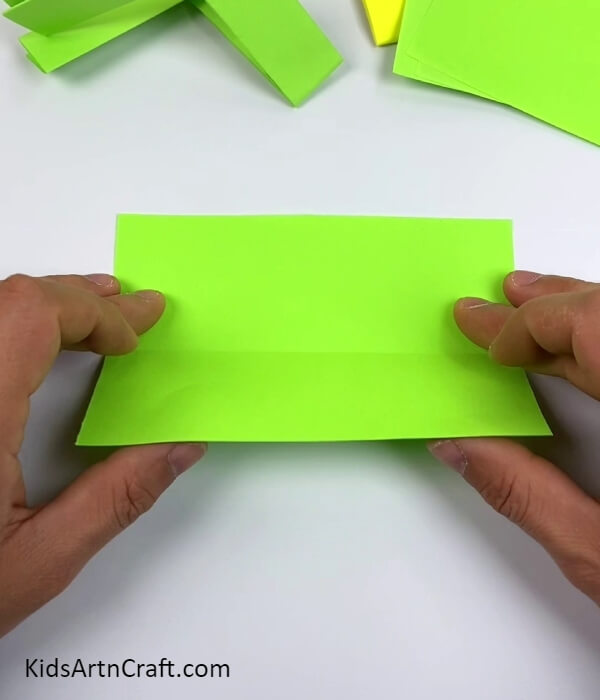
Fold a small paper piece into half from the longer side to form a crease and unfold again.
Step 12: Folding The Sides To The Crease
Fold the sides of the paper to the crease.
Step 13: Folding The Paper Along The Crease
Fold the paper along the crease to make a strip.
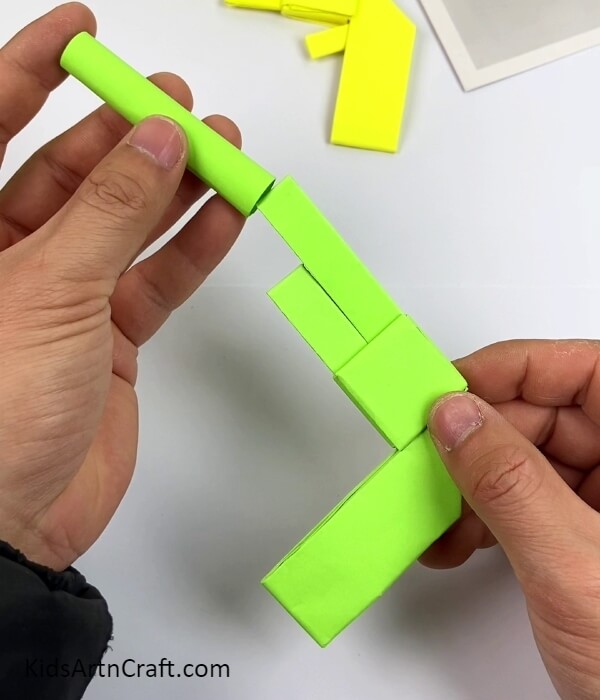
Step 14: Placing The End Of The Strip Over The Gun Base
Place the end of the strip over the gun base you made earlier beside the corner of the fold. Make sure to place it over the opened end strips of the gun base.
Step 15: Rolling Over The Strip
Roll and flatten the strip over the gun base.
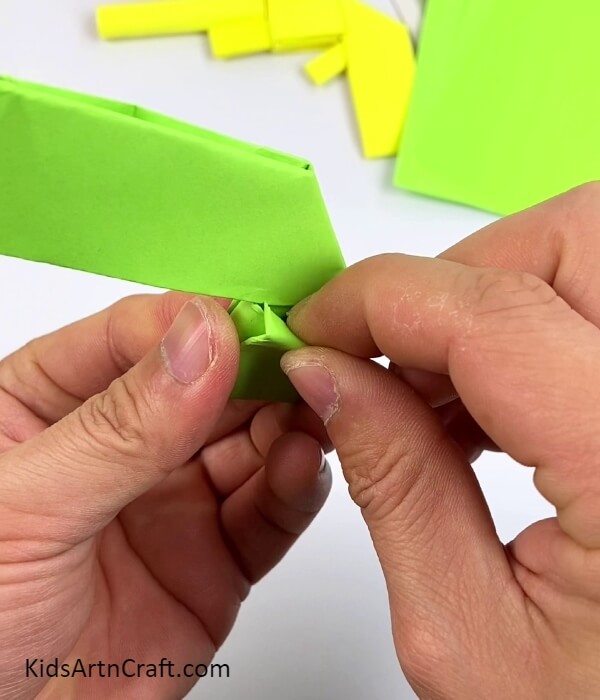
Step 16: Folding the Gun Base Over The Roll
Take one opened end strip of the gun base and fold it behind over the roll.
Step 17: Putting The End In The Roll
Put the end of the gun base inside the roll.
Step 18: Folding The Other Gun Base Strip Over The Roll
Fold the other gun case strip over the roll as before.
Step 19: Putting The End Of The Gun Base Inside The Roll
Put the end of the gun base inside the roll again as before.
Step 20: Folding Another Paper Piece
Follow the same previous steps 11 and 12 over another piece of paper.
Step 21: Folding The Sides To The Crease
Further, fold the folded sides to the middle crease.
Step 22: Folding In Halves
Fold the strip along the crease to form a strip and then fold the strip into half.
Step 23: Making Another Folded Strip
Follow the same previous steps (20-22) over another piece of paper to form a folded strip.
Step 24: Inserting The Folded Strip In Gun Base
Put one folded strip from the open-end side into the roll of the gun base as shown in the image.
Step 25: Inserting The Other Folded Strip Into Gun Base
Tear the other folded strip into half and insert it into the gun base below the first one.
Step 26: Making A Roll Of Another Paper Piece
Over a marker roll over a paper piece to make a roll of it.
Step 27: Inserting The Roll Over The Folded Strip
Over the long folded strip which was inserted in the gun base, insert the roll over it.
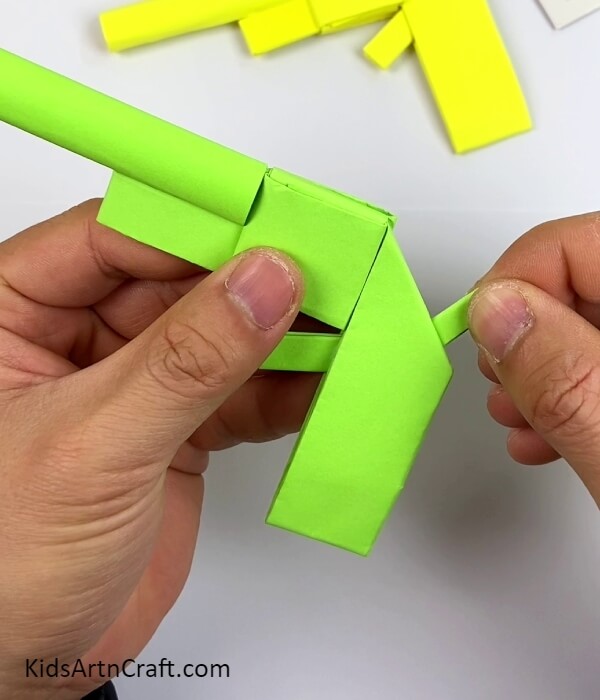
Step 28: Making And Inserting A Strip In The Gun Base
Take the last paper piece and fold it over and over to form a long thin strip, then put it from the folded side of the gun base as shown in the image.
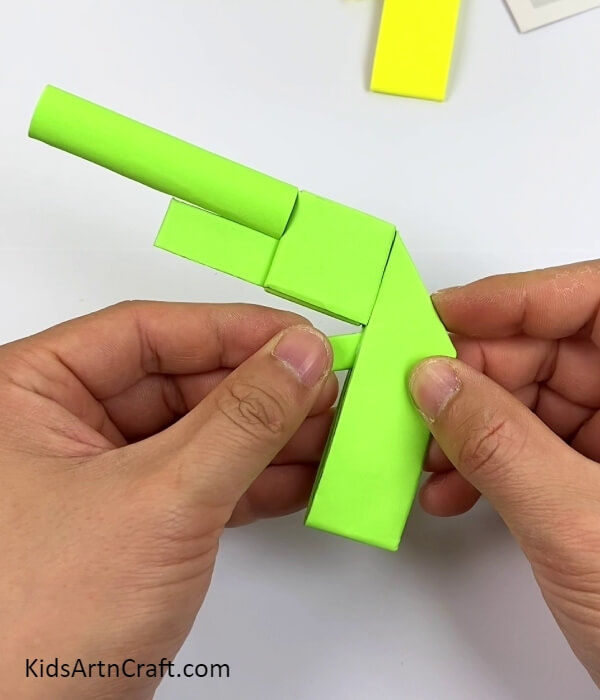
Step 29: Taking Out The Inserted Strip From Above
Take out the inserted strip from the other side of the gun base and take it to the top of the slanting part of the base.
Tada! Your Paper Gun Is Ready!
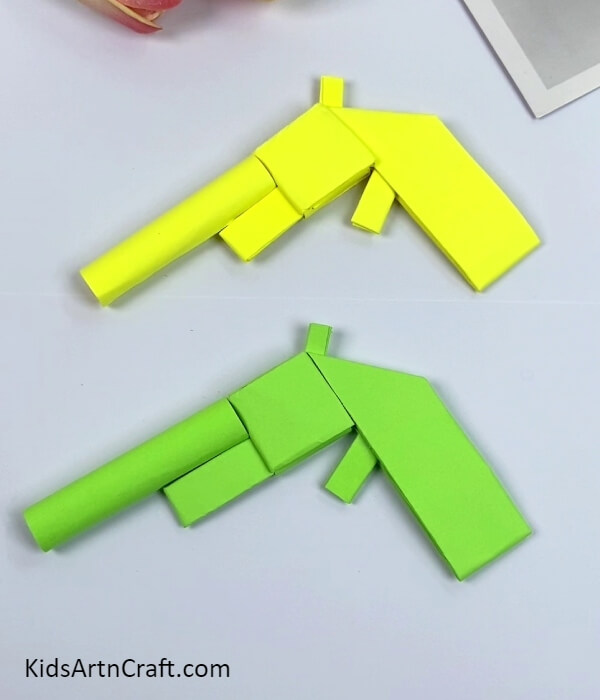
Yay! Your paper gun is finally completed!
Enjoy and play with your paper gun! This craft is an easy and fun way to keep your kids entertained for hours and engaged in creative activities! Let your kids unleash their creative side while making this craft! Crafting is also a fun way to get the kids involved in a sensory activity that will drive their motor skills, creativity, and imagination! Flaunt your crafting skills in front of your friends by teaching them to make this craft and have fun all together with your own personal guns!
Some More Toy Craft Tutorial
Cool Toy Car Craft Project Using Straw & Bottle Cap For Kids

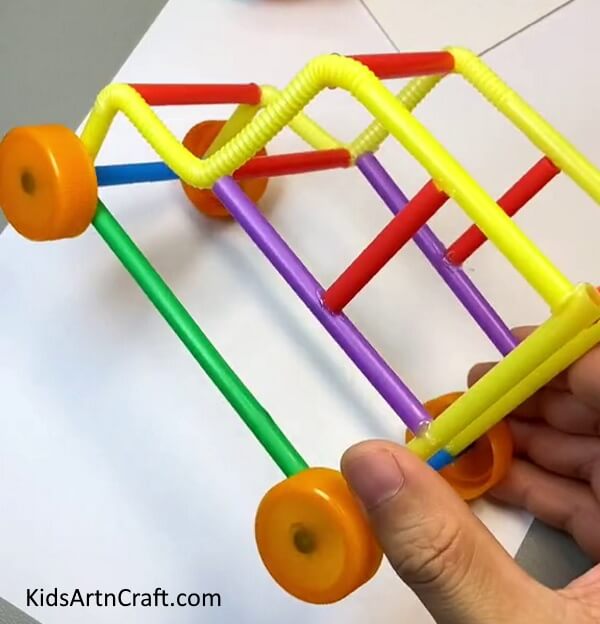
Image Source/Tutorial: Kids Art & Craft
This cool toy car is perfect for kids to play with! It’s made of straw and is easy to assemble. It’s a fun way to spend time with friends and family while encouraging creativity and imagination.
Artistic Toy Car Craft Using Straw, Rubber Band And Bottle Caps

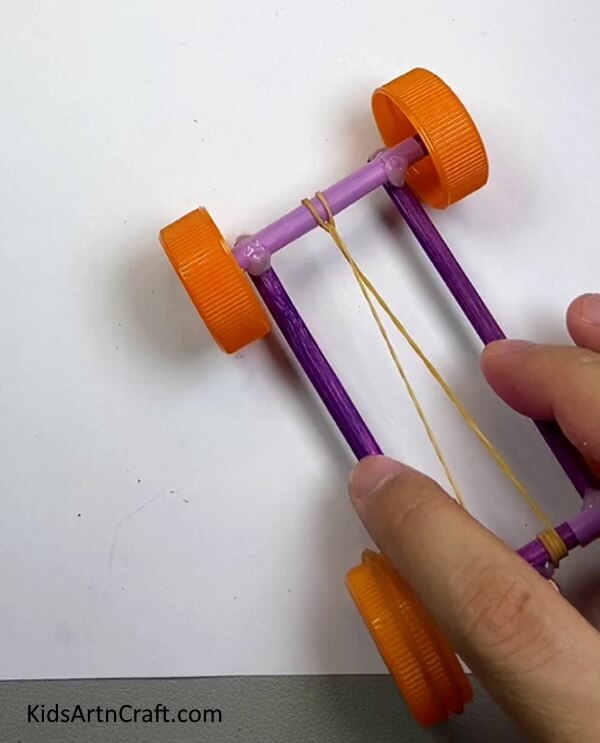
Image Source/Tutorial: Kids Art & Craft
This craft is a fun and creative way to make a toy car from everyday items. You can use chopsticks and bottle caps to make a car that looks artistic and unique. It’s a great way to get creative and make a toy that your child can play with.
Follow us on Youtube for art and craft tutorials and much more.
More Articles from Kids Art & Craft
- Easy Paper Bird Toy Craft To Play For Kids
- Learn To Make Easy Heart Shaped Paper Mouse Craft
- Easy Frog Paper Craft For Kids Easy Tutorial
- How to Make a Paper Fall Leaf for Kids
- Easy Paper Folding Crafts Video Tutorial for Kids