


Paper Crafts
Paper Princess Craft Tutorial For Kids

This paper princess craft tutorial is perfect for young kids to make a beautiful princess at home. With simple materials like paper, glue, and scissors, kids can create their own paper princesses in no time. Step-by-step instructions and photos make the process easy and fun.
Welcome to this paper princess craft tutorial for kids! This fun and easy craft is perfect for children of all ages, from preschoolers to elementary school-aged children. In this tutorial, you will learn how to make a princess using paper, scissors, and glue. Not only will this craft help your child explore their creativity, it will also help them practice their fine motor skills. So grab some materials and let’s get started!
Fun To Make Paper Princess DIY & Craft Tutorial For Kids

Read More: Amazing Paper Flower Craft – Step by Step Tutorial
Material Used:
- Craft Papers
- Glue
- Tweezers
- Colored Markers
- Thermacol Balls
Instructions:-
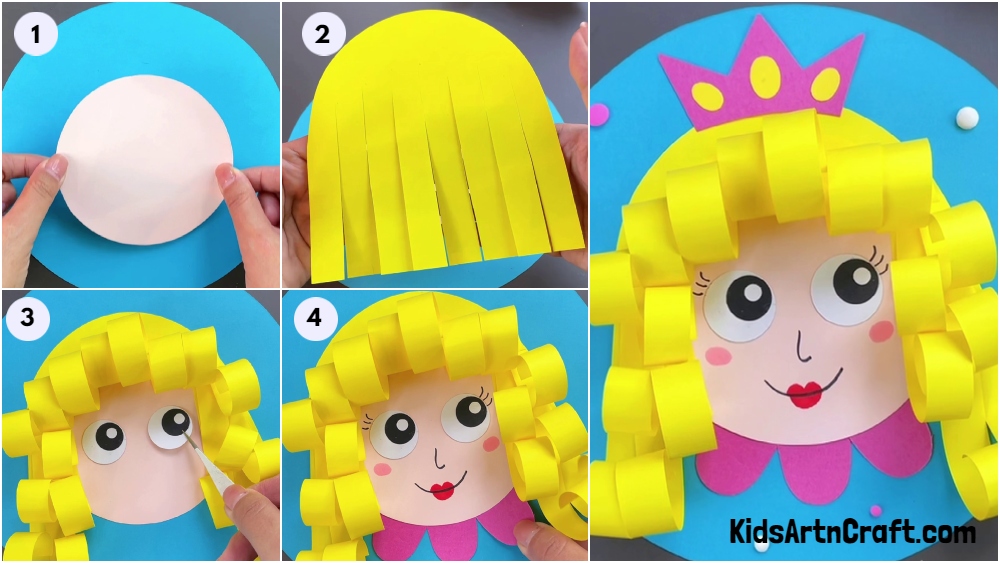
Step 1: Starting By Pasting A Circle Cut Out From White Sheet On Blue Color Circle

Let’s start by taking a light blue color sheet and cutting out a circle. Now take a white sheet and cut a circle smaller than the blue circle to make the face of our princess. Paste the circle in the center of the blue circle.
Step 2: Making The Hairs Of The Princess From Yellow Craft Paper
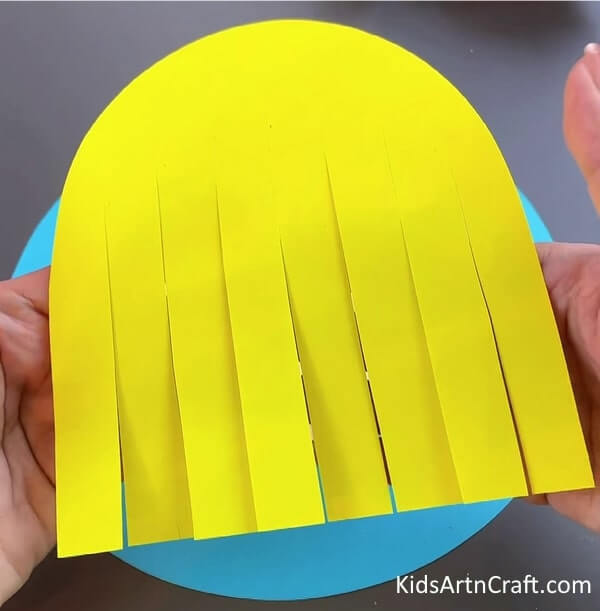
Now take a yellow craft paper and cut one side in a semi-circle. On the other side with the help of scissors cut strips till they are halfway of equal thickness.
Step 3: Making The Hairs Of The Princess By Rolling
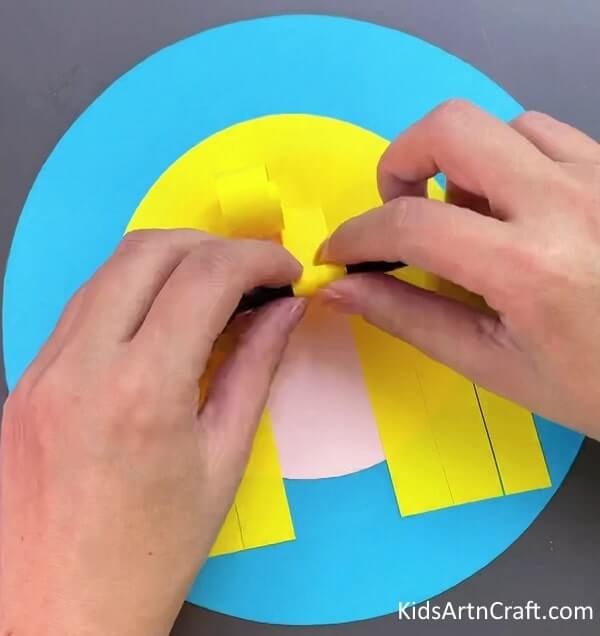
Now paste the hairs on the white circle we stuck on the blue sheet from the top edge only. Now with the help of a pencil roll up the strips making the curls.
Step 4: Adding The Eyes On The Princess Face
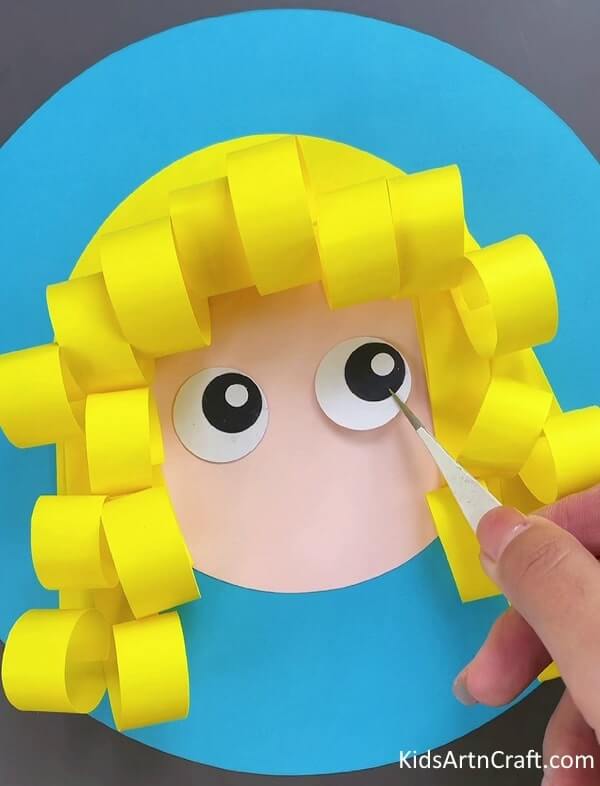
Now for the eyes, cut out two circles from a white sheet. Take a black sheet and cut out two circles smaller than the white circle and stick them at the corners of the white circles. Now again take the white sheet and cut out two small circles it. Paste the two circles on the black circles.
Now with help of tweezers stick the eyes on the face by applying the glue on the backside.
Step 5: Adding The Facial Expression. To The Princess Face
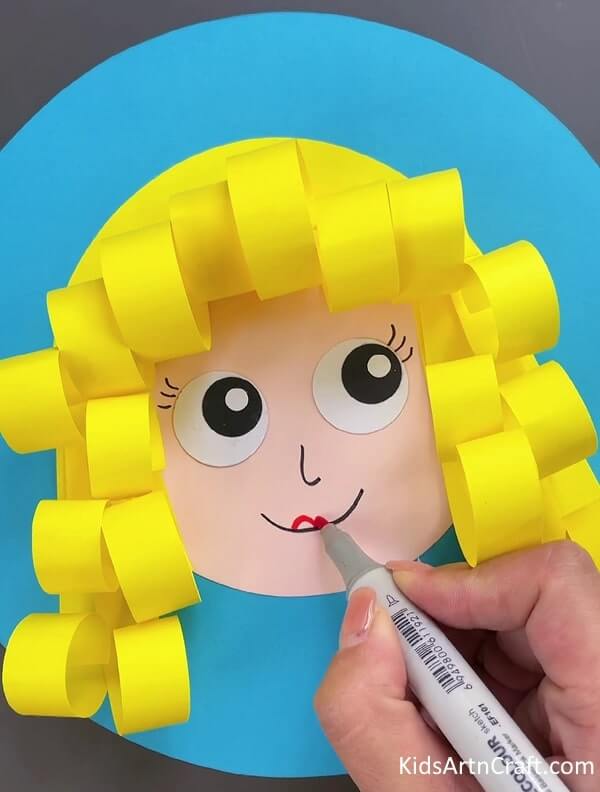
Take a black color marker and make eyelashes on the eyes by making three curved lines on the edges of the eyes. Also, make the nose and smile on the face.
Now take a red marker and make the outline of lips and fill it with the red marker.
Step 6: Making The Neck Corner From Pink Craft Paper
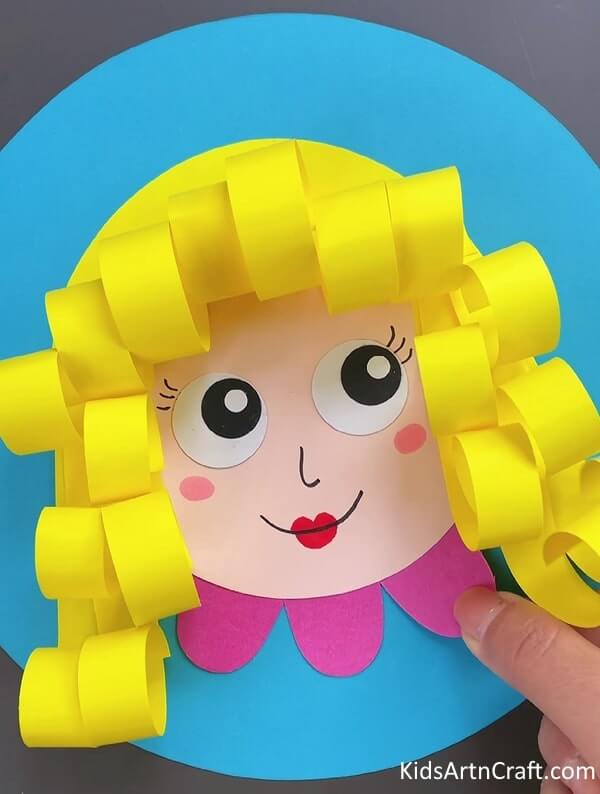
Take a piece of pink color craft paper and cut out a U shape frill by just making U shape continuously side by side on the sheet and cutting them all together to make the frill. With the help of glue paste the Neck corner below the face close to it.
Final Step: “DIY Paper Princess Craft For Kids – Step-by-step Tutorial”
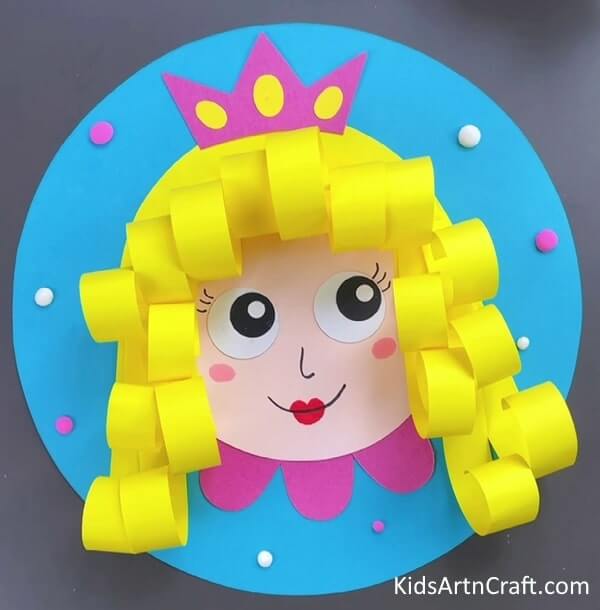
After adding some details like the crown from the pink and yellow craft paper and pasting thermacol balls on the background sheet, Your paper Princess is ready!
This DIY Paper Princess craft is a perfect activity for kids to unleash their creativity and imagination. Not only is it a fun and easy project to make, but it also allows children to develop their fine motor skills and hand-eye coordination. By following the step-by-step tutorial, kids can make their own beautiful paper princesses and have hours of playtime fun.
Encourage your child to personalize their paper princess by choosing their favorite colors and patterns for the dress and accessories. With just a few materials and a bit of creativity, your child can bring their very own paper princess to life! So try this tutorial today and bring your creativity some glamour.!
FAQs
What materials are needed to make a paper princess craft?
You will need craft paper, scissors, glue, markers, and other decorative materials.
How long will it take to complete the paper princess craft?
Depending on the complexity of the craft, it could take anywhere from 30 minutes to several hours.
What age group is this craft suitable for?
This craft is suitable for children aged 5 and up.
What other decorations can be used for the craft?
You can use items such as glitter, sequins, ribbons, and other items to decorate the paper princess craft.
Is it easy to make a paper princess craft?
Yes, it is fairly easy to make a paper princess craft. With some patience and creativity, you can create a beautiful craft.
This paper princess craft tutorial for kids is a great way to get kids excited about crafting. With just a few simple supplies, kids can create a fun and imaginative princess and bring her to life. Whether they want to make a princess from their favorite story or make one of their own, this tutorial will help bring their ideas to life.
Follow us on Youtube for art and craft tutorials and much more.
More Articles from Kids Art & Craft
- 3D Construction Paper Craft Ideas
- Paper Mouse Craft For Kids – Step by Step Tutorial
- Easy Leaf Art For Kindergarteners With Your Parents – Step by Step Tutorial
- Easy DIY With Cut out art projects for Kids
- Easy Crafts for 2nd Graders


