


Paper Crafts
Fun To Make Paper Cup Mouse Craft- Step By Step Tutorial

This tutorial is perfect for any crafty kid looking to make a unique paper flower. Step-by-step instructions make this an easy and fun project that will leave your child with a beautiful, handmade flower they can be proud of.
Welcome to this step-by-step tutorial on how to make handmade paper flowers for kids! With this easy-to-follow guide, you can create beautiful paper flowers that your children can proudly display in their room or give away as gifts. This craft is perfect for any age and can be used to teach your children about colors, shapes, and the art of crafting. Plus, the end product is sure to bring a smile to their faces! So, let’s get started!
DIY & Craft Easy And Fun To Make Paper Cup Mouse
Read More: Super Simple Pine Cone Crafts For Kids
Material Used:
- Paper cup
- Glue stick
- Scissors
- Black sheet
- Red sheet
- White sheet
Instructions:
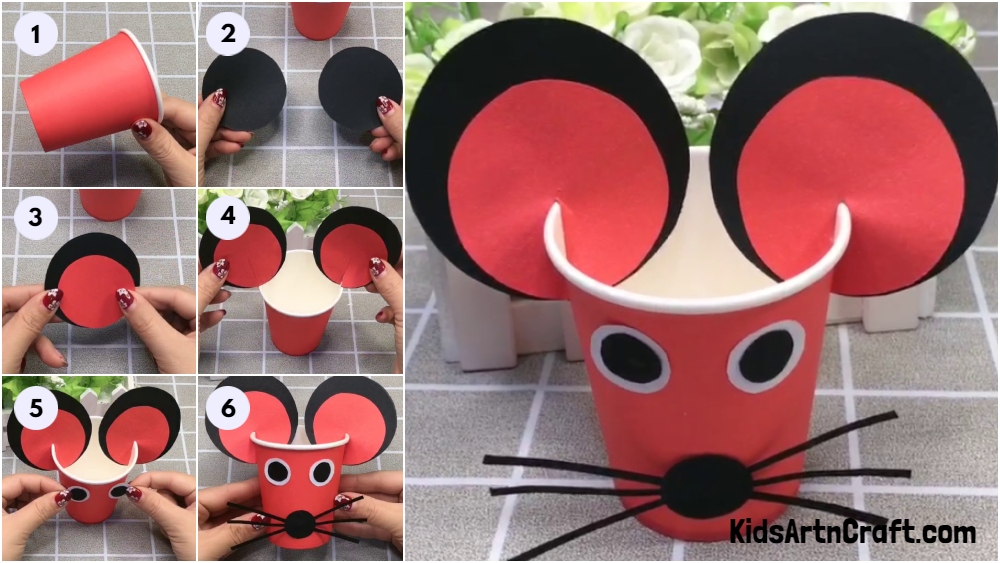
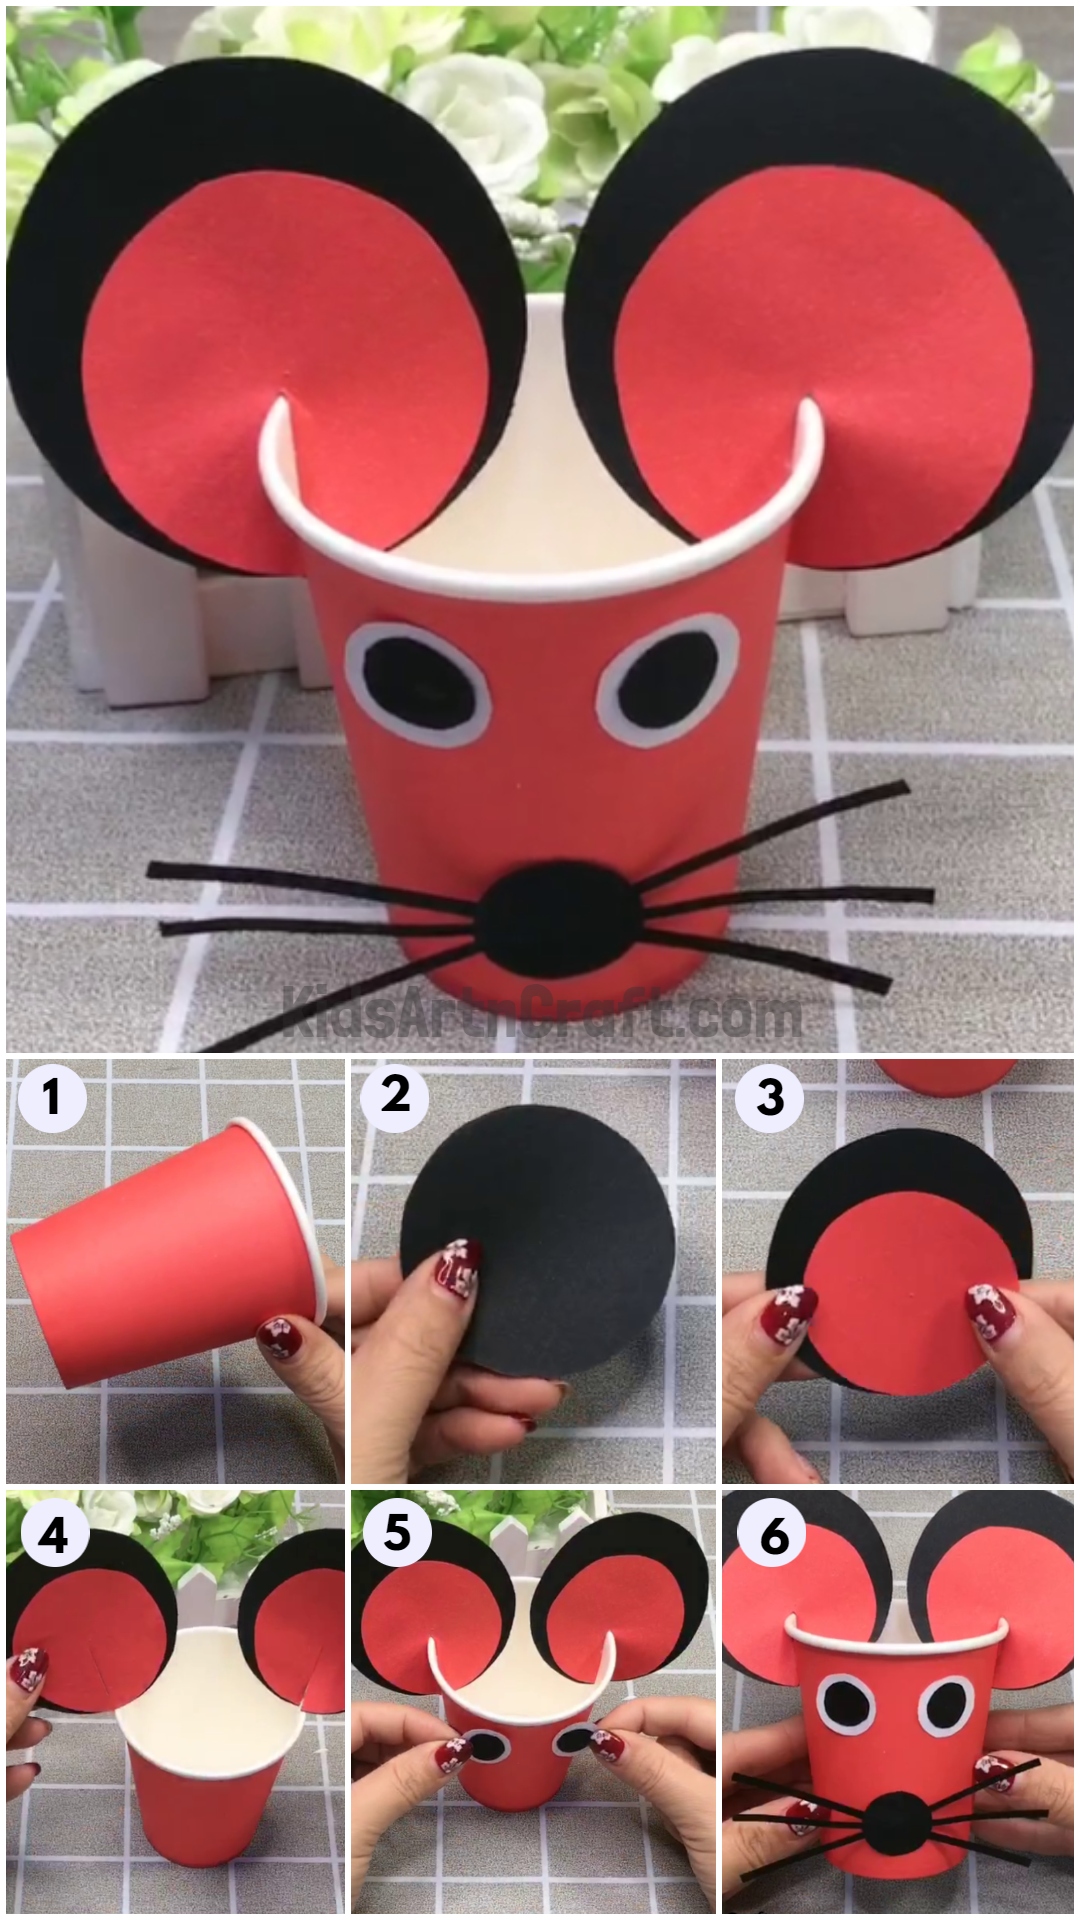
Step 1: Taking A Paper Cup

Take a paper cup for making of the mouse.
Step 2: Cutting Two Circles Out Of Black Sheet
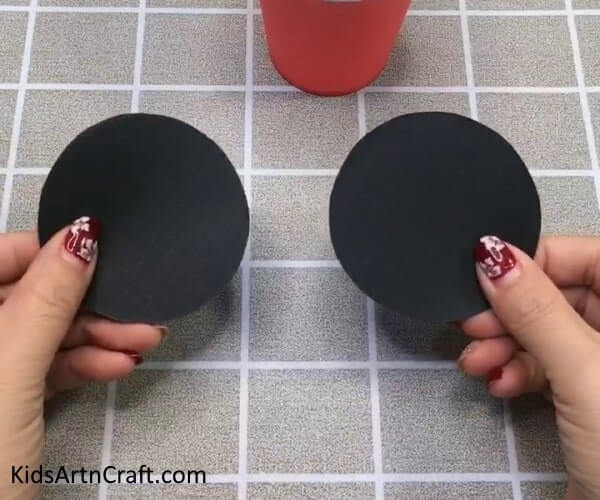 Cut two circles of about 3 cm radius out of the black sheet.
Step 3: Pasting Red Circles Of Smaller Radius
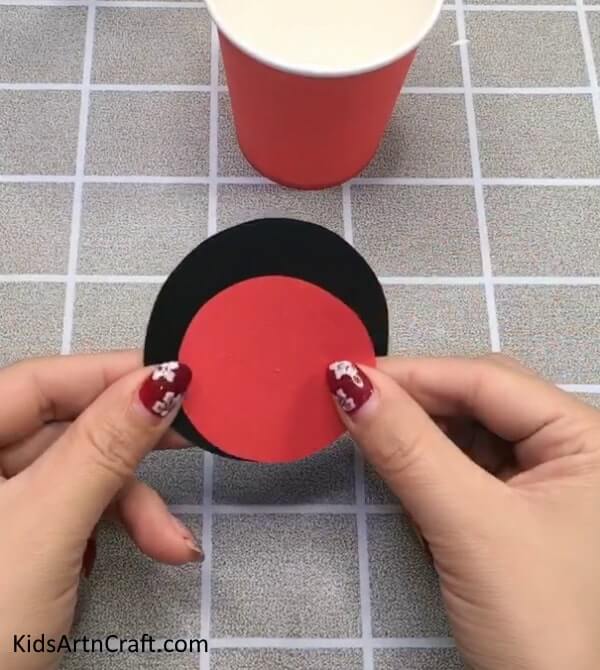
Take another sheet of red color make circles on it of radius 2cm and cut it off the sheet. Now, paste the red circles on the black circles touching the boundary on the black circle from one side.
Step 4: Giving A Single Cut From The Center Of Both The Red Circles
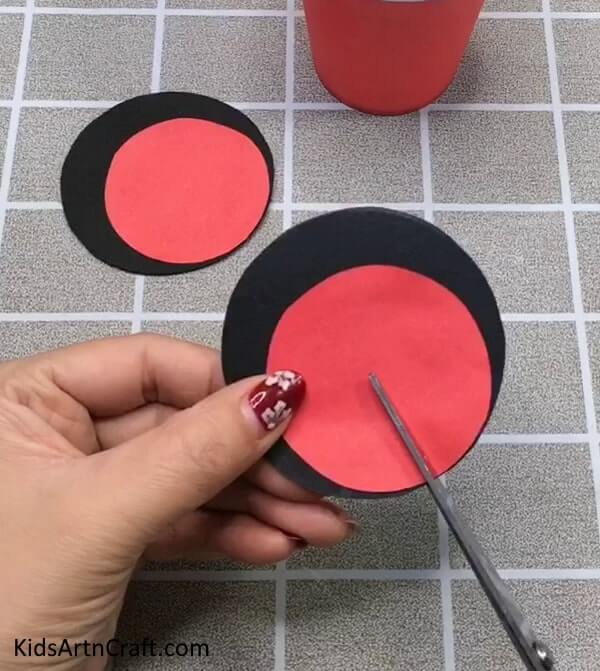
Take scissors and cut the circle from the center of the red circle.
Step 5: Inserting The Circles In The Edges Of The Cup
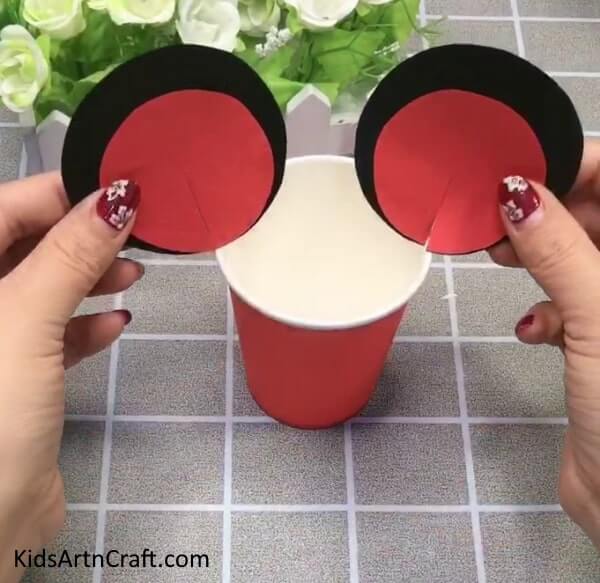
Insert the circles in the paper cup from the cut side.
Step 6: Making Eyes Of Our Mouse
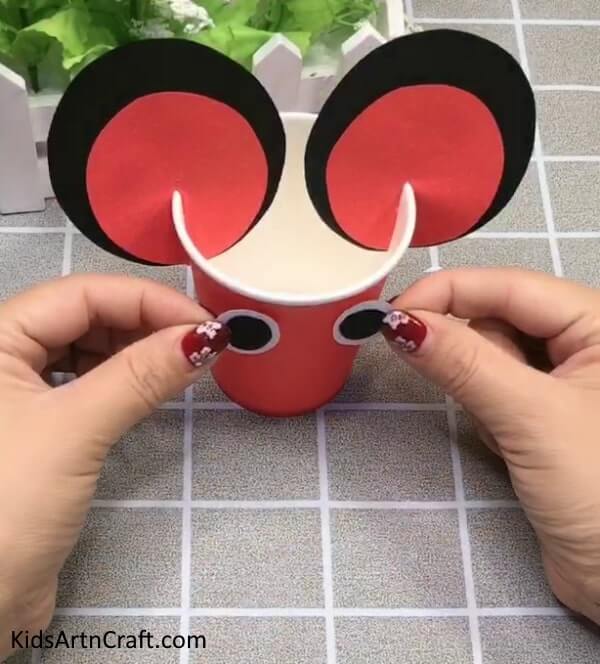
Take one white circle cut out of a white sheet and one black cut out of a black sheet which let the black one be a little smaller. Paste the black one on the white one and stick both of them on the paper cup indicating the eyes of the mouse.
Step 7: Making Mustaches Of The Mouse
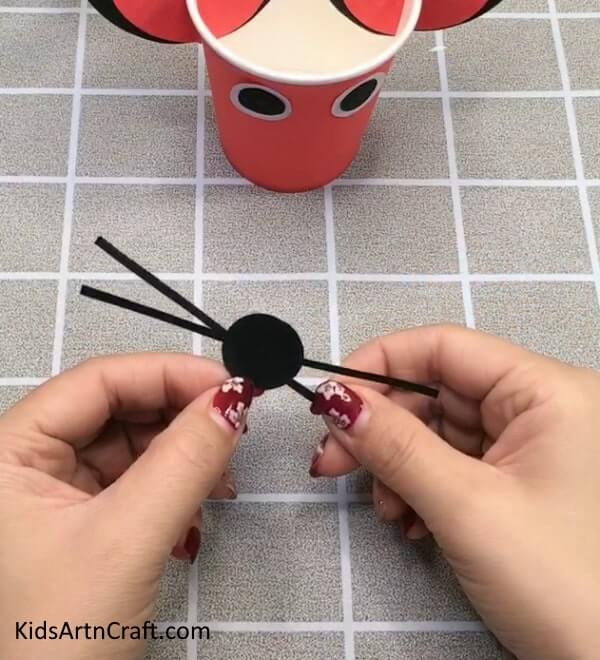
Take a black sheet for mustaches. Cut one circle and six rectangles from the black sheet.
Step 8: Completing Mustaches
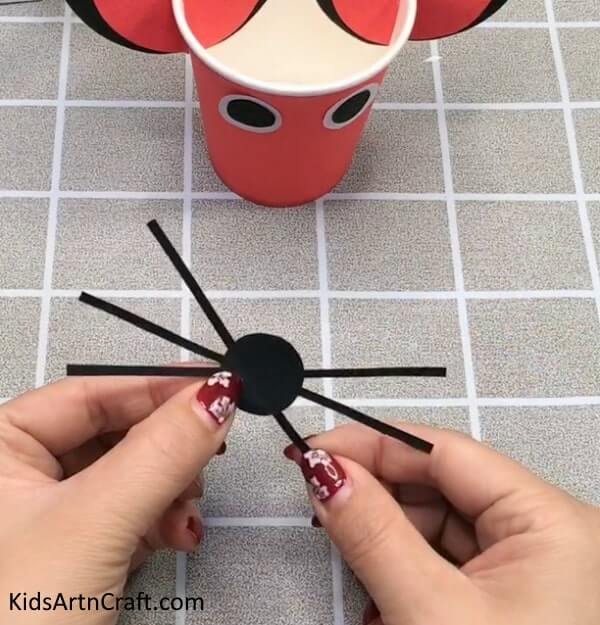
Paste the rectangles around the circles.
Step 9: Pasting Mustaches Below The Eyes
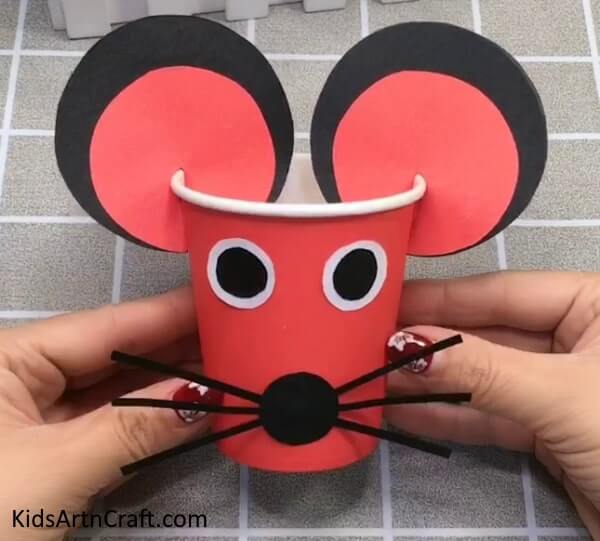
Paste the mustaches on the paper cup.
Final Step: This Is The Complete Look Of The Paper Cup Mouse!
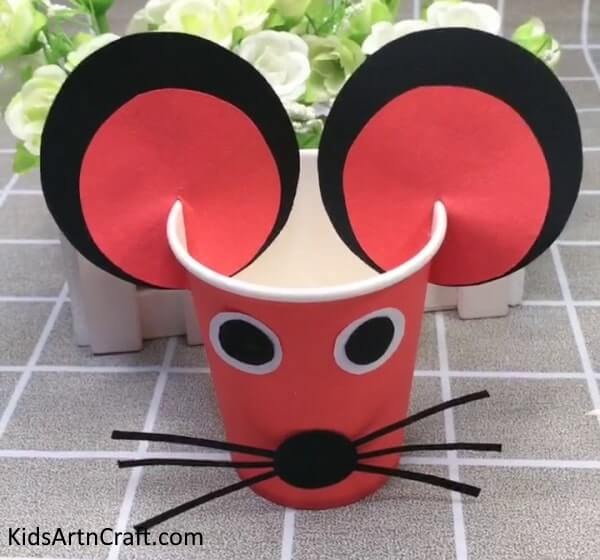
This is the complete look of the paper cup mouse. Make it at your home with only a few materials.
Some More Mouse Craft Tutorial
Making a Pine Cone Mouse Craft
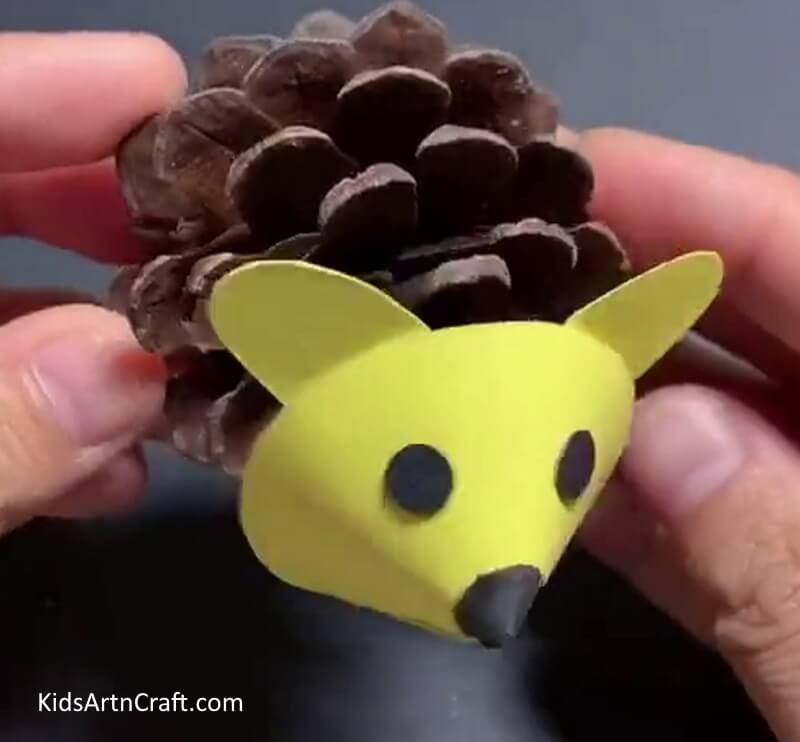
Image Source/Tutorial: Kids Art & Craft
Making a pine cone mouse craft is a fun and easy way to get creative! All you need is some pine cones, construction paper, glue, googly eyes, and markers to make your own little mouse friend. It’s a great activity for children and adults alike!
Paper Mouse Is Ready!
Image Source/Tutorial: Kids Art & Craft
This Paper Mouse Craft Tutorial for Kids is a great way to spend quality time with your children! Creative paper mouse craft make at home.
Art Project For Kids To Make Mouse Drawing

Image Source/Tutorial: Kids Art & Craft
This art project for kids is a fun and creative way to learn how to draw a mouse. It is great for all ages and can easily be done with a few simple steps. It is a great activity for children to explore their imaginations and create something unique.
FAQs
What kind of paper should I use for making paper flowers?
You can use any type of paper you like, including cardstock, construction paper, tissue paper, or even newspaper.
Do I need any special tools to make paper flowers?
You don’t need any special tools, but scissors and a craft knife will make the process easier.
How long does it take to make paper flowers?
The time required to make a paper flower varies depending on the size and complexity of the flower. Generally, it takes between 15 minutes and an hour.
What type of glue should I use?
You can use any craft glue, such as white glue, hot glue, or a glue stick.
Can I use paint or markers to decorate my paper flowers?
Yes, you can use paint, markers, glitter, and other craft materials to decorate your paper flowers.
This tutorial provides a fun and creative way for kids to make beautiful handmade paper flowers. With easy to follow instructions and materials that can be easily found around the house, it’s a great project for any child to take on!
Follow us on Youtube for art and craft tutorials and much more.
More Articles from Kids Art & Craft
- World Parrot Day Coloring Pages For Kids – Free Printables
- Poppy Coloring Pages For Kids – Free Printables
- Lion Drawing & Sketches for Kids
- Crumpled Paper Animal Crafts for Kids
- Meditation Coloring Pages For Kids – Free Printables


