


Painting
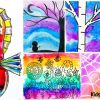
Rainbow Tree Scenery Through A Window Artwork Tutorial For Kids

Here is a Beautiful Rainbow Tree Scenery Through A Window Artwork for Kids step by step tutorial. Follow the given tutorial and have fun painting this amazing scenery.
This is a step-by-step DIY Fall Leaf Hedgehog Bird Craft Tutorial for Beginners. It is very much suitable for kids around the age of 3 and above. It is very popular among art enthusiasts. Through this artwork, you can teach yourself a lot about shades, colors, and tints. Since it is all done using sketch pens, it is completely apt for a beginner. It also tells you different tricks and techniques which are very basic yet always come in handy. About the shades, through this, you can observe, how the shades blend and alter into different ones. Since it is done through sketch pens, each layer of color will give your different shades of the same color, and this will give you a precise idea of what it is all about. Alright, let us start.
DIY Beautiful Rainbow Tree Scenery For Kids
Read More: Rainbow Parrot Painting Step by Step Tutorial For Kids
Materials Required
- A Set Of Color Sketch Pens
- A White Sheet Of Paper
- Drawing Tape
Procedure
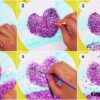
Step 1: Sticking The Drawing Tape On The White Sheet Of Paper
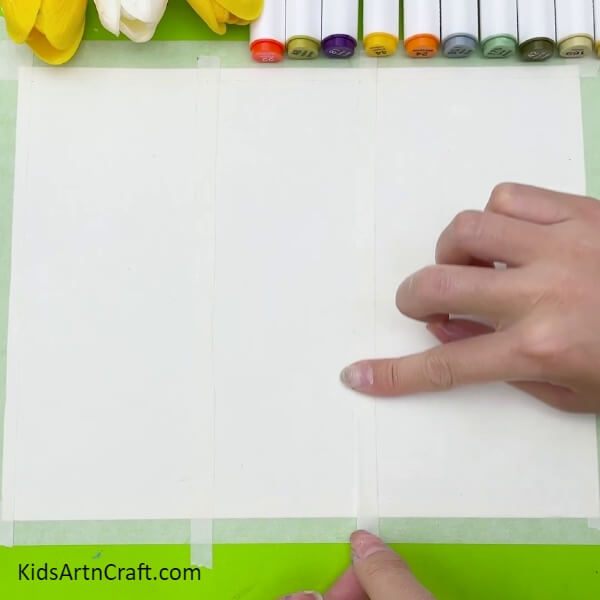
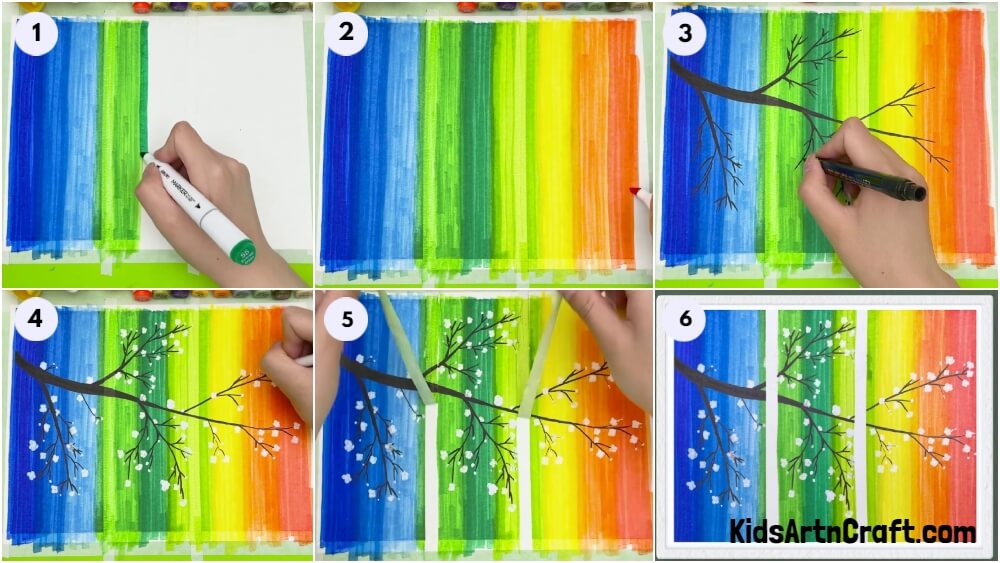
Take a white sheet of paper and a drawing tape. Paste the drawing tape as if a window panel, First making a border and then in two vertical lines as done in the image presented right above.
Step 2: Garbing Sketch Pens Of All Shades Of Blue
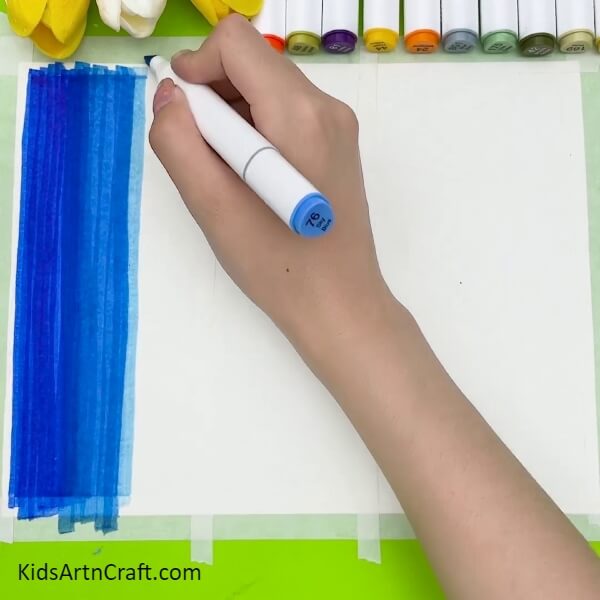
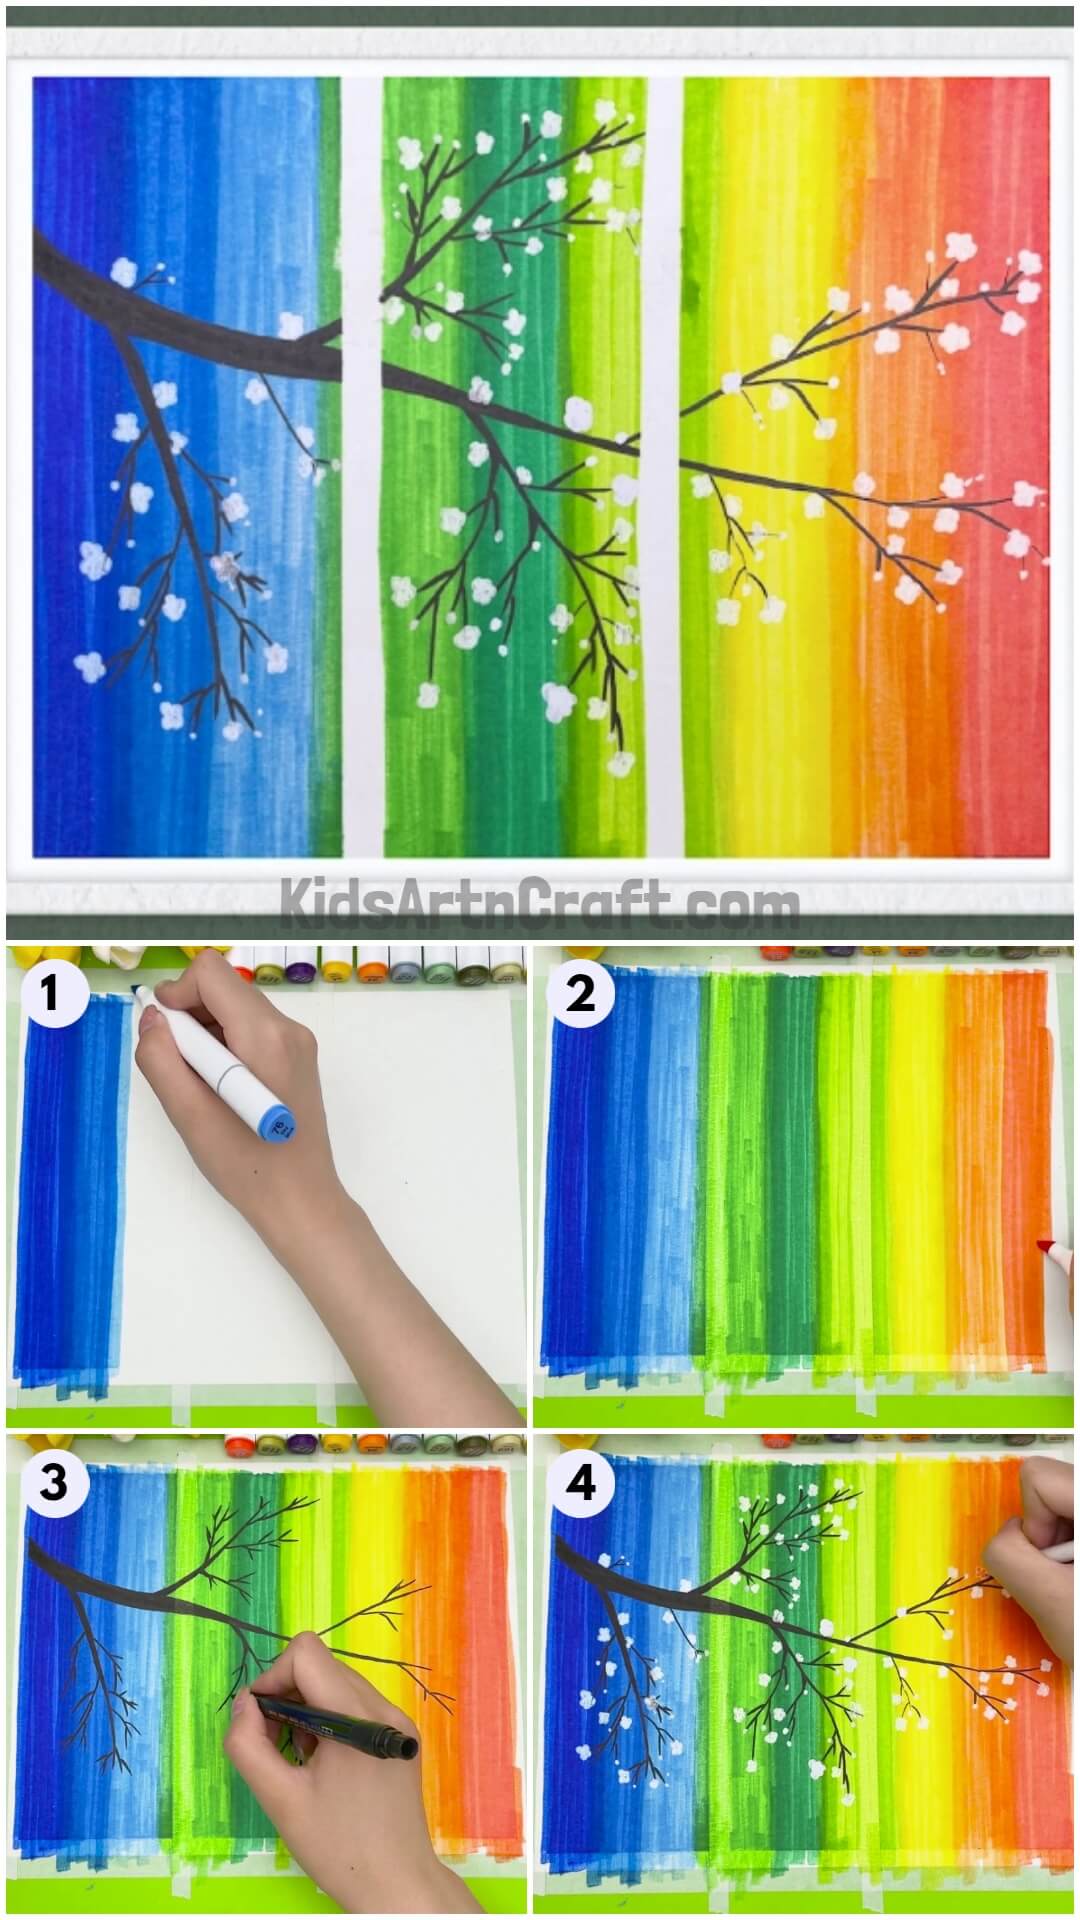
Starting from the darkest shade of blue, get to the lightest that you have available. Sketch in vertical lines and try to keep them straight and prevent unintentional overlapping. If you do not have a dark shade of any color, you can always overlap the light shade, and sketch it in layers until you get the shade of your choice.
Step 3: Collecting The Sketch Pens Of All The Shades Of Green That You Have
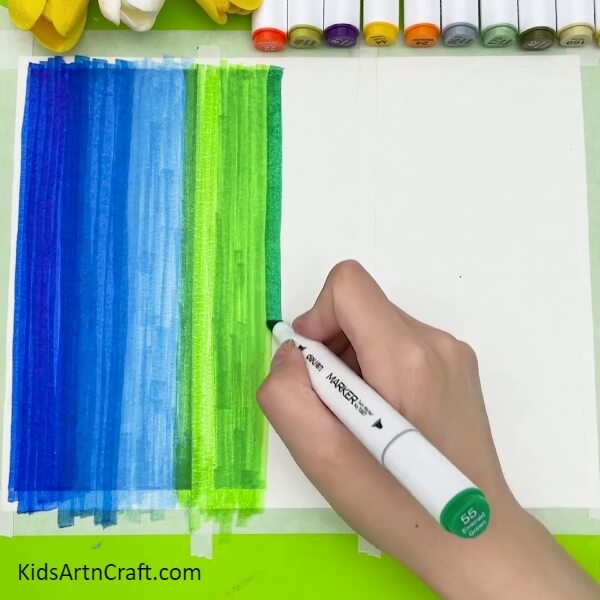
After blue, grab the shades of green, and this time, start from the medium shade, then to the darkest, followed by the lightest.
Step 4: Following The Similar Procedure With All The Shades Of Yellow, Orange And Red
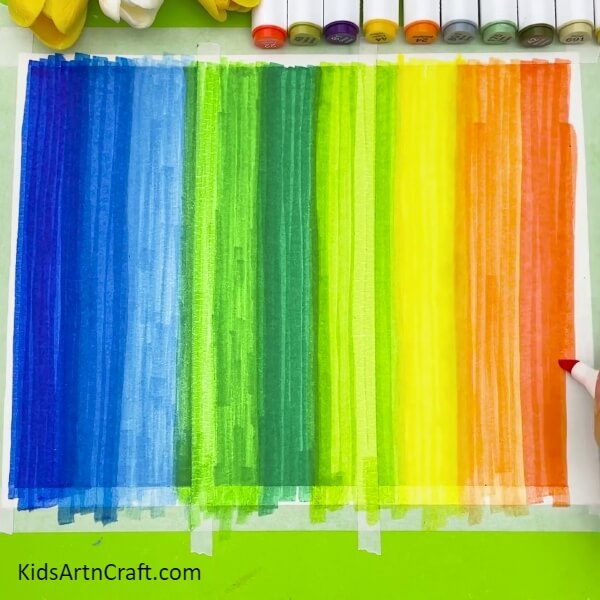
Similarly, take the shades of yellow, red and orange, and follow the same procedure. For assistance, use the reference image.
Step 5: Taking The Black Sketch Pen Or Marker And Draw The Branch
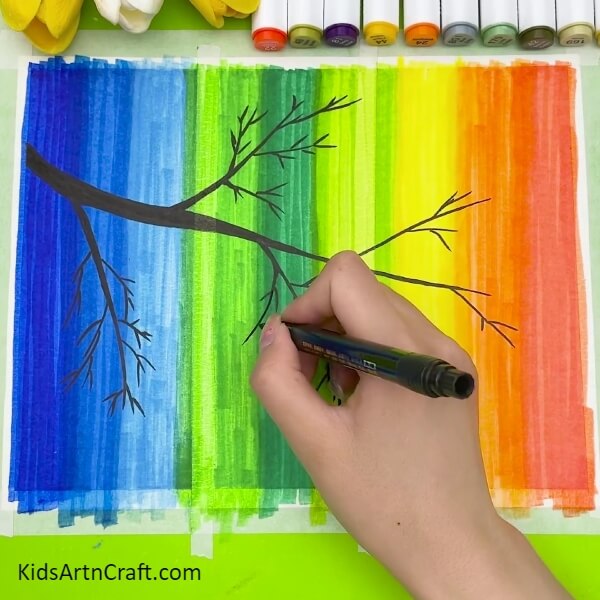
Take the black sketch pen and start drawing the branches as shown above.
Step 6: Using A White Pen, Make The Flowers
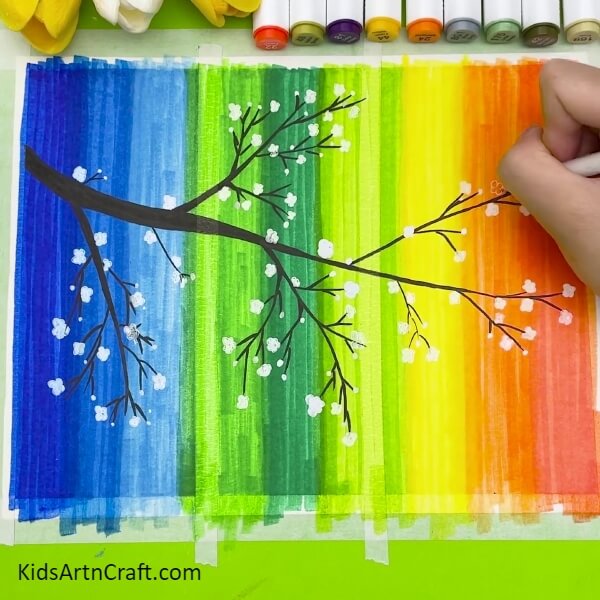
Grab the white pen and make flowers upon the branches.
Step 7: Carefully Remove The Tape From The Sheet
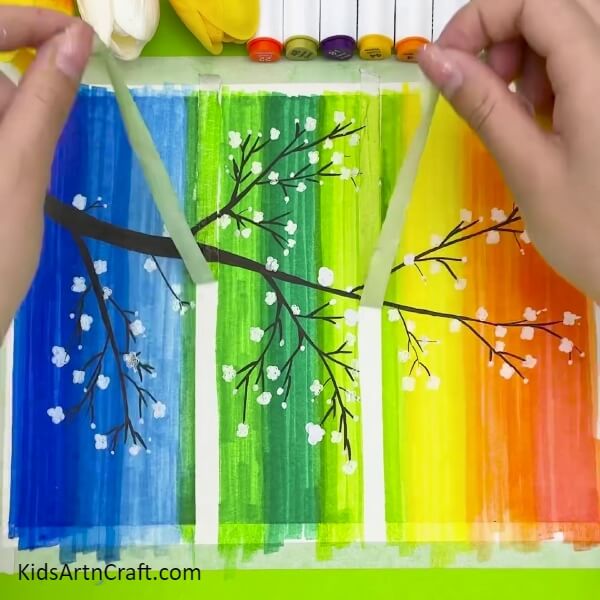
For this final step, remove the tape carefully and slowly so that you do not scrape the paper along with it.
This Is How It Looks In The End
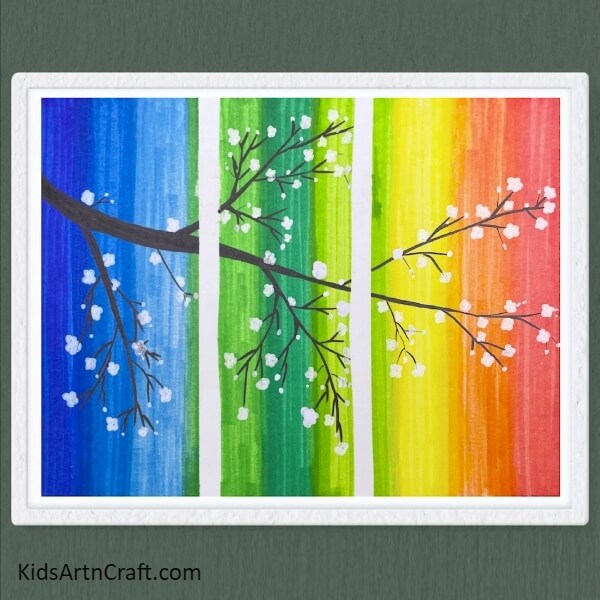
Isn’t the end result so pleasant to the eyes? We hope this gave you enough knowledge about different shades of a single color and how different colors blend in to complement each other. If you are done here, here is a follow-up idea – try doing this using posters or watercolors and observe the result you get. You will notice that as you change the medium of coloring, the way the artwork will look will totally change even when you used all the same shades. Different kinds of colors are used to portray different effects. So, you can try that. If not, go to the website, you will find plenty of other ideas based on art and craft, with tutorials and articles. Check them out now.
Also, mention your experiences, ideas, suggestions, and opinions in the comment section. We hope you enjoyed this. Thank you. Have a good day.
Follow us on Youtube for art and craft tutorials and much more.
More Articles from Kids Art & Craft
- Beautiful Way To Make Tree & Bird Paste Painting With Peanut Sells
- Acrylic Painting Make Easy Video Tutorial for Kids
- Colorful Lion Artwork Craft Tutorial For Kids
- Bamboo Painting Innovative Art For Beginners
- DIY Dandelion Flower Creative Painting Idea For Kids