DIY and Crafts
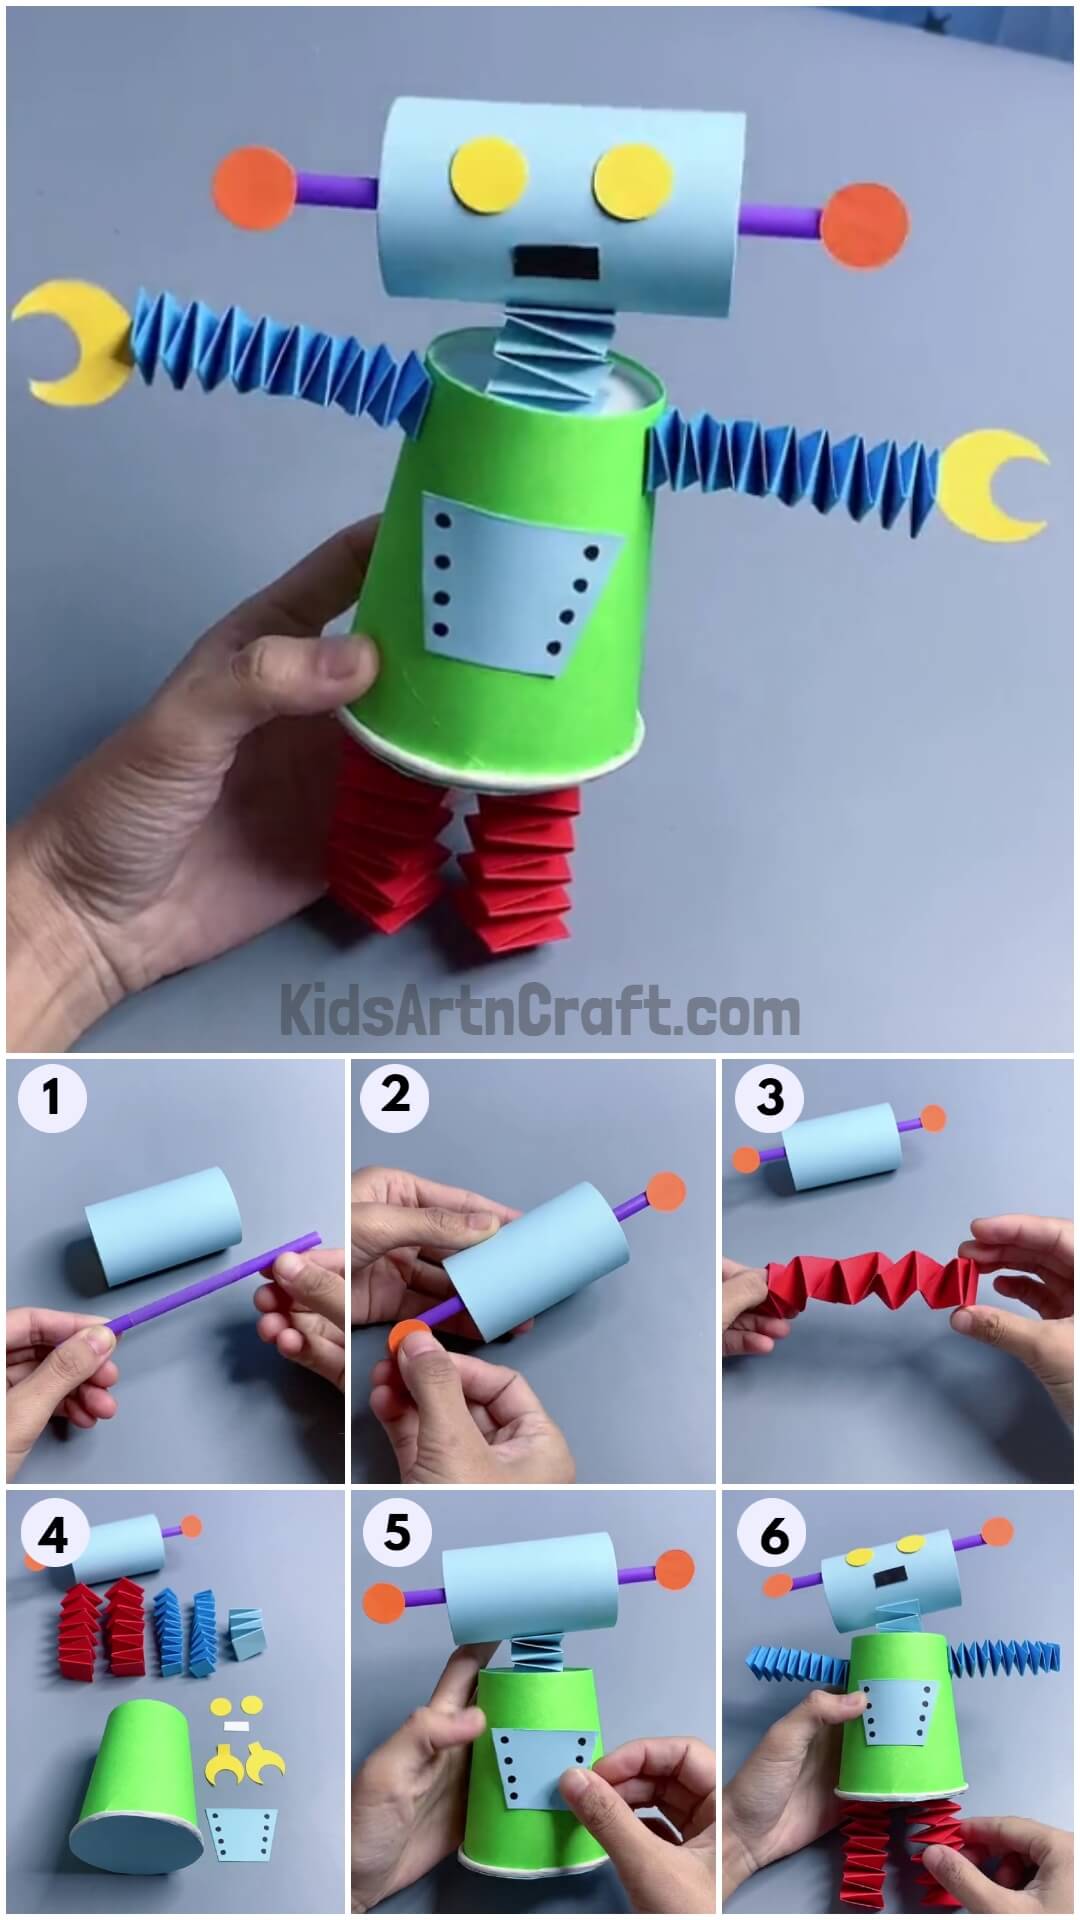
Cool Robot Craft Using Paper Cup & Toilet Paper Roll Step-by-step Tutorial

Discover a terrific, uncomplicated robot craft you can make using a paper cup and a toilet paper roll! This craft is great for kids of any age and they will have a blast with it!
The following activity is a fun learning activity for the students which can help in nurturing the artistic knowledge of the students and also is a great source of a leisure time activity. This step-by-step tutorial will show you how to create a cool paper cup robot craft using a paper cup and a toilet paper roll. This craft is simple enough for even the youngest of kids to make, and it’s a great way to get creative with materials you already have around the house. So let’s get started!
DIY Cool Robot Craft Step-by-Step Instruction For Kids

Read More: DIY Easy Paper Chick Craft For Kids
Materials required
- 1 Toilet paper roll
- Craft papers of different colors
- Straw
- Scissors
- Glue
- Pencil
- 1 Disposable cup
Procedure
Step 1: Cutting The Roll
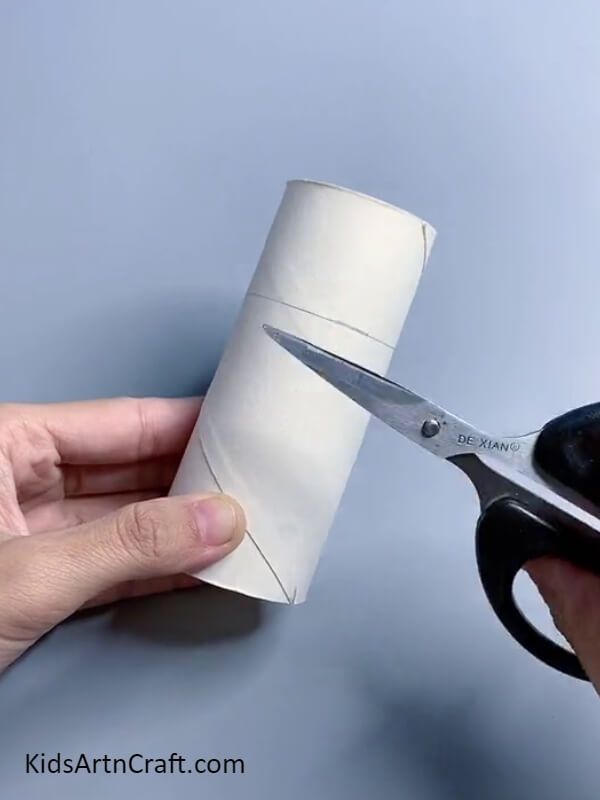

Take a toilet paper roll and scissors. Cut the roll to an adequate size.
Step 2: Covering The Roll
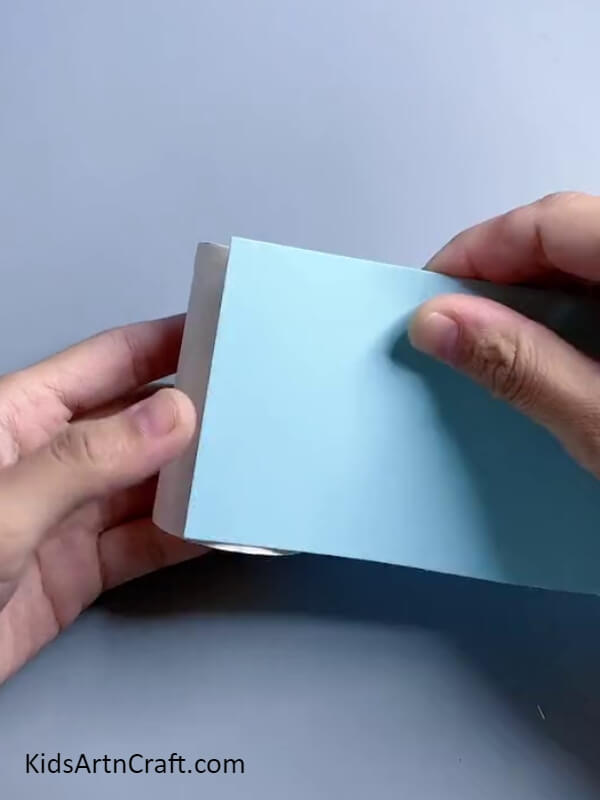
Take a blue craft paper and cover the roll with that paper.
Step 3: Taking A Plastic Straw
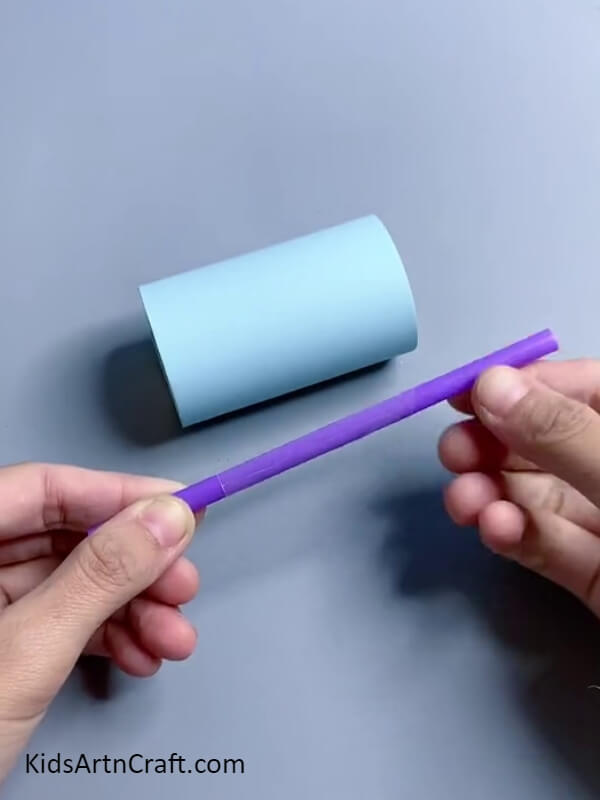
Let the craft paper dry and stick firmly to the roll and then take a straw as shown in the figure.
Step 4: Sticking The Straw
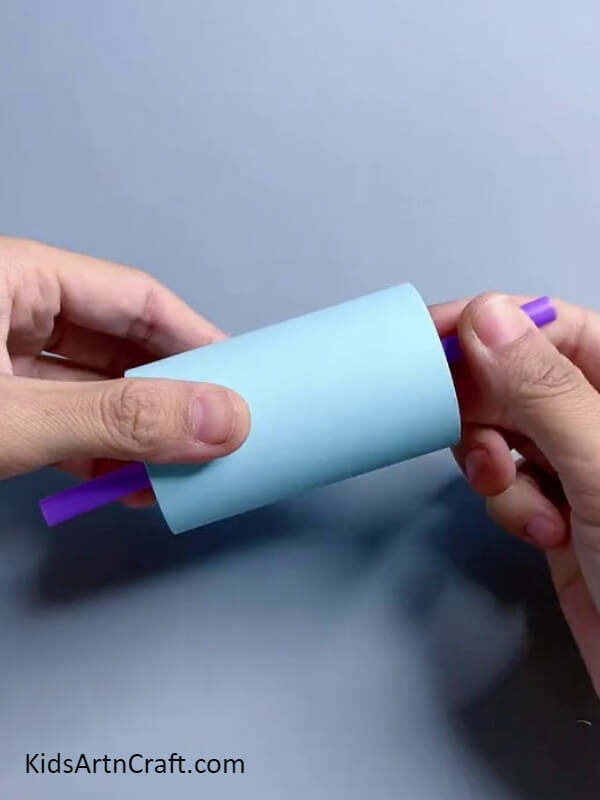
Stick the straw on the inner surface of the roll in a way that both ends of the straw are equally out from the sides of the roll.
Step 5: Making The Ear
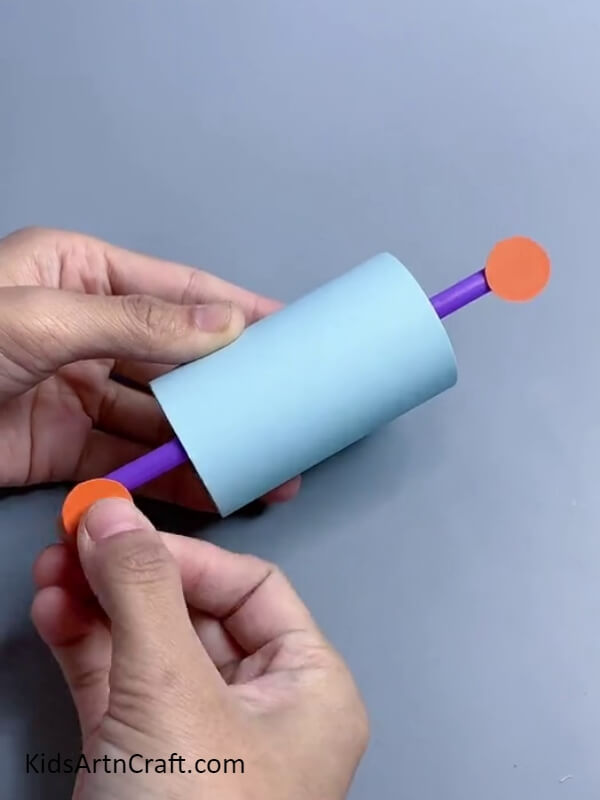
After the straw is stuck firmly, take an orange craft paper and cut it down into two small circles. After that, stick the circles on the ends of the straw. And the ears are ready.
Step 6: Cutting Two Paper Strips

Take a piece of red craft paper and cut it down into two strips. And then put glue onto one of them.
Step 7: Joining The Strips

After putting the glue, join the one end of both strips at a 90° angle.
Step 8: Folding The Strips In Crisscross Manner

Fold the strips in a crisscross manner at 90°. Make one similar red origami and two similar blue origami.
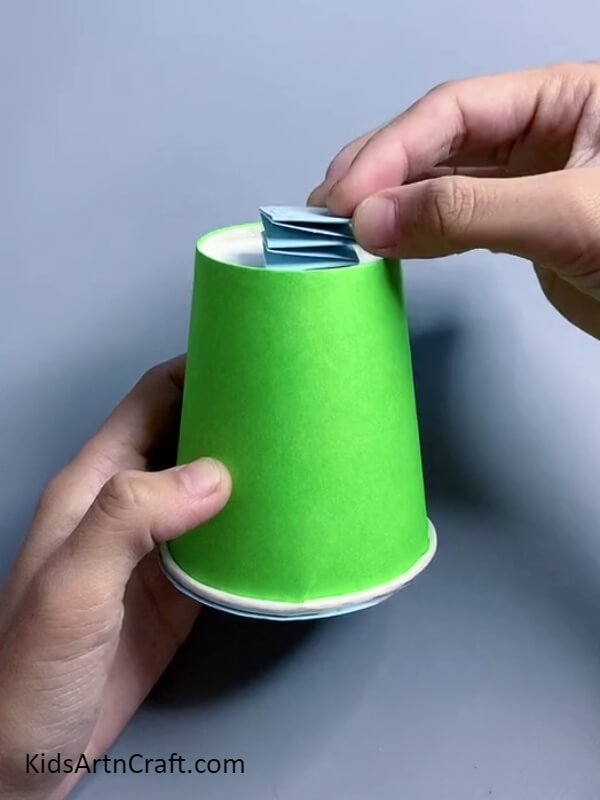
Step 9: Making The Main Body Using Disposable Cup
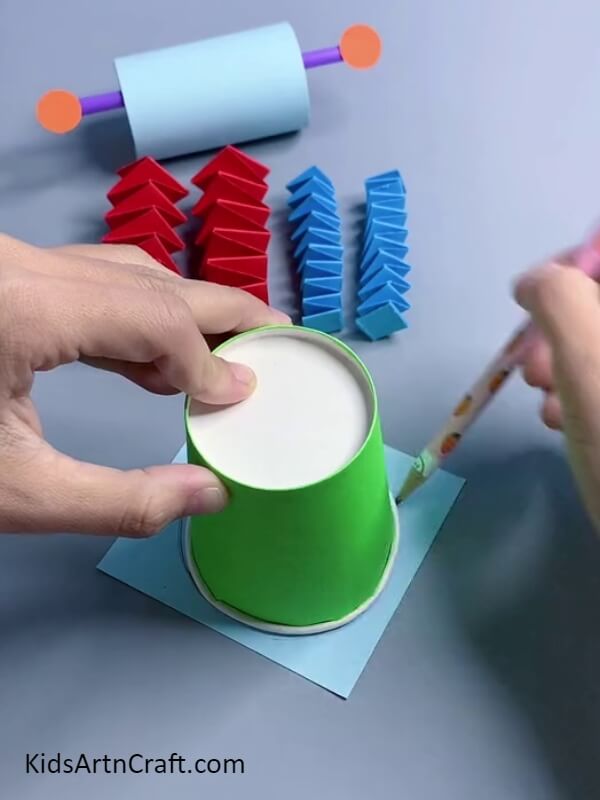
Take a disposable cup and a piece of blue craft paper. Place the cup on the paper and trace the circular opening of the cup. Cut out the traced circle and stick it on the open end of the cup.
Step 10: Cutting Out The Other Organs
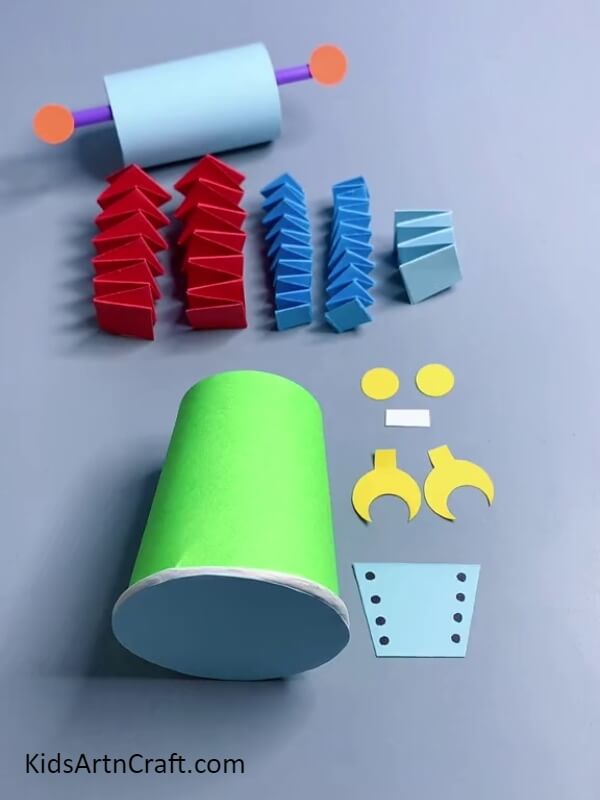
Take yellow craft paper, blue craft paper, and white craft paper. And cut down into the shapes as given in the figure above. Also, make one more crisscross origami from a light blue craft paper as given in the above figure.
Step 11: Setting The Neck
Place the light blue crisscross origami made in step 10 and place it on the cup and stick it firmly.
Step 12: Sticking The Face Over Neck
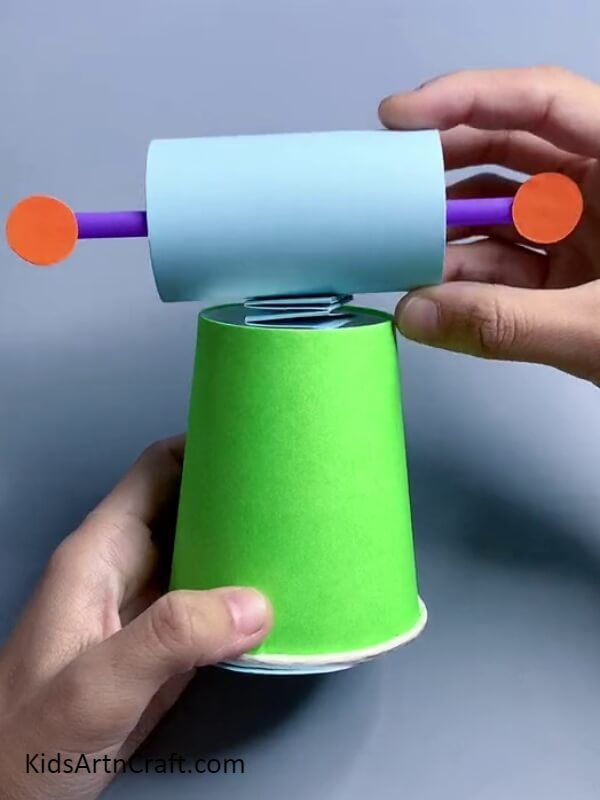
Place the cylindrical side of the roll on the crisscross origami stuck on the cup. And stick it firmly. Take help from the figure given above.
Step 13: Pasting The Other Organs
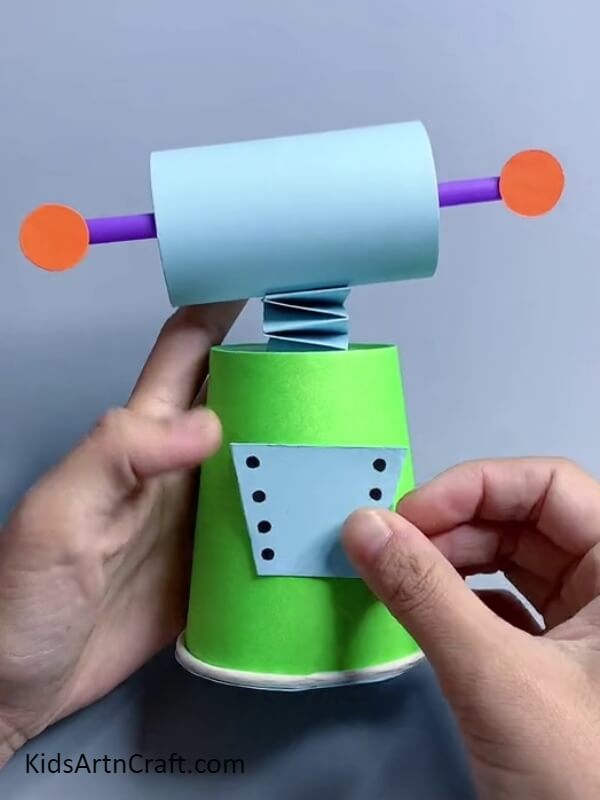
To separate a robot from a human, it’s necessary to show it like a machine. Hence, the above-shown craft is to be sucked on the cup as shown in the figure.
Step 14: Attaching The Legs And Arms
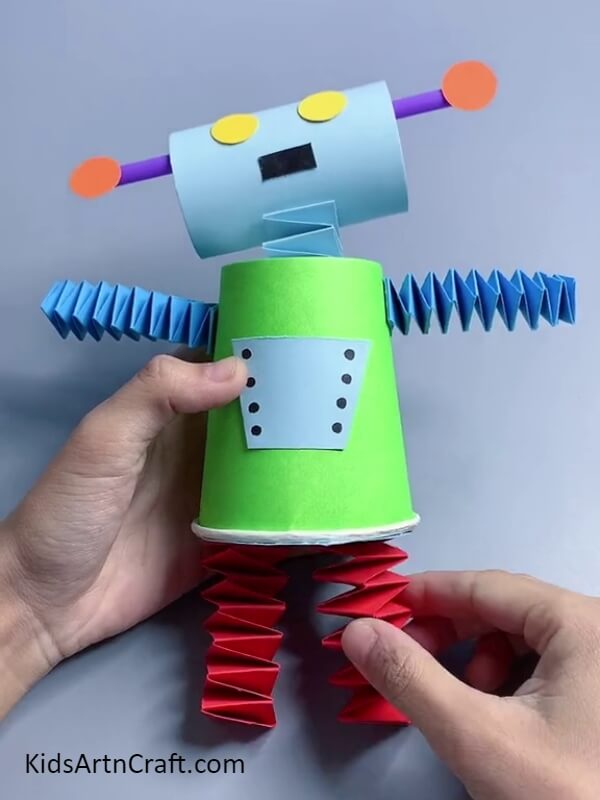
Now, take those red crisscross origami and paste them on the other end firmly in accordance with the figure shown above. Similarly, stick the blue crisscross origami on the cylindrical side of the cup. The arms and legs are done.
Hurray !! Your Cool Robot is Ready !!
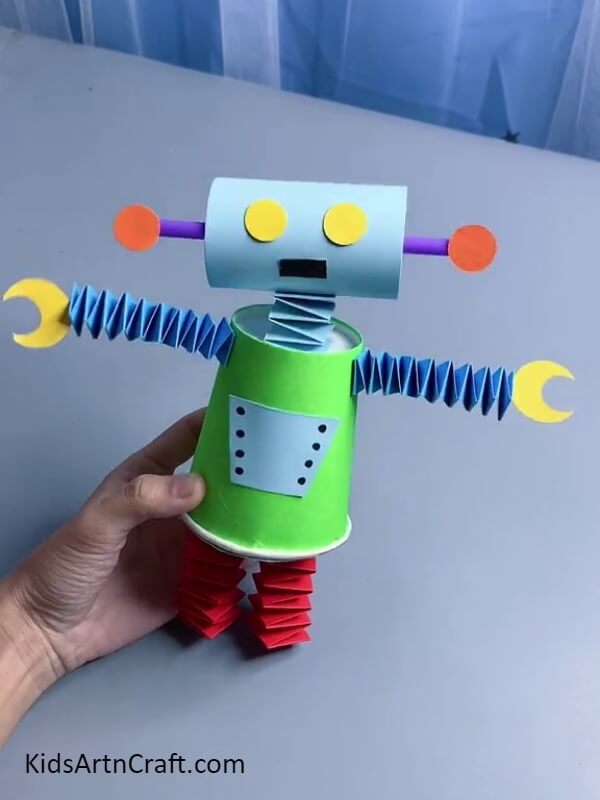
Now join the two yellow moon-shaped hands that were cut earlier on the arms attached.
This cool and creative robot craft is a great way to keep the kids entertained and can be done with minimal materials. With just a paper cup and toilet paper roll, you can create a fun robot craft in no time! This easy-to-follow tutorial will show you how to make a fun and creative robot craft using paper cup and toilet paper roll – perfect for at-home activities with the kids!
And your robot is ready!
Follow us on Youtube for art and craft tutorials and much more.
More Articles from Kids Art & Craft
- DIY Easy Paper Cup Octopus Craft For Kids
- How to Make Ladybug with Toilet Paper Roll
- Easy to Make Snowman by Bottle Craft Tutorial
- How to Make Bubble Wrap Corn Craft Easy Tutorial
- Easy Paper Robot Craft Step By Step Tutorial