Kids Activities
Snails Over Mushrooms Artwork Step by Step Tutorial For Kids

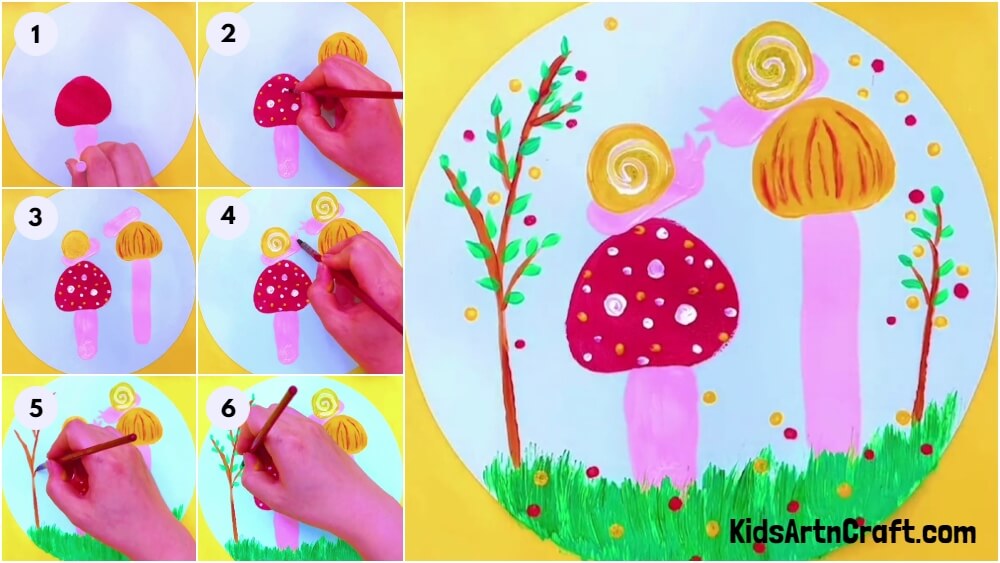
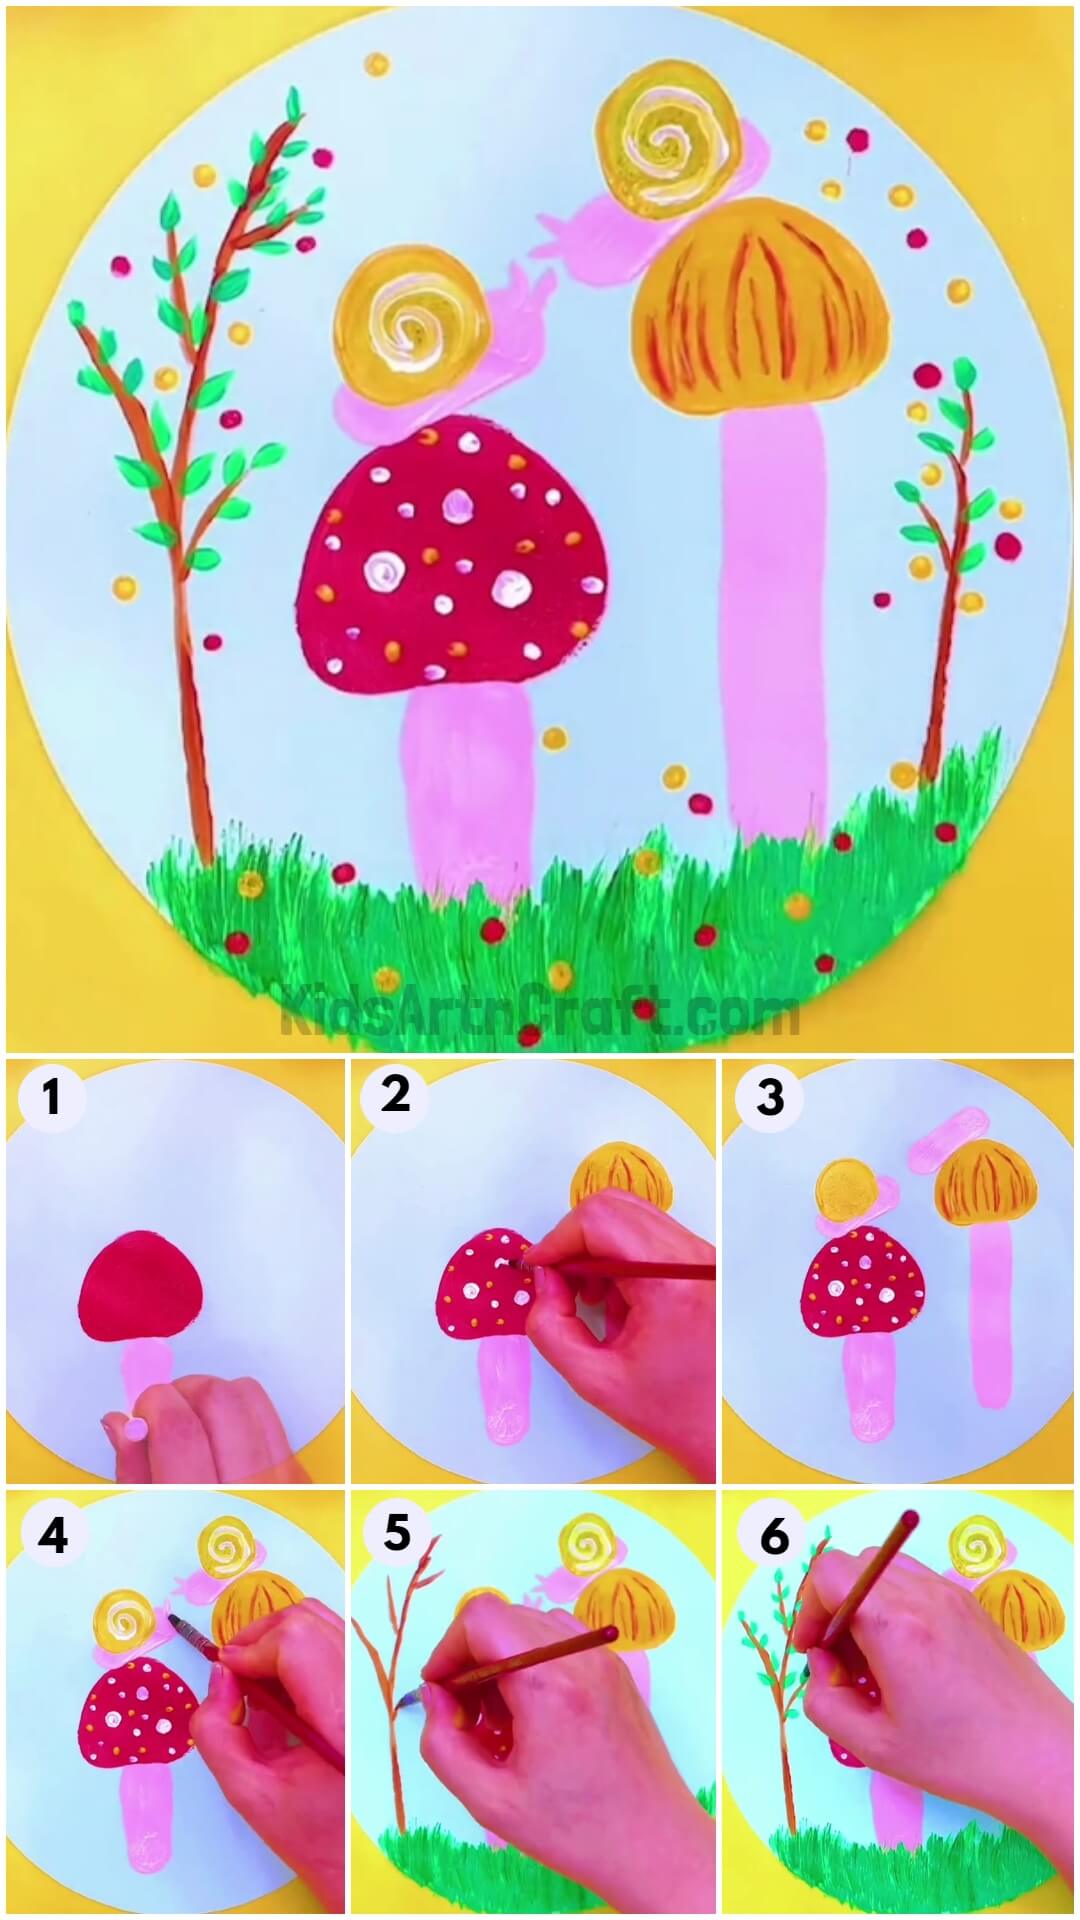
This tutorial is perfect for all ages! It will show you how to make a cute Snails Over Mushrooms Artwork quickly and easily. Follow the steps and you’ll have a beautiful piece of art in no time!
Greetings kiddos! Today this art and craft tutorial provided step-by-step narration on how to create a lovely snail pair over mushrooms only using a couple of things. To make this artwork all you need is some acrylic colors and an acrylic stick. Now you don’t have to worry if you have no acrylic stick, you can always use a cylindrical shape stick or even pens and pencils for the art. Without any delay let’s look for the materials needed in brief.
Simple Mushroom Artwork Tutorial For Kids
Read More: Learn to Draw a Flower Pot Easy Artwork Tutorial For Kids
Materials Required
- A white chart
- Acrylic paint colors
- An acrylic stick or any other cylindrical object for that matter can be used
- Paintbrush
- A toothbrush
- An earbud
Procedure
Step 1: Background Chart And Art
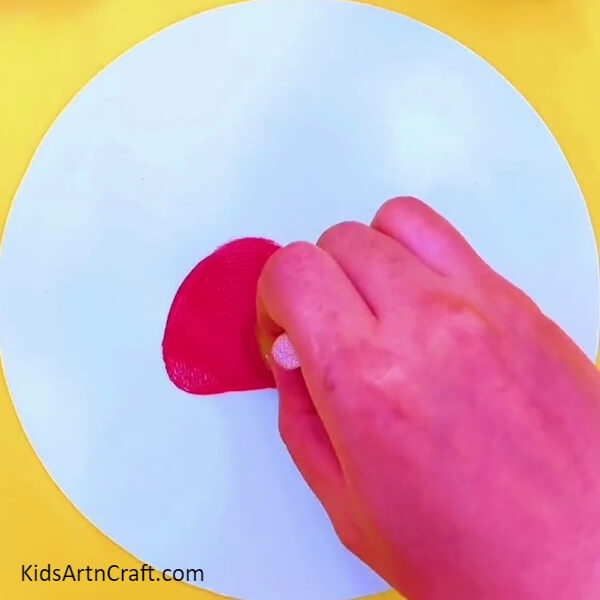
Let’s start with the background for our art piece first. So, take a white chart and cut out the shape and size of your choice. Once the background is set collect an acrylic stick and dip just the tip of the stick into the acrylic paint of your color choice. Here we have chosen red color for the first mushroom cap. Then drag the stick to make the shape of the cap as shown in the image.
Step 2: Painting The Stem Of The Mushroom
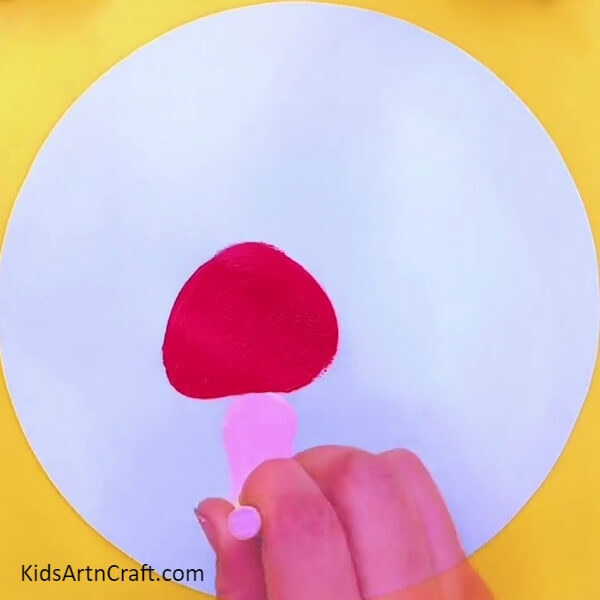
Moving to paint the next part of the mushroom once again dip the stick into the pink color paint and drag it from the bottom end of the mushroom cap to paint the stem. Repeat the same steps to paint another mushroom of different cap color with a longer stem and smaller cap to differentiate it from the other one.
Step 3: Adding Texture To The Mushrooms’ Caps
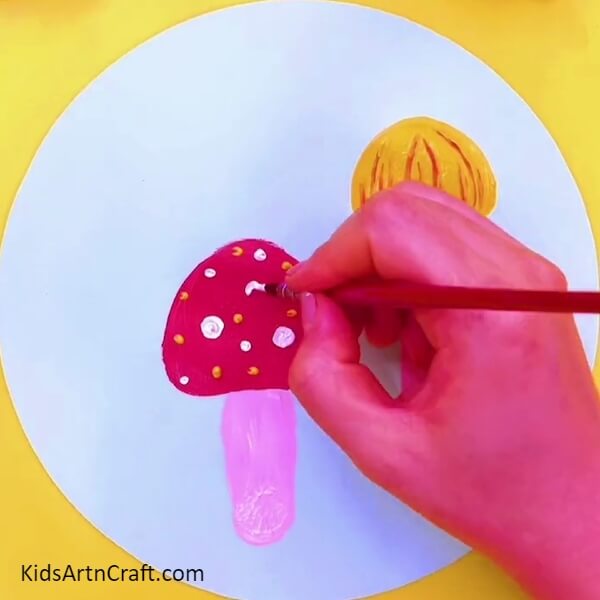
Next, add minute detailing like scales and stripes using a paintbrush. On one of the mushroom caps make different colored dots of various sizes to make it resemble the scales part. On the other mushroom cap add stripes in a contrasting color like displayed below.
Step 4: Making It Perfect
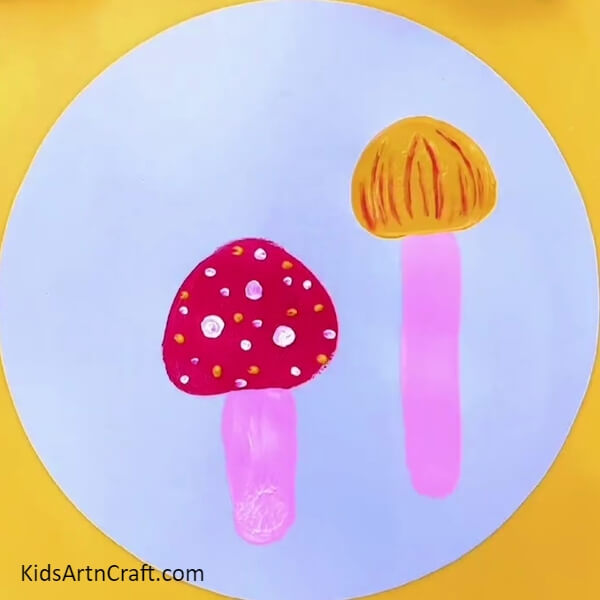
Make sure all the paintings and detailing are done neatly and perfectly without any bends and mistakes.
Step 5: Painting The Snails Over The Mushrooms
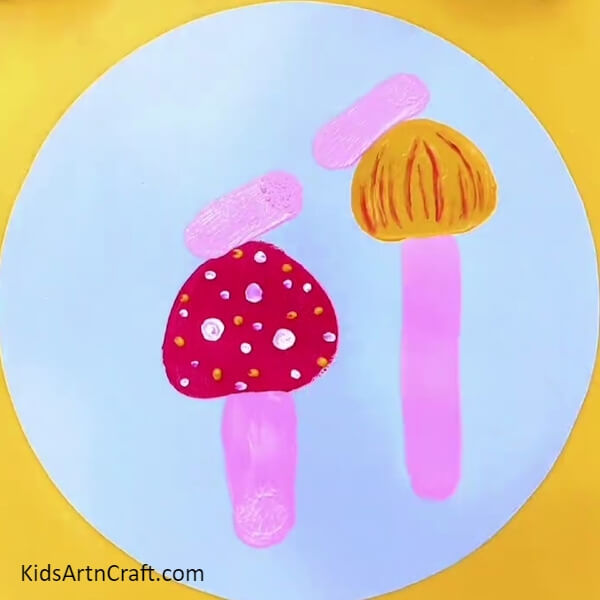
It’s time to paint our snail couple. As done before dip the stick’s tip in a paint of your color preference and drag a slightly inclined short line over the mushroom’s cap. Note that the drawn line should be touching the top of the caps.
Step 6: Painting The Snail’s Shell
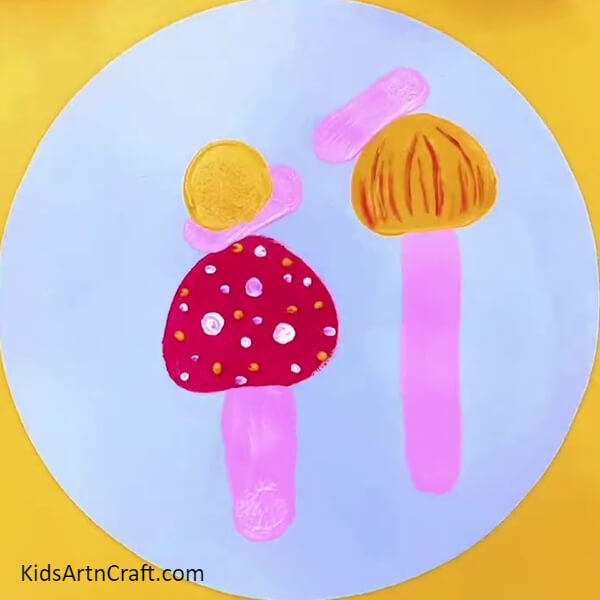
Further with the stick, paint or stamp the circular shells of the snails. Take a look at the image provided below and paint the shells likewise. Look at the shells and how they are painted in the middle of the snail’s body and how they are raised out from the body.
Step 7: Adding Fine Details
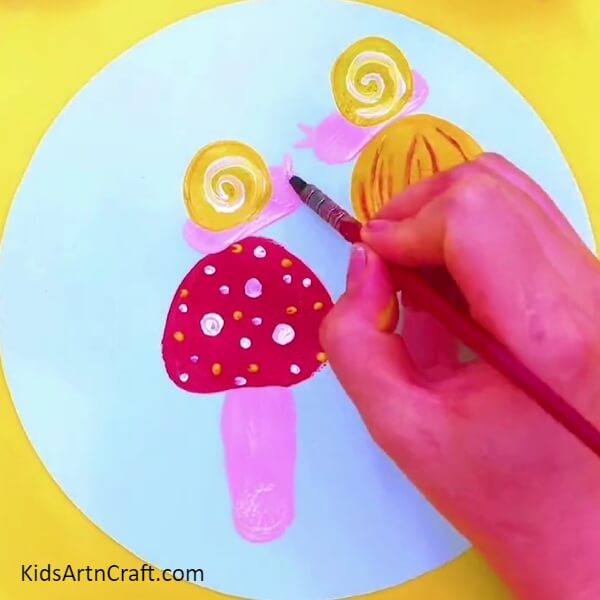
On the shells of the snails add swirls in both shells to make them appear as whorls. Then for the tentacle eyes use a brush and draw short lines protruding from the head of the snails.
Step 8: Background Sceneries
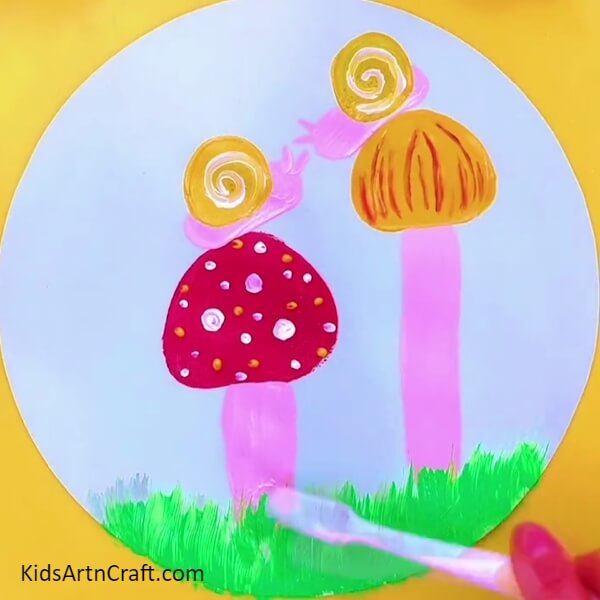
Now the two main parts of the artwork are done, let’s fill the remaining spaces with grass, plants, and flowers. To paint grassland take a toothbrush with pale green paint on the bristles and move it from the bottom to the top with short movements.
Step 9: Painting A Plant
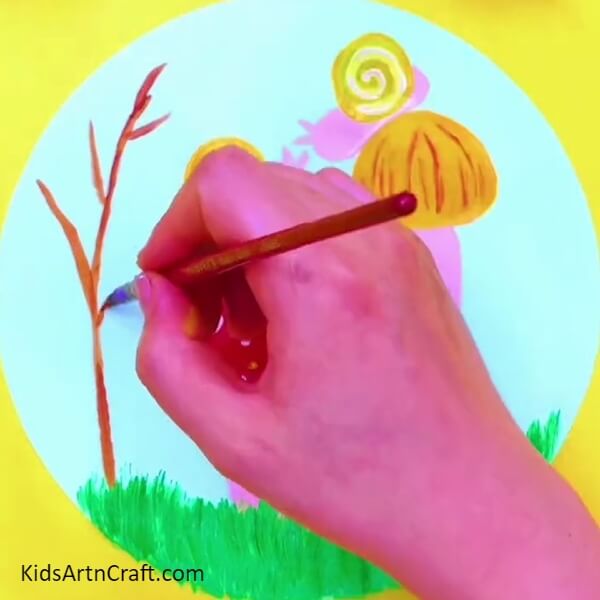
Fill in the blank space with a small plant. Using a brush with brown paint sketch the stem and branches as shown below.
Step 10: Adding Leaves To The Plant
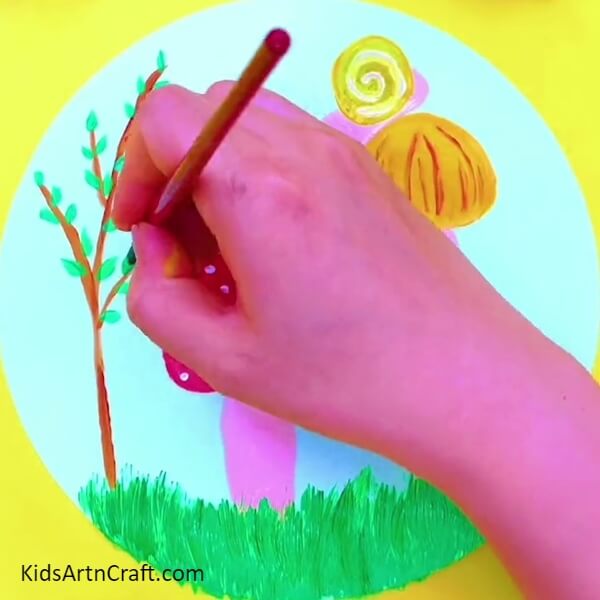
Next paint leaves and cover the branches in random.
Step 11: Filling The Space On The Other Side As Well
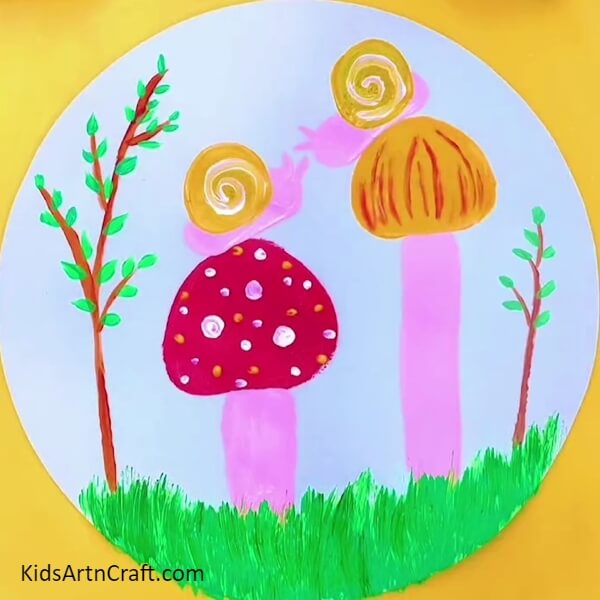
Repeat the same process on the other side and cover the gap with another plant or tree. Don’t forget to add leaves to the branches.
Step 12: Stamping The Flowers
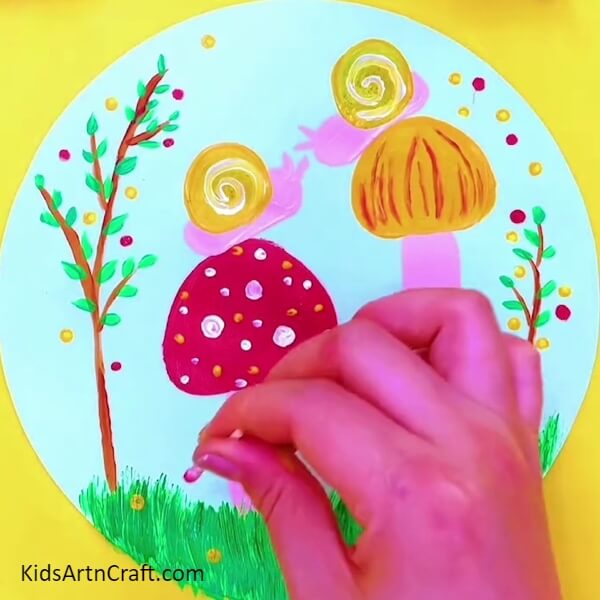
Finally, add some flowery stamps using an earbud. To make the flowers take an earbud and dip the cotton tip into the paint and stamp it in random places. Make many flowers colorful flowers by dipping the buds in different colors.
Finally Your Snail Over Mushroom Art Is Ready
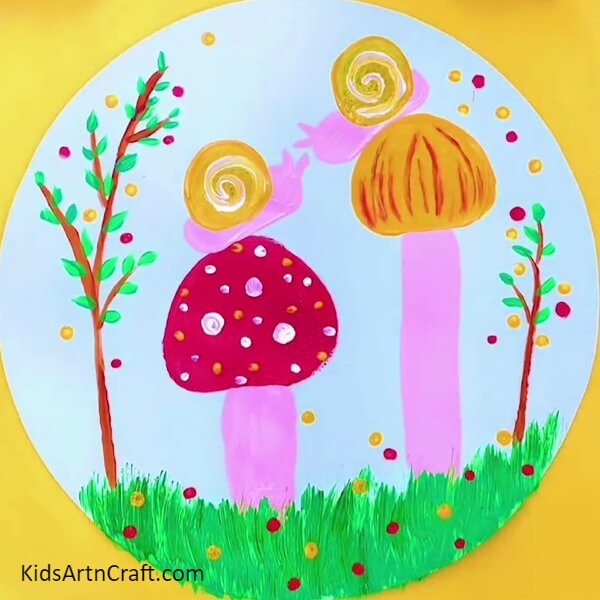
Tadda! Here’s the final result. Our Snail couple over the fluffy Mushrooms is ready. This can be hung on the walls as decor to display your artistic talents.
Thanks for visiting our arts and crafts content and tutorials. We strive to make recreation easy in terms of the art world by providing unique ideas in terms of the art world. Keep supporting us, and visit again!
Follow us on Youtube for art and craft tutorials and much more.
More Articles from Kids Art & Craft
- Sweet Lollipops Artwork Step by Step Tutorial For Kids
- DIY Foam Net Home Craft For Kids
- DIY Paper Fish Craft Easy Tutorial for kids
- DIY Surgical Mask pouch easy tutorial
- DIY Party Popper Easy Craft Tutorial for Kids


