Paper Crafts
Easy Wheat Craft Using Crepe Paper For Beginners

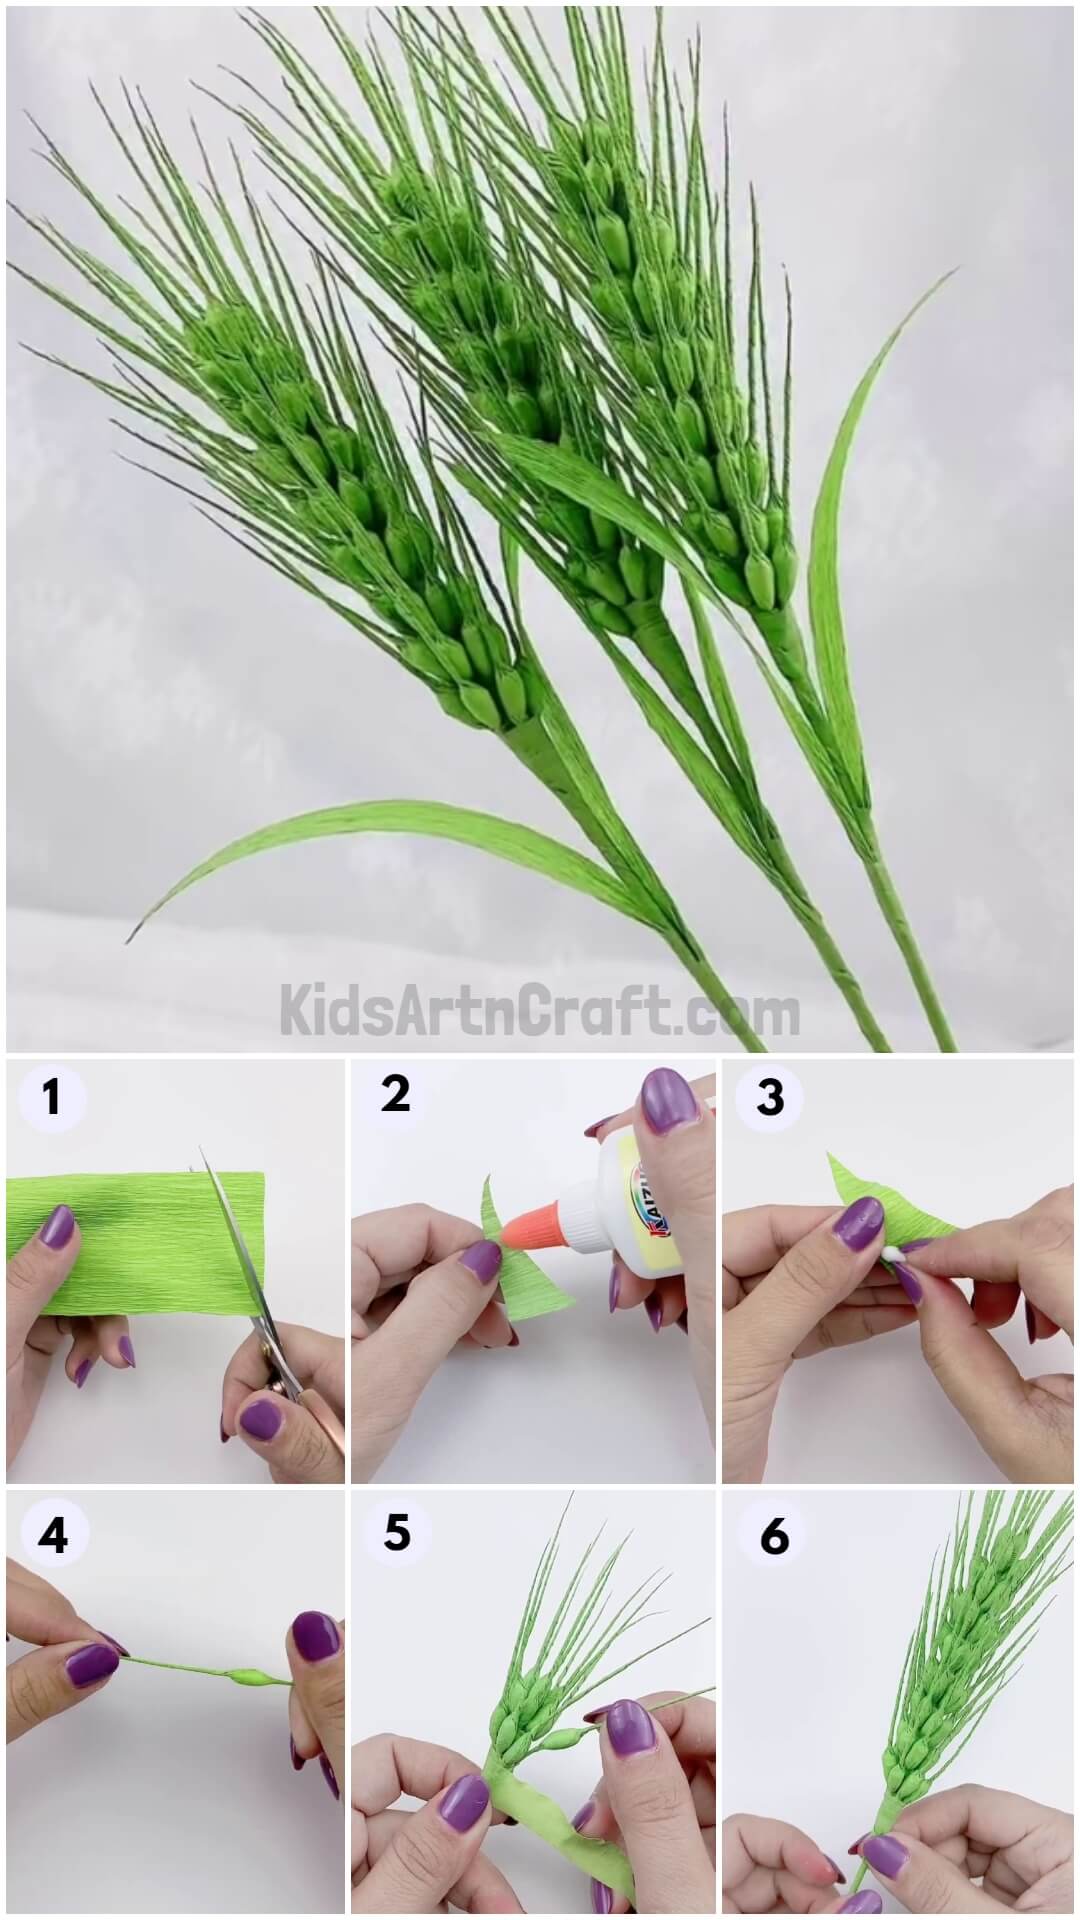
This tutorial is a step-by-step guide for making realistic common wheat using paper & cotton buds that will look directly plucked out from the fields!
Do you know? 95% of the wheat, which is produced worldwide is common wheat! This cereal is rich in nutrients too! Make these realistic common wheat that looks like directly plucked out from the fields! This step-by-step tutorial will guide you to each and every step with clear instructions for making this common wheat! The materials required for this craft making are too very simple which you already have at home, which makes this craft budget-friendly! This craft is appropriate for younger kids in elementary school and craft can also be a classroom activity to teach the kids about wheat and its importance!
Simple Wheat Craft Using Crepe Paper

Read More: DIY Easy Paper Chick Craft For Kids
Materials Required
- Green-colored Crepe Paper
- Green Floral Tape
- Scissors
- Glue
- Cotton Earbuds
Procedure
Step 1: Making A Slanting Cut
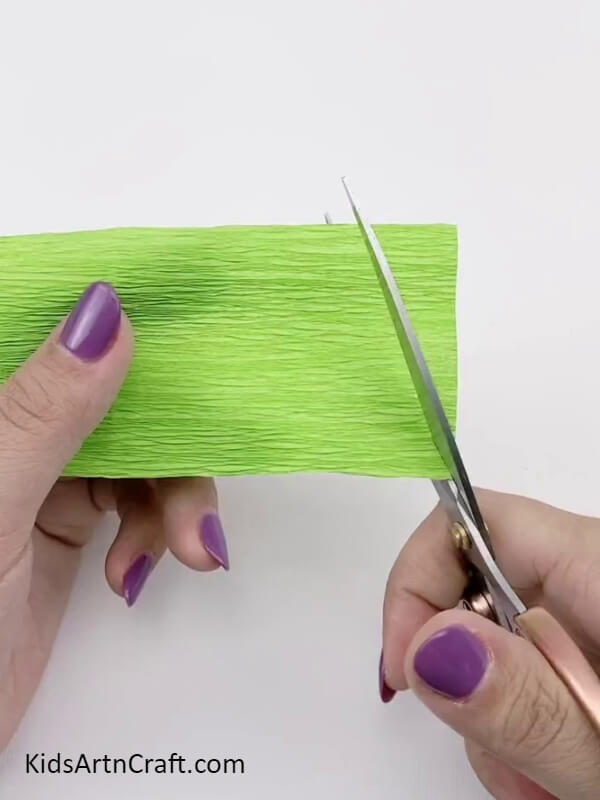

For beginning this craft, take a rectangular piece of green-colored crepe paper and scissors. Using the scissors, make a slanting cut along the shorter side of the rectangle.
Step 2: Making A Straight Cut
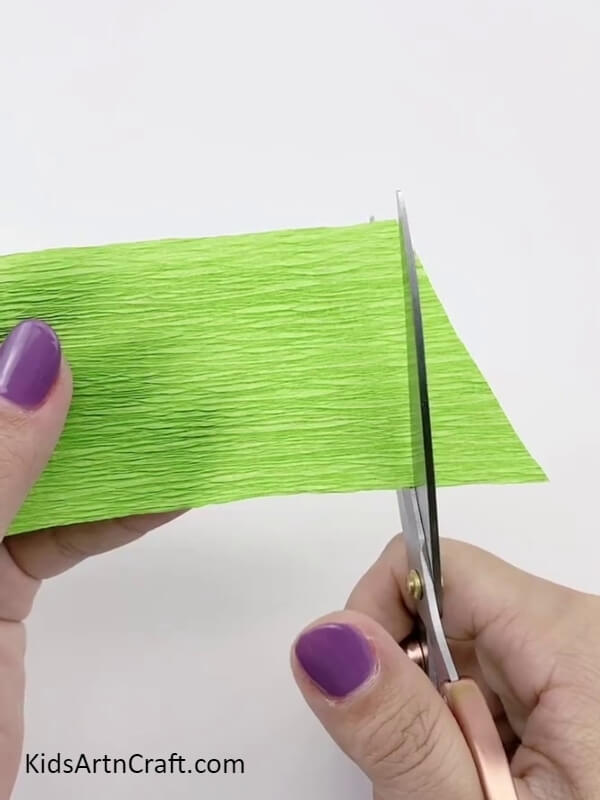
Now, make a straight cut to the end of the slanting cut to cut out a right-angled triangle shape.
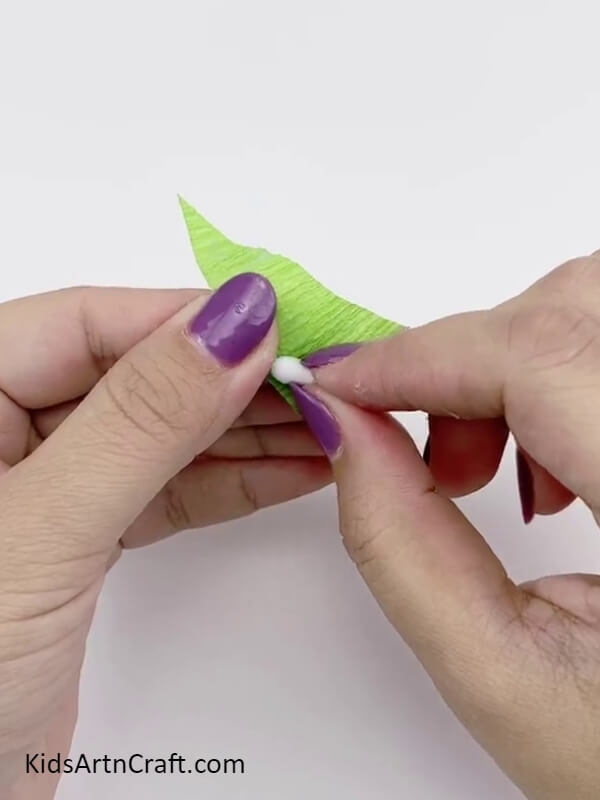
Step 3: Applying Glue To The Triangle

Apply Glue evenly to the whole triangle.
Step 4: Pasting A Cotton Bud
Cut out a cotton bud from the whole stick using scissors. Paste the cotton bud over the end of the right angle of the triangle.
Step 5: Rolling Over The Triangle
Now, from the side where the bud was pasted, start to roll over the triangle tightly.
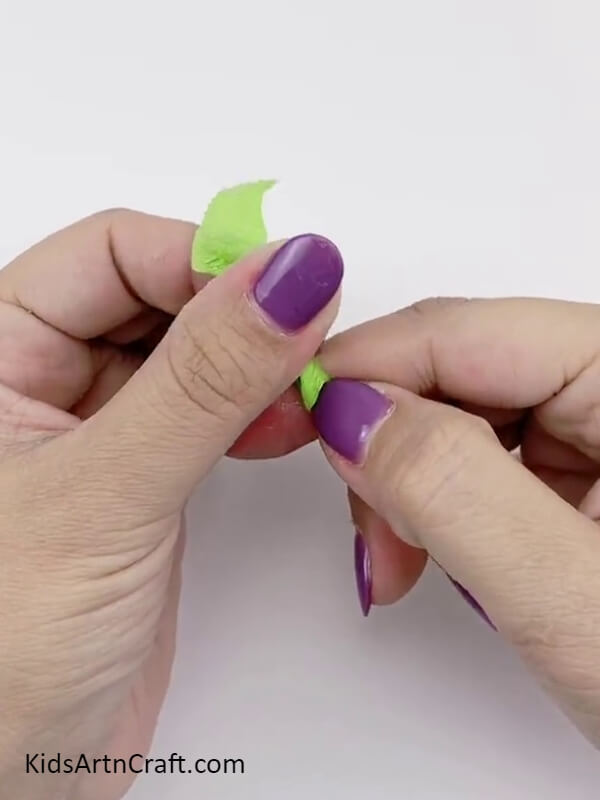
Step 6: Twisting The Ends Of The Roll
Tightly twist the ends of the roll to make them look like a needle from the ends. This makes a kernel of your whole common wheat.
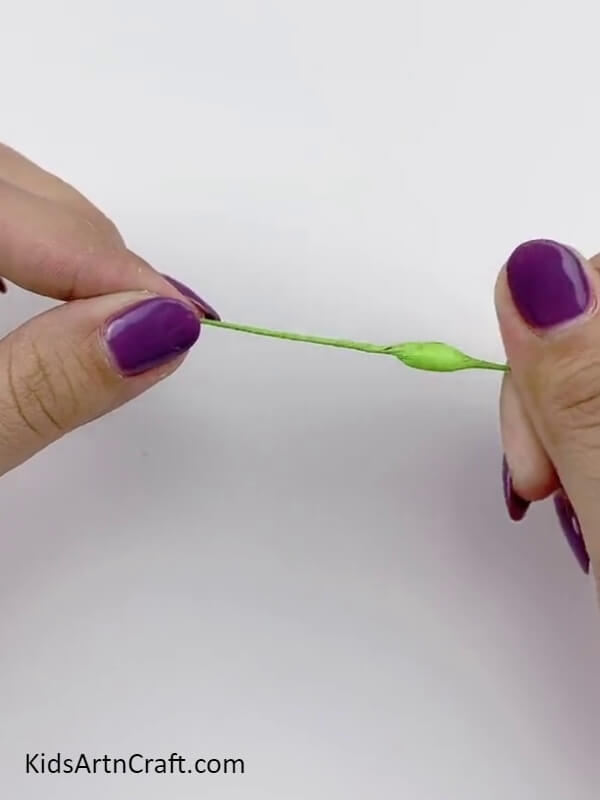
Step 7: Making More Kernels
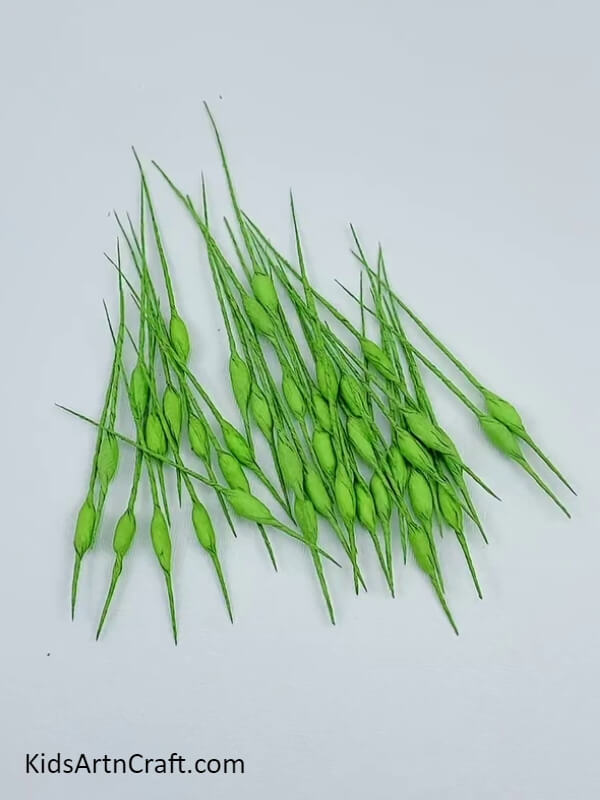
Following the same steps that are mentioned above, make more and more kernels.
Step 8: Rolling A Bunch Of Kernel In The Tape
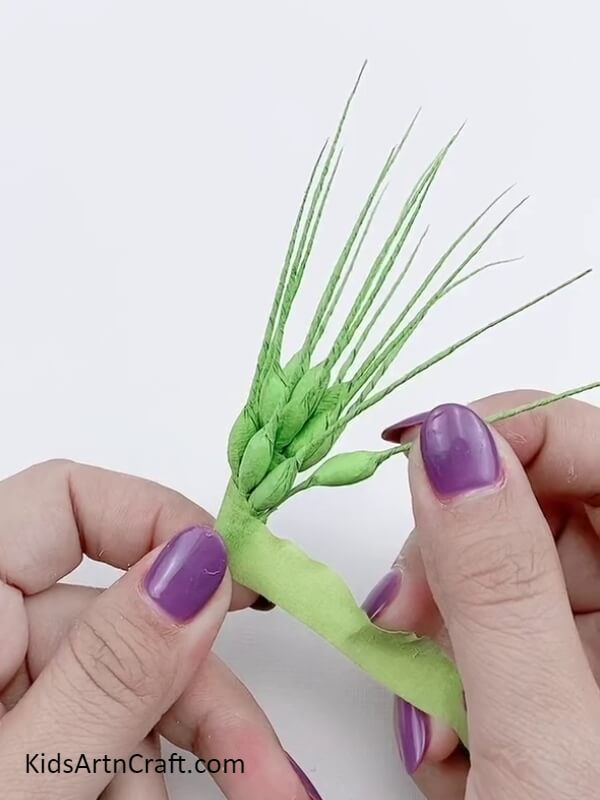
Now, take 4-5 kernels, hold them together, and from their short needles end roll them together with a floral tape.
Step 9: Placing More Kernels
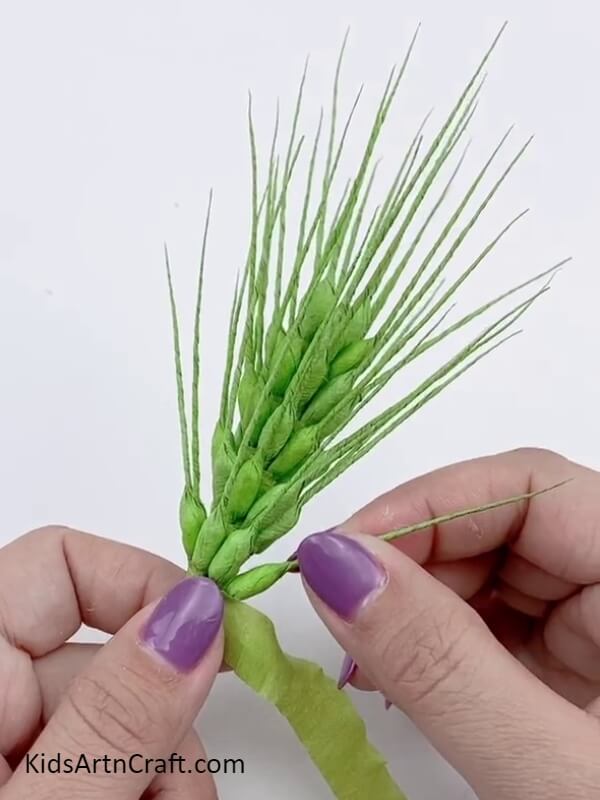
In the second round of the tape, one by one start placing kernels to make different layers of it and forming a whole common wheat.
Step 10: Completing Making The Common Wheat
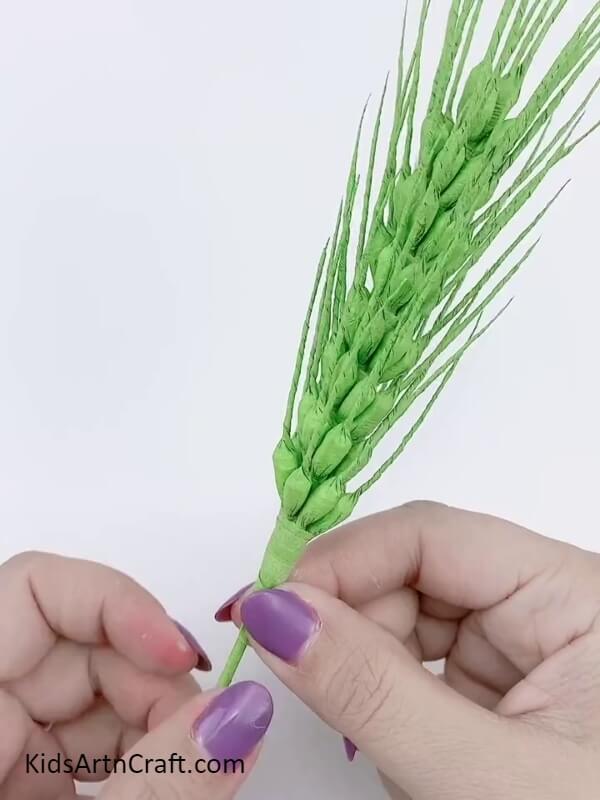
Continuously make rounds of the tape to reach a suitable length of the common wheat and as the end reaches, roll over the tape at one place over and over to secure the end. As the kernels are secured, start to roll over the tape again to form a stick beneath them. Tightly twists the end of it to make it stiff.
Step 11: Cutting Out A Crepe Paper Strip
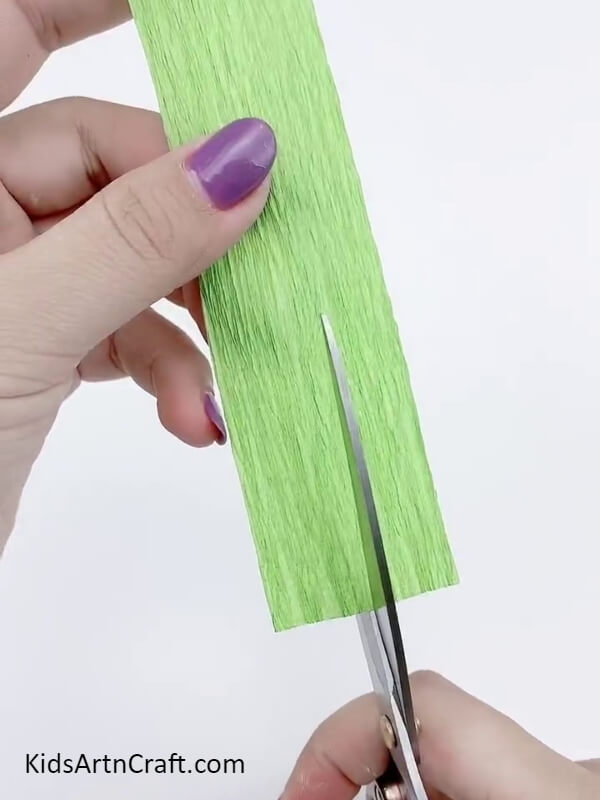
Using scissors, cut out a thick long green crepe paper strip.
Step 12: Shaping The Leaf
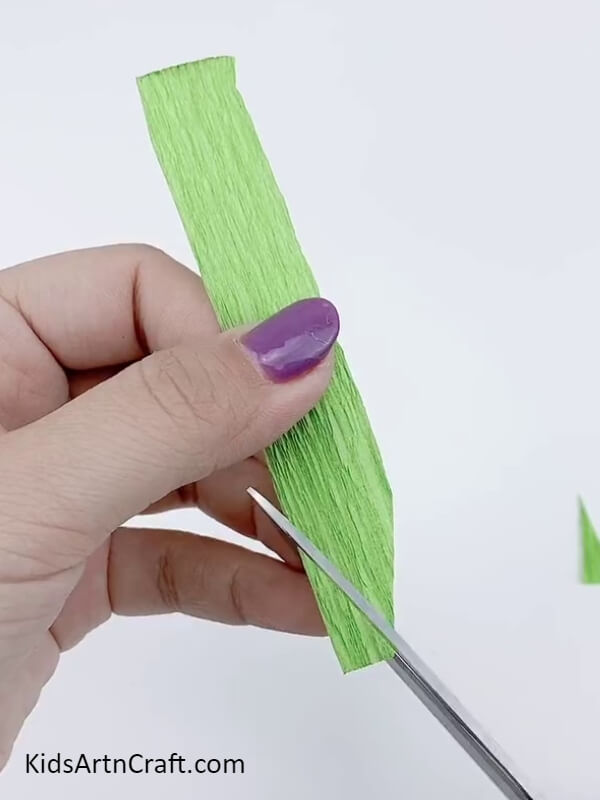
Make 2 slanting cuts at the end of the strip to shape the leaf.
Step 13: Attaching Leaves To The Wheat Stem
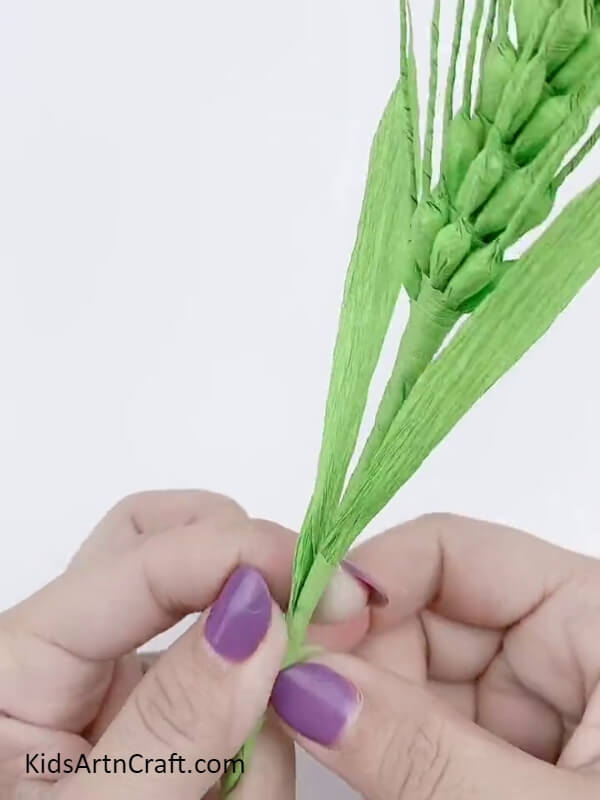
Attach the leaves on each side of the common wheat stem and roll over the floral tape at their ends to secure them with the stem.
Your Common Wheat Paper Craft Is Ready!
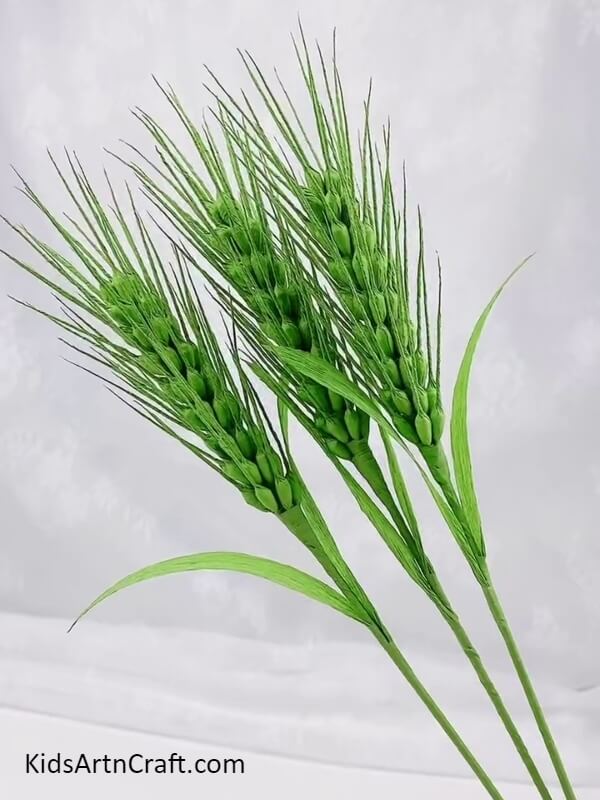
Make more and more common wheat and make a bunch of them.
Congratulations! You have successfully created your amazing paper common wheat craft!
Fool everyone with this artificial common wheat which looks exactly like the real one! Show off your crafting skills by flaunting this common wheat creation! They definitely look real and can be good decor for the kitchen! You can even make this common wheat from yellow-brown paper to make them look like normal wheat! Or, use this wheat as your school project over any topic like, farmers, cereals, etc.! Use your creativity while studying too!
Follow us on Youtube for art and craft tutorials and much more.
More Articles from Kids Art & Craft
- Heart-Shaped Paper Mouse Craft Step-by-Step Tutorial
- Origami Crab Making Easy Tutorial For Kids
- How to Make Paper Strips Boat Craft Tutorial For Kids
- How to Make Paper Lavender Flower Easy Tutorial
- How to Make a Paper Peacock Easy Craft