


Christmas
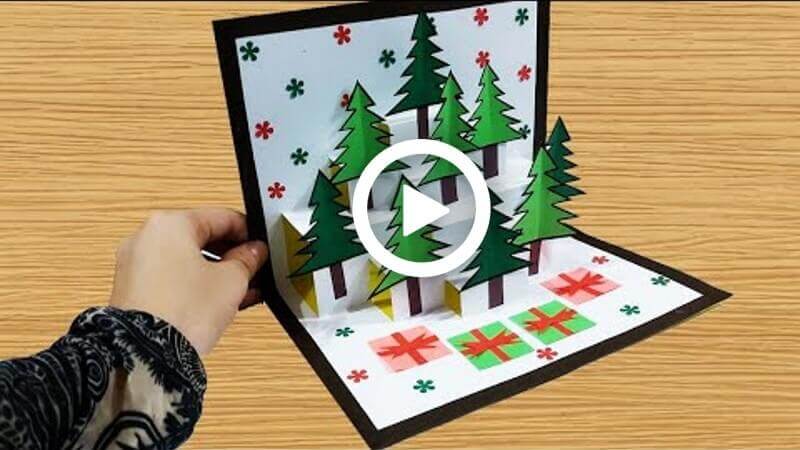
3D Christmas Pop Up Card

Christmas is almost knocking on the door! Christmas is the most favourite festival of many of you. It is celebrated in different countries all over the world. People like to decorate their house with Christmas trees, gifts, Santa’s look-alike toys and many more. There are many other decorations and people use for Christmas decorations, like lights, bulb lights, small lights, artificial snow and many more. You must have wanted to wish your friends, family and relatives with some beautiful greeting cards. Today, you’re going to learn how to make a 3D pop-up Christmas card that will make your loved ones happier. So, without any words, let’s get started!
Why 3D Christmas Pop-Up Cards Are Great for Kids
Making a 3D Christmas pop-up card is more than just a fun holiday craft activity. It also helps children improve their creativity, focus, and fine motor skills while learning basic paper engineering concepts. Folding, cutting, and assembling pop-up elements encourages problem-solving and develops hand-eye coordination engagingly. Paper crafts are also widely used in children’s educational activities because they are simple, affordable, and easy to work with.
3D Christmas cards are perfect for school projects, classroom activities, winter holiday crafts, and handmade gift ideas. Kids can personalize their cards with Christmas trees, snowflakes, Santa Claus, stars, bells, and festive decorations to create unique greeting cards for family and friends. Interactive pop-up designs also make handmade cards more exciting and memorable compared to regular flat cards.
How to make a 3D Christmas Pop-Up Greeting Card
Materials:
- A paper of 20*30 cm.m
- A paper that little bigger than 20*30 cm.
- Green shades paper 6*5c.m
- A big green coloured paper
- Small and big flower pictures.
- Colour pages.
- Round stones and a star
- A glue stick
- Scissors
- A ruler
- Black marker/ sketch pen
- Colour sketch pens.
Procedure:
- Take a paper of 20*30 cm.m, fold into half side-wise. Unfold it, then again fold by making a fold line. It should be a card base.
- Take a pencil and ruler, mark on the left side of the front part of the card base.
- Draw two lines of 4.5 cm horizontally on the side.
- Cut the drawn lines and fold the card horizontally without the cut parts. The cut parts will look like straight small stands.
- Fold the small rectangular part properly. Unfold it.
- Fold the paper now, containing the cut parts and some portion of the other side.
- Fold the part in and out to make a 3D part.
- Open the card and look for a rectangular shape that must be popping out.
- Fold the card like the first one and take a ruler, make two points by leaving space between the two straight lines.
- Draw two 2.5 c.m lines there with a pencil and ruler.
- Cut the lines and fold from the middle and the sides of the cut areas.
- Lift and fold the upper side of the cut areas.
- Fold this part inside the portion of that area as well. Unfold it.
- Follow the same for the other slide part of the lifted cut area.
- Open the card and look, and two small rectangular shapes must be popping out from over and under the big rectangular shape.
- Fold the card like the first one and take a ruler, make two points by leaving space between the two straight lines.
- Draw two 1.5 c.m lines there with a pencil and ruler.
- Cut the lines and fold from the middle and the sides of the cut areas.
- Lift and fold the upper side of the cut areas.
- Fold this part inside the portion of that area as well. Unfold it.
- Follow the same for the other slide part of the lifted cut area.
- Open the card and look for four small square shapes that must be popping out over the previous shapes.
- Look at the card, a 3D base and stairs must be lifted.
- Lift a side of the card and place it like that on your desk.
- Apply glue on the edge of the bottom part of the card, take a brown colour strip and attach it there.
- Do the same for the whole cards’ other sides as well.
- Take a green colour page of 6*5 cm.m, fold it into half from the left and right sides.
- Cut it from one corner to another like an arrow-like shape and take out two pieces.
- Cut the sides of one piece slightly by making zic-zak small straight lines all over with scissors.
- Cut the lines in the upper part like an arrow-like shape.
- Open the piece and a Christmas tree will be in front of your eyes.
- Take the tree and place it on a page, and border the sides of the tree with a black sketch pen.
- Take a brown page and cut out a bark for the Christmas tree.
- Apply glue to the bark and attach it under the tree.
- Follow this process and make seven more Christmas trees. Use different green colour shades for the tree to make your card look more attractive.
- Take the card and attach the trees in front of the 3D stairs according to the reference video.
- Take coloured papers and sketch pens, and make a small square gift box with them.
- Attach the gift boxes to the bottom part of the card with glue.
- Make small flower shapes as well with pages and sketch pens, as many as you want to attach to your card.
- Apply some glue and stick the flowers all over the empty parts of the card.
- Take a colour page a little bigger than this current card.
- Fold the page in half to make another card base.
- Place the current card base into this card base.
- Apply glue to both sides of the card and attach it to the tree card.
- Take a medium-sized green colour page, fold it in half from the left and right sides.
- Cut it from one corner to another like an arrow-like shape and take out two pieces.
- Cut the sides of one piece slightly by making zic-zak small straight lines all over with scissors.
- Cut the lines in the upper part like an arrow-like shape.
- Open the piece and a Christmas tree will be in front of your eyes.
- Take a brown page and cut out a bark for the Christmas tree.
- Apply glue to the bark and attach it under the tree.
- Apply glue on the back of the whole tree and stick it in front of the card.
- Take a star shape and attach it to the top of the tree with the glue stick.
- Take a ruler and a sketch pen, and make vertical straight lines on the topsides of the tree. Make the lines small and big accordingly.
- Take small flower or star shapes as you want and attach them under the lines with the glue stick.
- Take small stones and attach them to the Christmas tree to decorate it.
- Your beautiful 3D Christmas card will be ready!
Wow, it’s so beautiful, just look at how beautiful the inside of the card looks! You can easily make it with what’s available. People will love it! Without buying anything, you can use your own creativity to bring a smile to your loved one’s face. Your relatives, guests, and kids will love it. So, hurry up, grab the materials and make a dazzling pop-up Christmas greeting Card!
Benefits of Making 3D Christmas Pop-Up Cards
- Improves creativity and imagination
- Enhances fine motor skills and paper-folding techniques
- Encourages patience and concentration
- Introduces basic 3D paper engineering concepts
- Helps children express holiday emotions through art
- Creates personalized, handmade Christmas gifts
- Encourages screen-free learning activities during holidays
Tips for Making the Best Pop-Up Christmas Card
For the best results, use thick craft paper or cardstock so the pop-up structure stays strong and stands properly when the card opens. Children can also decorate their Christmas cards with glitter, stickers, markers, cotton snow, ribbons, or small paper ornaments to make the design more festive and colourful. Parents and teachers can guide younger kids during the cutting and folding steps for safe crafting.
Creative Ideas to Decorate Your Christmas Pop-Up Card
Here are some popular themes kids can try:
- 3D Christmas Tree Pop-Up Card
- Santa Claus Surprise Card
- Snowman Pop-Up Greeting Card
- Reindeer Christmas Card
- Winter Wonderland Pop-Up Scene
- Christmas Gift Box Card
- DIY Holiday Greeting Card for Friends and Teachers
FAQ’s 3D Christmas Pop-Up Card
Q1. What is a 3D Christmas Pop-Up Card?
Answer: A 3D Christmas Pop-Up Card is a festive paper card featuring intricate 3D artwork that pops up when opened.
Q2. What materials are used for 3D Christmas Pop-Up Cards?
Answer: The cards are typically made from high-quality paper with intricate laser-cut designs.
Q3. What are the size dimensions of a 3D Christmas Pop-Up Card?
Answer: The cards typically measure 4.5” x 6.25” when folded.
Q4. How much does a 3D Christmas Pop-Up Card cost?
Answer: It depends on the design and complexity of the card, but typically they cost between $7 and $15.
Q5. Are 3D Christmas Pop-Up Cards available in different designs?
Answer: Yes, there are a variety of designs available, ranging from traditional holiday images to modern, abstract designs.
Q6. Are 3D Christmas Pop-Up Cards customizable?
Answer: Yes, some cards are customizable, allowing you to personalize them with your own message or image.
Q7. Can 3D Christmas Pop-Up Cards be personalized?
Answer: Yes, some cards are customizable, allowing you to personalize them with your own message or image.
Q8. Are 3D Christmas Pop-Up Cards easy to assemble?
Answer: Yes, the cards come pre-assembled, requiring only a few easy steps to complete.
Q9. How should I store 3D Christmas Pop-Up Cards?
Answer: It is best to store them in a cool, dry place away from direct sunlight and moisture.
Q10. How should I display 3D Christmas Pop-Up Cards?
Answer: The cards can be displayed in a variety of ways, such as on a mantle, shelf, or table. They can also be hung on a wall or window.
Making a 3D Christmas pop-up card is a fun and creative holiday activity that children of all ages can enjoy. This easy paper craft not only helps kids improve their artistic and crafting skills but also allows them to create beautiful handmade Christmas greeting cards for family, friends, and teachers. With simple materials like paper, glue, scissors, and colours, kids can design unique festive cards filled with creativity and holiday cheer.
Where creativity meets learning! Explore easy crafts, school projects, and fun DIY ideas for kids every day. Join our Telegram community and follow us on YouTube & Facebook. today.
Read More:
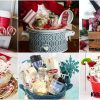
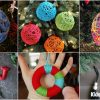
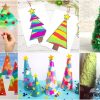
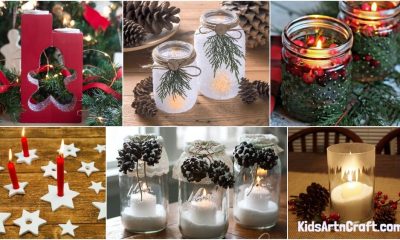
- Christmas Light Crafts And Activities For Kids
- Enjoy Christmas with Santa Claus Craft Ideas for Kids
- Christmas Craft Ideas to Make and Sell
- Playdough Recipes for Kids – Christmas Special
- Easy Popsicle Stick Crafts for Kids