


Recycled Crafts
How to Make Paper Cup Fish Craft

With a few simple supplies and a little bit of creativity, you can create beautiful paper Cup Fish crafts. Creating crafts is a fun and engaging activity that allows us to unleash our creativity.
In this article, you will learn the process of making a delightful paper cup fish and get some tips on how to make the most of your creations. Get ready to enjoy the creative process and dive into the colorful world of paper cup fish!
Recycled Paper Cup Fish Craft Idea For Kids

Read More: DIY Easy Paper Cup Octopus Craft For Kids
Material required
- Paper Cup
- Scissors
- Glue Or Adhesive
- Markers Or Crayons
Procedure
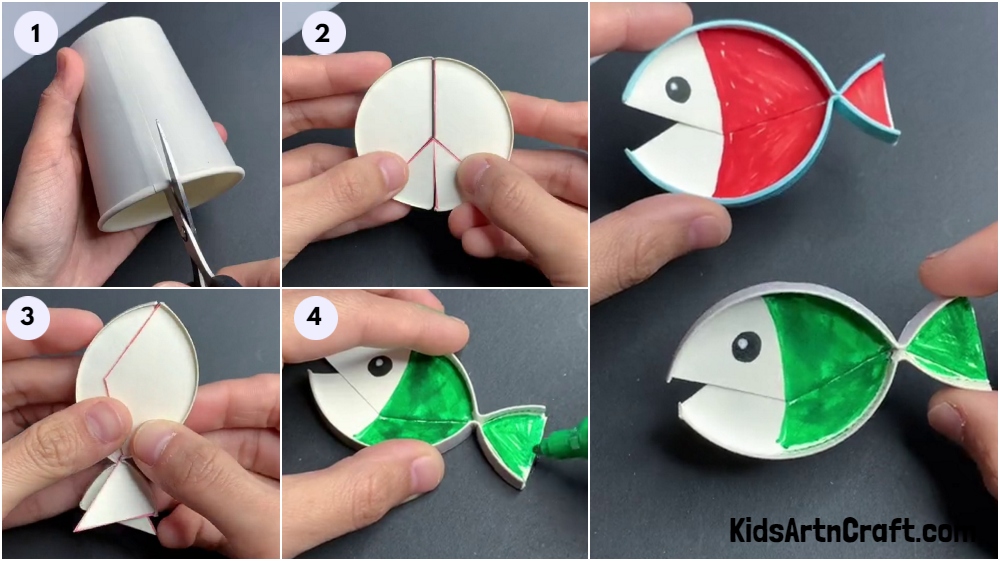
Step 1: Cutting the mouth of cup with scissor
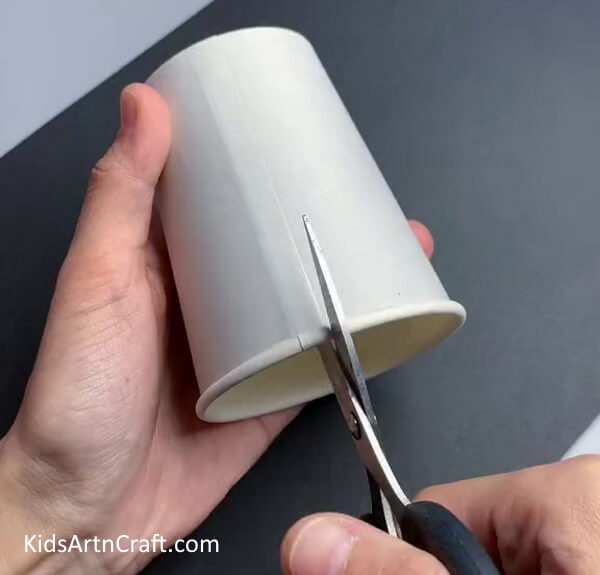
Start by preparing the paper cup. Ensure it is clean and dry before proceeding. Cut in the mouth of the cup with the help of scissors.
Step 2: Cutting the bottom part
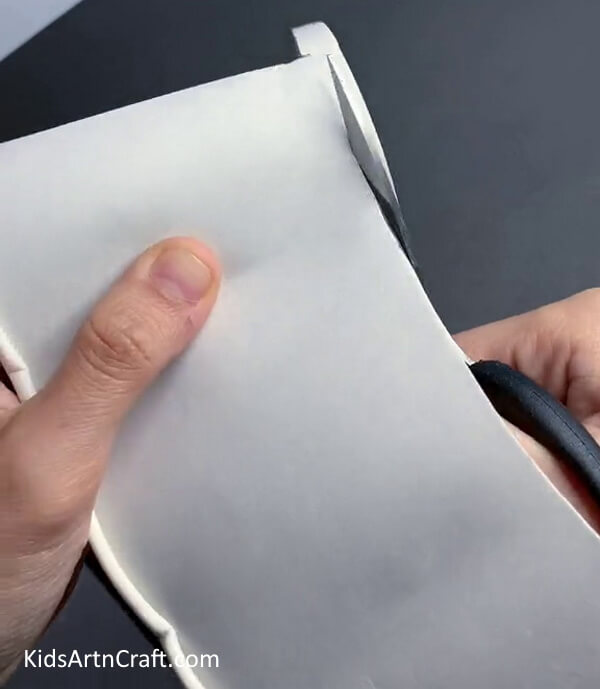
Cut out the bottom part with help of scissor.
Step 3: Drawing Lines on Bottom Part
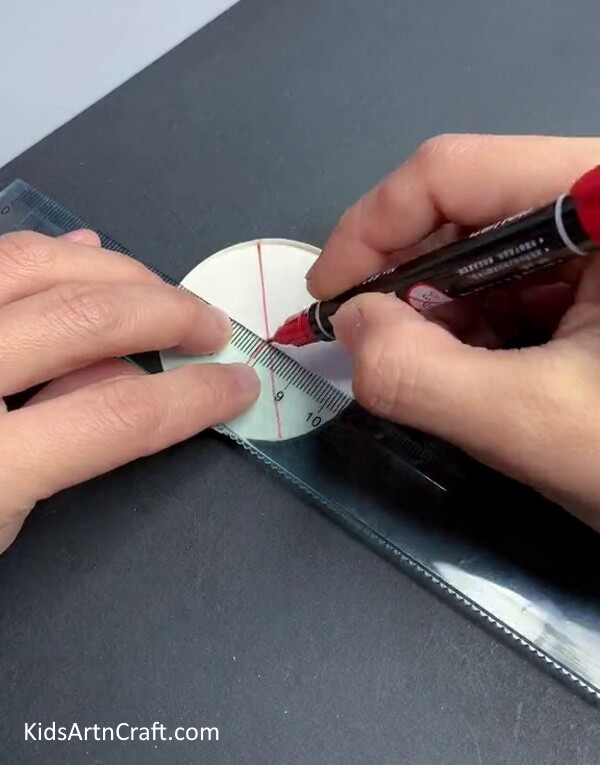
Take the bottom side of the cup which is round in size and draw a line as shown in the picture with the help of scale and marker.
Step 4: Cutting along the lines
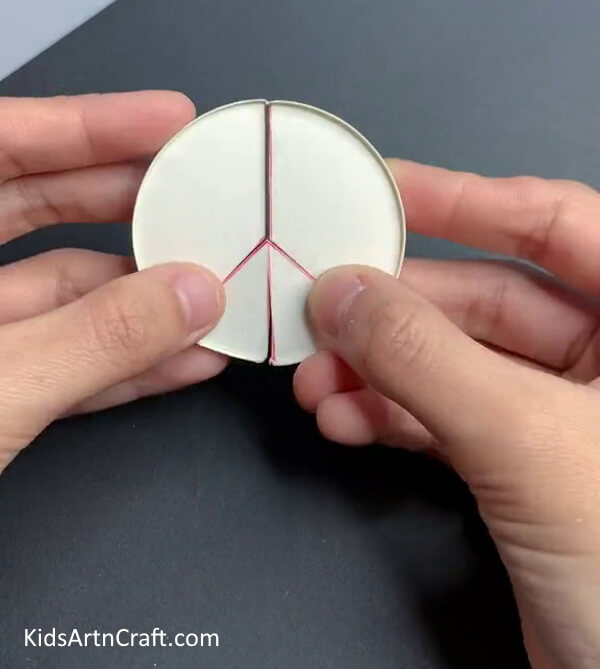
Cut the lines which are already drawn in the bottom of the cup with the help of scissors.
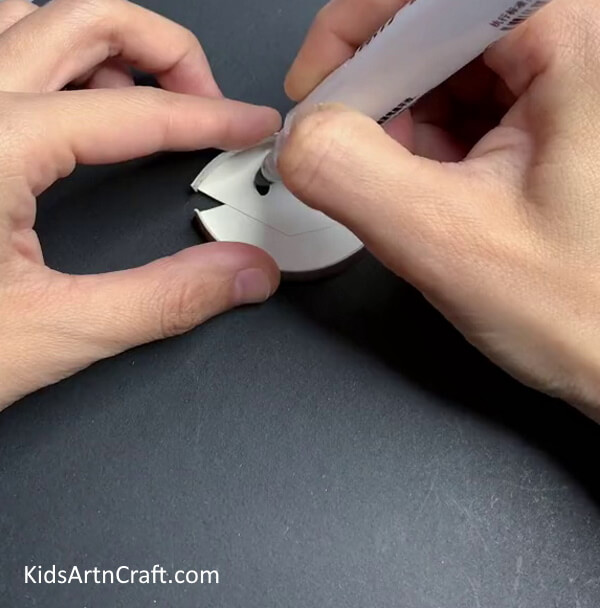
Step 5: Gluing the pieces together
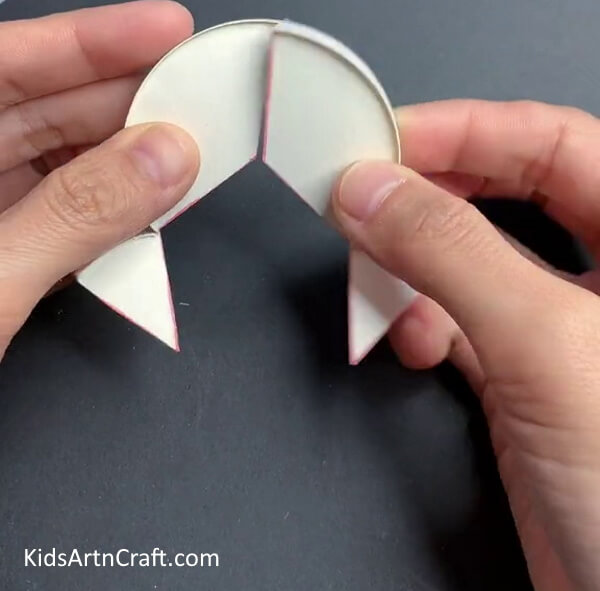
Take pieces that already we cut and attach them as shown in the picture with the help of glue. Now we have two sides of shapes.
Step 6: Placing the different parts to make body of fish
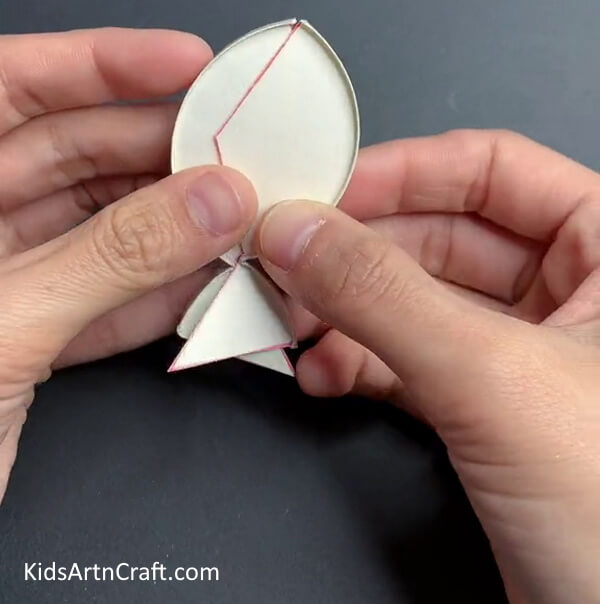
Attach the two sides of the shapes as shown in the picture with the help of glues, then allow the glues to completely dry. Now we have the Body and tails of the fish.
Step 7: Cutting extra parts
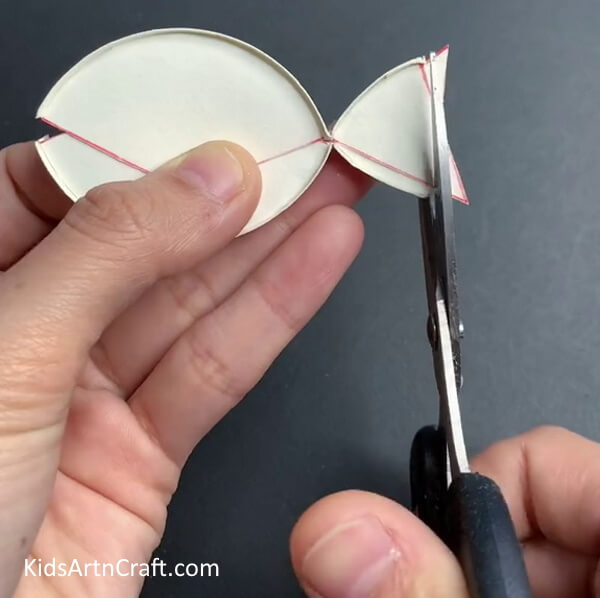
Cut the extra parts of the fish as shown in the picture to make it more crisp and perfect.
Step 8: Drawing Eye of the fish with Marker
Now draw the fish’s eyes with the help of a marker.
Step 9: Coloring with Green Color
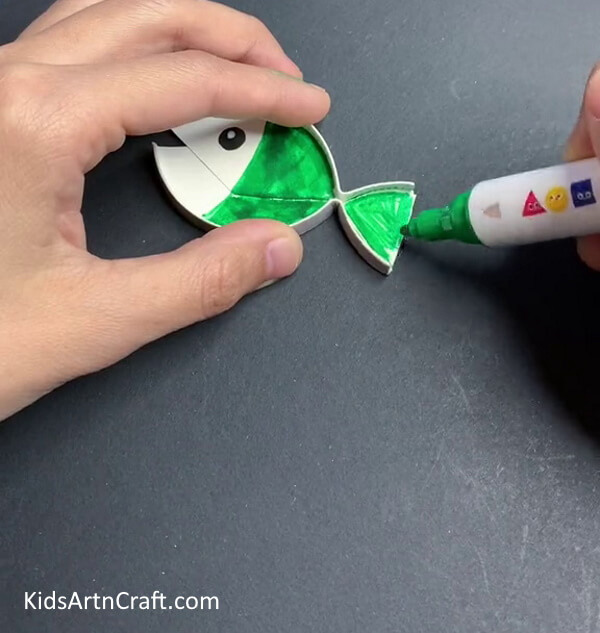
Use markers or crayons to draw details on the fish’s body, Be creative and add your personal touch.
Fish is ready to swim!
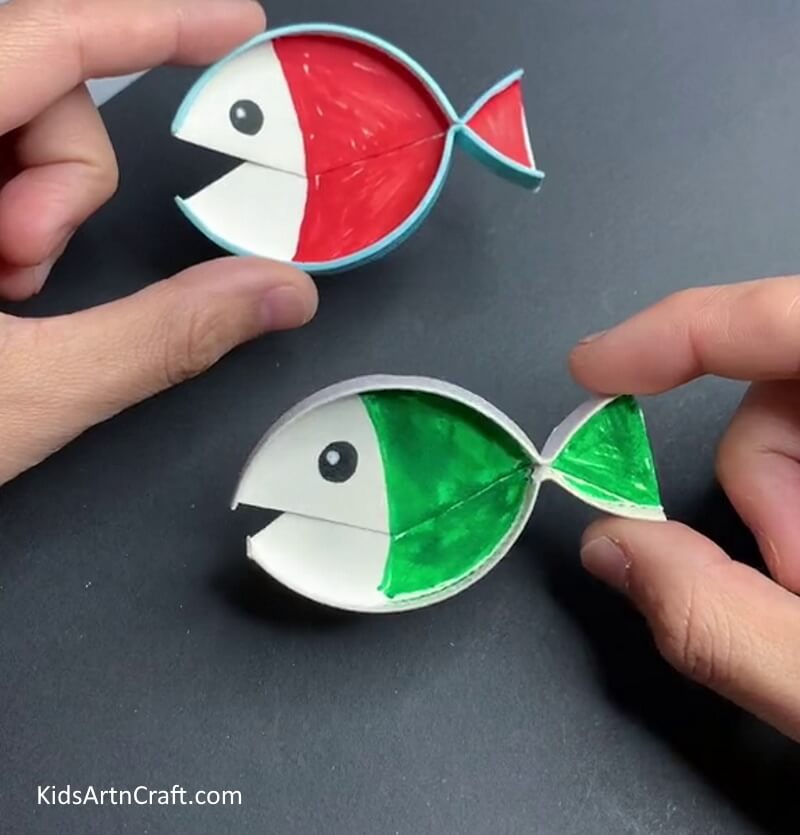
Finally, the paper cup fishes are ready Be creative and add some designs, this will boost your creativity. Thanks for visiting our website, Visit again thank you!
Some More Fish Craft Tutorial
Simple To Make Handprint Fish For Little Ones
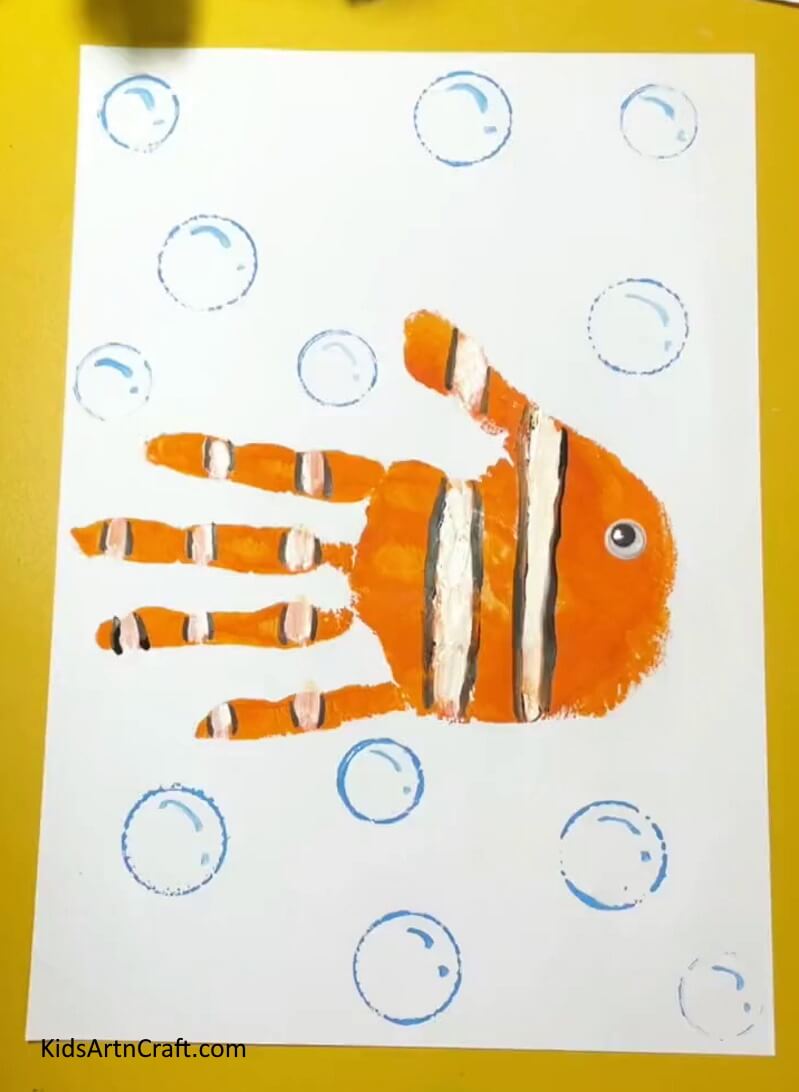
Image Source/Tutorial: Kids Art & Craft
This fun fish craft is perfect for young children! It’s easy to create a handprint fish with just a few supplies. You can even customize it with colorful paint and decorations to make it your own. Let your little ones explore their creative side and make a unique keepsake that they’ll treasure for years to come!
Follow us on Youtube for art and craft tutorials and much more.
More Articles from Kids Art & Craft
- Easy Snail Craft using Egg Carton and Leaf – Step-by-Step Tutorial
- How to Make Handmade Straw Fan Tutorial for Kids
- Recycled Plastic Bottle Dragon Craft Tutorial for Kids
- Easy Paper Robot Craft Step-By-Step Tutorial
- Water Bottle Airplane Tutorial for Kids


