


Drawing
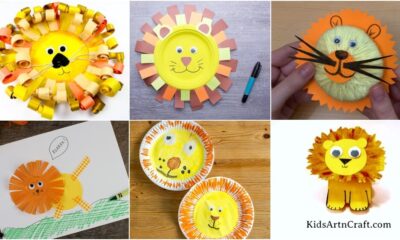
Cute Animals Clay Artwork Tutorial For Kids

Here, we brought you an extraordinary craft artwork! This step-by-step tutorial is all about making various animals on a paper base!
Are you an animal lover? Then create this astonishing craft artwork to enlighten your love for them! This craft will be a perfect collection for anyone! You can have an amazing crafty time while making this craft! The results will definitely bring a smile to anyone’s face who looks at it! This craft is full of motor skills and creativity that will unknowingly engage your kiddos in learning on their own! Encourage them to unleash their creative selves in this craft-making! So, let’s begin!
Cute Animals Artwork For Kids
Read More: DIY Dandelion Flower Creative Painting Idea For Kids
Materials Required
- White Circular Paper Sheet
- Black Marker
- Sketch Pens (Red And Pink)
- Clay Pressing Tool
- Round Clay Shaping Tool
- Colored Clay (White, Pink, Black, Red, Orange, And Peach)
Procedure
Step 1: Drawing Animal Bodies Over The Base
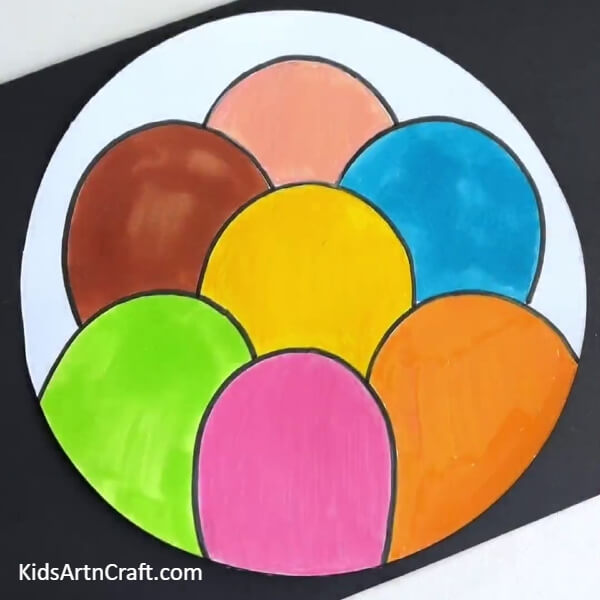
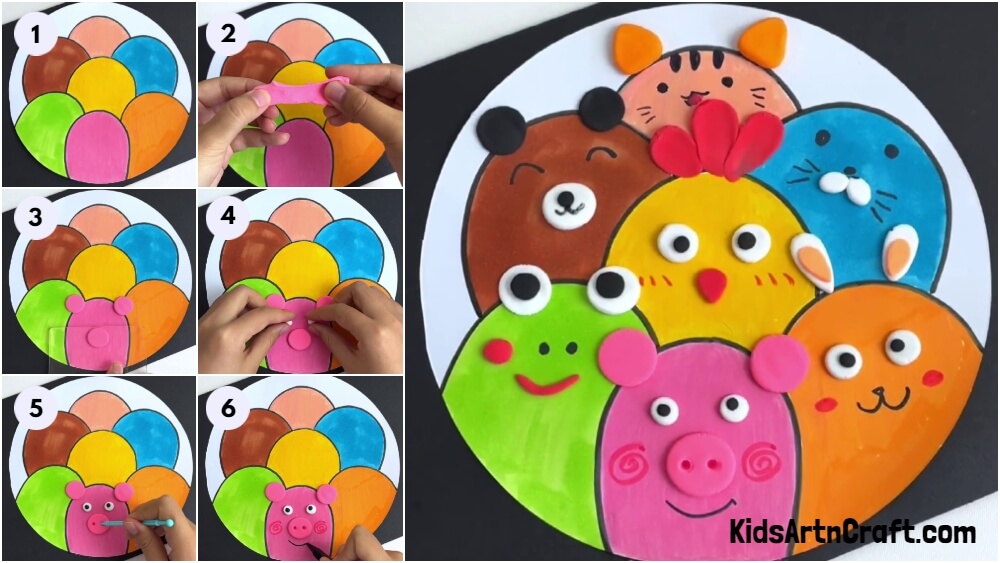
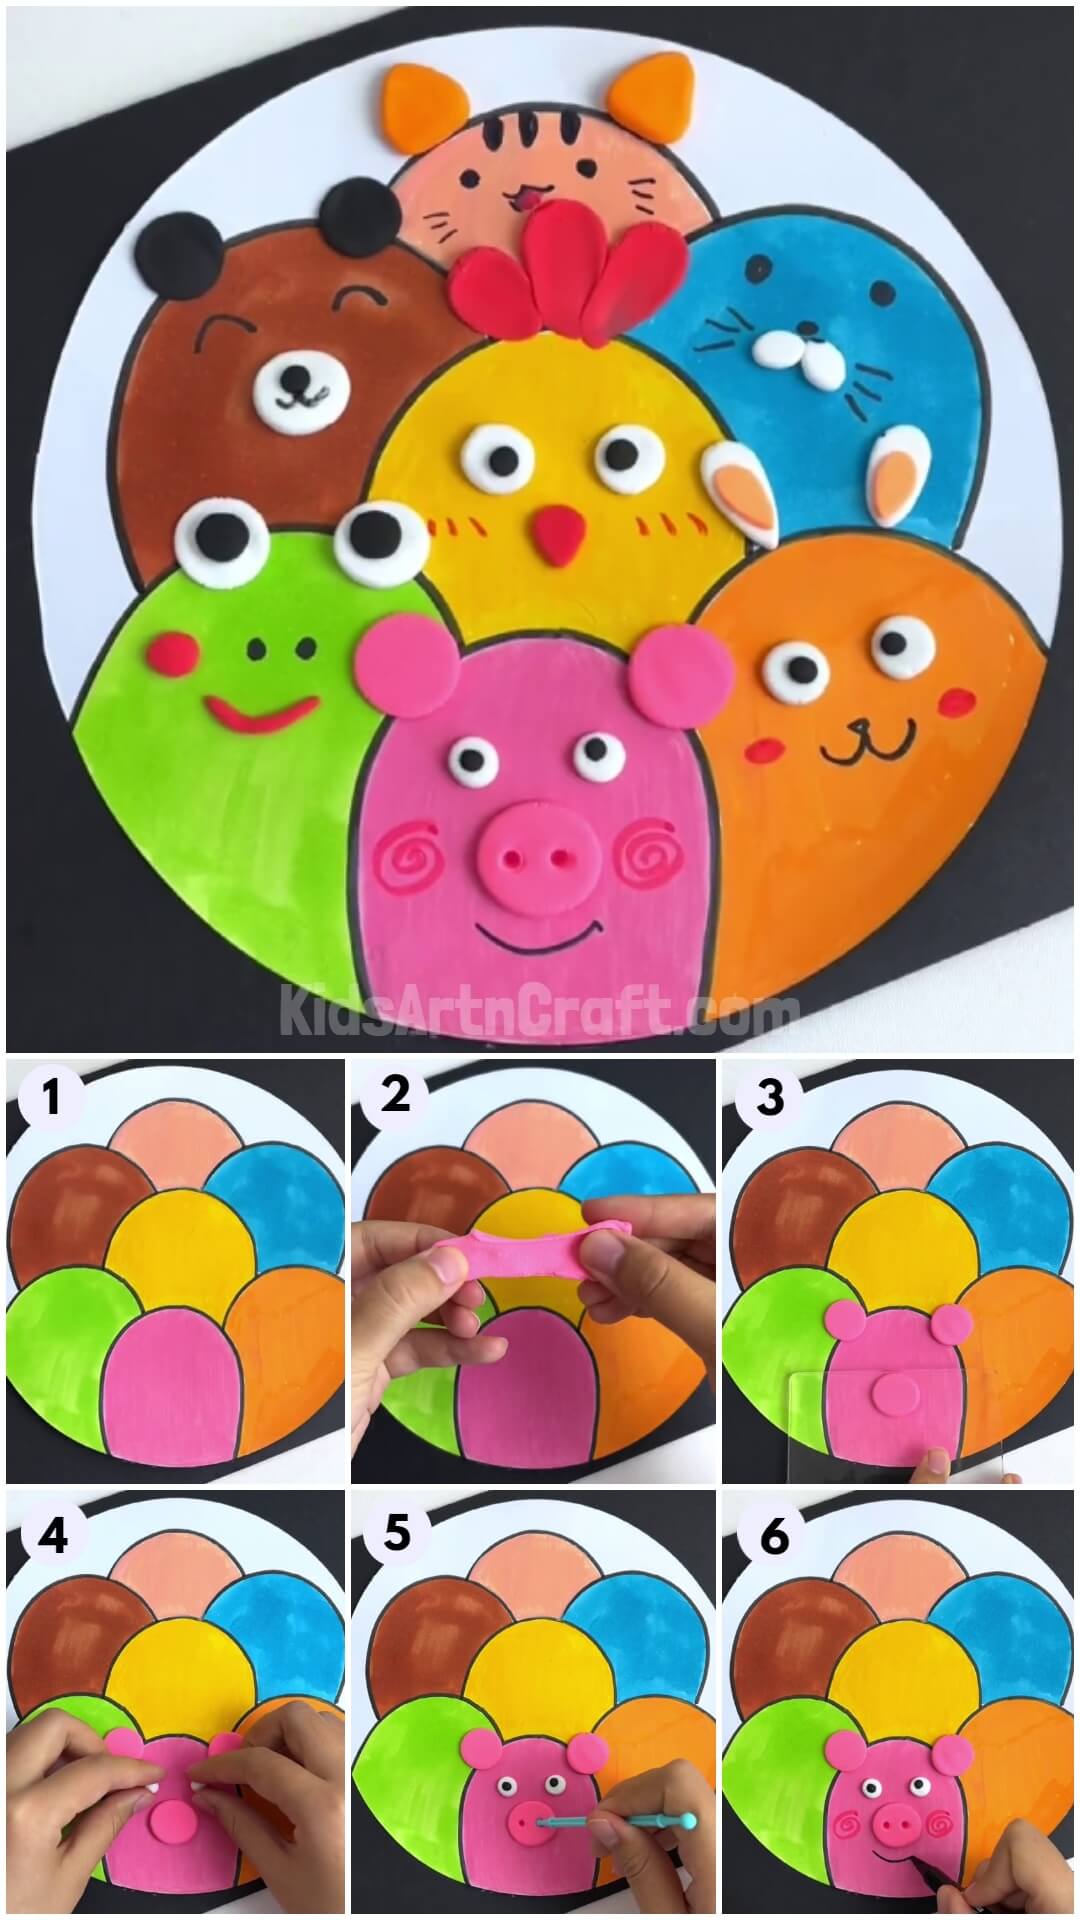
Begin this craft by taking a white circular paper sheet as the base for the artwork craft and some colored sketch pens. Using a black sketch pen, draw 7 arched boundaries of the animals from the bottom to the top, one over the other on the base. Now, using green, pink, orange, brown, yellow, blue, and peach-colored sketch pens, color the animals one by one starting from left to right and raising above respectively as shown in the image.
Step 2: Taking Out A Piece Of Pink Clay
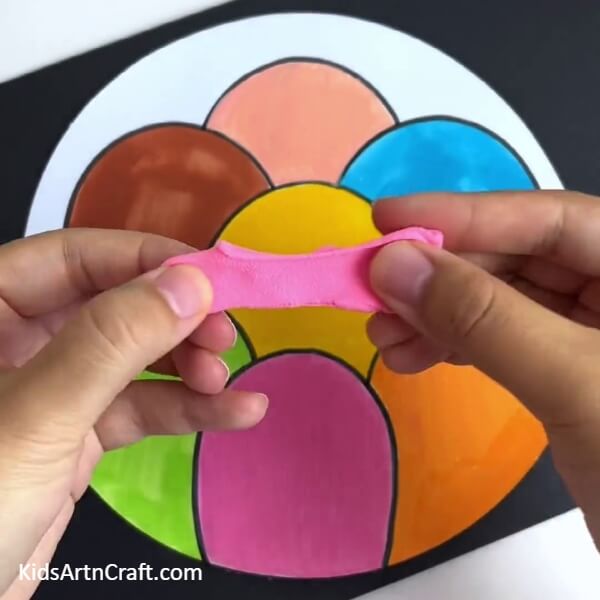
Take pink clay, stretch it, and take out a piece from it.
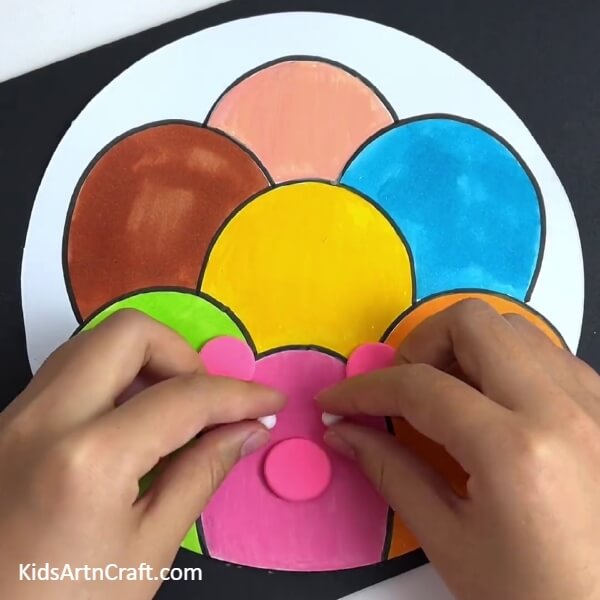
Step 3: Making The Pig Features
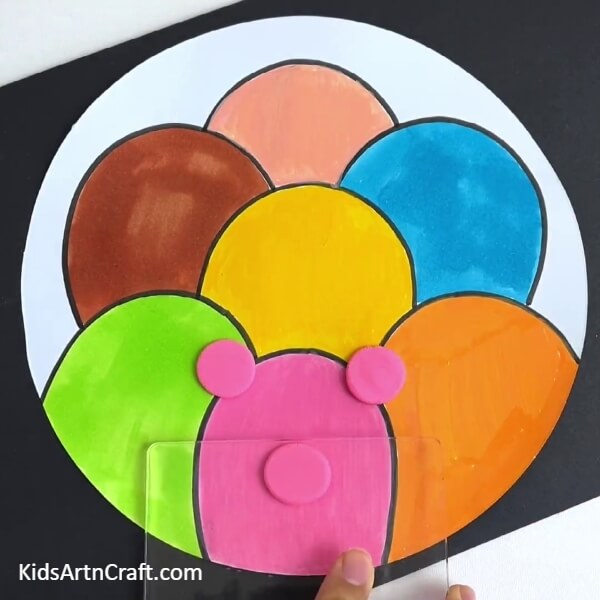
Make 3 rounds of the pink clay and place one in the center of the pink body and the other 2 over the boundary of it on each side to make the nose and ears respectively of the pig. Now, using a clay pressing tool, press all 3 clay balls to flatten them and take the shape of those features.
Step 4: Making Eyes Of The Pig
Make 2 small white clay balls for the eyes and place them above the nose on each side to make the eyes of the pig.
Step 5: Making Eyeballs
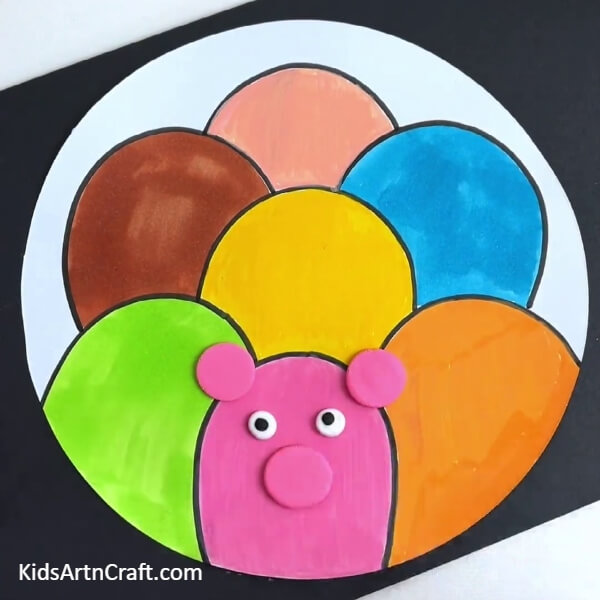
Make 2 further small black clay balls and place them over the white ones to make the eyeballs and using the pressing tool flatten them both.
Step 6: Making The Nostrils Of The Pig
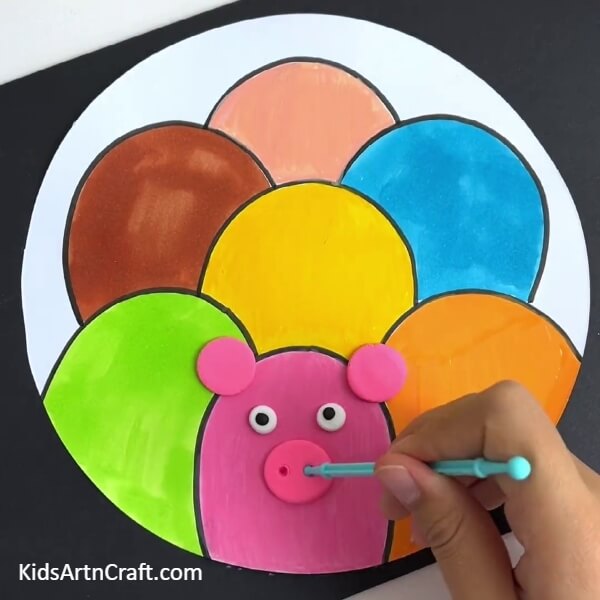
Using the round clay shaping tool, press over the nose to make 2 nostrils side by side of the pig.
Step 7: Making Spiral Blush Of The Pig
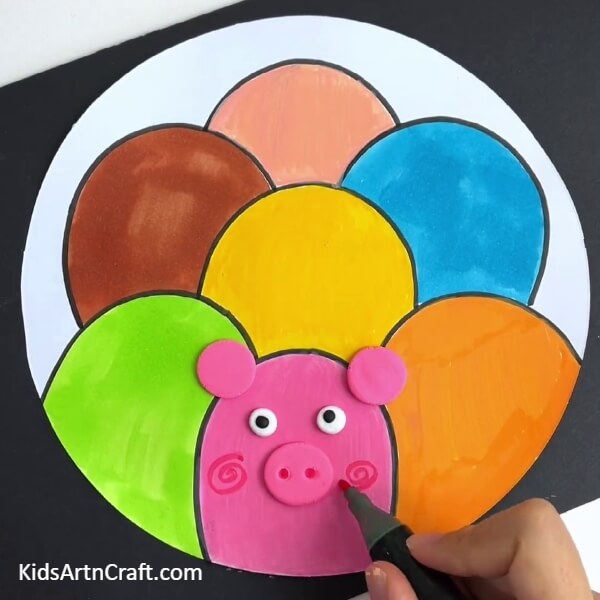
Using a pink sketch pen, make 2 spirals on each side of the nose over the body to make the blush over the cheeks of the pig.
Step 8: Making A Smile Of Pig

Using a black marker, make a curvy smile below the nose of the pig.
Step 9: Making Comb Of The Hen
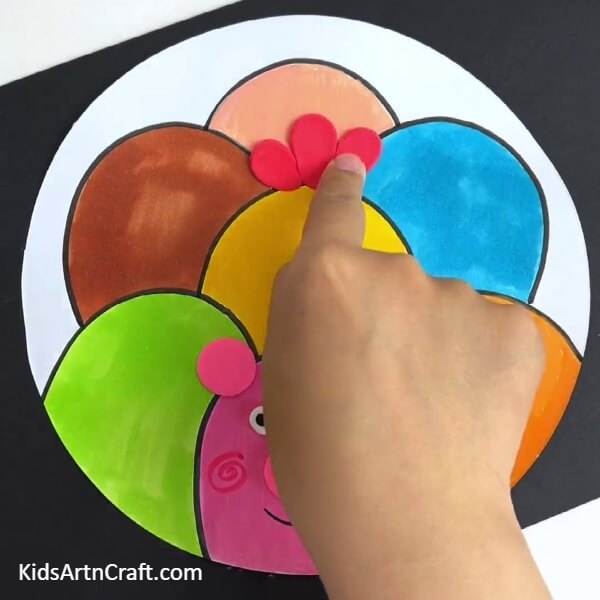
Make 3 clay balls of red clay and place them a little above the yellow hen’s body. Now, using your finger drag the clay over the hen top one by one to make the hen comb over it.
This Is The Final Look Of Your Animal Clay Craft!
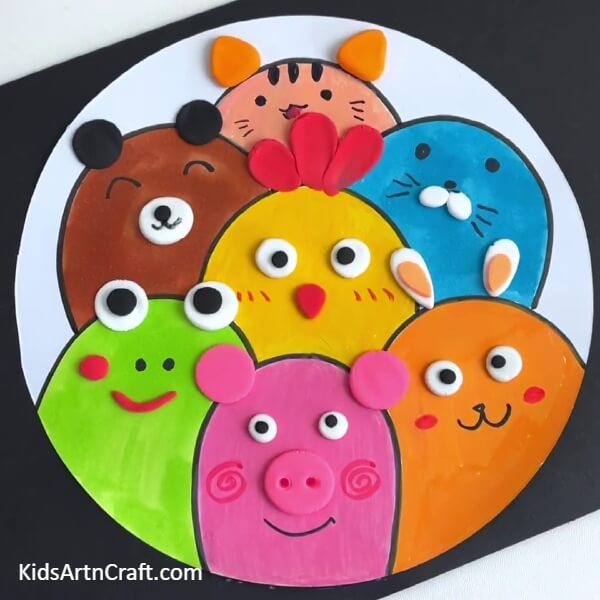
For the hen’s nose, make a drop shape and place it in the middle of the body and flatten it to form a rounded triangular nose using the clay pressing tool. Also, make the eyes above the nose as you made of the pig, and using a red sketch pen, make tilted dashed lines over the cheeks for the blush.
Make the green body of a frog. Make the eyes of the frog the same way, but just bigger over the boundary of the body on top. Using a black marker, make oval-shaped nostrils in the middle of the body. Now, for the blush and smile take red clay and make a ball and a thin roll out of it. Place the roll below the nose to make a curvy smile and place and press the ball on the left side of the nostrils to make the blush.
Make a bunny on the orange body by making the clay eyes and inverted drop-shaped white clay ears, above the head and again further small drop-shaped clay of peach color over the white ones and using the pressing tool to shape them into bunny ears. Using the black marker, make the triangle nose and smile attached to it in the middle of the body, and using a red sketch pen make the oval blush on each side of the smile.
Make a bear on the brown body by making 2 black clay balls and a white clay ball. Place the black ones on the boundary and a white one in the middle of the body to make the ears and mouth respectively. Using the clay pressing tool flatten them. Using the black marker, make the curvy closed eyes and the nose and curvy smile attached to it over the white mouth.
Make a seal on the blue body with 2 ovals of white clay and place them one beside the other in the middle a little tilted as the mouth of the seal. Now, using the black marker, draw the 3-3 whiskers on each side of the mouth and a circled nose above the mouth, and also, 2 circled eyes above them on the sides.
Make the peach body of a cat by making 2 wide drop shapes of orange clay and placing them above the head, also, flatten them using the pressing tool to make the ears of the cat. Using the black marker, make the rounded eyes and mouth below and in between. Also, make 3-3 whiskers on the sides of the body and 3 bold lines on the mid-top of the body to make the cat’s texture. Color the mouth with the red sketch pen.
Congratulations! Your animals are ready on the piece of paper!
This craft will be perfect as a school classroom activity as it is a pack of motor skills and creativity! You can help the kiddos to learn and recognize the animals through this craft-making as well! You can even decorate this craft in your room as a decor! Customize this craft to add more of your favorite animals and unleash your creativity and innovative skills! This craft has a lot of benefits, then why delay? Grab the benefits and make this craft today!
We are hoping you liked this article. Give it a like and share with your buddies and don’t forget to tell your craft journey in the comments section! We would love to hear from you!
Follow us on Youtube for art and craft tutorials and much more.
More Articles from Kids Art & Craft
- Beautiful Tree Painting Using Leaf Impression Step-by-step Tutorial For Kids
- Easy Apple Tree Craft Using Paper Step-by-step Tutorial
- How to Make Apple Tree Craft Tutorial For Beginners
- DIY Paper Tree Crafts for Kids Easy Tutorial
- How to Make Ladybug Crafts tutorial for Kids