


Fun Food
Candy Crafts And Treats For Kids

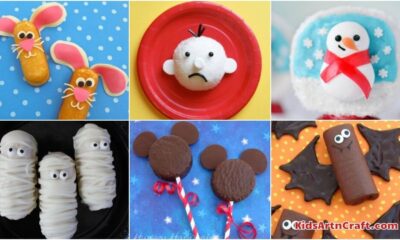
Candy crafts and treats are a great way to keep kids entertained while also satisfying their sweet tooth. There are a variety of ways to make candy crafts, from simple lollipop decorations to more complex edible sculptures. And for those who prefer their candy a little less hands-on, there are always candy-themed snacks and drinks to enjoy. Whether you’re looking for a fun activity to do with the kids or just want to indulge in some sweet treats, candy crafts and treats are a great option.
Life’s way of making up for Mondays is with candy. We grownups are never too old to have a sweet tooth. Rarely do we encounter individuals who dislike sweets. Do you still have any memories of how much you adored confectionery as a kid? Children seem to be addicted to sweets! Giving out candy constantly, though, isn’t necessarily a good idea. But now we’re going to show you some crafts and kid-friendly goodies you can make with candy. Let’s look at some.
Handmade Candy Crafts And Treats For Kids

Read More: Easy Candy Cane Crafts for Kids
Eye Catching & Fun To Make Peppermint Bowls
Parchment paper, a heatproof basin, vegetable oil, 18 Starlight mint candies, and scissors are required for this. Use parchment paper to cover a baking sheet. Use the oil to coat the bowl’s outside. On the baking sheet, put 1 piece of candy. Put the candy in the oven for 2 to 2 1/5 minutes, or until it begins to look sparkly and soften but not melt. Six candies should be taken out and placed close together around the heated candy. Reheat for 4 to 5 minutes in the oven. As soon as the candies begin to soften, remove them from the oven. Keep them from melting. On the baking sheet, surround the circle with eleven more candies. (For a smaller dish, try this step with nine or 10 candies.) 7 minutes later, put the oven back on. Take it out and allow it cool for a minute. Cut a section of the parchment paper off quickly. Utilizing an oven mitt and the candy still on the parchment paper, rapidly center the center candy on the bottom of the oiled basin. Using the oven mitt to push the candies into one another, form the candy around the bowl. The peppermint bowl should be gently lifted from the bowl after removing the parchment paper (it should slide right off, but if it sticks, let the candies cool for another minute or two and gently pull it off). To prevent them from sticking to surfaces, place the finished candy bowls on top of little circles of parchment paper.
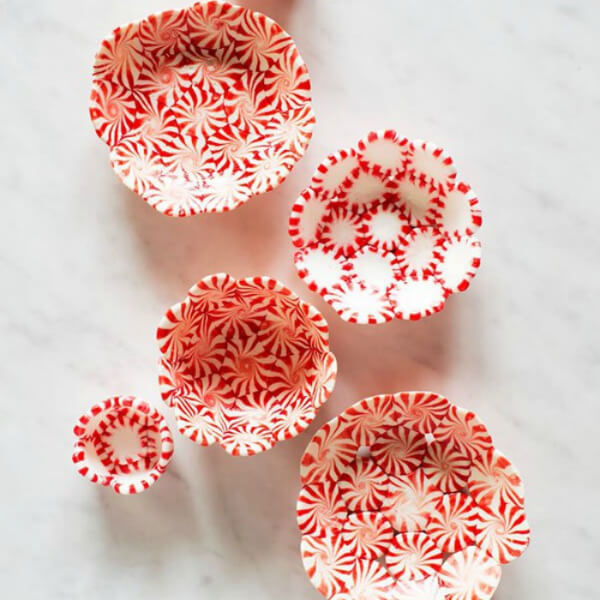
Image Source/Tutorial: Purl Soho
Cute DIY Peppermint Candy Ornaments For Decoration
A bag of peppermint candies, metal Christmas cookie cutters, cooking spray, parchment paper, a cookie sheet, a hot glue gun, and a Christmas ribbon is required. Place parchment paper on the cookie sheet and preheat the oven to 350 degrees. Remove the plastic from the peppermint candies and set them aside. Place cookie cutters on the baking sheet after spraying them with Pam. Using the cookie cutters, insert peppermint candies. Keep a tight watch on them as they bake for around 4 to 9 minutes (as the time depends on the candy and your oven). Pull them out once you notice that they have melted. Push them out of cookie cutters gently once they have hardened. Use a little dab of hot glue to attach it to the back once it has cooled.
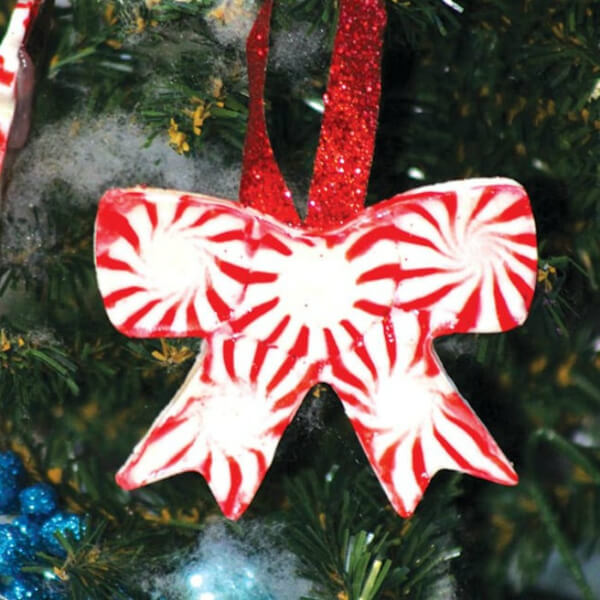
Image Source/Tutorial: Easy Peasy and Fun
Candy Cane Garland Decorative Craft For Kids
Preheat the oven to 250 degrees. Candy canes are placed on a baking pan that has been covered with parchment paper. Check to see if they are touching. For four minutes, preheat them in the oven. Allow the candies to cool until you can handle them. It took roughly 30 seconds for me. Next, create circles with the canes. Create a circle by rotating the first candy cane. Firmly press the ends together. next, add more links

Heart-Shaped Candy Cane Heart
You’ll need candy canes, cotton thread, decorative ribbon or string, and scissors. Use the cotton thread to knot the two candy canes together where they overlap to form a heart shape. Tie a tight knot after wrapping the cotton thread around many times.

Image Source/Tutorial: Flavor Pink
Tiny & Tasty Candy Cane Christmas Trees For Kids
Candy canes, peppermint candies, white chocolate wafers, Christmas sprinkles, and a silicon baking mat are required. Set the oven to 300 °. Place candy canes on the mat in the shape of hearts. Put a starlight peppermint candy at the “heart” tip end. Place the “tree stump” cut from a tiny sugar cane at the other end of the heart. Place for three to five minutes in the oven. As soon as it comes out of the oven, form the tree by aligning the “humps” of the heart into a straight line, pressing the peppermint candy into the “points,” and then attaching and pinching the tree root to the tree. Await cooling. In accordance with the instructions on the package, melt the white chocolate wafers. Put the white chocolate into the tree’s center with care using a teaspoon. Sprinkle your choice of sprinkles over everything right away. Your Christmas candy tree is prepared.

Image Source/Tutorial: Princess Pinky Girl
Read More: Candy Cane Day Paper Plate Crafts for Kids
Cute Candy Cane Elf Made Using Cricut
Nothing says Christmas quite like candy canes and elves! Combining these two iconic holiday symbols is a great way to bring a festive touch to your home this season. To start, you’ll need a few supplies. You’ll need a Cricut machine, colorful cardstock, candy cane, scissors, glue, and a black pen. Begin by uploading the candy cane elf cut file to your Cricut machine and following the instructions to cut out the elf shape from the cardstock. Once you have the elf shape cut out, use the scissors to cut out the hat, palms, and boots from the cardstock. Assemble all by using glue and use candy cane as the legs and arms of the elf. After assembling, make eyes and smile of the elf. Your Candy Cane Elf Using Circut is ready to celebrate Christmas with you.
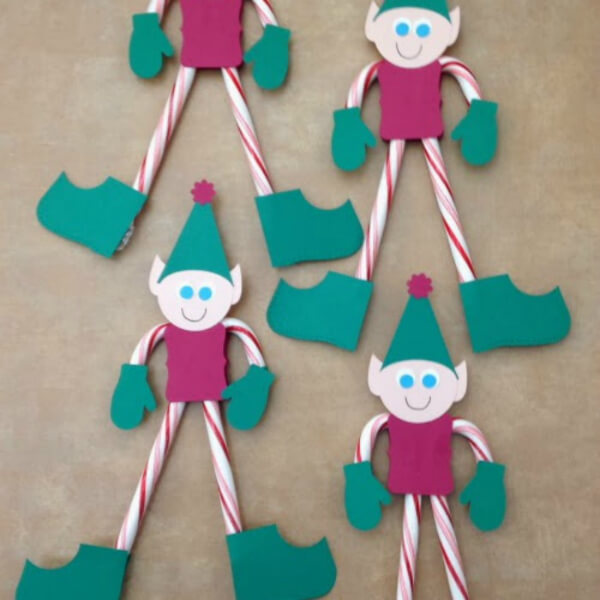
Image Source/Tutorial: The Crafty Blog Stalker
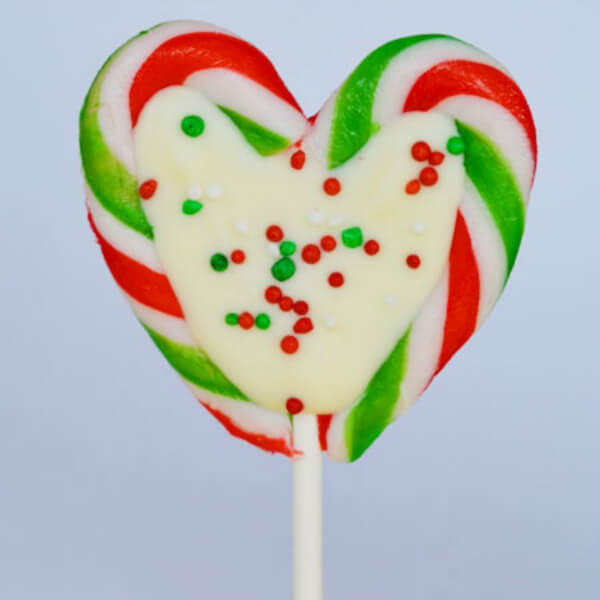
Delicious Candy Cane Heart Pops Treat For Kids
All you need is lollipop sticks, mini candy canes, white chocolate, and Christmas sprinkles. Lay the lollipop sticks on a baking pan lined with waxed paper or parchment paper. Place the mini candy canes at the top of each stick to form a heart shape. Preheat the oven to 300F and bake the hearts for three minutes. Remove from the oven and press the ends together to form the heart. Spoon a few teaspoons of melted white chocolate into the middle and top with colored sprinkles. Allow to cool for a minimum of 10 minutes before serving.
Amazing Peppermint Shot Glasses For Any Occasion
You will require peppermint candies, parchment paper, and shot glasses. Start preheating the oven to 300 degrees Fahrenheit. Take the peppermint candies out of their wrappers and place them in a hexagonal shape on a parchment-lined baking sheet. Put the pan in the oven and bake for 11 minutes. Take the melted candy out of the oven, carefully remove them from the parchment and fold them over the shot glasses so they take the same shape. Let the molten candy cool and solidify before taking them off the glasses. Pour the cocktail or any other desired beverage into the peppermint shot glasses and enjoy

Image Source/Tutorial: The Watering Mouth
DIY Peppermint Candy Christmas Ornaments
To make the word ornaments, you first want to peel and stick the letters so they spell out the word you wish to display. We chose JOY for ours. Peeling and sticking the letters was so easy! Once you’ve placed the letters, decide if you want your ornament to go vertically or horizontally. You want to create a row of mints (bare, no lettering) that is two mints longer than your word. For example, if you’re spelling out JOY, you’d need four bare mints. On the bare mints, apply a layer of glue running all the way across (or down if going vertically) so you can then apply your lettered mints. Press the lettered mints to the glue firmly, placing them where each mint in the bottom row meets. Finally, add a dab of glue to the back of the lettered ornaments and apply a ribbon for hanging. Now you have a beautiful word ornament that’s ready to be hung up and enjoyed for the holidays.
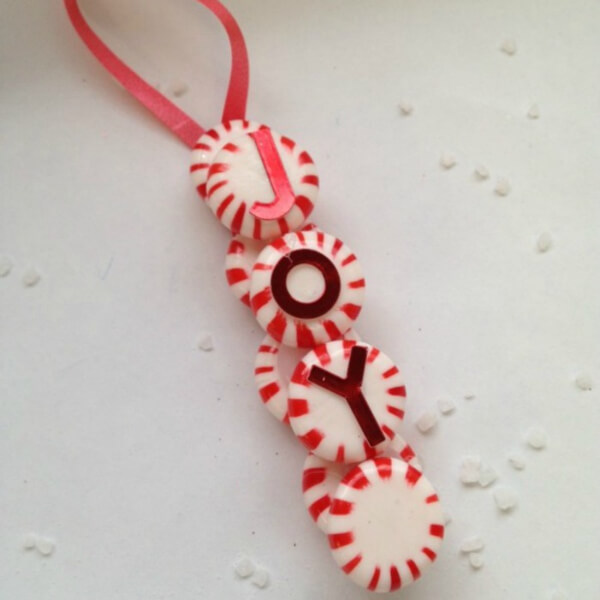
Image Source/Tutorial: A Few Shortcuts
Creative Peppermint Candy Letter Craft Ideas
You can make a whimsical monogram with just craft store letters, craft glue, and some peppermints. To do this, cut the peppermints in half and use a fine grater to make the back side even, then fasten them with glue.
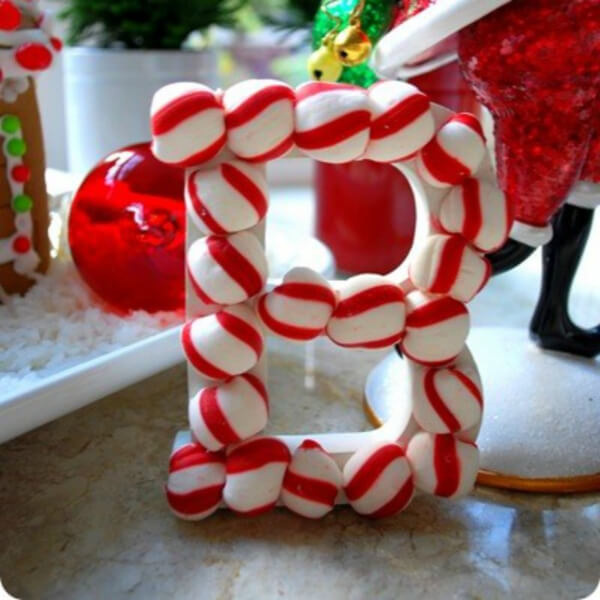
Image Source/Tutorial: Centsational Style
Read More: Candy Art & Craft Ideas for Kids & More
Cute Candy Cane Lollipops For Kids
Mini candy canes, peppermint candies, edible writing pens, a dab of icing, and a red candy nose are required for this. Preheat the oven to 350 degrees and place a peppermint candy on a cookie sheet covered with aluminum foil. Add two mini candy canes at the top of the peppermint candy to create the antlers, breaking the canes a bit to make them shorter. Put the candy in the oven for 3-5 minutes and monitor its progress. Once you take the treats out of the oven, carefully insert a lollipop stick into the melted peppermint. Make sure to let it cool entirely before decorating.

Image Source/Tutorial: Party Wagon
Delicious White Chocolate Marshmallow Pops Dipped In Peppermint
All you need is white candy melts, marshmallows, crushed peppermints, and striped lollipop sticks to make this candy treat. Secure a marshmallow onto each stick. Be wary since they can become sticky. Melt the candy according to its instructions. Dip each marshmallow halfway into the melted candy. Sprinkle crushed peppermint over the melted chocolate. Put the Marshmallow Pop into a cup (with the marshmallow side facing up) to let it harden. Wrap it, savor it, and give it a cup of hot chocolate.

Image Source/Tutorial: Totally The Bomb
Easy To Make Peppermint Bark Oreos
You will require a packet of Oreo cookies, white melt candies, crushed peppermint, and wax paper. Start with heating the candy melts in the microwave then dip the Oreo cookies into the melted chocolate and lay them on wax paper. Sprinkle the crushed peppermint candy on top of the cookie. Let the cookies harden for about 30 minutes. Perfect for the holiday season, Peppermint Oreo is a great way to indulge during the festive season. Enjoy them with a cup of hot cocoa for an extra special treat.
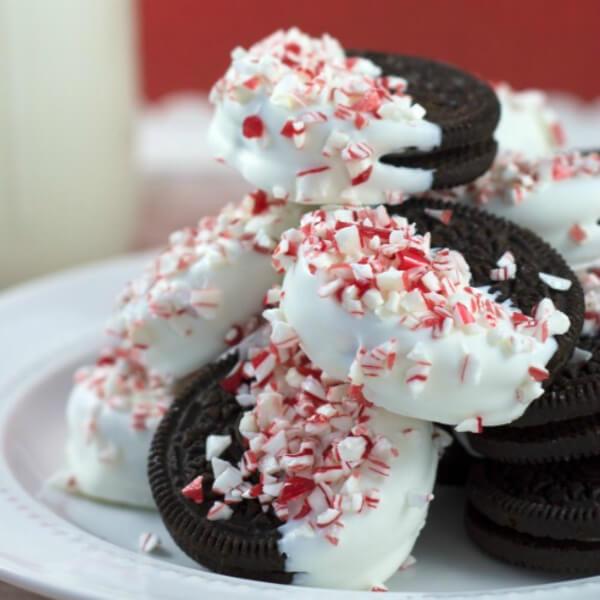
Image Source/Tutorial: Totally The Bomb
Melted Candy Cane Christmas Ornaments
To make this, candy canes, cookie sheets, aluminum foil, and Christmas cookie cutters are required. Turn your oven to 300°F and cover a baking sheet with aluminum foil, placing cookie cutters on top. Place candy canes in a single layer in the cutters. Put them in the oven for 15 minutes, then take them out and press the pieces down to fill in any gaps. Put them back in for another 10 minutes until they puff up. Let them cool completely and push the foil away from the candy canes (careful not to break them). Attach a ribbon to the back with hot glue and you’re done!
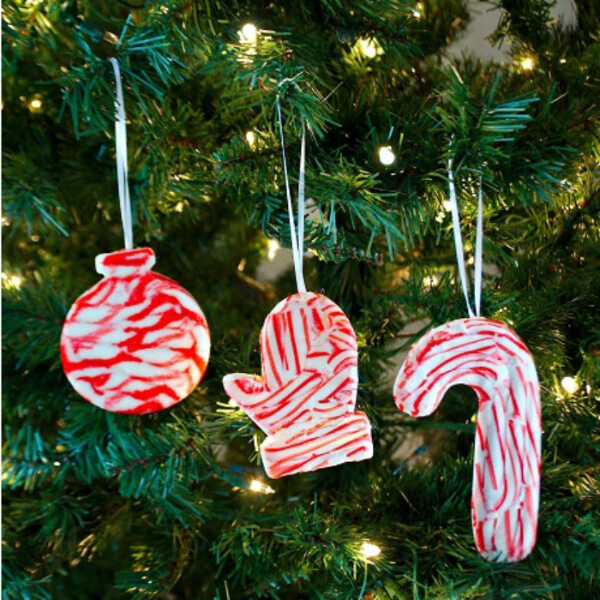
Image Source/Tutorial: Crafty Morning
Handmade Cute Candy Cane Reindeer Ornament
Candy canes, ribbons, pom-poms, brown felt, and other basic supplies are required. Start it by making a reindeer on brown felt and pasting its googly eyes, and pom-pom nose. Make its ears and create a pocket using scissors for candies. Use small candy canes as the antlers of the reindeer. Finally, attach the ribbon on the antlers to hang your ornament. And, guess what? You’re done with it.

Image Source/Tutorial: HGTV
Read More: Candy Cane Craft Ideas For Kids
Adorable Little Reindeer Craft For Kids
This holiday season, get creative with your decorations by crafting your own candy cane reindeer! This fun and festive project is sure to bring a smile to the faces of all who see it. To make your own candy cane reindeer, you’ll need two candy canes, a hot glue gun, googly eyes, a small red pom-pom, and brown pipe cleaner. Start by gluing the googly eyes and the red pom-pom for the nose on the candy cane. To create the antlers, twist the brown pipe cleaner into two antler shapes. Your candy cane reindeer is now ready to be proudly displayed in your home. Grab some candy canes and get crafting!

Image Source/Tutorial: One Little Project
Tiny Candy Cane Sleigh With Candy Bars
This candy cane sleigh with candies is the best DIY Christmas Gift. All you need is a few candy canes, a few candy bars, and some ribbon and you’re ready to get started. First, take your candy canes and place them in a straight line, with the curved part facing up. Then, take your candy bars and place them on top of the candy canes, creating the body of the sleigh. Finally, add a ribbon or string to the back of the sleigh to turn it into a festive gift. This cute and simple decoration is sure to bring a smile to everyone’s face.

Image Source/Tutorial: Princess Pinky Girl
Sledding Small Snowman Craft Using Marshmallow
You will require marshmallows, edible marker, pretzel twists, and candy canes for this. Construct a snowman using a recipe for royal icing. Cut jumbo and standard marshmallows in two parts, and use a piping bag and tip 5 to secure a regular marshmallow head to a jumbo marshmallow body. Decorate the snowman with coal features using an edible black marker. For arms, break pretzel twists into pieces and insert them into the sides of the body. To build a sled, break off the hook portion of candy canes and attach them side-by-side using a piping bag and tip 5. Attach hard candy to the back edge of the sled with icing. Allow the snowman and sled to set for about two hours, then attach the snowman to the sled with icing.
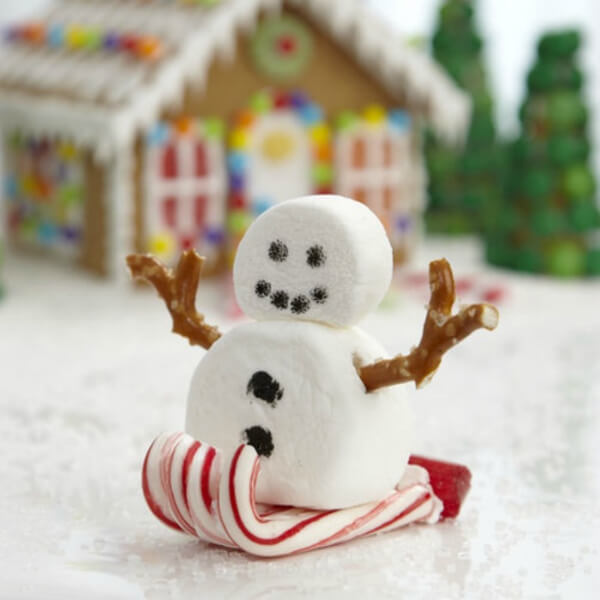
Image Source/Tutorial: Wilton
DIY Snowman Using Marshmallow & Straws
Marshmallow, candy canes, Hershey Kisses, twizzlers, black gel, and other basic supplies are required to make this marshmallow snowman. Snip the top of the candy cane off so you have a straight stick. Take 3 Kraft marshmallows and put the candy cane through each one to make the snowman’s body. Take a strand of Twizzlers and wrap it around the middle and top marshmallow to make a scarf. Put a dab of icing on a Hershey Kiss and put it on top of the top marshmallow for a hat. Put three red mini M&Ms on the front of the marshmallows with a bit of icing as buttons. Cut a Reese’s Pieces Mini (orange) in half and attach it to the top marshmallow with some icing for a nose. Add two eyes with black gel icing. You are ready! If you want to be extra creative, use pretzel sticks as arms.
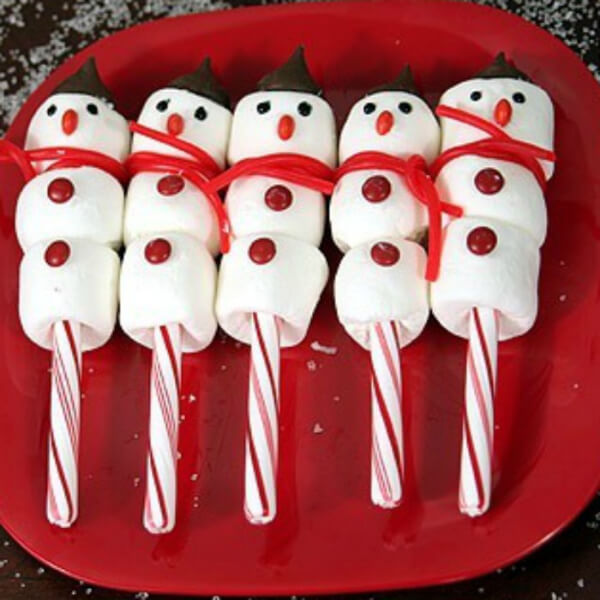
Image Source/Tutorial: Baby Gizmo
Creative Peppermint Candy Spoons For Kids To Make
Starlight Peppermint Candy, Chocolate Candy Melts, Spoon Molds, and Christmas Sprinkles are required to make this DIY peppermint candy spoon. Start by crushing peppermint and fill the spoon mold with it. Now, bake it in oven and dip it in the melted hot chocolate. Sprinkle some chocolate or Christmas Sprinkle on it. And, it’s done! Isn’t it too easy and quick to make?

Image Source/Tutorial: Princess Pinky Girl
Read More: Easy Ice-Cream & Candy Drawings for Kids
Star Shaped Wreath Using Candy Cane & Peppermint
This Wreath is made from materials, including candy canes, peppermint candies, mints, and ribbon. Take ten candy canes and twenty peppermints and remove their wrappings. Use a glue gun to attach the candy canes into five hearts. Place two peppermints between the ends of each of the hearts and then overlap them and glue them together to create the wreath. To give it a nice finish, use some sealant and wrap pieces of red ribbon around the intersections of the candy canes and mints. To hang the wreaths, use fishing line. You can opt to use ribbon to add some color and to hide the glue, or leave it off.
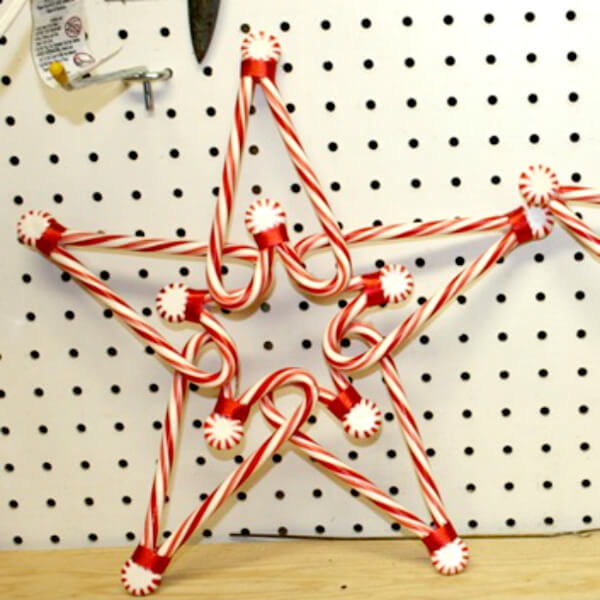
Image Source/Tutorial: Virginia Sweet Pea
Beautiful Peppermint Stocking Ornaments For Hanging
You will require peppermint, parchment paper, stocking cookie cutter, food writers pen, red fondant, and other basic supplies to make peppermint stockings. Start by laying peppermints on parchment paper in about a shape of stocking and bake it at 325 degree for 10 minutes. Immediately press prepared cookie cutter into melted candy. Similarly, make cuff of the stocking from the red fondant. Place cuff on stocking and let it harden completely. Write the name on it or you can decorate it using berries and holly.
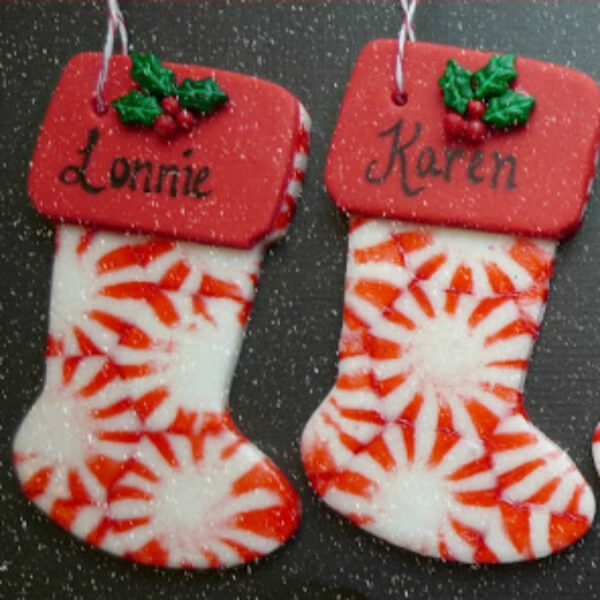
Image Source/Tutorial: Sugartown Sweets
Fun To Make Candy Ornaments For Hanging
All you need is round peppermint candies, ribbon, and aluminum foil. Begin by preheating oven to 250 degrees. Put the foil on a baking tray and arrange the candies in a circular shape on it. Put it in the oven and bake for between 10 and 15 minutes. Finally, tie a ribbon on the top of make a hanger. And, it’s done!
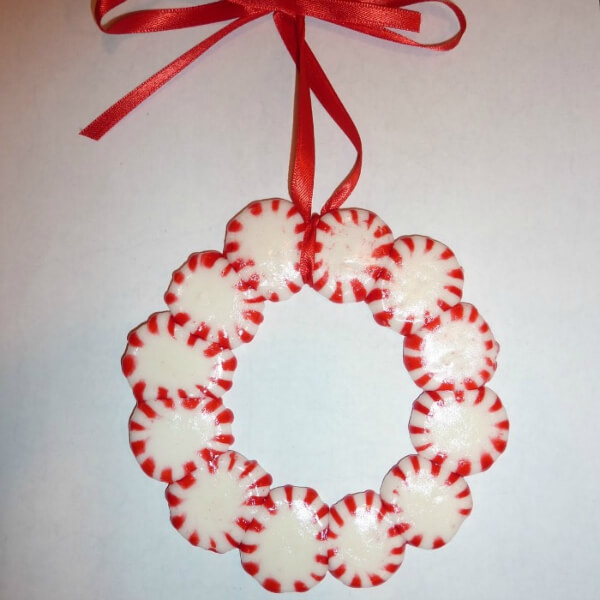
Image Source/Tutorial: Jennwa
Cute Little Snails Craft Made Using Candy
To make this unique and tasty treat, all you need is peppermint candies and gumdrop candies. Cut gumdrop candy with knife, that will act as gum on peppermint candy. Stick gumdrop to peppermint candy to give it a snail shape. Use Twizzlers to make antlers of the snail. Finally add eyes. And, it’s done!
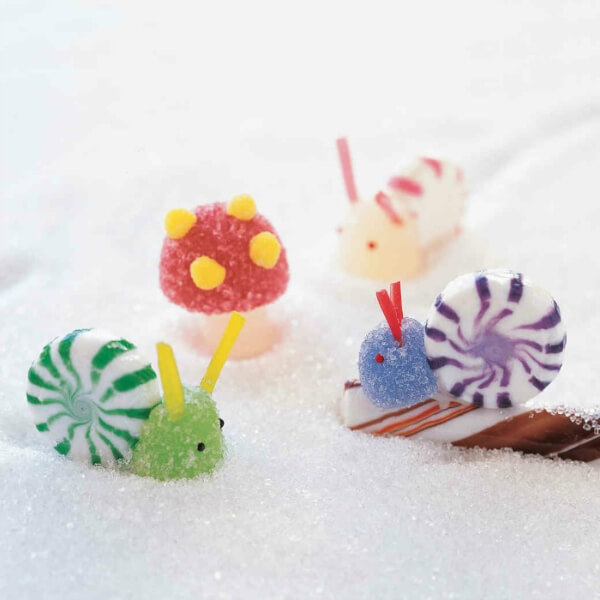
Image Source/Tutorial: Martha Stewart
Making candy crafts and treats with your kids can be a fun and creative way to spend time together. From candy cane garland to candy snails, the possibilities are endless!
We hope you’ve found this article useful. If you want to read such more creative and unique ideas, do visit our website. Don’t forgot to give your valuable feedback by commenting down on this article. Stay Creative!
FAQs
What do crafts do for kids?
Crafts provide kids with an outlet for their creativity, and can help them develop fine motor skills. Crafting can also be a fun and social activity, allowing kids to chat and bond with their peers while they create.
What is Candy crafts?
Candy crafts are a type of craft that uses candy as the main material. These can be anything from sculptures to jewelry to paintings. Candy crafts can be made with any type of candy, but popular choices include gummy bears, marshmallows, and chocolate.
What can we make with kids?
There are all sorts of things that we can make with kids. It really depends on their age and what they are interested in. For example, younger kids might enjoy making things like paintings or sculptures out of clay. Older kids might enjoy making things like jewelry or cards. Ultimately, it is up to the parent or guardian to decide what they want to make with their kids.
What can you make out of candy?
Candy can be used to make a variety of sweet treats, including candy bars, chocolate candies, and hard candy. Candy can also be used to decorate cakes and cupcakes.
Follow us on Youtube for art and craft tutorials and much more.
More Articles from Kids Art & Craft
- Easy Christmas Craft Ideas For Family
- Outdoor Christmas Party Decoration Ideas
- Pony Bead Decoration Crafts For Christmas
- Handmade Jewelry Beaded Crafts
- Easy Christmas Craft Ideas For Kindergartners