Clay Crafts
Easy Clay Flower Garden Craft Tutorial For Beginners

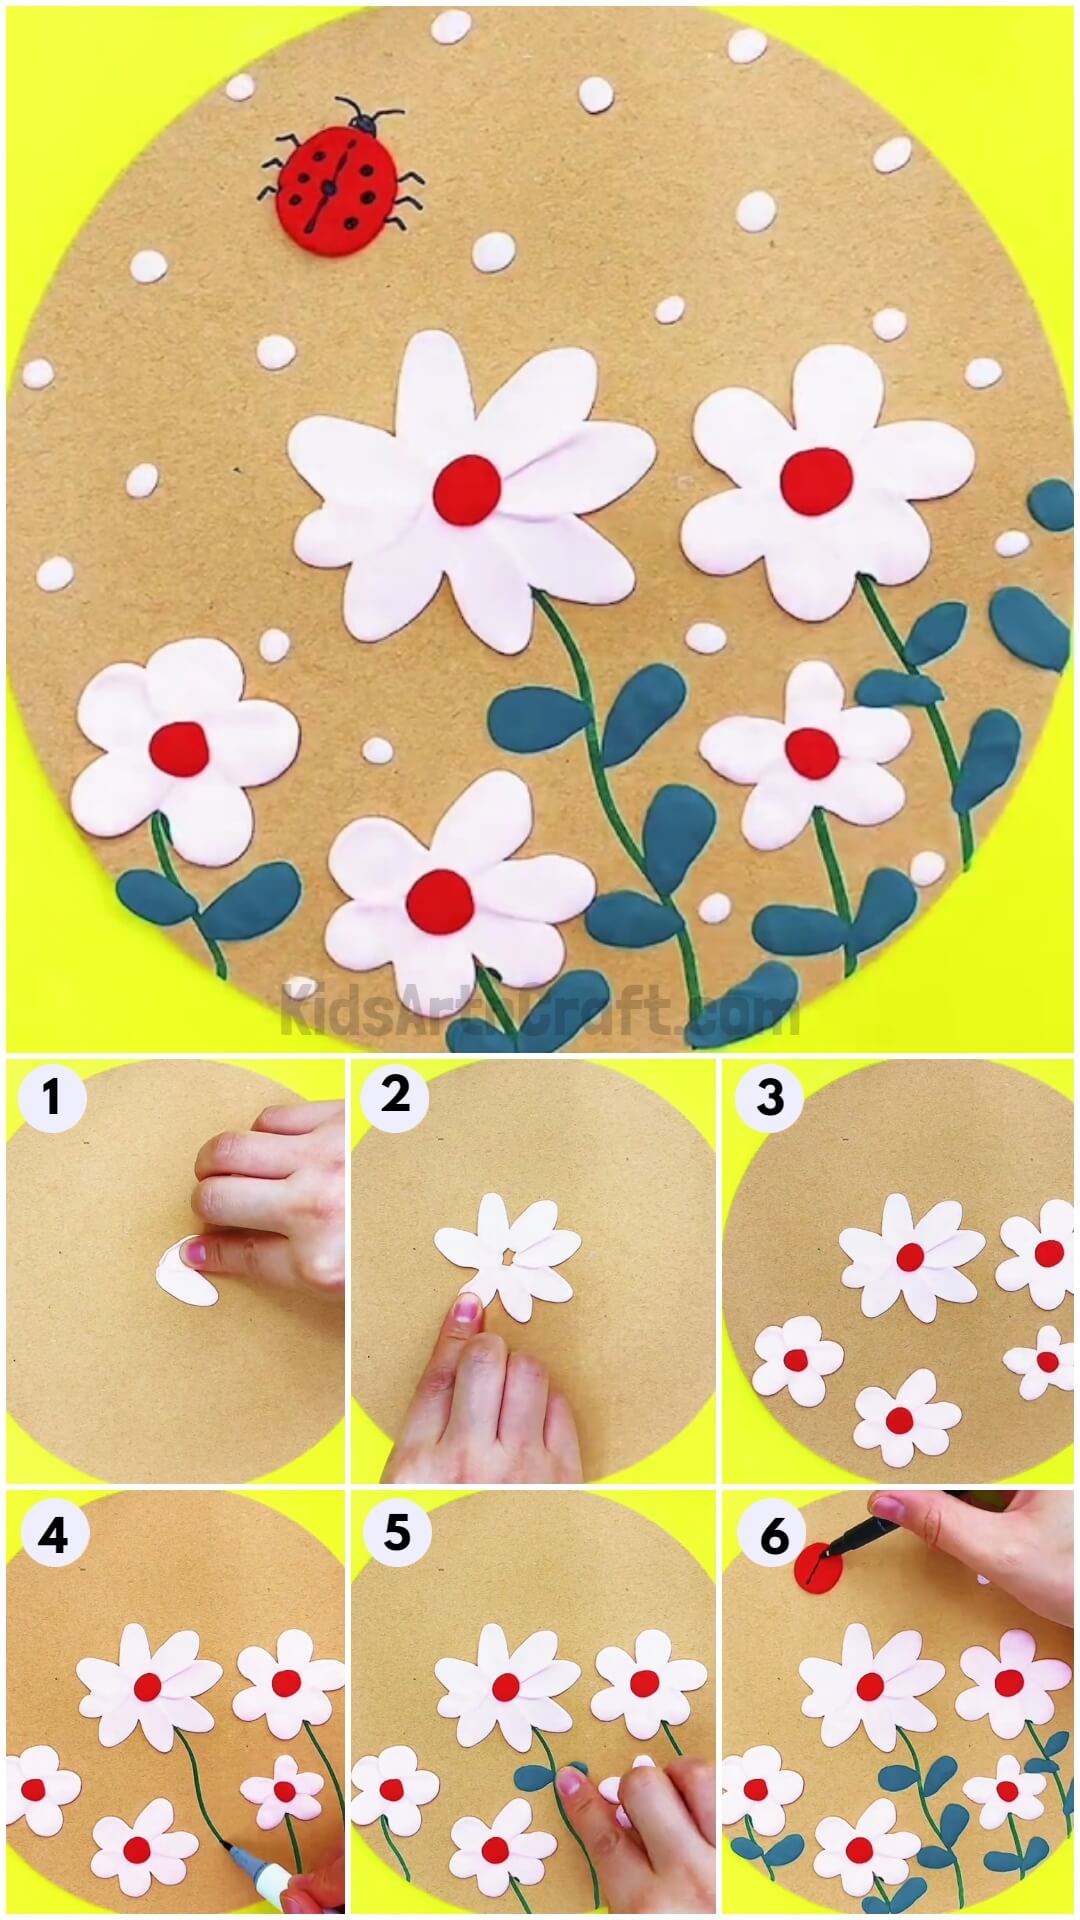
Create beautiful flower garden decorations with this easy clay craftwork for beginners. Learn how to make stunning clay flower garden art perfect for your home decor.
Have you ever thought about having a garden full of flowers and watering them daily and taking care of them? Whenever you see your garden it will bring peace and satisfaction to you. I’m sure you have already imagined it. So, today we are going to plant our own garden with clay. Let’s get started!
Easy Clay Flower Garden Craft
Read More: DIY Miniature Clay Cake Craft Activities for Kids
Materials Required
- Clay (White, Red, Dark Blue)
- Marker/sketch pen (Green and Black)
- Cream craft paper
Procedure
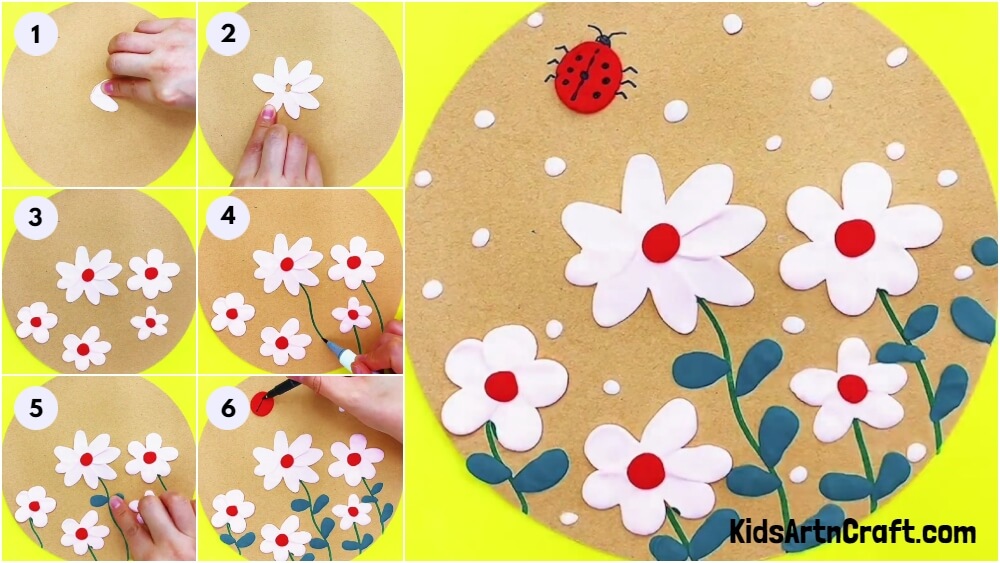
Step 1: Taking White Clay And Stick It On Cream Craft Paper
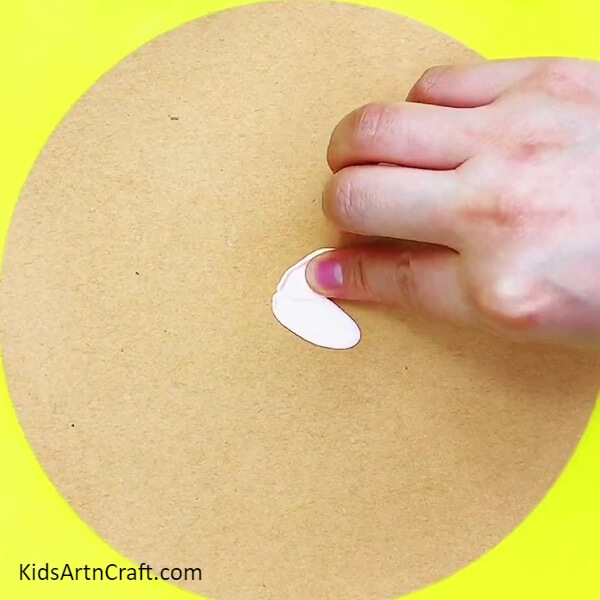
Your first step is to take a cream-colored craft paper. The cream-colored craft paper should be in a circle shape. Then, take a white colored clay. Place it on cream-colored craft paper. Place the white-colored clay in the center of the cream-colored craft paper.
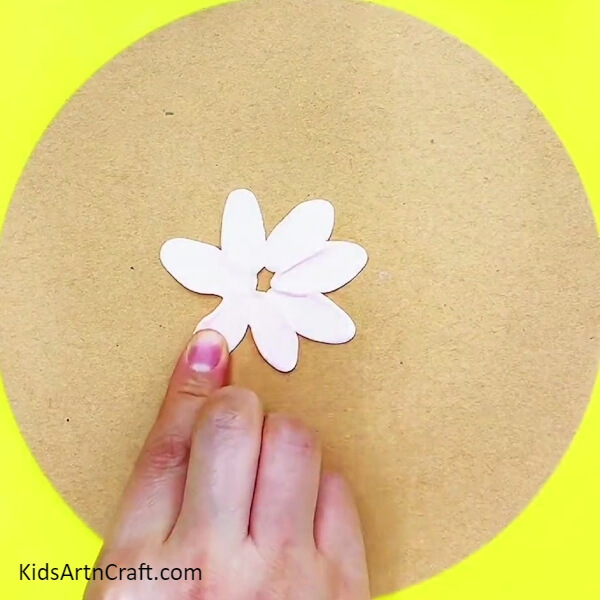
Step 2: Presing White Clay With Your Fingers
 Easy
Easy
Now, to make a flower, press the white-colored clay which is placed on the center of the cream-colored craft paper with your fingers, and turn it into a flower.
Step 3: Sticking Red Clay On White Clay
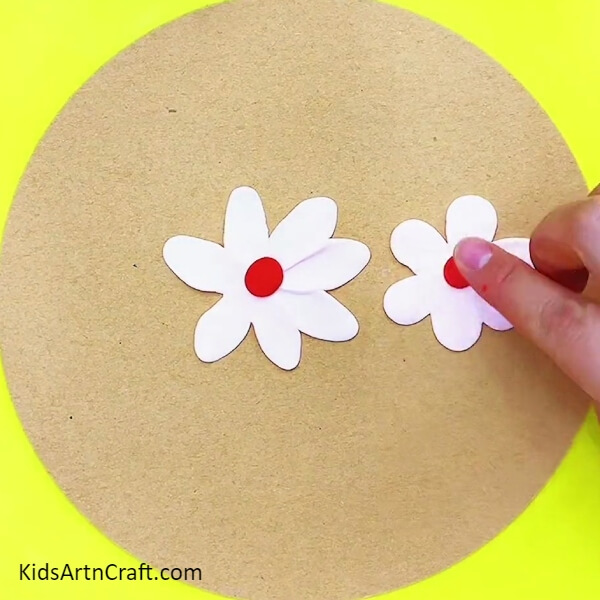
With the help of red coloured clay, make a small red coloured ball. After making a small red ball place the red ball in the middle of the white coloured flower which you made from white-colored clay.
Step 4: Making More Flowers With White And Red Clay
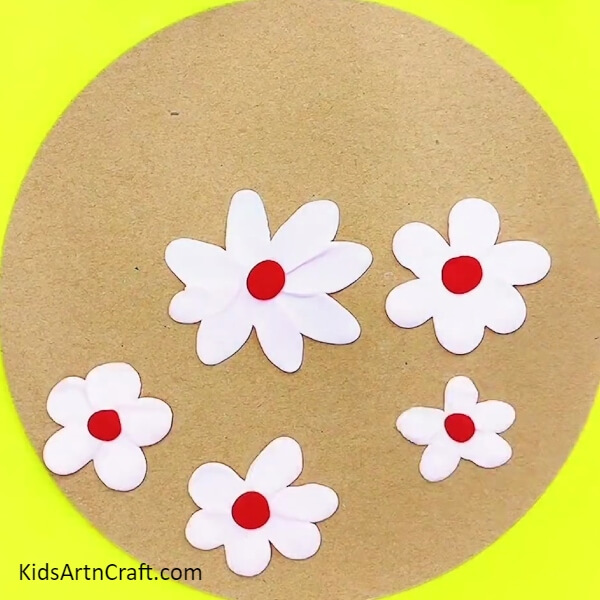
By repeating the same step, make more flowers with the help of white-colored clay and red-colored clay. You have to make a total of five flowers of different sizes and stick them on the cream-colored craft paper as shown.
Step 5: Making Stem With Green Marker/Sketch Pen
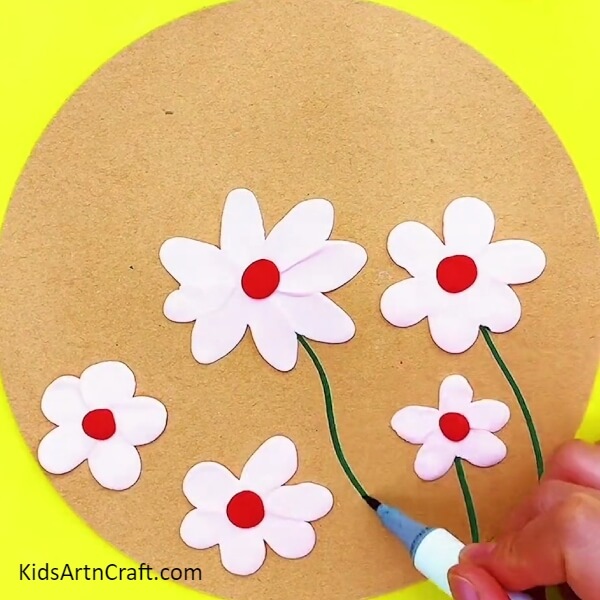
Now, with the help of a green marker/sketch pen, make the stem of each flower that you made from white-colored clay and red-colored clay. Make the stem to the bottom of the cream-colored craft paper with the help of a green marker/sketch pen.
Step 6: Making Leaves With Dark Blue Clay
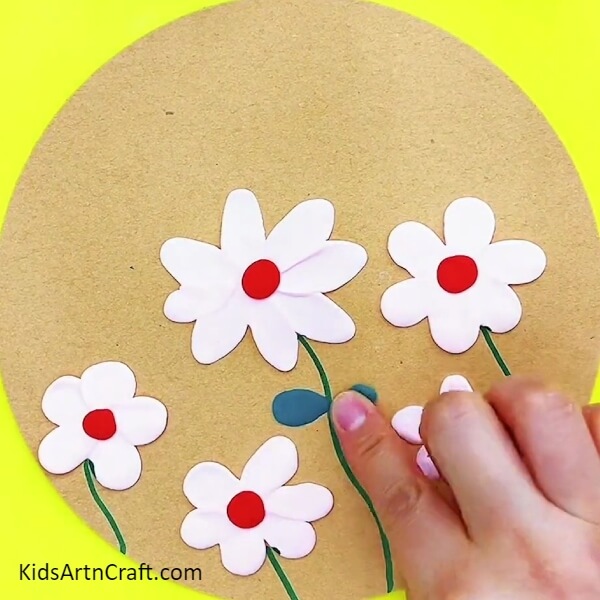
Take dark blue clay. After taking dark blue clay, make leaves for the flowers with the help of dark blue clay. Stick the dark blue-coloured leaves on each side of the stem.
Step 7: Making Leaves For Each Flower With Dark Blue Clay
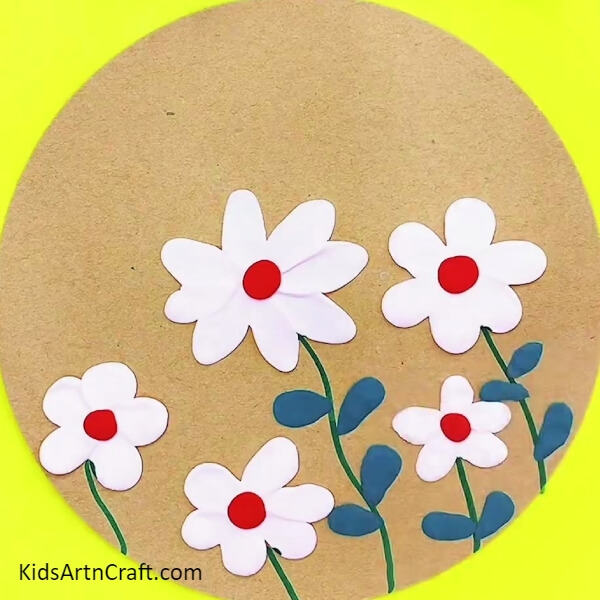
Make more leaves with the help of dark blue clay. Stick at least more than two dark blue leaves on each of the stem which is made from green marker/sketch en.
Step 8: Making A Red Circle With Red Clay
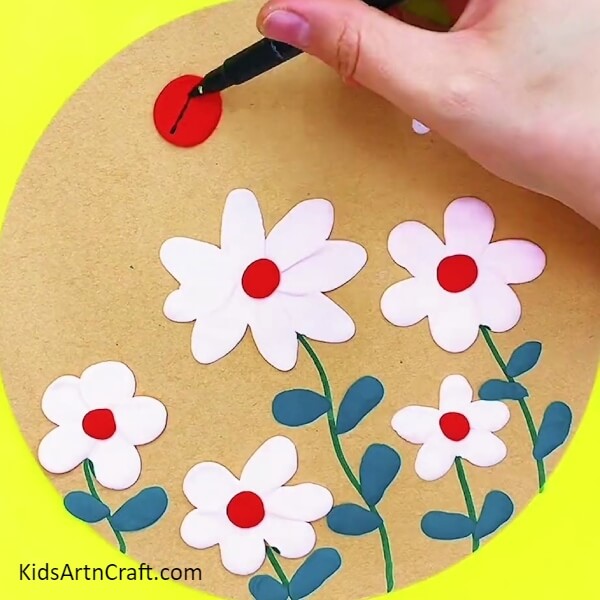
Now, with the help of red-colored clay, make a circle. After making a circle, stick the red-colored clay on the top middle part of the cream-colored craft paper.
Then, with the help of a black marker/sketch pen, make a line in the middle of the red-colored circle which you made from red-colored clay. Then, make three dots on either side of the line. Then, make three legs on each side of the red-colored clay. So, you have to make a total of six legs. Make a small circle at the front of red-colored clay with the help of a black marker/sketch pen. Your ladybug is ready!
Your Craft Is Ready!!
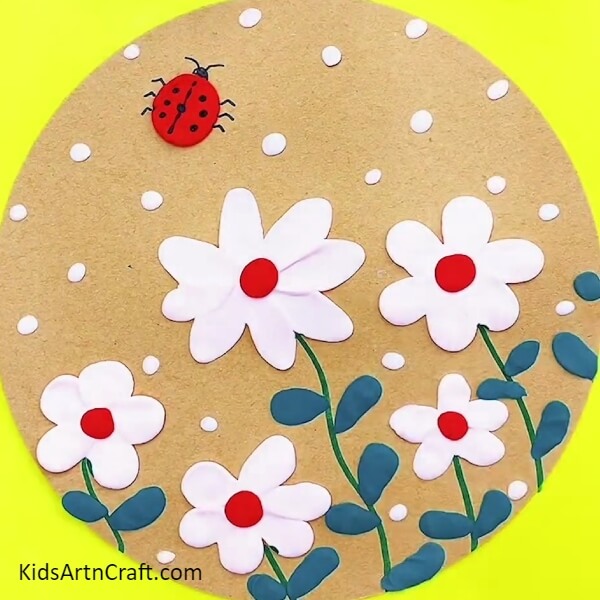
Finally, your own beautiful flower garden is ready to be watched in peace. This clay art looks amazing though. You should definitely try this super easy and amazing clay craft. From this, you can even learn more about clay art and stuff.
I hope you try this craft so that you can give your own flower garden where you can watch it in peace and satisfaction without worldly stress. It will be just you, your flowers, and your peace.
Follow us on Youtube for art and craft tutorials and much more.
More Articles from Kids Art & Craft
- How to Make Clay Flower Easy Tutorial for Kids
- Clay watermelon ice cream easy craft tutorial
- How to Make Worm Using Clay For Kids
- DIY Clay Giraffe Step by Step Tutorial For Kids
- Simple & Tasty Ice-Cream Craft Using Clay – Step by Step Tutorial


