Recycled Crafts
Deer Light Lamp DIY Craft For Kids

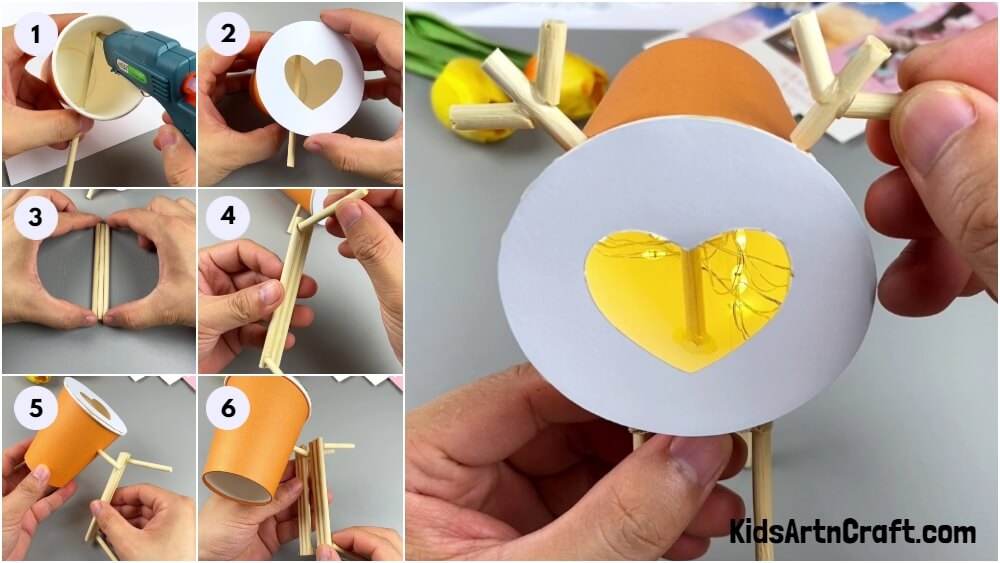
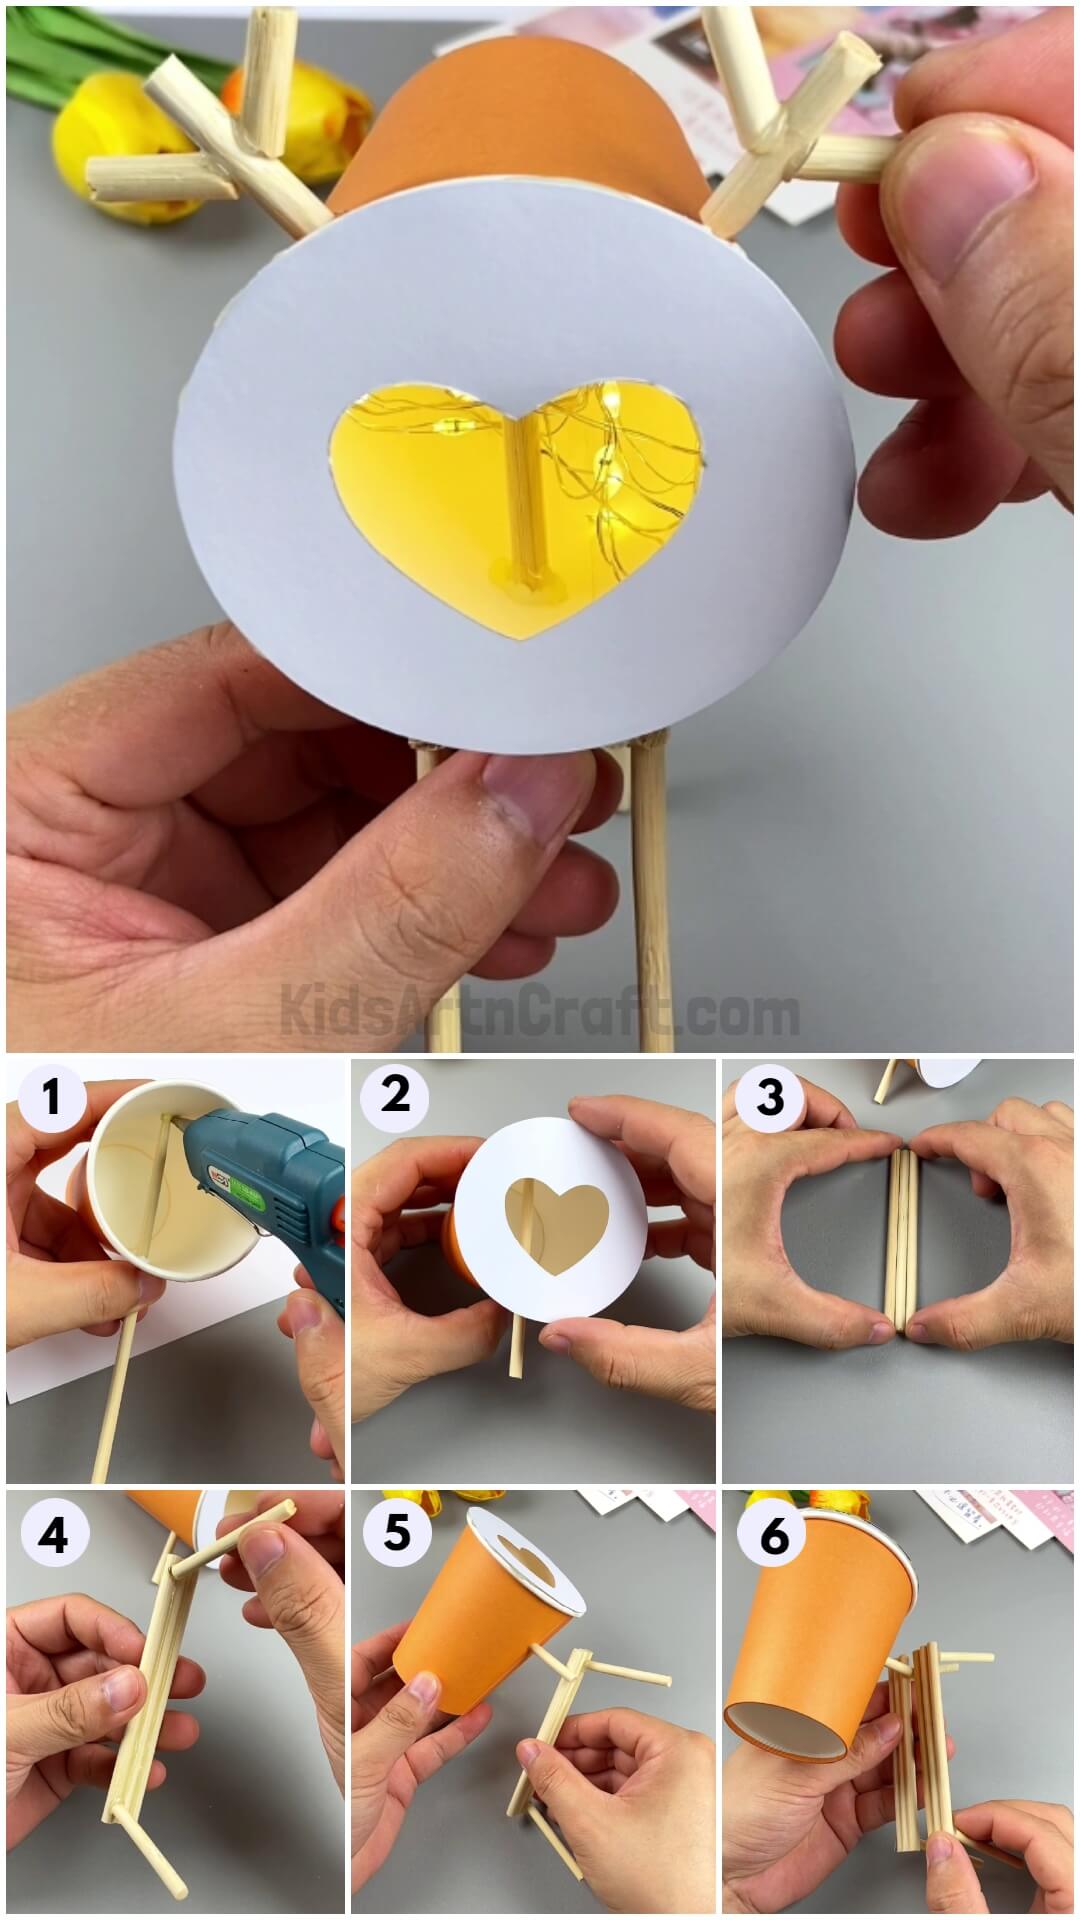
Let’s make a cute and pretty light lamp using paper cups and wooden sticks! This step-by-step tutorial will serve as a guide for the same!
Hello and welcome to this easy yet amazing tutorial on making this paper cup and stick craft! This craft is suitable for kids to make of every age and is budget-friendly too! Kids will love to make a creative light lamp in a deer shape on their own and the results will be the apple of their eyes, they will even get motivated by their crafting skills and imagination! Encourage them to unleash their creative selves in this craft-making by grabbing up the listed materials and beginning!
Simple Deer Light Lamp Craft
Read More: How to Make Paper Cup Wrist Watch Tutorial for Kids
Materials Required
- Paper Cup
- White Paper Sheet
- Metal-wire Fairy Light
- Wooden Sticks
- Craft Cutter
- Hot Glue Gun
Procedure
Step 1: Inserting A Wooden Stick Into a Paper Cup
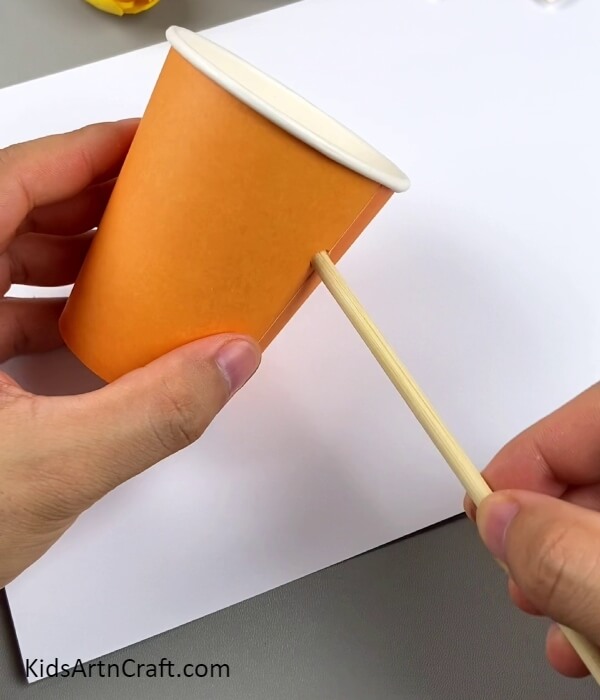
Begin this craft by taking a paper cup and a wooden stick. Make a hole in the side of the paper cup and push-in the wooden stick into it.
Step 2: Pasting The Wooden Stick To The Cup
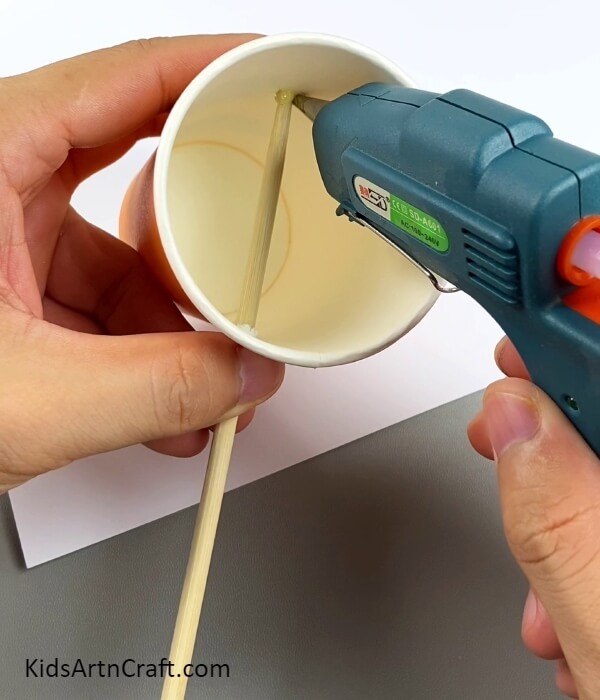
Make the stick reach the opposite side and a little above the hole and using a hot glue gun paste the stick from there to the cup.
Step 3: Cutting The Stick
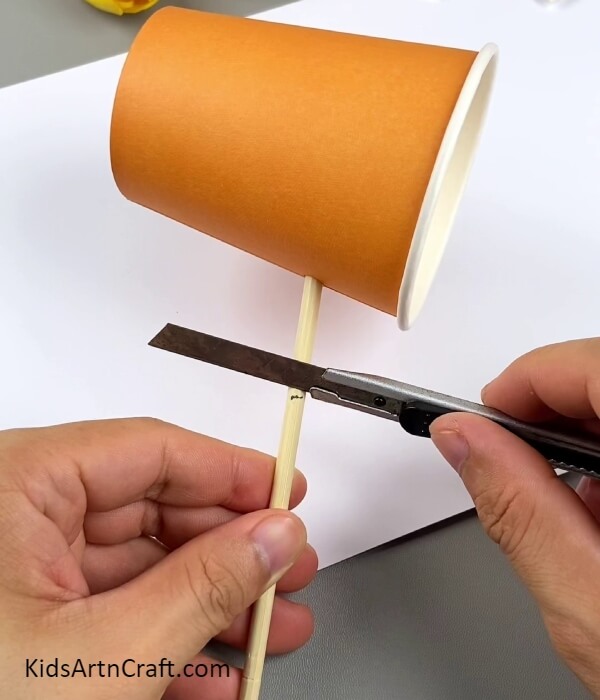
From outside the paper cup, cut the stick after leaving some space from the cup as shown in the image using a craft cutter.
Step 4: Drawing And Cutting Out A Heart In A Circle
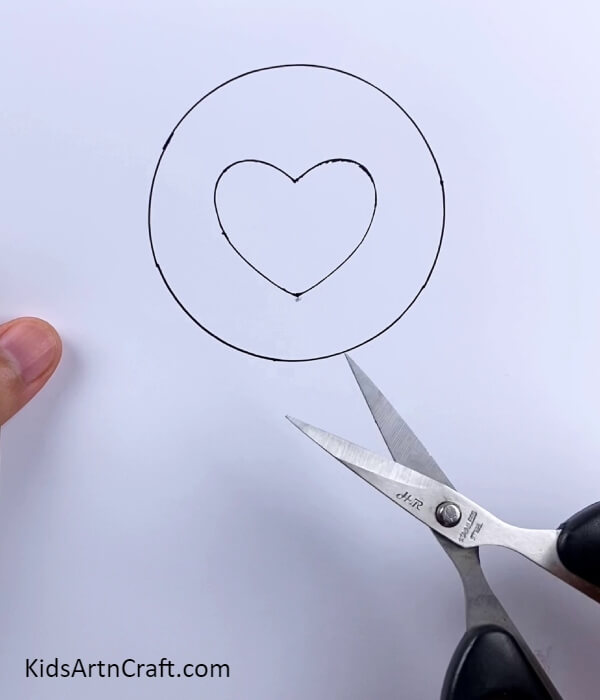
From the open side of your cup, place it over a white paper and trace the boundary with a black pen. Now, draw a heart inside the cup boundary. Using scissors, cut out the circle and the heart it it from the paper.
Step 5: Pasting The Circle Over The Cup
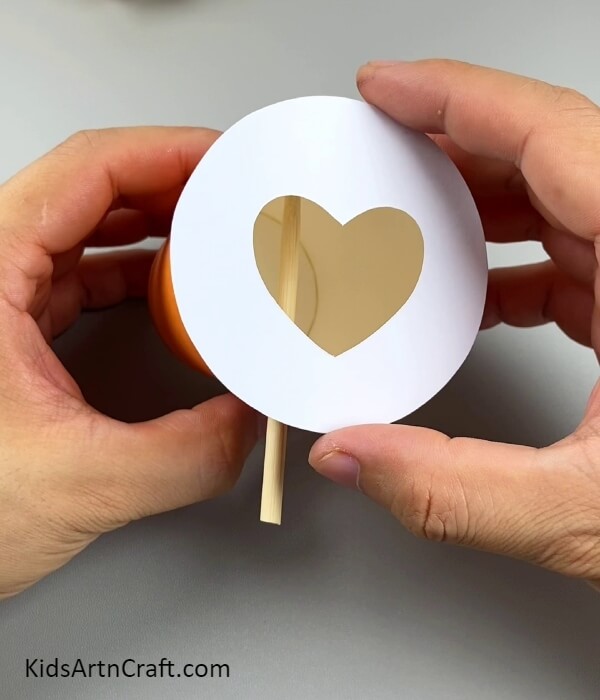
Paste the circle with the heart cut out over the opened side of the cup to make a lid over it using hot glue. This will be the face of the deer and the stick coming out of it will be the neck.
Step 6: Cutting the Wooden Sticks Into Half
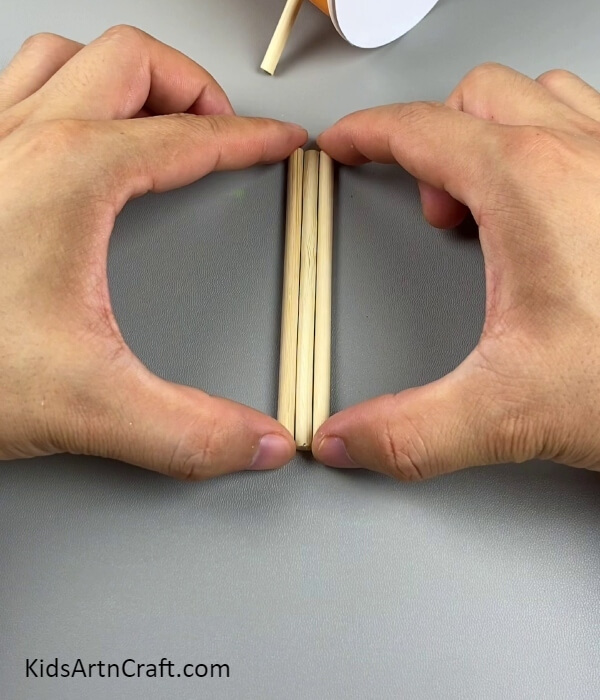
Using the craft cutter, cut down 2 wooden sticks in half and join the 3 pieces together using hot glue.
Step 7: Pasting Two More Stick Pieces
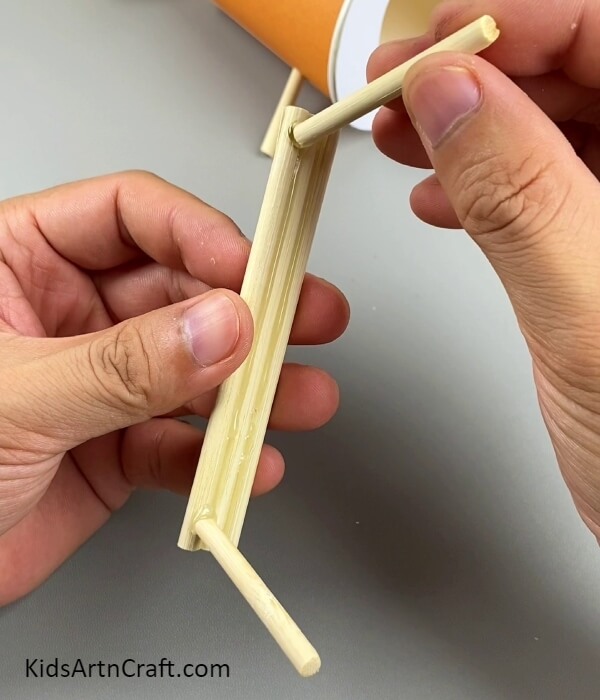
Using the cutter, cut down the half stick piece into 2 further small halves and paste these 2 over the 3-stick figure at their corners and a little tilted outwards using hot glue. This will be the body-leg of your deer lamp.
Step 8: Making Another Body-Leg
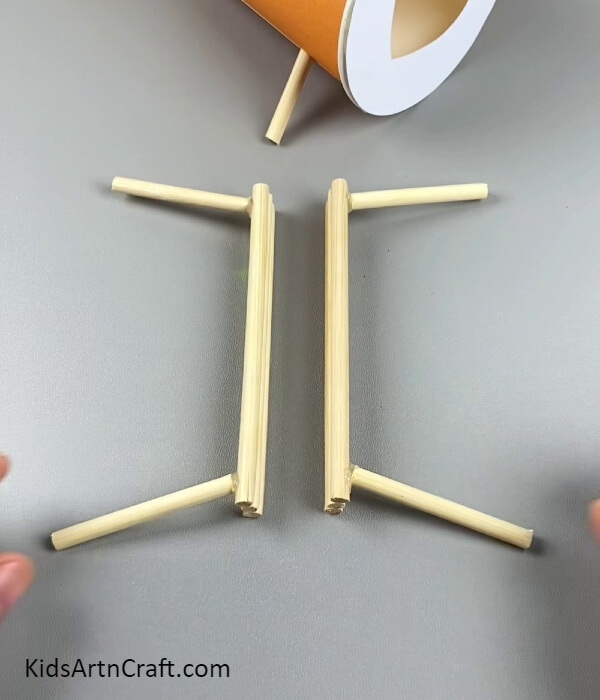
Following the same previous steps, make another same body-leg of your deer lamp.
Step 9: Pasting The Body-Leg To The Neck
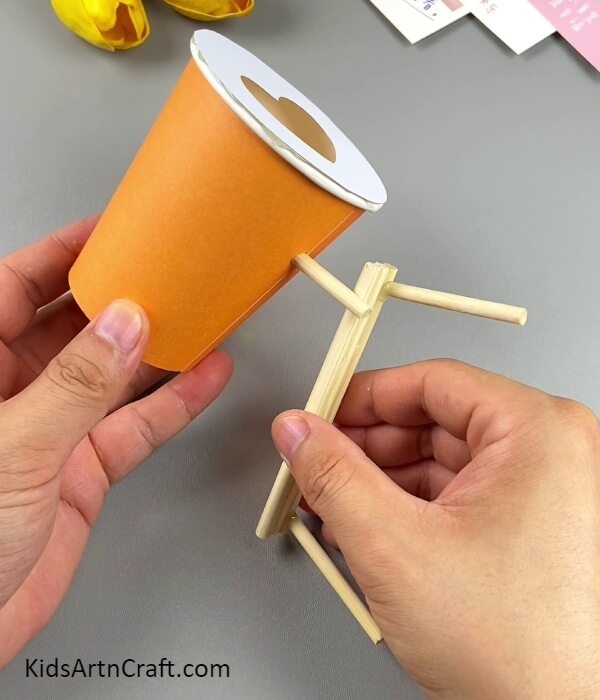
Paste one leg on one side of the stick body coming out of the cup using hot glue. Make sure to paste the leg from one corner of it as shown in the image.
Step 10: Pasting The Other Body-Leg
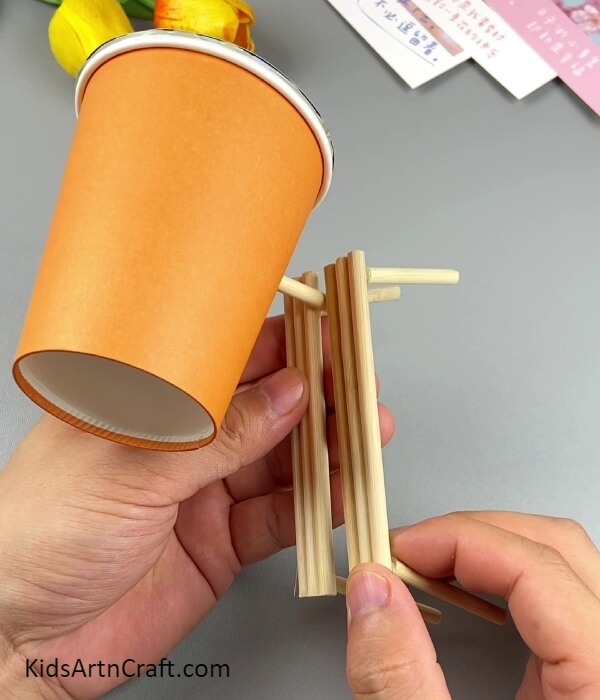
In the same way, paste it other body leg from the other side of the body.
Step 11: Making A Tail Of Your Deer
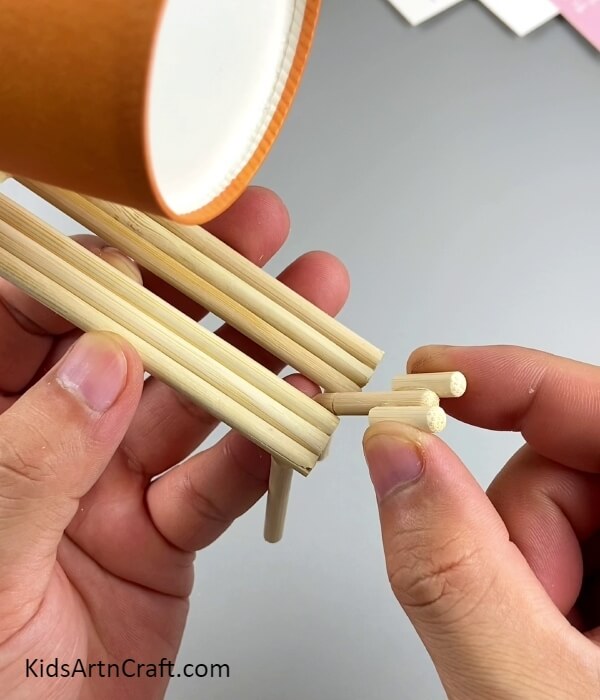
Cut out a stick piece of the length of the legs and further 2 small stick pieces and paste them on the ends of the bigger stick piece, this will be the tail of your deer. Now, paste this tail on the other end of the body legs in the middle gap tilted outward using hot glue.
Step 12: Making A Rectangular Hole On The Cup Base
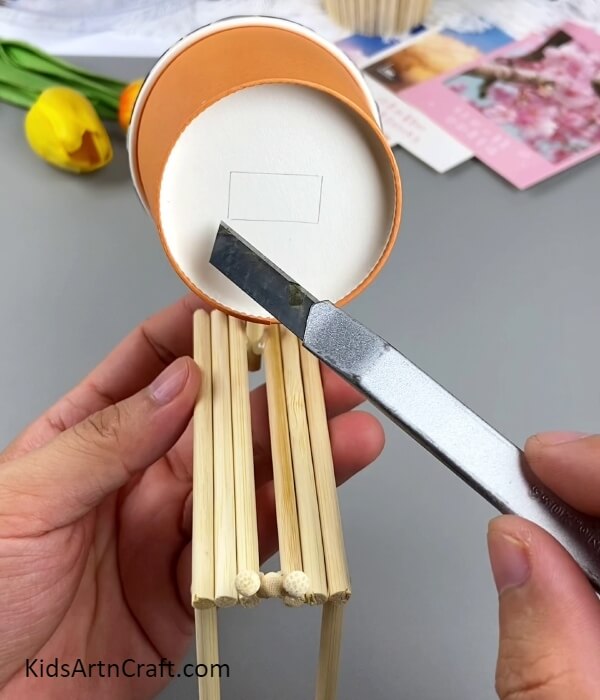
Using a pencil, draw a rectangle on the cup base, and using the craft cutter, cut it out to make a rectangular hole over it.
Step 13: Inserting A Fairy Light In The Cup
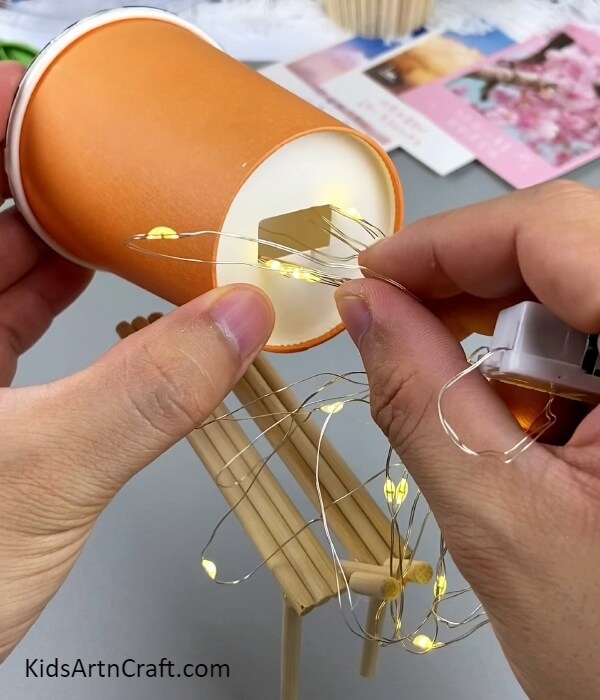
Take a metal-wire fairy light with a battery attached to it and put it into the cup from the rectangular hole.
Step 14: Sticking The Battery Over The Hole
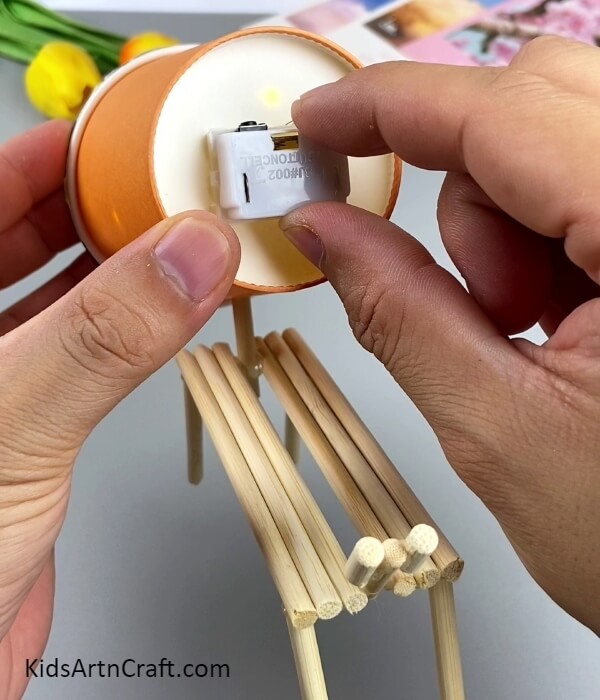
After putting the whole fairy light in the cup, using hot glue stick the battery over the hole on the cup base.
Your Deer-Shaped Light Lamp is Ready!
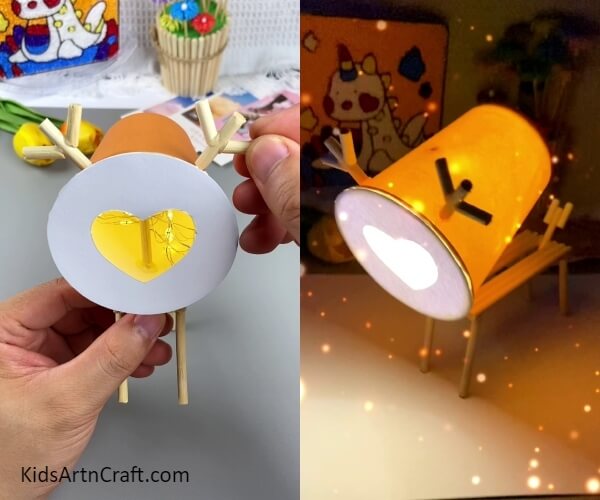
Woohoo! Your deer-shaped light lamp is ready to brighten up your room!
You can take a minute to admire your creation! This brings an end to this tutorial. You can now use up your craft any way you want, decorate it in the home, make it as a school art project, add it to your craft collection, give it to your loved one, anything! This craft will definitely thrive everywhere! If you want to add a touch of your creativity, you can go for it too! Make it as unique as you are!
Follow us on Youtube for art and craft tutorials and much more.
More Articles from Kids Art & Craft
- DIY Paper Cup Swan Step-by-Step Tutorial For Kids
- How to Make Paper Cup Fish Craft
- Paper Cup Octopus Craft Tutorial For Kids
- DIY Ribbon Flowers Craft Step-by-Step Tutorial For Beginners
- Plastic Straws Flower Making Craft Tutorial For Kids


