


Recycled Crafts
Rainbow Straw Chair Craft Tutorial For Beginners

Learn how to make a bright and cheerful Rainbow Straw Chair. This guide is for beginners and has clear steps and materials needed to make a special chair. Get started now!
Welcome everyone! Rainbow is a colorful beauty from nature, who don’t like rainbow! Vibrant colors from rainbow calms mind. Creating crafts with rainbow colors is a pleasant thing to do. In this tutorial, we going to learn how to create chair craft with rainbow colored straws. This tutorial is for beginners to create this colorful craft with simple steps. Let’s start.
Easy Rainbow Straw Chair Craft For Beginners
Read More: Autumn Leaf Squirrel Craft Tutorial For Beginners
Materials Required
- Color straws (choose different colors of straws, rainbow colors are must)
- Scissors
- Glue gun
Procedure
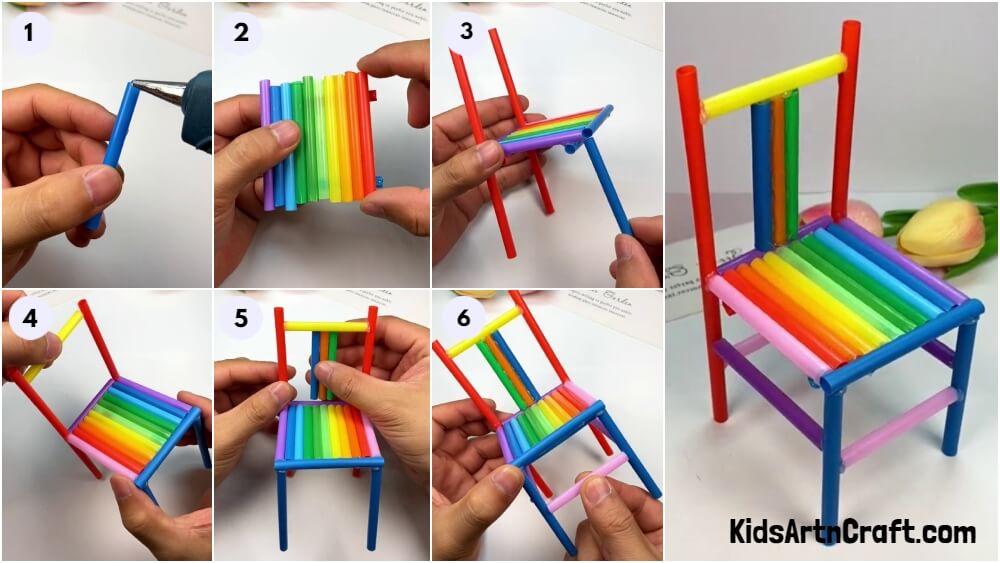
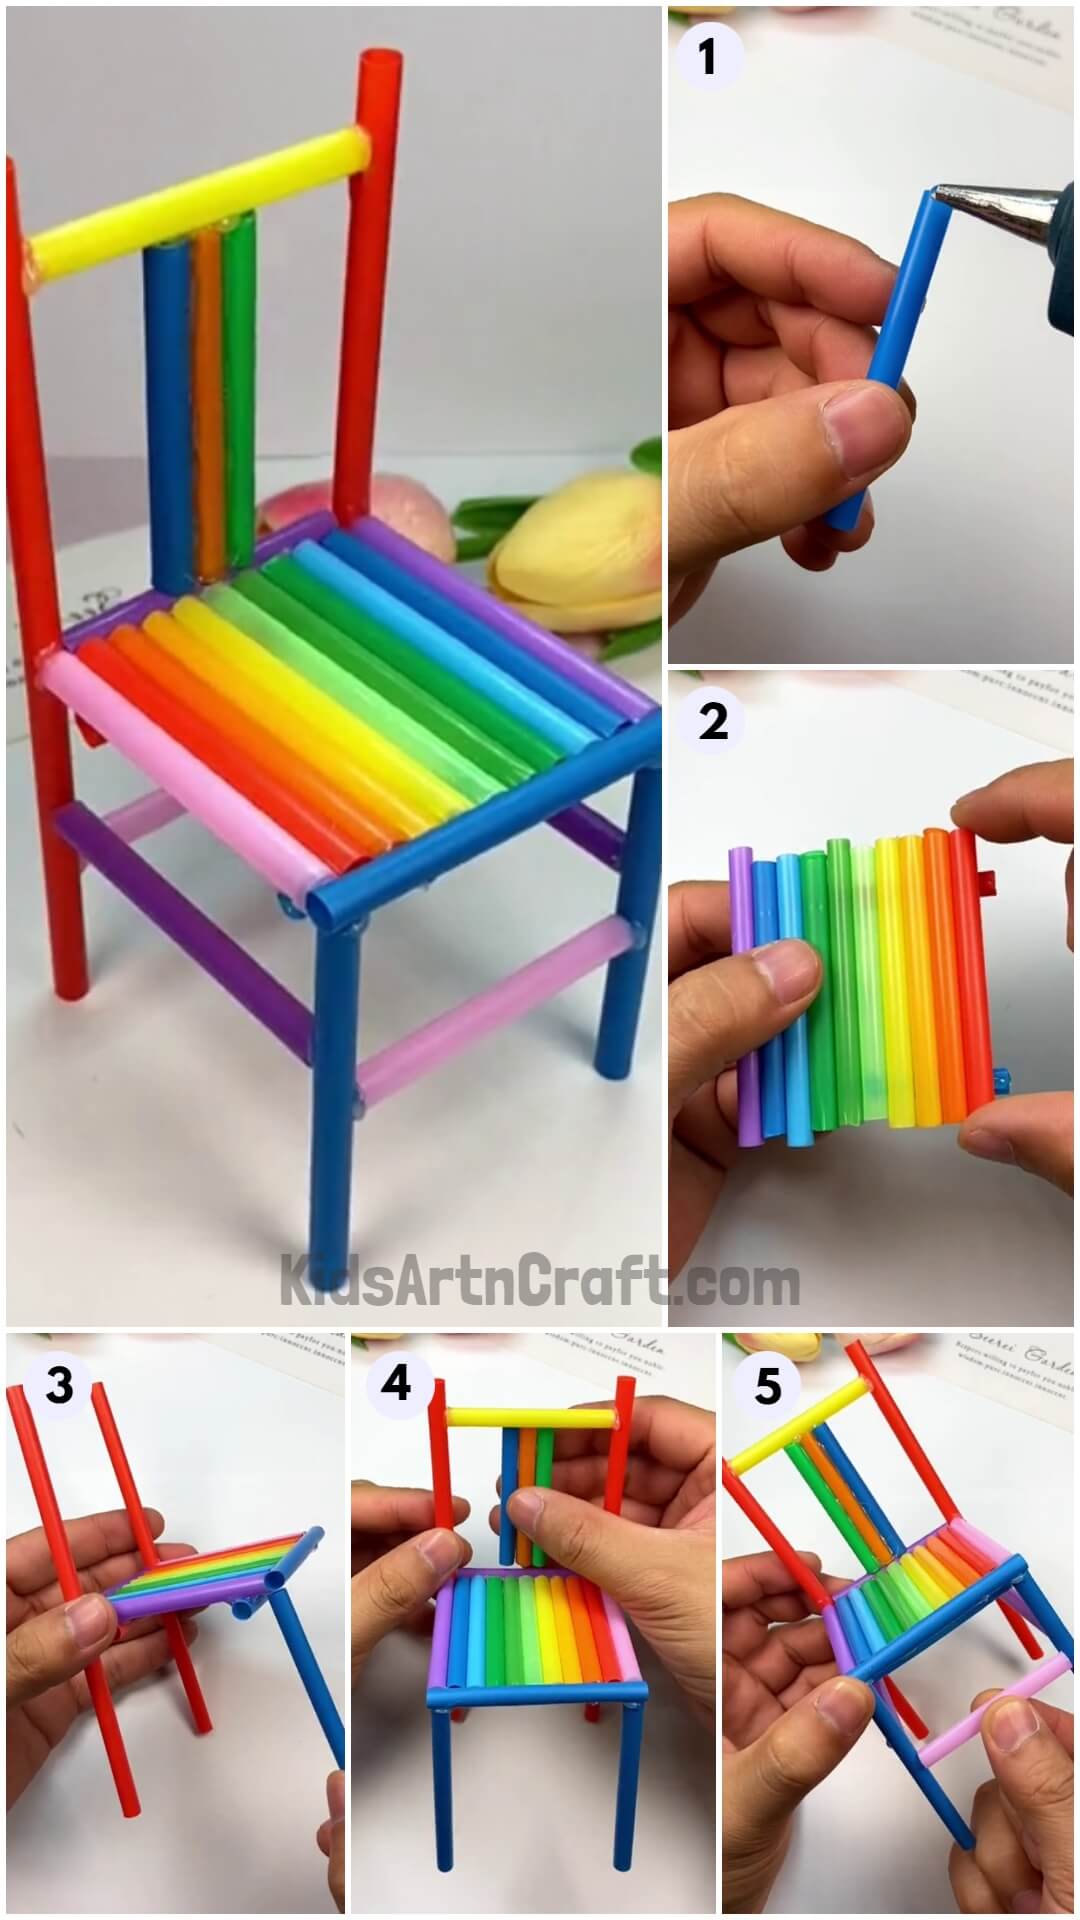
Step 1: Cutting straws and applying glue on it
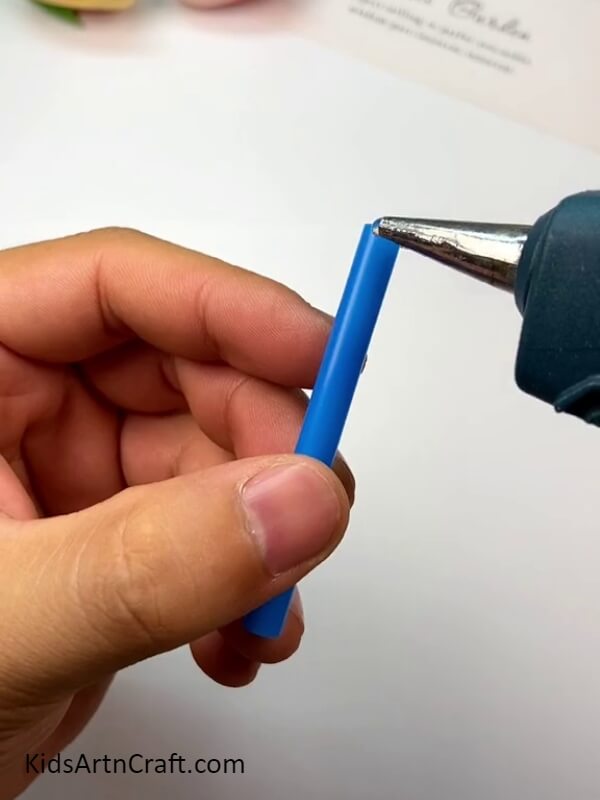
Grab your scissors, cut blue color straw into 10 cm piece and apply some glue at one end.
Step 2: Pasting violet color straw with blue straw
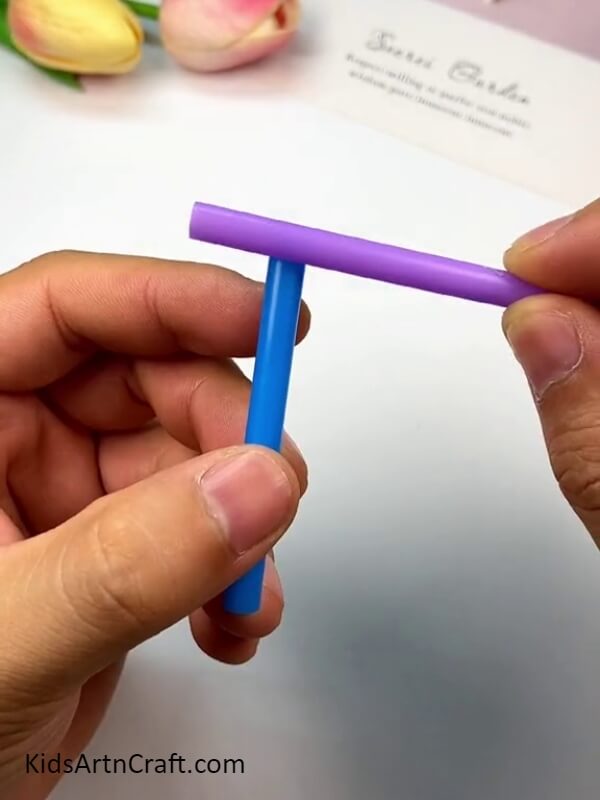
Then take your violet color straw and also cut it into 10cm piece, then paste one end of violet straw with end of blue straw as shown in the image.
Step 3: Pasting red color straw with violet
And also cut blue and red color straws into 10 cm pieces, then paste one edge of red color straw with another end of violet straw. Take blue piece of straw and paste it near to violet straw.
Step 4: Pasting all pieces of straw to create chair
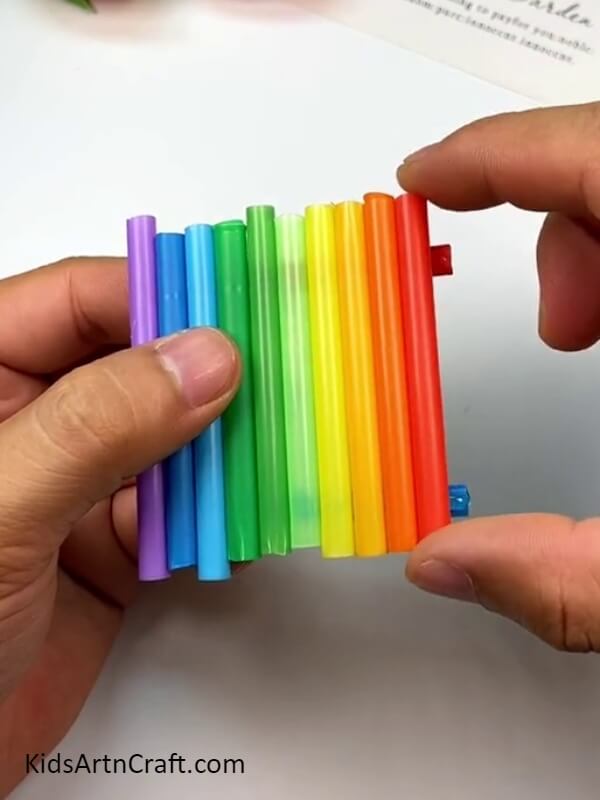
Choose 7 colors of rainbow (dark& light blue, green& light green, yellow, dark& light orange, red) and cut all straws into 10cm pieces, then paste it one by one on red and blue as shown, finally paste one rose color straw, then cut both edges for proper shape.
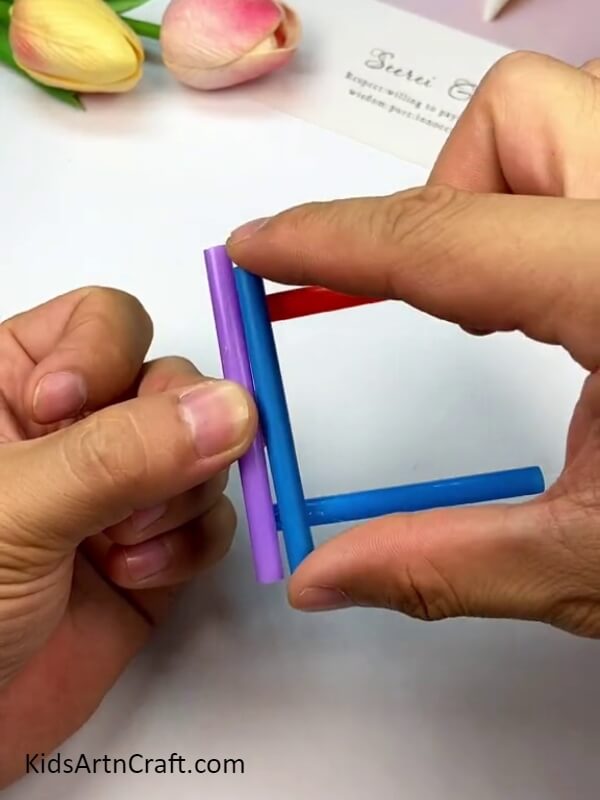
Step 5: Pasting red color straw to create chair leg
Take two pieces of red straws and paste it at two ends of our chair seat.
Step 6: Pasting piece of violet straw to connect chair seat with legs
Then, cut 9cm piece from violet straw and paste it between those red straws to joint chair seat with red straws.
Step 7: Pasting blue straw for front legs
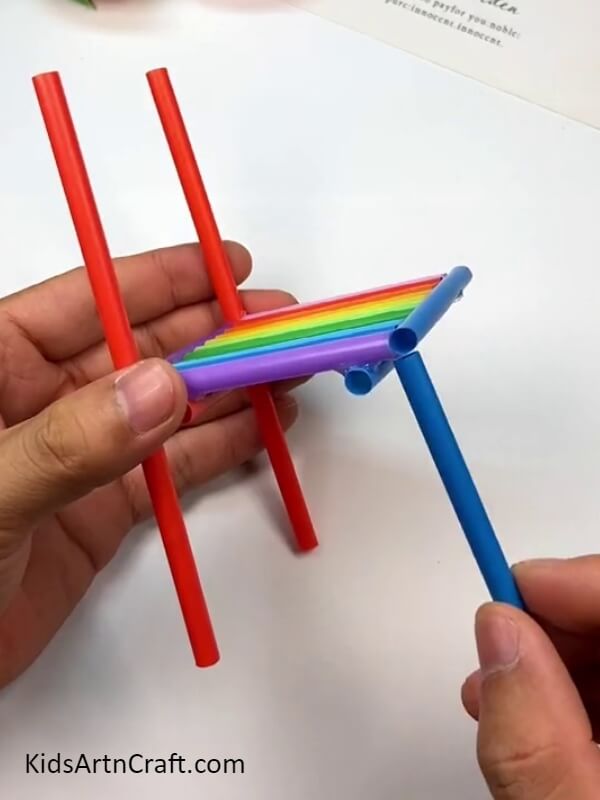
Now, cut two 10 cm pieces from blue straw for chair legs and paste it at front edges of chair seat.
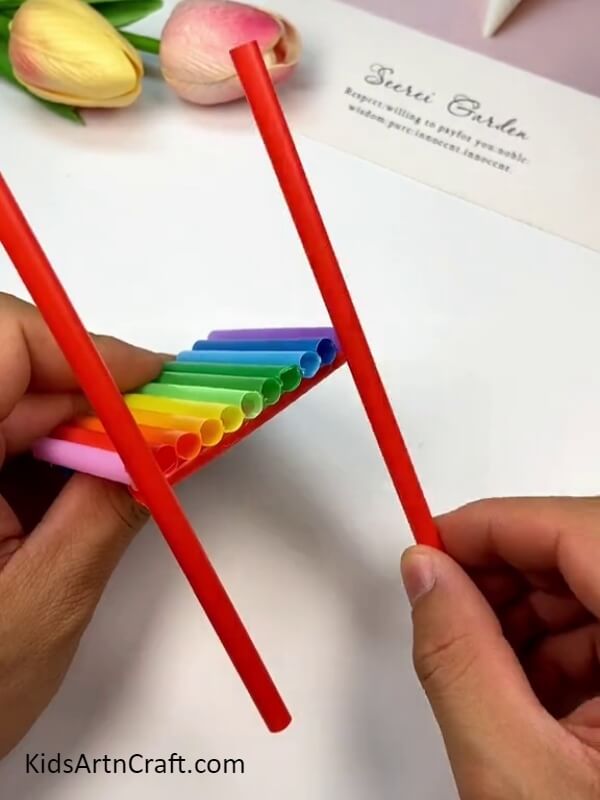
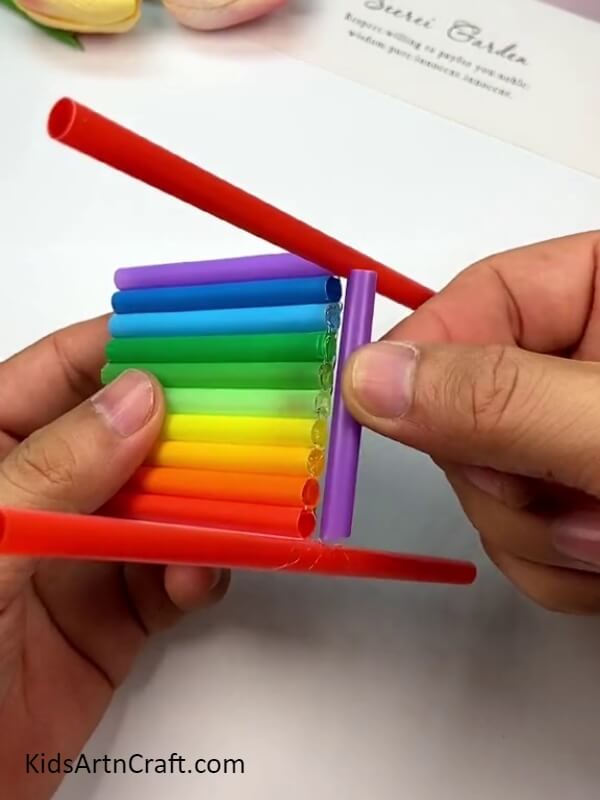
Step 8: Pasting piece of yellow straw with top of red straws
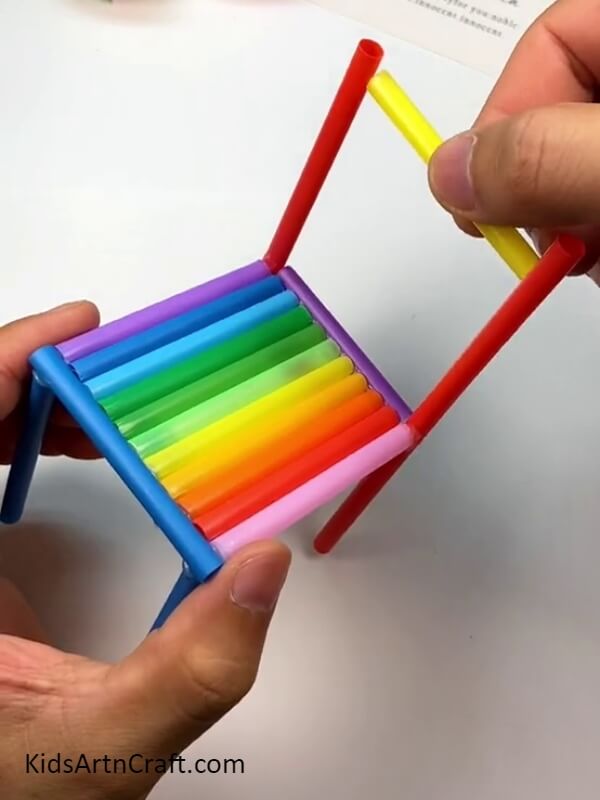
Cut 9cm piece from yellow straw, paste it on top of red straws.
Step 9: Cutting small pieces from blue, orange and green straw and pasting it
Select your three favorite colors of straw or take orange, blue& green. Measure length between yellow and violet straw, which is top part of chair and cut three color straws we choose before into that measurement, then paste it between yellow and violet straws.
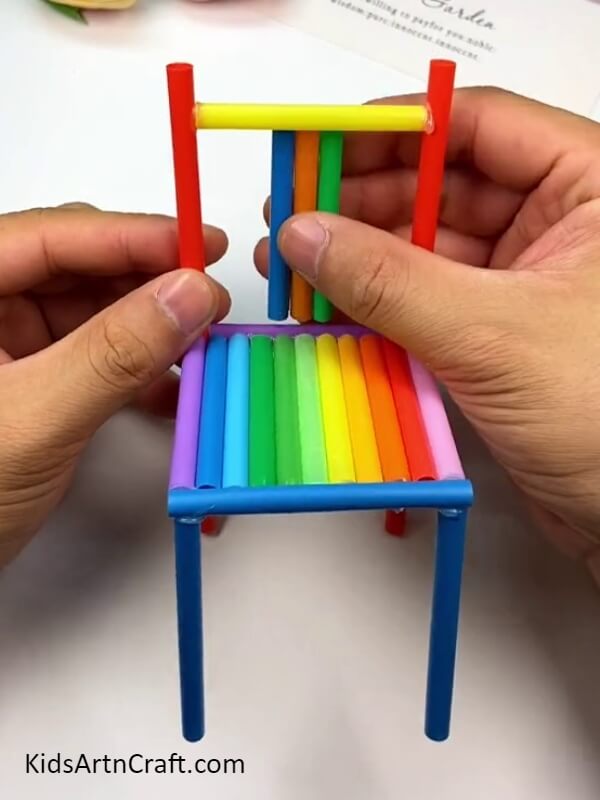
Step 10: Cutting two pieces from violet and rose color straw
Take violet and rose color straws and cut 9cm pieces from it. Paste rose color pieces in between font and back side of chair legs. Paste violet color pieces in between left and right side of chair legs.
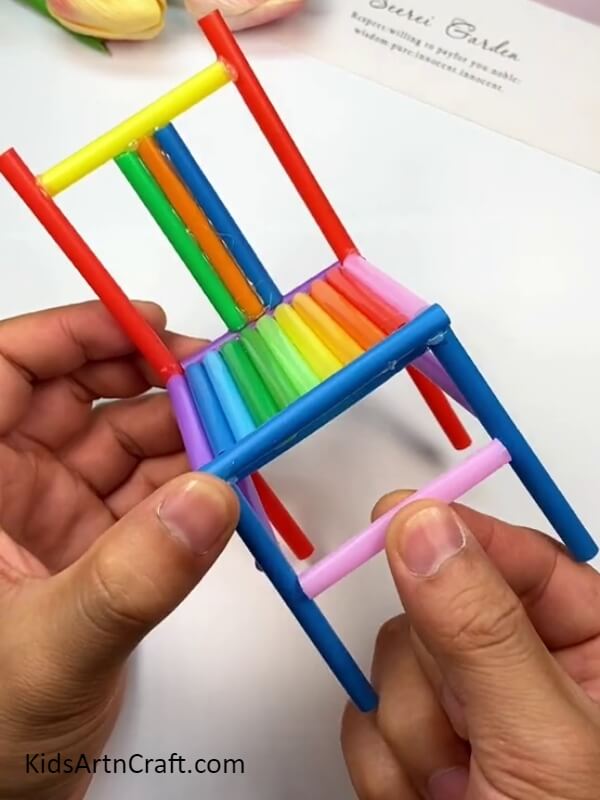
Our rainbow straw chair craft is ready!
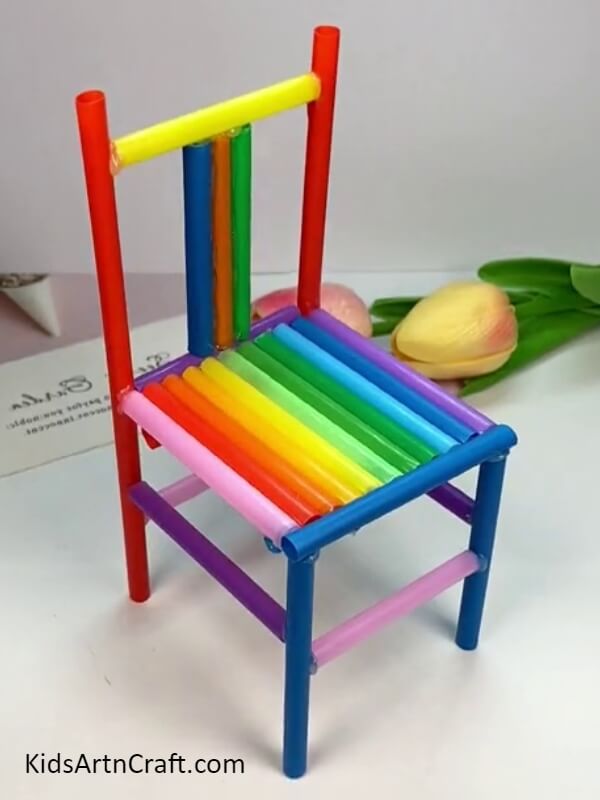
After complete everything let it dry, cut if any extra edges there and that’s it our colorful rainbow chair is ready!
We hope you all like this tutorial. Share your thoughts about this tutorial in comment box. If you are interested in creating more crafts like this, visit our website for more.
Thank you for visiting our website!
Follow us on Youtube for art and craft tutorials and much more.
More Articles from Kids Art & Craft
- Rainbow Paper Windmill Step-by-step Tutorial For Beginners
- How to Make Handmade Straw Fan Tutorial for Kids
- DIY Car With Balloon and Straw Easy Tutorial
- Easy Spinning Toy From Paper Cup And Straws For Kids
- Fun To Make Octopus Water Bottle Craft Step-by-step Tutorial For Kids


