


Paper Crafts
Rainbow Paper Windmill Step-by-step Tutorial For Beginners

This tutorial will show you, even if you’re a beginner, how to make a beautiful rainbow paper windmill with very few supplies. Follow the instructions step by step and you’ll soon have a unique decoration!
When I was in my childhood days, I love to play with colorful windmills. I never thought creating a colorful windmill is also fun to do. In this tutorial, we going to teach you how to create a rainbow paper windmill with color papers. You can use this rainbow paper windmill to decorate your study or office table by putting it in the flower vase. We give you step-by-step instructions to make this vibrant rainbow paper windmill.
Rainbow Paper Windmill Step-By-Step Tutorial For Beginners
Read More: Handprint Craft Paper Frog Easy Craft for Kids
Materials Required
- Color paper (Red, Orange, Yellow, Green, Dark& light blue, Pink, Violet)
- Straw
- Clay (Yellow color)
- Glue
- Needle
- Piece of wire
- White beat
- Single sided foam tape
Procedure
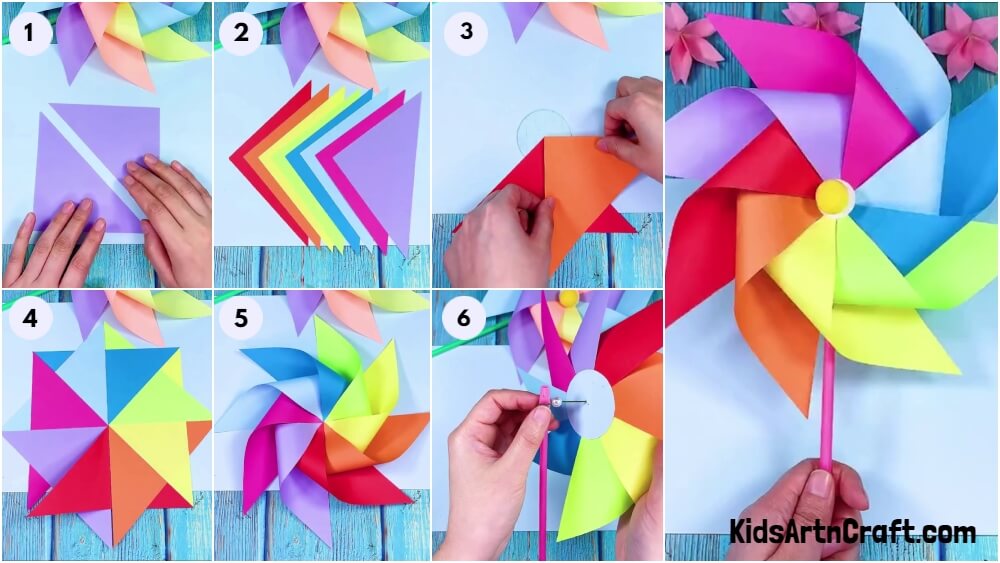
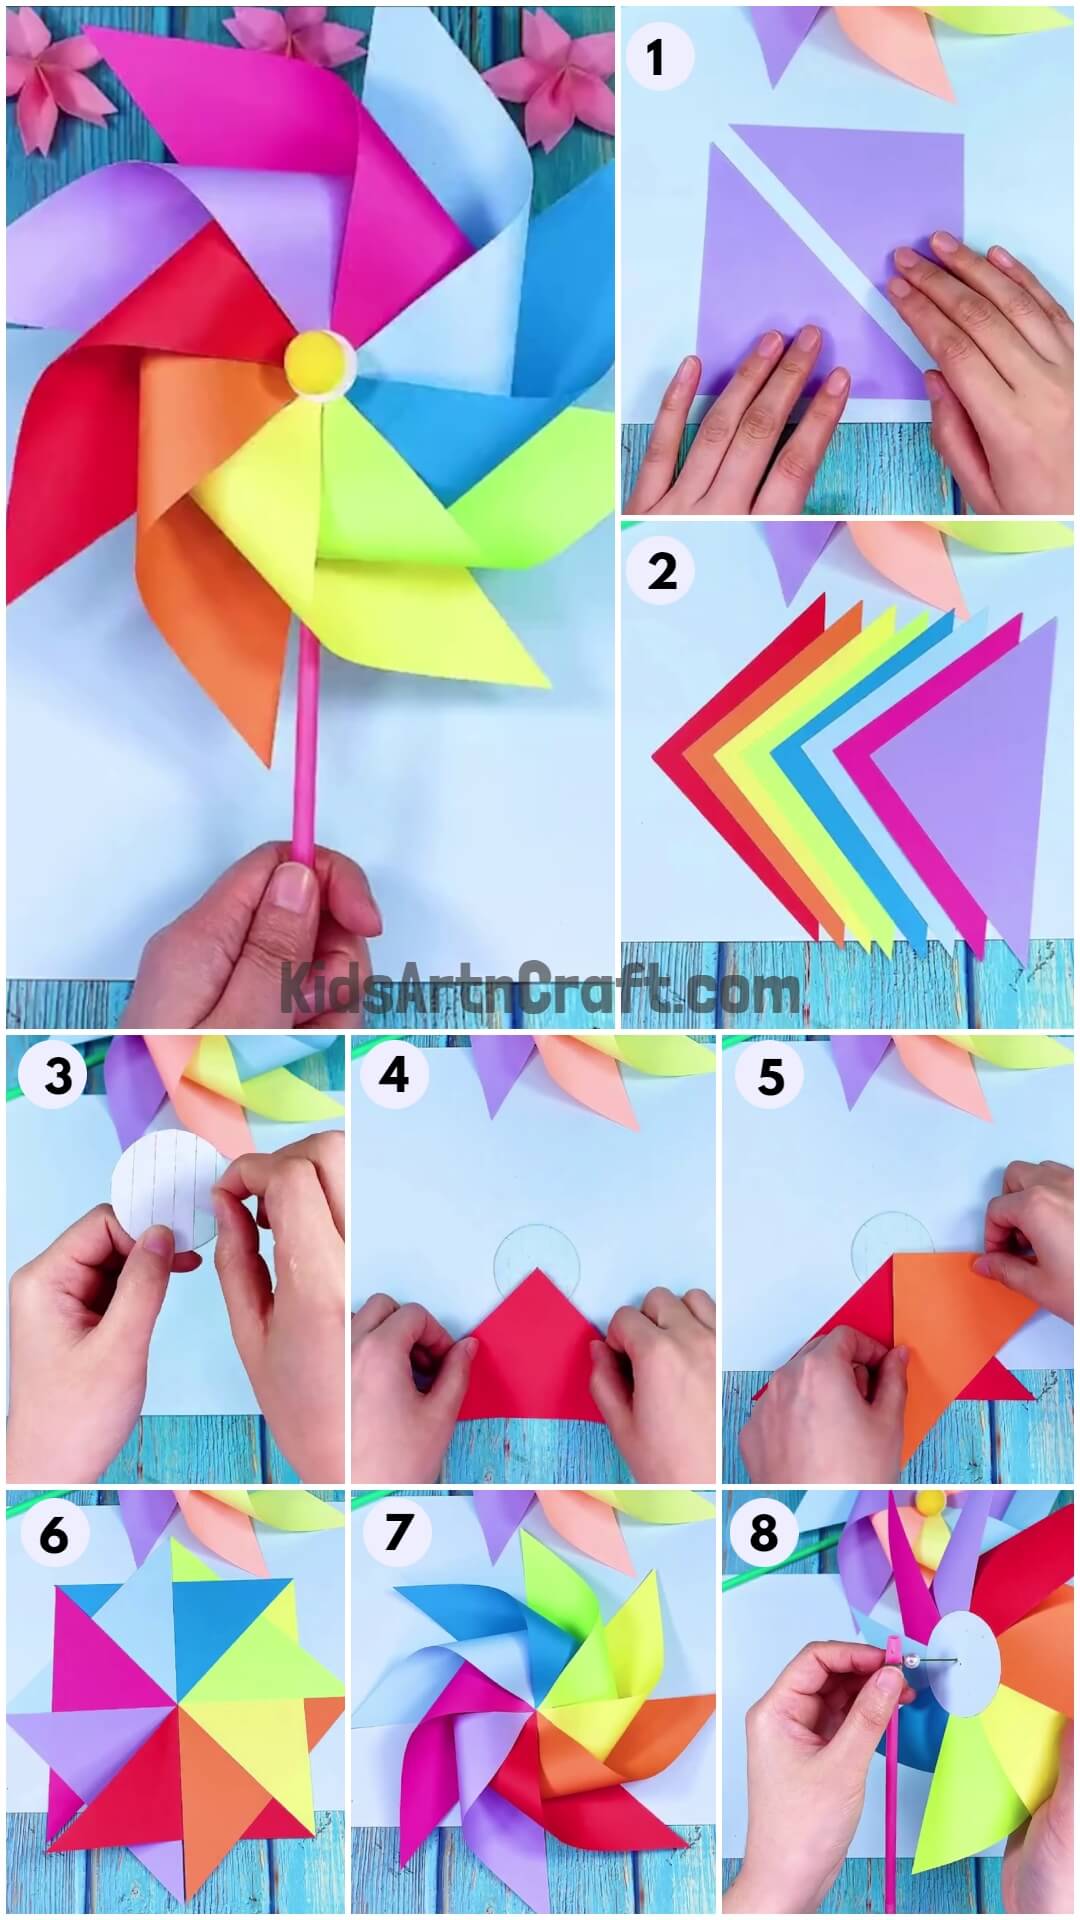
Step 1: Cutting Violet Color Paper in Triangle Shape

First cut your violet color paper in triangle shape as shown in the image.
Step 2: Cutting Remaining Color Papers in Triangle Shape
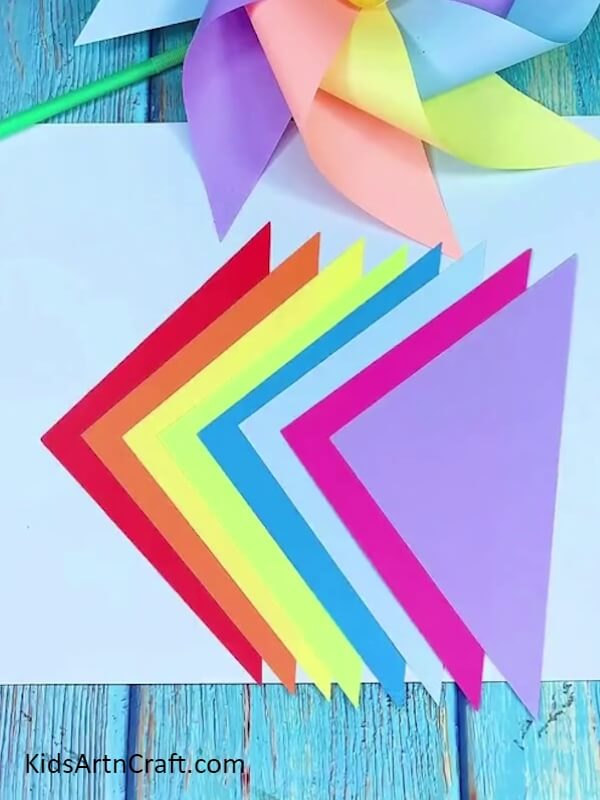
Just like the violet paper, cut all the remaining color papers in triangle shape.
Step 3: Cutting Single Sided Foam Tape in Circle Shape
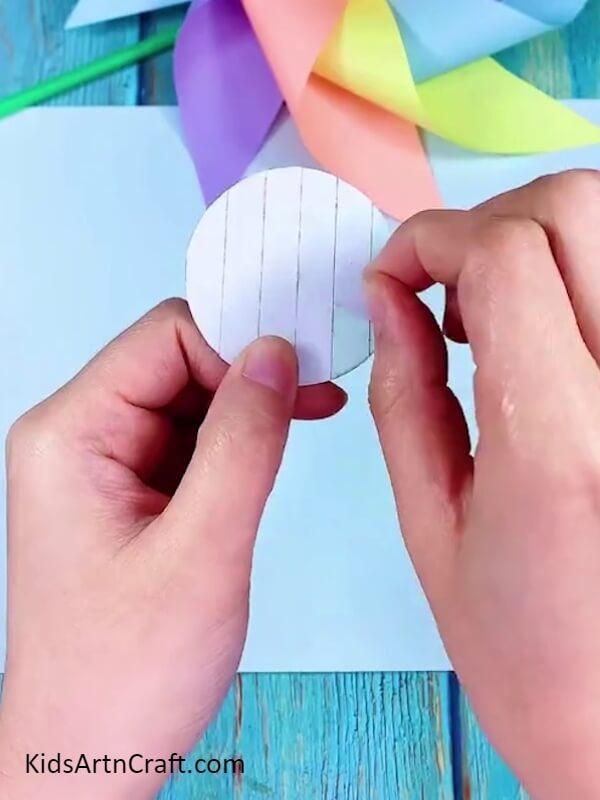
Take piece of single sided foam tape and cut it in circle shape.
Step 4: Pasting Red Color Paper with Tape
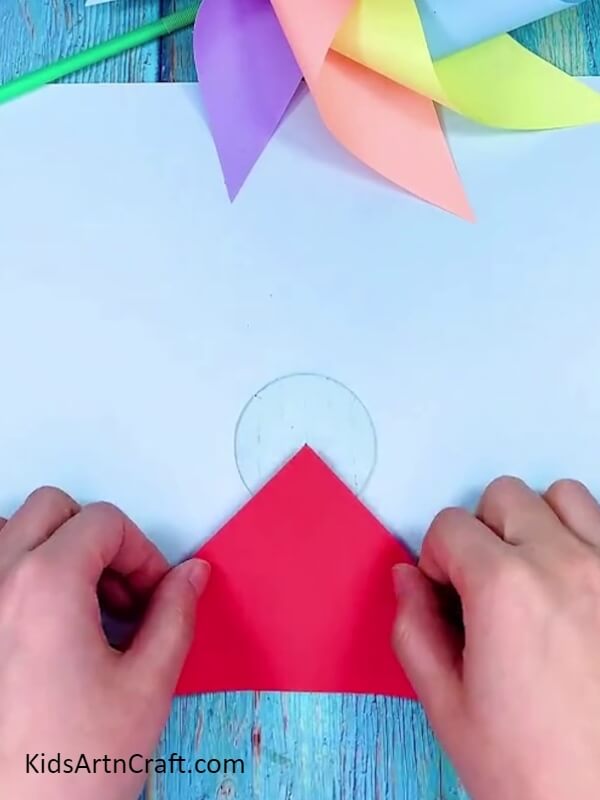
Start to paste red color paper with foam tape as shown in the image.
Step 5: Pasting Orange Color Paper
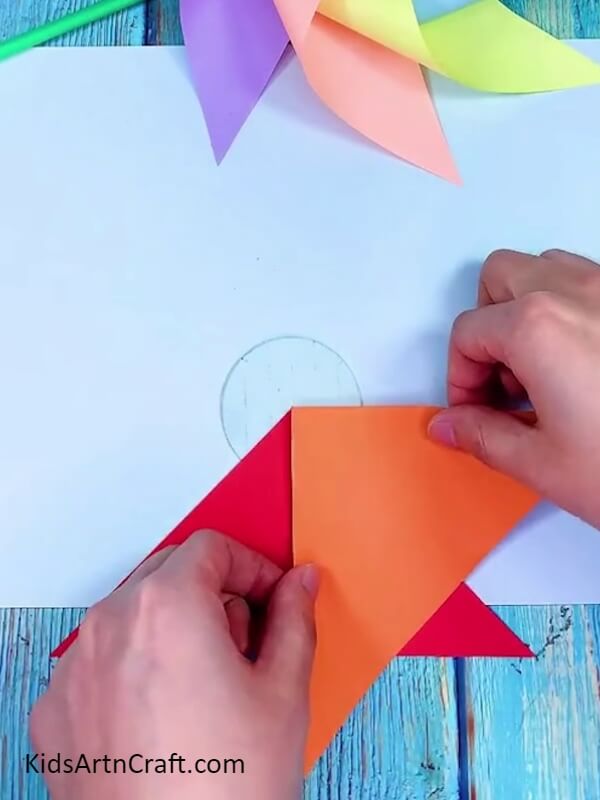
After red, paste orange color paper on the red paper as shown in the image.
Step 6: Pasting All Color Papers With Foam Tape
Just like red and orange, paste all the remaining color papers with foam tape one by one as shown.
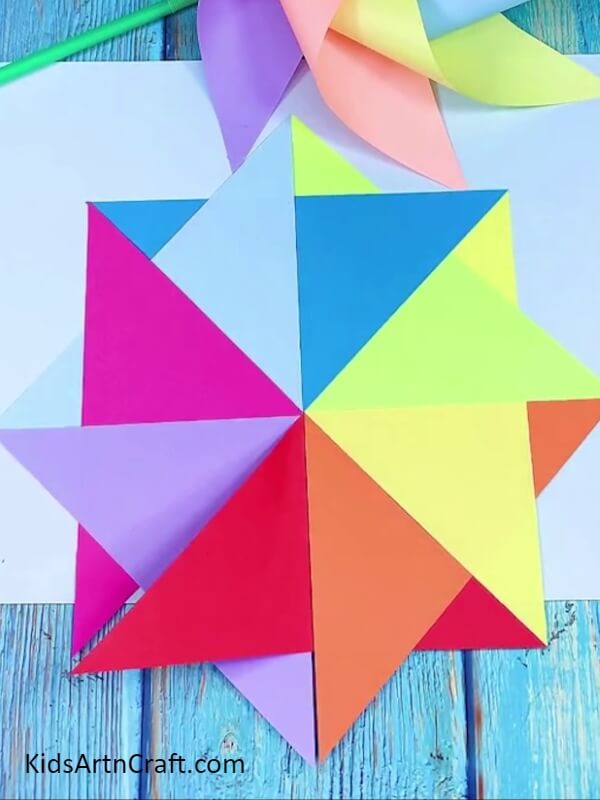
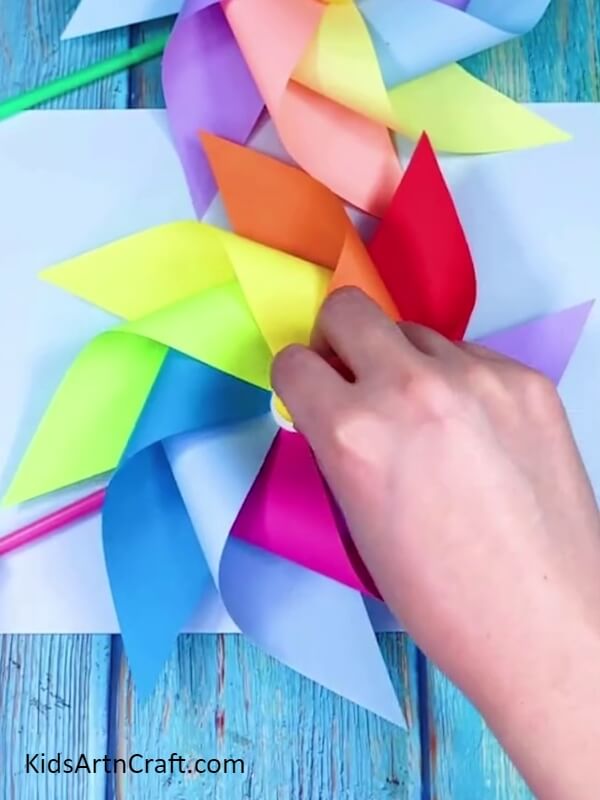
Step 7: Making Paper Windmill Blades
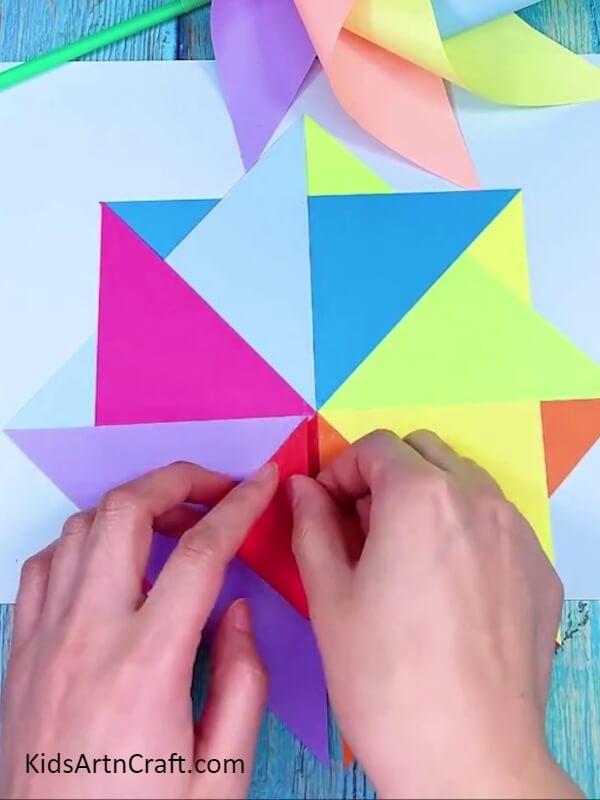
To create blades, start to fold red color paper and paste it in the middle of the windmill using glue as shown.
Step 8: Completing Windmill Blades
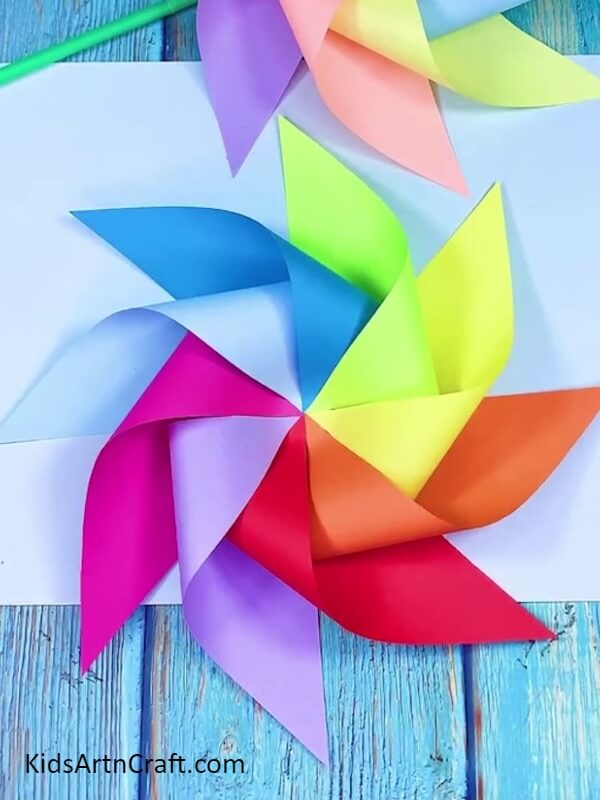
Just like the red one, fold and paste remaining color papers in the middle of the windmill using glue and give some time for it to dry.
Step 9: Pasting Small Piece of Foam Tape
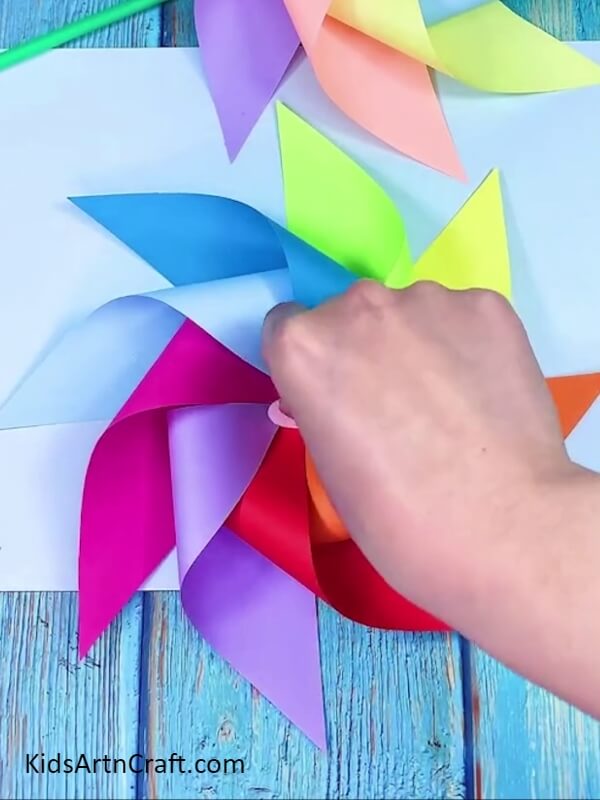
After its dried, take another small round piece of foam tape and stick it in the middle of the windmill.
Step 10: Putting Hole in the Straw
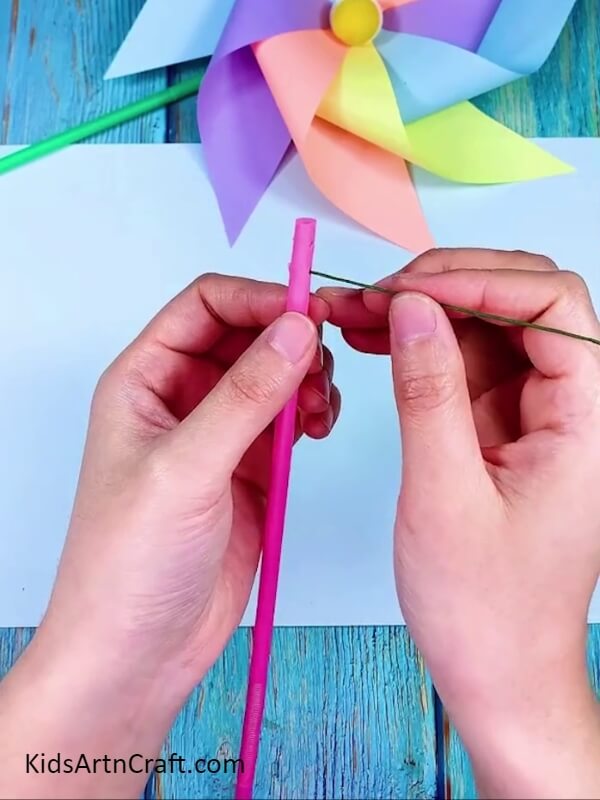
Put small hole at one end of straw using needle and insert piece of wire in that hole and pull it around the straw and tights it.
Step 11: Inserting Wire in White Beat
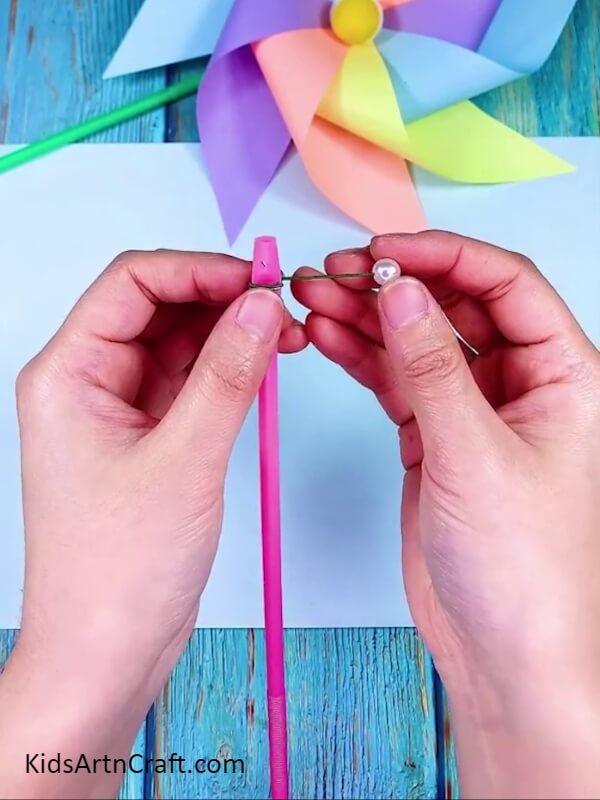
Take one piece of white beat and insert wire with it as shown in the image.
Step 12: Attaching Straw With Windmill
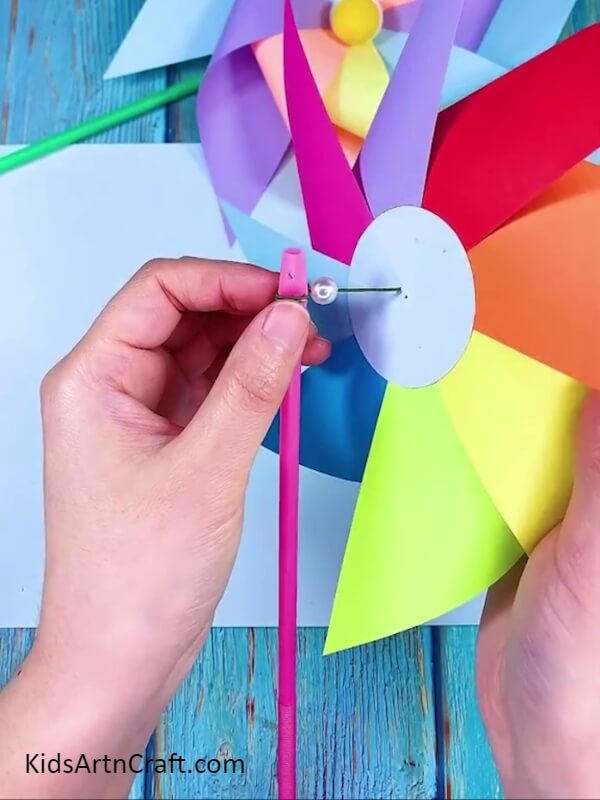
To attach straw with windmill, make little hole in the middle of the windmill and insert wire in the back side of windmill as shown in the image and take it another side.
Step 13: Taking Small Amount of Clay
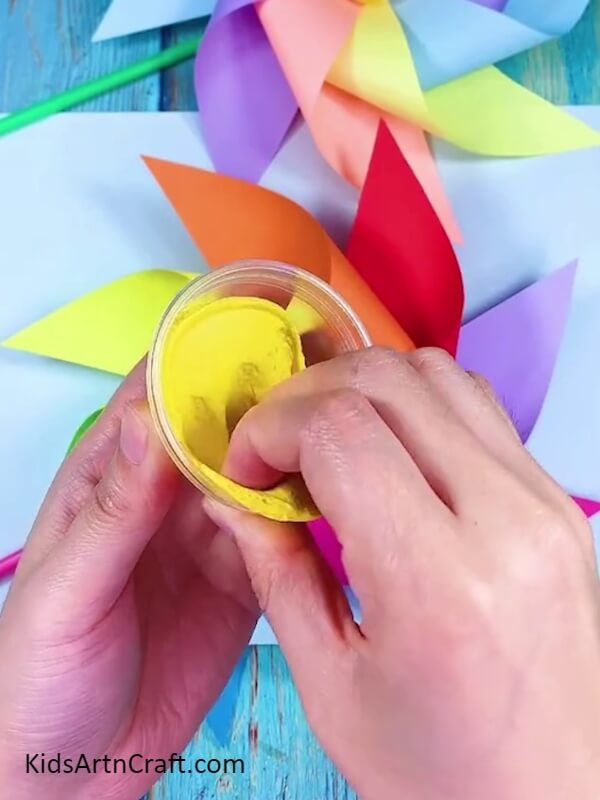
Take a small amount of yellow clay and make it in round shape.
Step 14: Pasting Small Piece of Clay with Wire
Paste that round yellow clay with the wire in front side of windmill as shown.
We Complete Our Colorful Paper Windmill
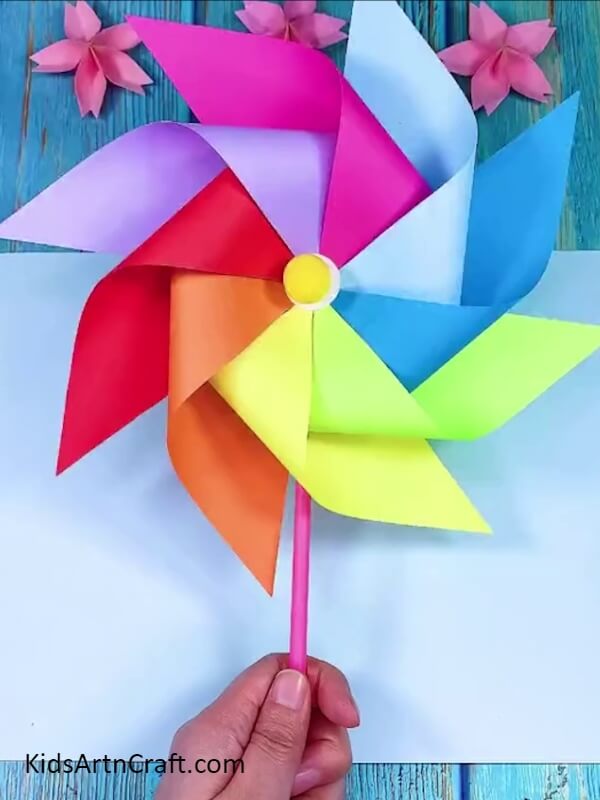
Let every thing we paste to dry and put it in glass jar or flower vase to decorate your home.
We hope you all make this windmill craft with easy effort, even kids can make this craft with our step-by-step tutorial and it is a colorful craft, also a grate decorating item for your home. You will definitely like this craft. Tell us your thought about this craft and this tutorial. Visit our website for more useful craft like this.
Thank you for visiting us!
Follow us on Youtube for art and craft tutorials and much more.
More Articles from Kids Art & Craft
- Christmas Santa Face Paper Craft Step-by-step Tutorial For Beginners
- Summer Paper Fan Step by Step Tutorial for Kids
- DIY Easy Paper Strawberry Tutorial For Kids
- How To Make Paper Snowflakes Easy Tutorial
- Handprint Paper Rocket Craft for Kids


