
DIY and Crafts
Fin-Tastic Shark Crafts For Kids


As we all know, Shark Week is coming up soon, and we all want to create some unique crafts for the same with our children. We will create these crafts by using some of the simplest materials, and it will be super fun to create and present. We can’t even imagine all the crafts that we can make from this theme, and it will be perfect and easily affordable. If you’re worried about where you will get materials for the same? Then here’s the deal, they are available in almost every bookstore or shop in the market, or you can simply order them online from these famous shopping sites such as Amazon, Flipkart, etc. They are easy to make and inexpensive objects.
Fun Shark-Themed Arts and Crafts for Children
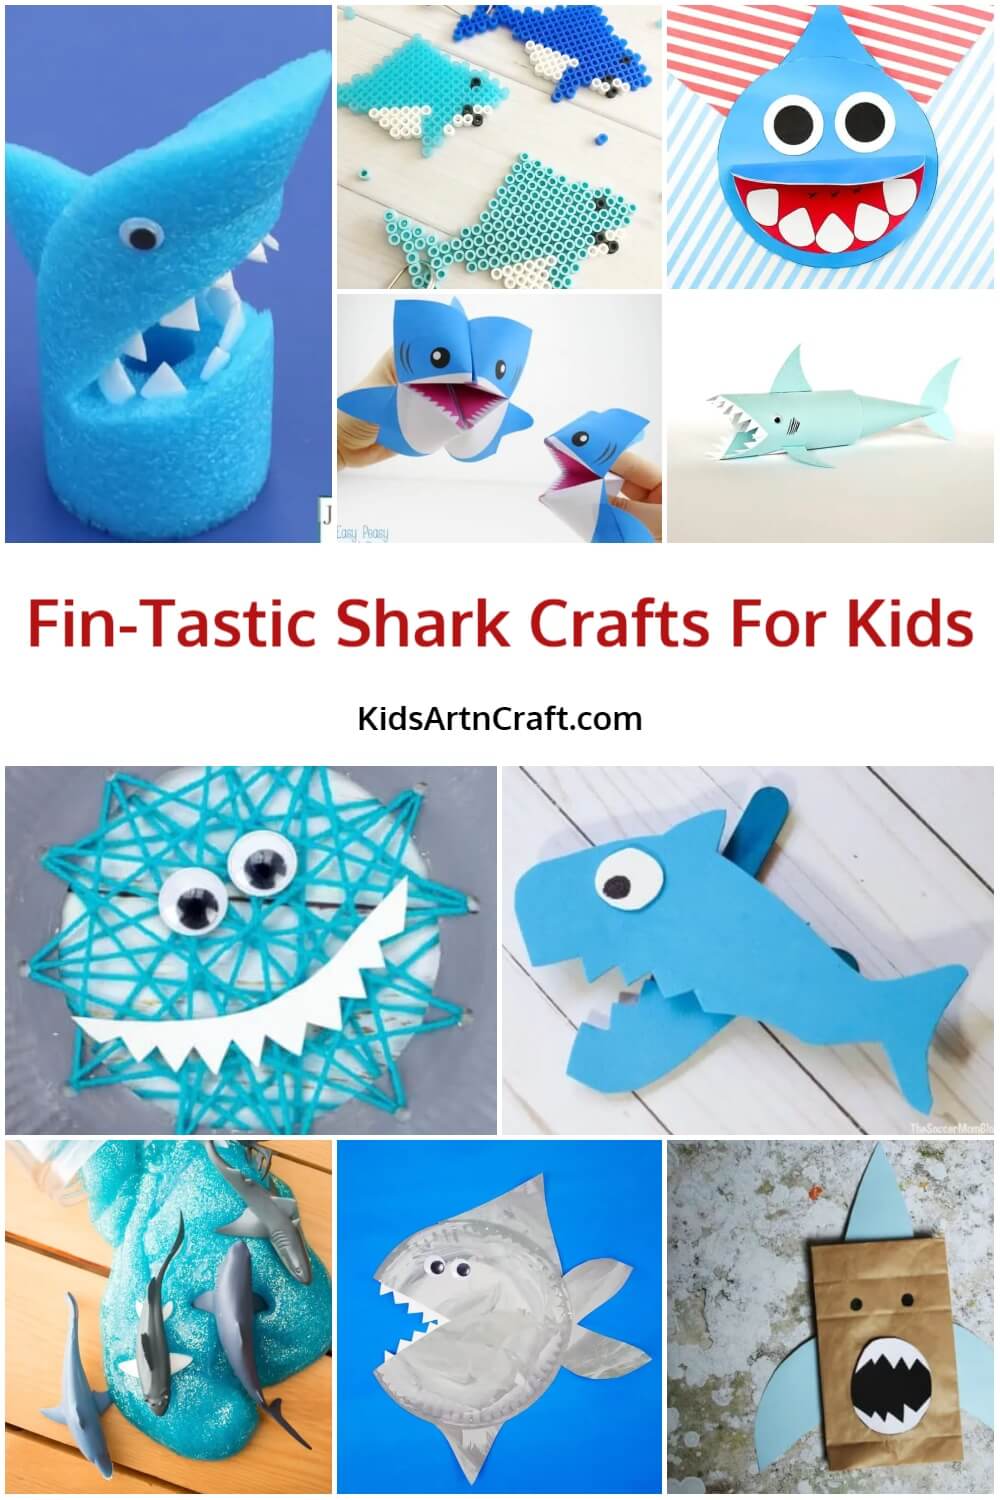
If you’re looking for craft ideas for Shark Week, then this is the article for you. Choose your favorite craft from the following activities and put on your artist attire to start making it.
Adorable Popsicle Stick Shark Craft For Kids
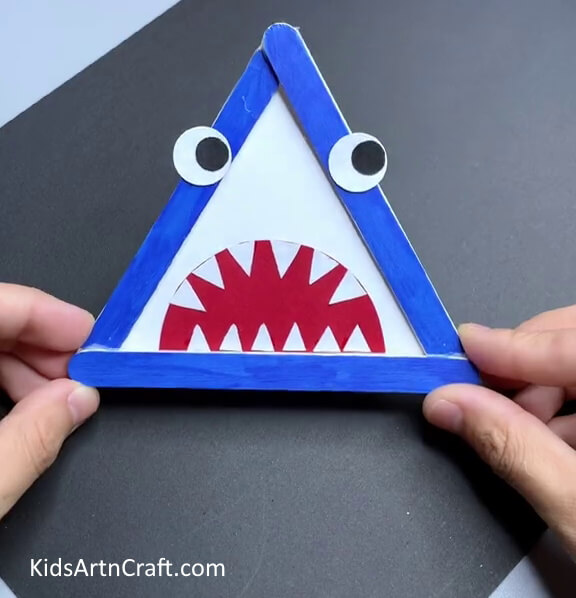
Image Source/Tutorial: Kids Art & Craft
This craft is perfect for kids of all ages! It’s fun and easy to make and will bring a smile to their face. With just a few popsicle sticks, some paint, and some glue, they can make an adorable shark craft that will be sure to impress.
Create Your Own Ocean Shark Out of a Cardboard Tube
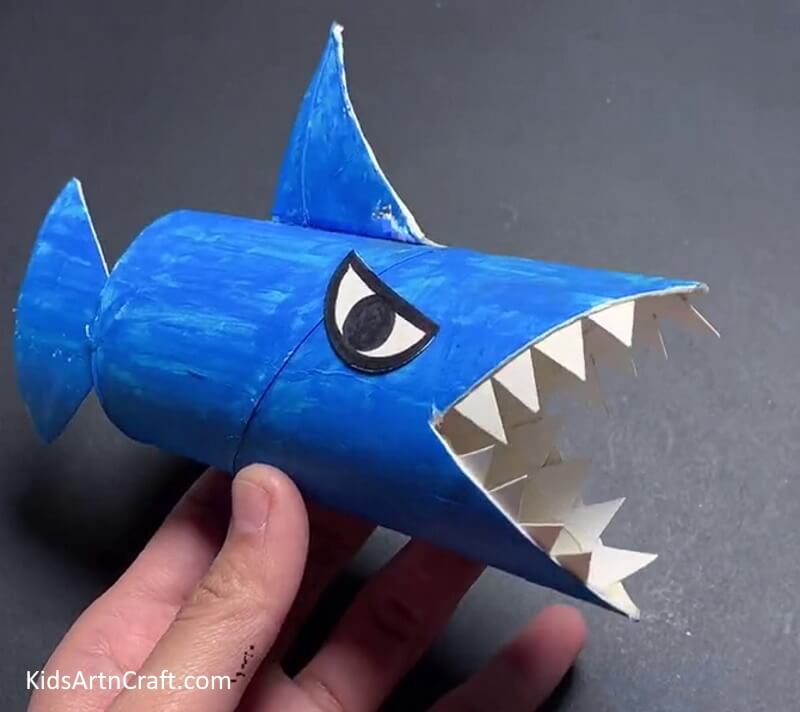
Image Source/Tutorial: Kids Art & Craft
Making your own ocean shark out of a cardboard tube is a fun and creative activity. It is simple to do and usually requires basic craft materials. With a few simple steps, you can create your own unique shark perfect for imaginative play.
Shark Card
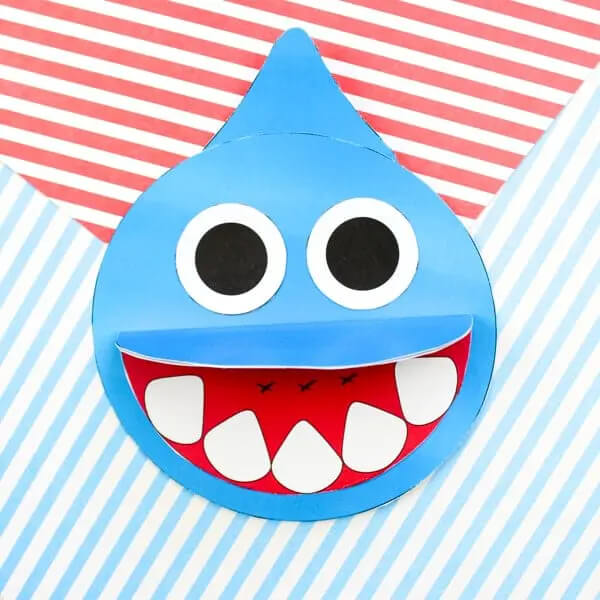
Baby shark dodododododo!!! We all love this song so much, right? because our kids listen to it endlessly. So, here today we have an activity on the sharks, where you will have lots of fun making it. It is a DIY card, and it will be super-adorable to give to anyone.
Suitable age group- 9-14 years
Supplies you may need-
- White Paper or Cardstock
- Glue Stick
- Scissors
- Pencils
- crayons
- sketch pens
Procedure-
- Start by downloading and printing the shark template from the internet.
- Now, cut out the elements of the shark from the template.
- Next, start assembling the elements of the shark. Fold the mouth of the shark in half so that the shark’s teeth are clearly visible.
- Fold the blue circle in half so that the blues are visible.
- Take the red mouth and the blue circle together and secure them with glue.
- Now, paste both the circles on the bigger blue circle.
- Place the fin of the shark at the top of the backside of the blue circle.
- Finish it off by pasting two large circles on the shark.
Shark Puppet
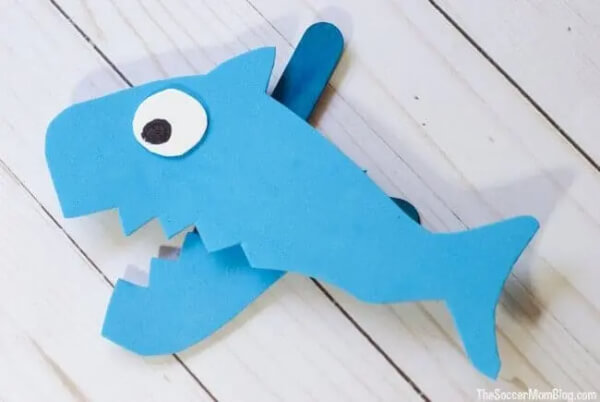
Image Source/Tutorial: The Soccer Mom Blog
Description- Let’s kick off Shark Week with this beautiful activity that we have brought exclusively for you, where you will be making a shark puppet, and you can also make your shark do the talking. Here’s how:
Suitable age group- 9-14 years
Supplies you may need-
- Craft sticks
- Thick rubber bands
- Printable shark pattern
- Blue craft foam sheet
- white craft foam sheet
- hot glue gun
- scissors
- pencil
- black marker
Procedure-
- Start by making an ‘X’ with two craft sticks and secure them with a thick rubber band.
- Then, print the free shark pattern and cut them out.
- Next, cut a small circle out of white foam, and that will be the shark’s eyes.
- Now, paste the piece of foam on the upper side of the cutout.
- Paste the eyes of the shark on the foam, and with a black marker, draw a black hole in the middle of the white circle.
- With the help of the hot glue gun, help to secure the shark’s body on the two craft sticks fixed together.
- Secure the small one diagonally on the back side of the shark such that it represents the teeth of the shark and it’s completed.
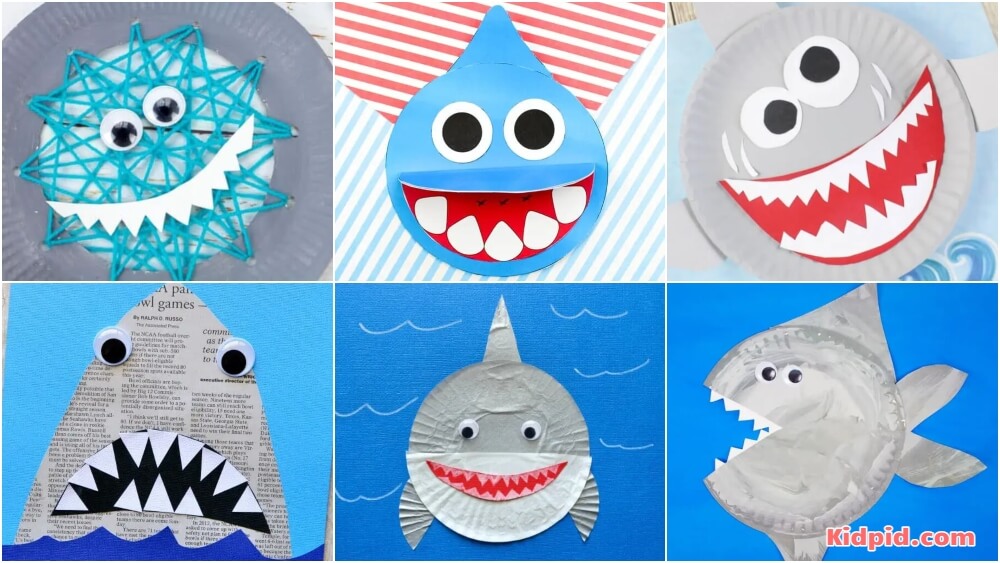
Shark Sewing Craft
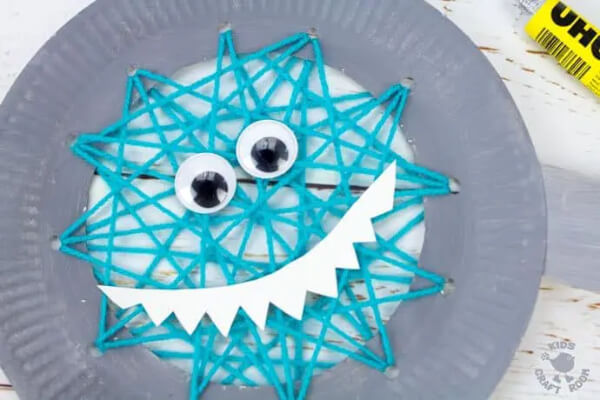
Image Source/Tutorial: Kids Craft Room
Shark week consists of activities or crafts related to sharks. This super-easy craft will help kids gobble up the sharks on the big screen. This super-easy activity will also help you focus on the hand-eye coordination of the kids.
Suitable age group- 9-14 years
Supplies you may need-
- Paper Plate
- Paint
- Single Hole Puncher
- Yarn
- Googly Eyes
- Glue
- Sticky Tape
- Scissors
- Brush
- Black marker
Procedure-
- Start by taking a paper plate and cutting out the middle circle of the paper plate.
- Next, draw the shape of a boat on the circle with the sketch pen
- Now, cut the individual shapes out of the circle.
- Paint all the cut-outs with the grey color.
- Then, paint the outer circle cut out and paint it with grey color.
- Using the hole puncher, punch holes throughout the circle in a round shape.
- Flip the outer ring and insert a thread of yarn in one of the holes, and secure the end of the same with a knot.
- Now, go ahead and sew the yarn in and out of the holes in a criss-cross manner
- Repeat the above-mentioned step until the middle of the ring is filled with yarn.
- Finish it off by adding googly eyes and a smile to the shark by using UHU glue.
Shark Toilet Paper Roll
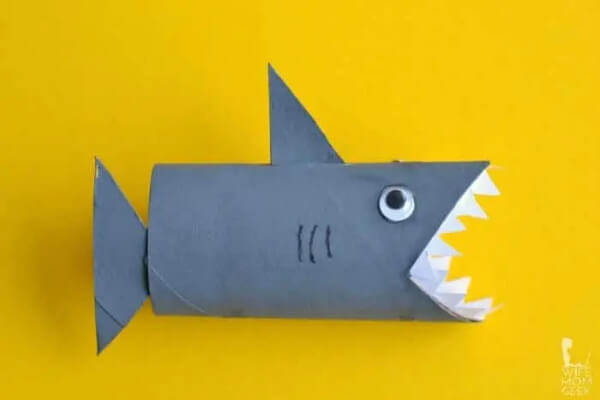
Image Source/Tutorial: Glue Sticks And Gumdrops
Description- We have brought a fun activity for you to celebrate Shark Week. The activity is super fun and will also help you recycle the materials that we usually throw out. Here’s how:
Suitable age group- 9-14 years
Supplies you may need-
- Toilet paper tubes
- Gray paint
- Paintbrushes
- Googly eyes
- School glue
- Hot glue gun
- Black marker
Procedure-
- Start by taking the empty toilet paper roll and cutting out a triangle from the above section on each side.
- Save the leftover triangle pieces for the fin and the tail.
- Now, paint the roll with grey paint and leave it to dry.
- Meanwhile, cut some teeth out of a white paper.
- Now, with the help of hot glue paste, the googly eyes are on the top section of the roll.
- Paste the teeth of a shark at the inner edge of the triangular cutting.
- Finish it off by pasting the fin and the tail as well.
Shark Slime
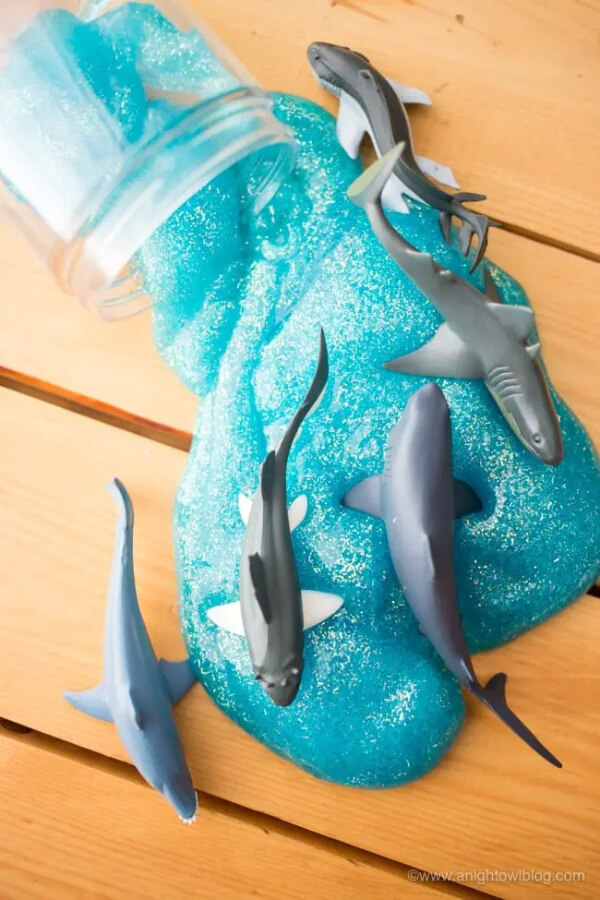
With Shark Week coming up, I knew we had to search for an activity that would be both unique and easy to perform. So, here we have brought to you an activity where you will be floating sharks with just sparkling glitter and baking soda. Here’s how:
Suitable age group- 9-14 years
Supplies you may need-
- 6 ounces blue glitter glue
- 1/2 teaspoon baking soda
- 1 1/2 tablespoons contact lens solution
- Toy sharks
Procedure-
- Start by simply squeezing all the glue out of the bottle into a bowl.
- Mix some baking soda with it.
- Then add the contact lens solution to it.
- Now, stir the mixture thoroughly till the mixture no longer moves.
- Mix the solution with your fingers until it reaches a consistency where the solution no longer sticks to your fingers.
- Now you can finish it off by adding toy sharks to them.
Shark Bookmarks
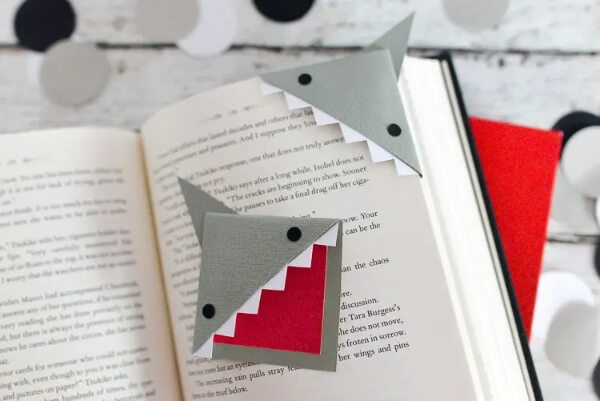
Image Source/Tutorial: Hey Let’s Make Stuff
We all love reading novels or books, but we often forget on what page we were on and for th, so we always use some sort of bookmarks. Shark Week is going on, and we have brought to you an activity where you will be creating your own DIY shark bookmark, and it will be super fun to build. Here’s how:
Suitable age group- 9-14 years
Supplies you may need-
- Grey, white, and black paper
- Craft glue
- Scissor
- Hole punch
Procedure-
- Start by downloading and printing the shark template from the internet.
- Next, cut out all the elements of the shark from the template.
- For the eyes, make a hole by using a hole puncher.
- Fold the two triangular flaps of your shark head.
- Now, paste the red square at the center of the grey square.
- Glue the back of the top flap to the front of the back flap, so that the page can be inserted.
- Then paste the teeth into the place, behind the flap.
- Finish it off by pasting the eyes and fin of the shark.
Shark Fin Hat

Image Source/Tutorial: Glue Sticks And Gumdrops
There’s no exception that we have been brainstorming ourselves with the thought of how to make the Shark Week super unique, and for that,t we are constantly searching for some unique ideas. So, here we have brought to you a unique activity where you’ll be making a hat that will mainly consist of a shark’s fin. To make the same, you can follow the steps mentioned below:
Suitable age group- 9-14 years
Supplies you may need-
- Construction paper
- Glue
- Scissors
Procedure-
- Start by pasting two pieces of construction paper and then cut out the fin.
- Create small outward folds in the fin and leave them.
- Leave it to dry.
- Take the measurement of your kid’s head.
- Cut the bands out of a piece of construction paper and then form a circle with the same.
- Glue the ends of the bands.
- Finish it off by pasting the fin by pasting the outward folds into the bands.
Shark Paper Plate Craft
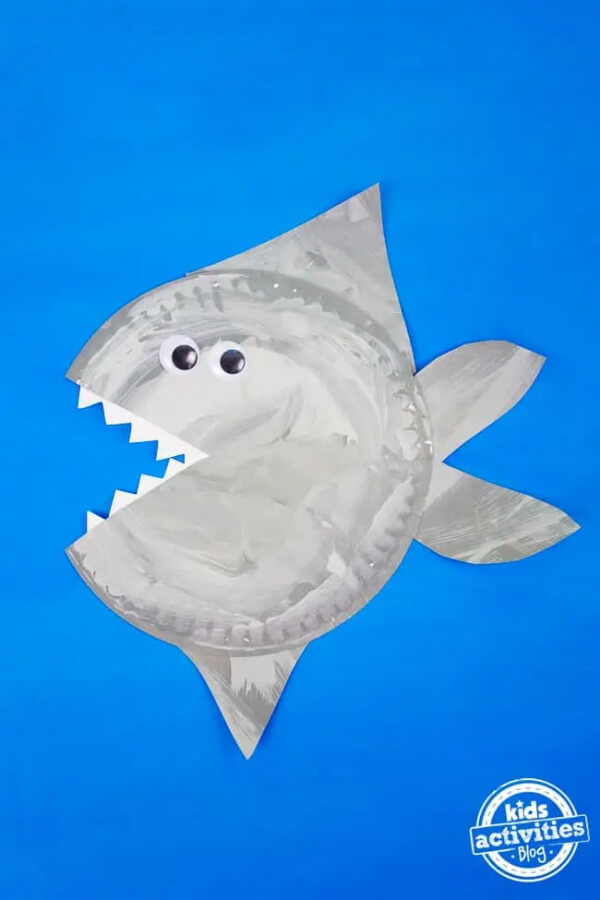
Image Source/Tutorial: Kids Activities Blog
Do you ever wish to create something unique for your child, and do so with their help and their beautiful little hands? Well, don’t worry, we have got you covered! Today, we have brought you a simple DIY activity where you’ll make a customized shark paper plate. Here’s how:
Suitable age group- 9-14 years
Supplies you may need-
- Three white paper plates
- Paint
- Googly eyes
- Glue
- Scissors
- Marker
Procedure-
- Start by taking two paper plates and painting them grey: one will be the shark’s body, and the other will be used as a fin for the same.
- Leave it to dry.
- Now, cut a small triangle from the middle of the shark’s body, which will be the mouth of the shark.
- Next, cut the shape of the tail fin and the top and bottom of the fins from the other plate.
- Then, cut the teeth of the shark from a white paper plate in a zigzag pattern.
- Paste the teeth behind the edge of the triangle, cutting into the body of the shark.
- Paste the fins as well.
- Finish it off by pasting googly eyes on the paper plate and creating the eyebrows with a black marker.
Shark Paper Bag
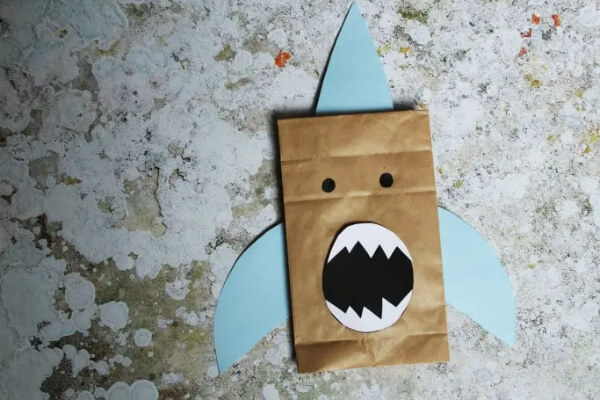
Image Source/Tutorial: Crafts On Sea
Description- We all never use paper bags and often throw them out after one time usage. But we have researched an activity for you where you’ll be creating a personalized shark paper bag, and you can hang them around your house.
Suitable age group- 9-14 years
Supplies you may need-
- Paper bag
- Black cardstock
- white cardstock
- Black pen
- Blue or grey cardstock
- Glue
- Scissors
Procedure-
- Start by cutting two circles out of the cards, one from the black one and another from the white one, such that they overlap.
- Next, from the white circle, I cut two spooky teeth from the top of the white card and paste them on the top of the black circle.
- Now, take a blue or a grey card and cut out three fins of the shark with scissors.
- Glue the same at the back of the paper bag.
- Then paste the black circle on the paper bag.
- Finish it off by drawing two black eyes on your shark.
Footprint Shark
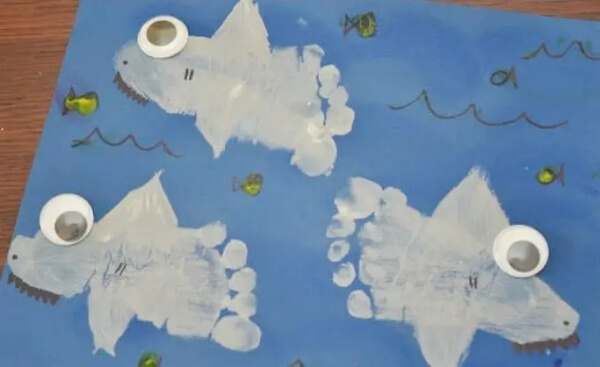
Image Source/Tutorial: Glued To My Crafts
Description- Ever thought about taking a print of your child’s foot? A shark week is just around the corner. We have brought an activity for you where you’ll be making a shark out of your child’s footprint, and it will be super-fun to perform. Here’s how:
Suitable age group- 9-14 years
Supplies you may need-
- Paint colors
- Paint brushes
- Paper plates
- Large wiggle eyes
- Glue
- Construction paper
- Baby wipes
- Marker
Procedure-
- Start by taking a blue piece of construction paper and drawing blue waves all over the paper.
- Next, with the help of a black marker, draw little fish on the paper.
- Now, pour some grey paint on a plate and paint your baby’s foot with the paint.
- Then, thrust the foot onto the construction paper.
- Next, using the paintbrush, paint some triangles over the foot, which will be your fin.
- Finish it off by pasting the googly eyes on the foot.
- Leave it to dry.
Shark Puppets
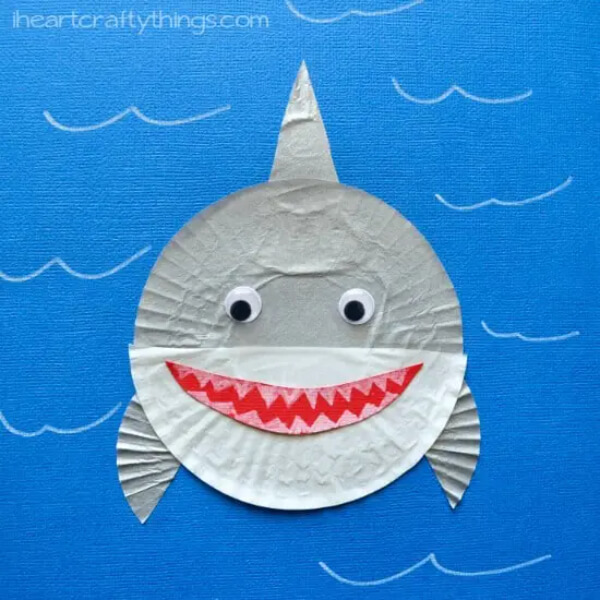
Image Source/Tutorial: Heart Crafty Things
We’re ll well aware of the Baby Shark song, right? It is often one of the first lullabies that kids listen to! So, keeping that in mind, it is time to take our children, gear up, and revisit their initial years. We have an activity here that can help you do the same!
Suitable age group- 9-14 years
Supplies you may need-
- Printing paper
- Craft stick
- Glue
- Scissors
Procedure-
- Start by printing a template of shark puppets.
- Now, take a craft stick and paint it with paint.
- Next, using glue or tape, paste the sticks on the back of the shark puppets.
- Your shark puppet is complete.
Cupcake Shark Craft
Image Source/Tutorial: Heart Crafty Things
We all know that sharks are found in deep and shallow waters throughout the world’s oceans, but I was thinking,g why not bring the toto to your table? We have brought an exclusive activity for you where you’ll be creating shark paper plates. Here’s how:
Suitable age group- 9-14 years
Supplies you may need-
- gray/silver cupcake liner
- mini gray/silver cupcake liner
- white cupcake liner
- blue cardstock paper
- red cardstock paper
- googly eyes
- white chalk marker
Procedure-
- Start by cutting down a triangle out of your grey cupcake liner, and you will be left with three pieces.
- Next, take another paper plate and glue the triangle and remaining portions at the top and bottom, left and right sides of the plate.
- Cut the white cupcake liner in half and paste it onto the bottom half of the grey cupcake liner.
- Now, cut a mouth in the shape of a crescent moon from the red cardstock.
- Paste the same on the bottom half of the grey cupcake liner.
- Using the white chalk marker, draw the teeth of the shark on the red mouth.
- Finish it off by pasting the googly eyes on the shark.
Shark Paper Plate Craft
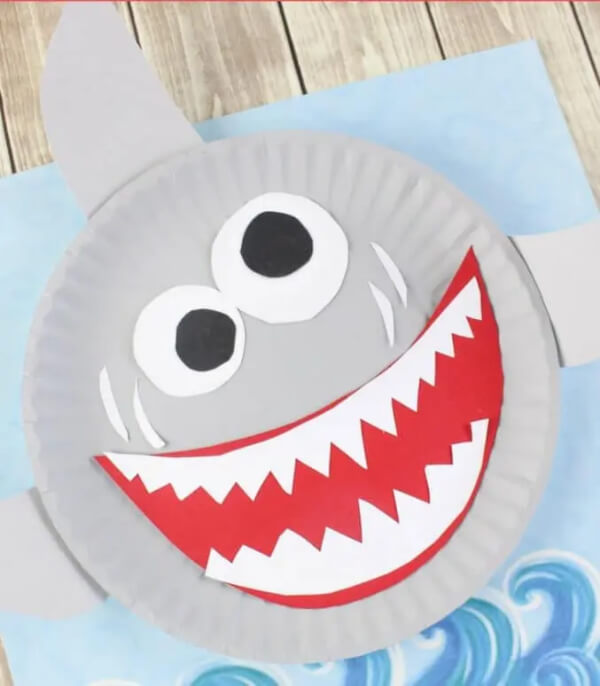
Image Source/Tutorial: The Relaxed Homeschool
Description: Sharks are pretty huge; they are about 15-20 feet long. Well, everyone can’t see sharks,k so here we decided to bring the sharks onto your table!!
Suitable age group- 9-14 years
Supplies you may need-
- 1 large white paper plate
- Grey paint
- Paint brush
- Construction paper: gray, black, red, and white
- Scissors
- Glue stick
Procedure-
- Start by painting the paper plate with grey paint and leave it to dry.
- Take a white piece of construction paper and cut two small circles from it.
- With the help of a black marker,r draw black circles on the white circle.
- Next, take a red construction paper and cut out a crescent moon shape.
- Paste the mouth cut out on the paper plate.
- Then take a white construction paper and cut out two teeth in a zigzag pattern.
- Paste the teeth on the red mouth.
- Using the leftover white construction paper, cut out thin 3-4 crescent shapes.
- Finish it off by pasting it on the paper plate: two on the right and two on the left.
Pool Noodle Shark
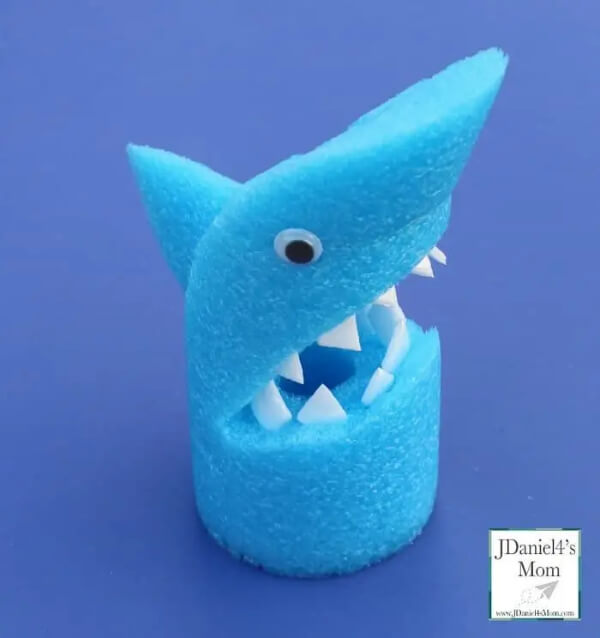
Image Source/Tutorial: JDaniel4’s Mom
We all love doing crafts with leftover things or have this urge to recycle something, so today we have an activity for you where we will be creating a shark with the help of some leftover sections of pool noodles, and it will be super fun to create.
Suitable age group- 9-14 years
Supplies you may need-
- Pool noodle
- Googly eyes
- Egg carton
- Glue
- Bread knife
Procedure-
- Start by taking two pieces of a pool noodle to make the body of a shark.
- We will be using a bread knife to cut the same.
- Now, the flat side of the smaller piece was glued to the top of the larger piece.
- Glue the googly eyes on either side of the shark’s head.
- Now, as for the teeth of the shark, take a styrofoam egg carton and cut diamond shapes from it.
- Next, to make the space for the teeth, use a cupcake topper and make the space.
- Then, with the glue stick, paste the teeth inside the opening in the middle.
- Cut out a fin from the pool noodle and insert a toothpick in the same, and pinch that in the shark.
And that’s it, it’s done!
Shark Hammerhead
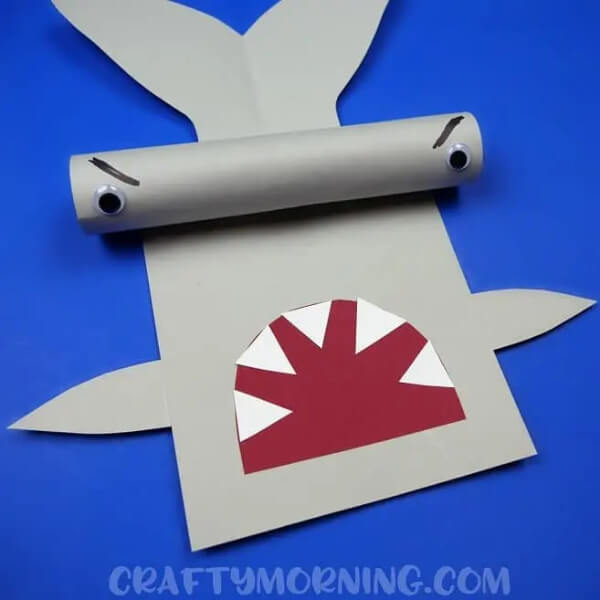
As Shark Week is coming up soon, we wanted to create something that would be of some use in the future. So, we have created a hammerhead and kept the theme the same as a shark. You can easily hang it on the wall as decoration material, and by doing this, your child will feel confident and engage in more and more crafts.
Suitable age group- 9-14 years
Supplies you may need-
- Paper towel roll
- Googly eyes
- Red, grey, white construction paper
- Black marker
- Scissors
- Glue/tape
Procedure-
- Start by cutting out a rectangle and grey fins from grey construction paper.
- Next, apply some glue on top of the grey paper and paste the cardboard tub,e and keep holding it until it is dry.
- With the help of a black marker,r draw some eyes and mean eyebrows of the shark on the cardboard tube.
- Take a red piece of construction paper and cut out a semicircle from it.
- Next, draw some zigzag teeth on the white construction paper and cut them out.
- Paste the teeth on the upper edge of the red mouth.
- Glue the mouth of the shark on the rectangle.
- Finish it off by pasting the grey fins: two at the top edge and two at the bottom left and right side.
Shark Cootie Catcher
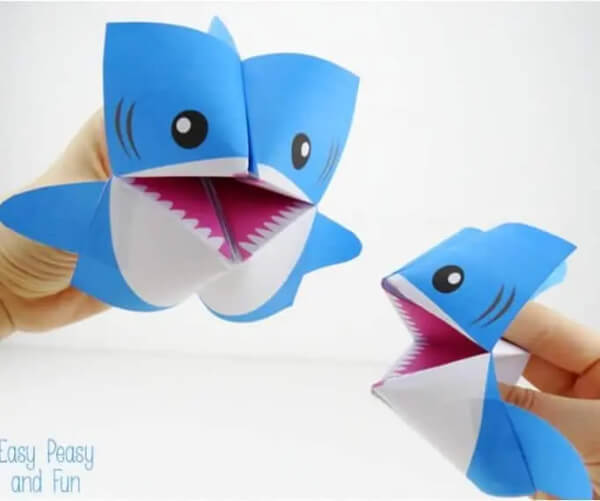
Image Source/Tutorial: Easy Peasy And Fun
Cootie Catcher is one of the first things a child learns like a toddler, and it’s great for their art and craft skills. As you all know, Shark Week is also coming up, so keeping that in mind,d I decided to combine them both and create a unique activity. Here’s how:
Suitable age group- 9-14 years
Supplies you may need-
- Shark template
- Scissors
Procedure-
- Start by downloading and printing the shark template from the internet.
- Now, with the help of scissors, cut out the square with the shark design and the fins from the template.
- As for making the cootie, start by folding the shark design in half to make a crease.
- Unfold and rotate the paper, and then make a fold again while making a crease.
- Next, flip the paper so that the white part is facing towards you.
- Then, rotate the paper in such a position that it makes a diamond shape. Start folding all four corners to the middle of the paper.
- Flip the paper again, have the white side facing you again, and then start folding all four corners into the middle of the paper.
- Now, fold the square shape in half such that it makes a rectangle.
- Using your fingers, push the pockets of the same and push the flaps of the cootie catcher to open up.
- Adjust your fingers a little bit more to make a cootie catcher.
- Finish it off by pasting the cut-out fins on the side that is the white side of the cootie catcher, and your adorable shark cootie catcher is ready.
Shark Paper Tube Craft
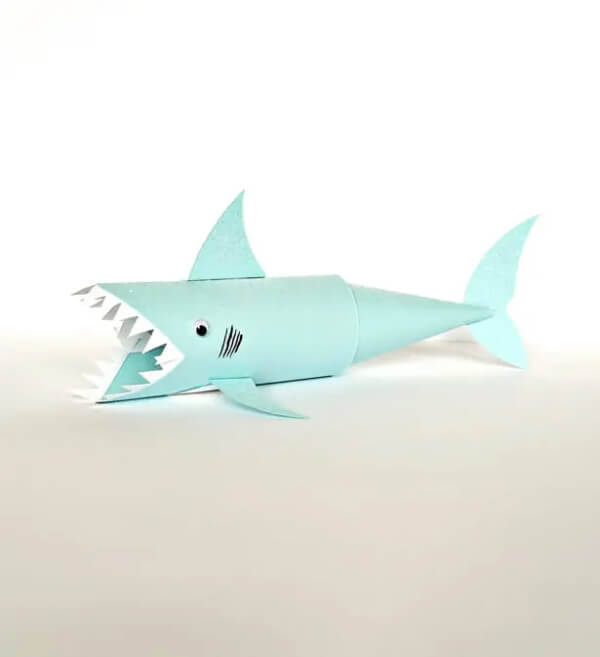
Image Source/Tutorial: Hello Wonderful
The sea creature that remains under the water and generally never comes up? Well, we all know I am talking about sharks, and I wanted to recreate it but uniquely, and so I thought of doing it with a toilet paper tub,e which we often throw out because of its no use. So, let’s see how to recreate the same:
Suitable age group- 9-14 years
Supplies you may need-
- Cardstock paper
- Toilet tube
- Scissors
- Glue
- Stapler
- Cake plate (for tracing)
- Marker
- Googly eyes
- Construction paper
Procedure-
- Start by cutting out a piece of cardstock measuring 4 1/2*6 which will be the body of the shark.
- Next, cut out the fins and tail shapes of the sharkark, including a flap.
- With the help of a cake plate which is 7 in diam,eter cut out a circle by tracing the same.
- Cut this circle in half.
- Take the paper and wrap it around the cardboard toilet roll and secure it with glue.
- Now, cut out a V from the top of the tube.
- Using the half circle, make a cone shape with it.
- Fit the cone at the circular end of the cardboard tube and staple it.
- Now, with white construction paper, cut teeth out of it in a zigzag pattern.
- Paste the teeth on the inner edge of the V-shaped entrance of the cardboard tube.
- Glue the tail of the shark to the end of the cone.
- Paste the fins of the shark at the top and bottom of the shark.
- Finish it off by pasting the googly eyes and drawing some lines at the side of the eyes with a black marker.
Shark Keychains
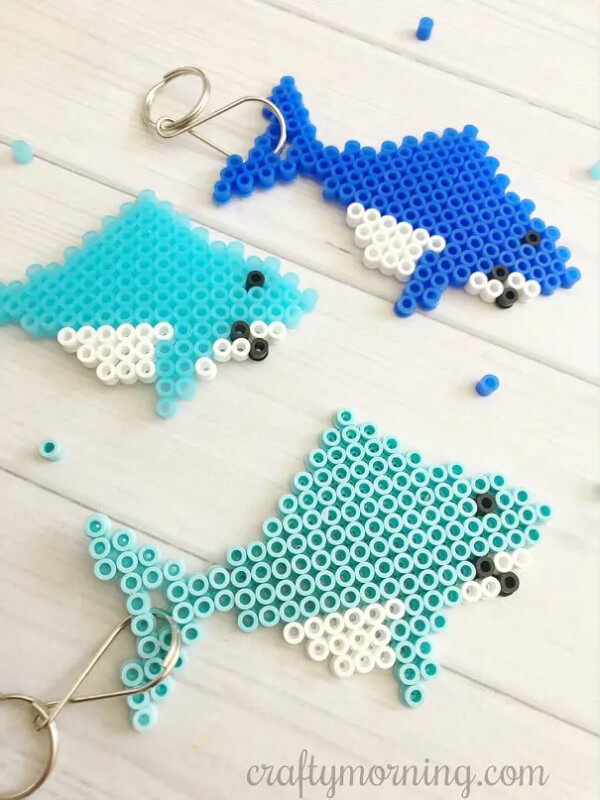
Image Source/Tutorial: Crafty Morning
Well, welcome to a new craft activity. I wanted to make something unique and extraordinary for Shark Week, so I landed on this idea where we will be creating a keychain of a shark using the Perler beads. You can follow the steps mentioned below to create your shark keychain.
Suitable age group- 9-14 years
Supplies you may need-
- 5.5” square pegboard
- Perler beads
- Perler bead ironing paper
- Small bead tweezers
- Iron
- Keychains
Procedure-
- Start by using the blue beads to make the top of the shark.
- Using the bead tweezers, carefully pick one blue bead at a time and place it on the pegboard.
- Now, use the white beads to outline the bottom part of the shark.
- Leave a space of 2 beads in the tail of the shark.
- Once you’re finished with the bead pattern, place an ironing paper on the pattern and iron it carefully till you notice the beads starting to fuse.
- Once it’s done, carefully remove the paper and the beads from the paper and immediately press flat with your pegboard.
- Leave it to cool down properly.
- Once it’s all cooled down, open the keychain and place it in the two open holes in the tail of the shark, and it’s ready.
Popsicle Stick Shark
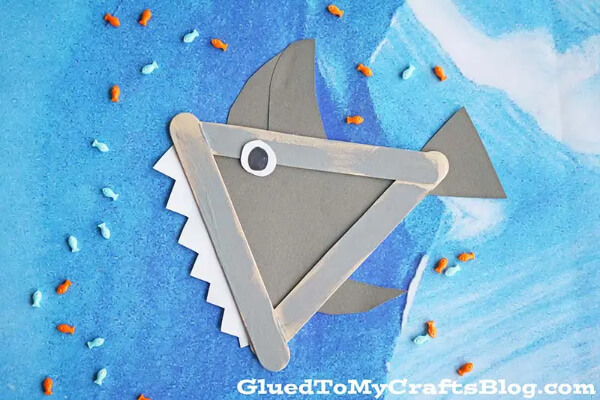
Image Source/Tutorial: Glued To My Crafts
Description- Well, I know sharks are scary, and most people are scared of them,m but there is no need to be scared of the ones we are creating because they are made out of popsicle sticks and cause no harm. Here’s how:
Suitable age group- 9-14 years
Supplies you may need-
- Popsicle sticks
- Glue
- Grey and white cardstock
- Paint
- Paint brush
- Scissors
- Black marker
Procedure-
- Start by pasting three popsicle sticks together such that it forms a triangle.
- Leave it to dry.
- From a grey cardstock, cut a piece of the triangle that will be posted within the sticks.
- Next, cut out some teeth and eyes from the white cardstock and fins from the grey cardstock.
- Now, paint the sticks with grey paint and paste the piece of paper on the stick.
- Finish it off by pasting the eyes, fins, and teeth of the shark.
- Leave it to dry for some time.
Tissue Shark Craft
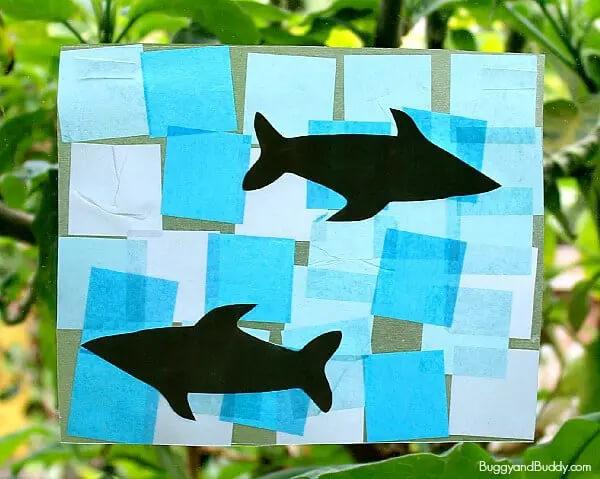
Image Source/Tutorial: Buggy And Buddy
We all know that sharks have an excellent vision better than a cat’s or even a wolf’s vision. Keeping that in mind,d we have brought an activity for you where you will be making a shark suncatcher with your children,ld and this will be super fun. It will help you develop your child’s motor skills. To make this, you can follow the steps mentioned below:
Suitable age group- 9-14 years
Supplies you may need-
- Clear contact paper
- Tissue paper squares in different shades
- Gray construction paper
- Scissors
- Free shark template
Procedure-
- Start by downloading and printing the shark template on cardstock.
- Next, cut two pieces of clear contact paper.
- Take the grey construction paper and cut some sharks out of them.
- You can use the shark templates for tracing them out on the construction paper.
- Now, attach one piece of contact paper to the surface you are currently working on, and then peel off the sheet to have the sticky side on.
- Start pasting small tissues all over the sticky contact paper: blue, light blue,e and white.
- Finish it off by pasting your shark anywhere on the contact paper, and you’re done.
Newspaper Shark
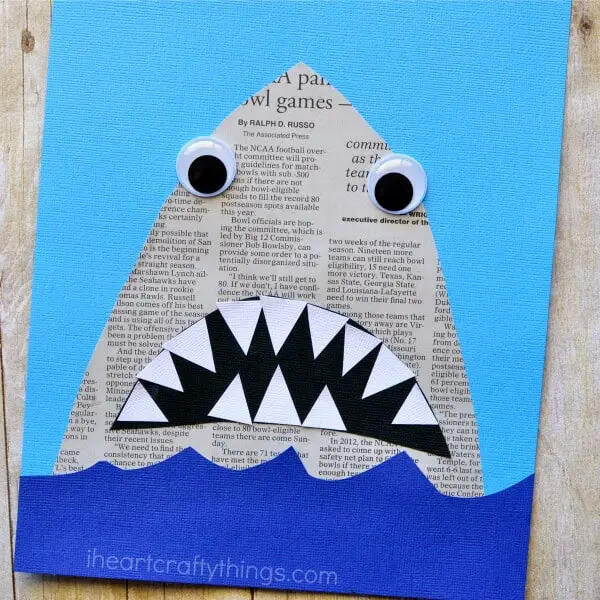
Image Source/Tutorial: I Heart Crafty Things
Description: This shark craft that we have brought to you is simply amazing and so fun to perform because it requires just a newspaper and some colorful sheets. This also gives us an idea of where we can recycle our old newspapers, which become absolutely useless! To perform this activity,y you can follow the steps mentioned below:
Suitable age group: 9-14 years
Supplies you may need-
- Light blue, dark blue, black, and white cardstock paper
- Newspaper
- Googly eyes
- Scissors
- Glue
Procedure-
- Start by cutting out the shark face from a newspaper with the help of scissors in a triangular shape.
- Next, paste this shark’s face on a light blue cardstock.
- Now, cut out ocean waves from a dark blue cardstock or construction paper and paste them at the bottom of the shark’s face.
- Take a black piece of construction paper and cut a semicircle from it, and paste it on the shark’s face, as it will represent its mouth.
- Now, take a white construction paper and cut some very small triangles and paste them inside the mouth of the shark.
- Finish it off by pasting the googly eyes on the top of the shark’s face.
Stone-cold Shark Paint Craft
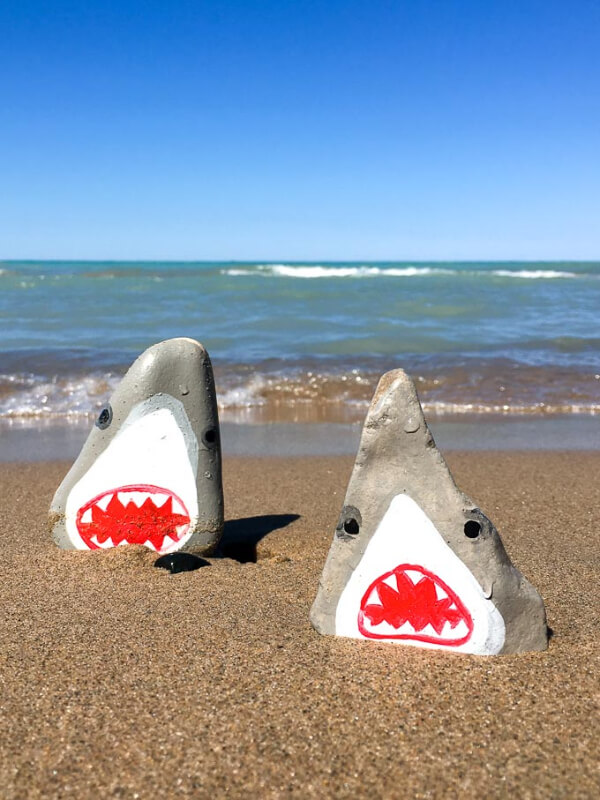
Image Source/Tutorial: Sustain My Craft Habit
We all created activities where we would make crafts, generally out of construction paper, cardstock, and a koa shark template, but as Shark Week is coming soon, I wanted to create something unique,e and so I decided to head to the beach and collect some rocks and pebbles and create a live shark painting with them. It’s such a unique idea, ea and you will have a lot of fun while performing it.
Suitable age group: 9-14 years
Supplies you may need-
- Medium-sized triangular-shaped rocks
- Paint
- Paintbrushes
Procedure-
- Start by picking a clean, triangular-shaped rock, and then pick up a paintbrush and paint a little triangle at the bottom of the rock.
- Leave it to dry for some time.
- Again,n outline the white triangle created at the bottom and paint the remaining part with grey paint.
- Paint two eyes on the side of the head.
- Next, paint an oblong mouth with red paint.
- Leave it to dry.
- Then apply a second coat with some red paint.
- Again, after some time, apply a third coat of red paint,t and you’re done.
Rocking Paper Shark
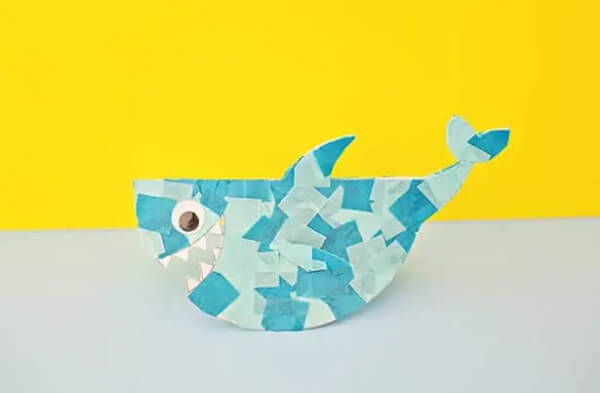
Image Source/Tutorial: Hello Wonderful
Description: Let us kick off Shark Week with this cute rocking paper shark. It’s super easy and fun to make. You’ll only need some craft materials, as well as your kid’s attention,n to perform this one. It will also improve your child’s concentration level and hand-eye coordination. It’s a great exercise for adults as well! You can take instructions on how to perform this activity with the steps mentioned below.
Suitable age group-
Supplies you may need-
- Cardstock
- Tissue paper
- Scissors
- Glue and/or double-stick tape
- Googly eyes
- Mod podge
- Small paintbrush
Procedure-
- Start by downloading and printing the shark template on a piece of paper.
- Cut out both sides of the shark and fins.
- Cut out small squares of tissue paper of different colors,s such as blue, light blue, and white.
- Now, take a small paintbrush and start applying Mod Podge all over the shark, and paste small square tissue paper all over the shark as well as on the fins and the tails.
- Chop off the excess tissue paper from the shark template.
- Leave it to dry for some time.
- Finish it off by pasting googly eyes on the shark.
Easy DIY Shark Craft Step-by-Step Tutorial
Learn how to make fun and easy shark crafts for kids in this step-by-step tutorial. This DIY ocean animal craft is perfect for preschool, school projects, or creative play at home. Using simple materials, kids can create adorable sharks while developing creativity and motor skills through a fun hands-on craft activity.
Educational Benefits of Shark Craft Activities
Shark craft projects support early childhood learning and development in many ways:
- Improve fine motor skills through cutting and gluing
- Encourage creativity and imagination
- Teach children about ocean animals and habitats
- Develop focus and hand-eye coordination
- Support STEM and sensory learning activities
- Promote screen-free creative play
Teachers and parents can also combine shark crafts with ocean science lessons, underwater storybooks, and marine animal learning activities.
Popular Shark Craft Ideas Kids Love
Children enjoy many different types of shark-themed crafts, including:
Paper Plate Shark Crafts
Paper plates can easily be turned into cute or realistic shark faces using paint, googly eyes, and simple craft supplies.
Shark Puppet Crafts
Puppets made from paper bags or cardstock help children enjoy imaginative storytelling and pretend play.
Shark Origami Projects
Origami shark crafts are excellent for older kids learning paper-folding and creative design techniques.
Recycled Shark Crafts
Using cardboard tubes, egg cartons, and recycled materials teaches children eco-friendly crafting habits.
Shark Painting and Coloring Activities
Painting and coloring shark scenes encourage artistic expression and ocean-themed creativity.
Easy Supplies Needed for Shark Crafts
Most shark craft projects can be made using affordable household materials:
- Colored paper and cardstock
- Paper plates
- Glue and scissors
- Paint and crayons
- Googly eyes
- Popsicle sticks
- Cardboard tubes
- Markers and sketch pens
- Recycled craft materials
Simple supplies make these crafts ideal for classrooms, daycare centers, and home activities.
Fun Shark Facts for Kids
- Sharks are fish that live in oceans around the world.
- Some sharks can grow very large, while others are small enough to fit in your hand.
- Sharks have several rows of teeth that continuously replace themselves.
- Many sharks are important for keeping ocean ecosystems balanced.
Adding fun facts makes shark crafts more educational and engaging for children.
Creative Ways to Use Shark Crafts
Finished shark crafts can be used for:
- Ocean-themed classroom displays
- Shark Week activities
- Storytelling games
- Underwater party decorations
- Educational science projects
- DIY puppet shows
Children enjoy proudly displaying their handmade shark creations at home or school.
Safety Tips for Shark Craft Activities
- Use child-safe scissors and non-toxic glue
- Supervise younger children during cutting activities
- Keep small decorative items away from toddlers
- Cover workspaces to make cleanup easier
- Choose age-appropriate craft difficulty levels
Why Shark Crafts Are Fun and Educational for Kids
Shark crafts are exciting hands-on activities that help children explore ocean animals, creativity, and imaginative play. Kids love sharks because they are fascinating sea creatures with unique shapes, sharp teeth, and powerful swimming abilities. Creating shark-themed crafts allows children to learn about marine life while improving artistic and problem-solving skills. Ocean-themed activities are commonly used in classrooms and homeschooling to make learning more interactive and enjoyable.
Frequently Asked Questions (FAQ)
Q1. What are the easiest shark crafts for kids?
Answer: Paper plate sharks, shark puppets, and coloring activities are simple and fun for young children.
Q2. Are shark crafts educational?
Answer: Yes, shark crafts teach children about marine animals, ocean habitats, creativity, and fine motor skills through hands-on learning.
Q3. What age group enjoys shark crafts?
Answer: Shark crafts are suitable for preschoolers, kindergarten kids, elementary students, and even older children, depending on the project type.
Q4. Can shark crafts be made using recycled materials?
Answer: Yes, cardboard tubes, egg cartons, paper bags, and other recycled items work perfectly for creative shark craft projects.
Shark crafts are a fun and creative way for kids to explore ocean animals while learning through art and hands-on activities. From paper plate sharks to recycled ocean projects, these exciting crafts encourage imagination, creativity, and educational play for children of all ages.
Learn, play, create, and smile with us every single day! Follow our journey on Telegram, YouTube & Facebook
Reviewed By Rachit Gupta
Read More:
- 24 Crazy Monster Crafts for Kids
- 24 Easy Day of the Dead DIY Crafts Project for Kids
- 70+ Halloween Craft Ideas for Kids
- Jungle Safari Theme Birthday Party Ideas
- Snacks Decoration Ideas for Christmas