Recycled Crafts
Flying House Cotton Buds Craft Step-by-Step Tutorial

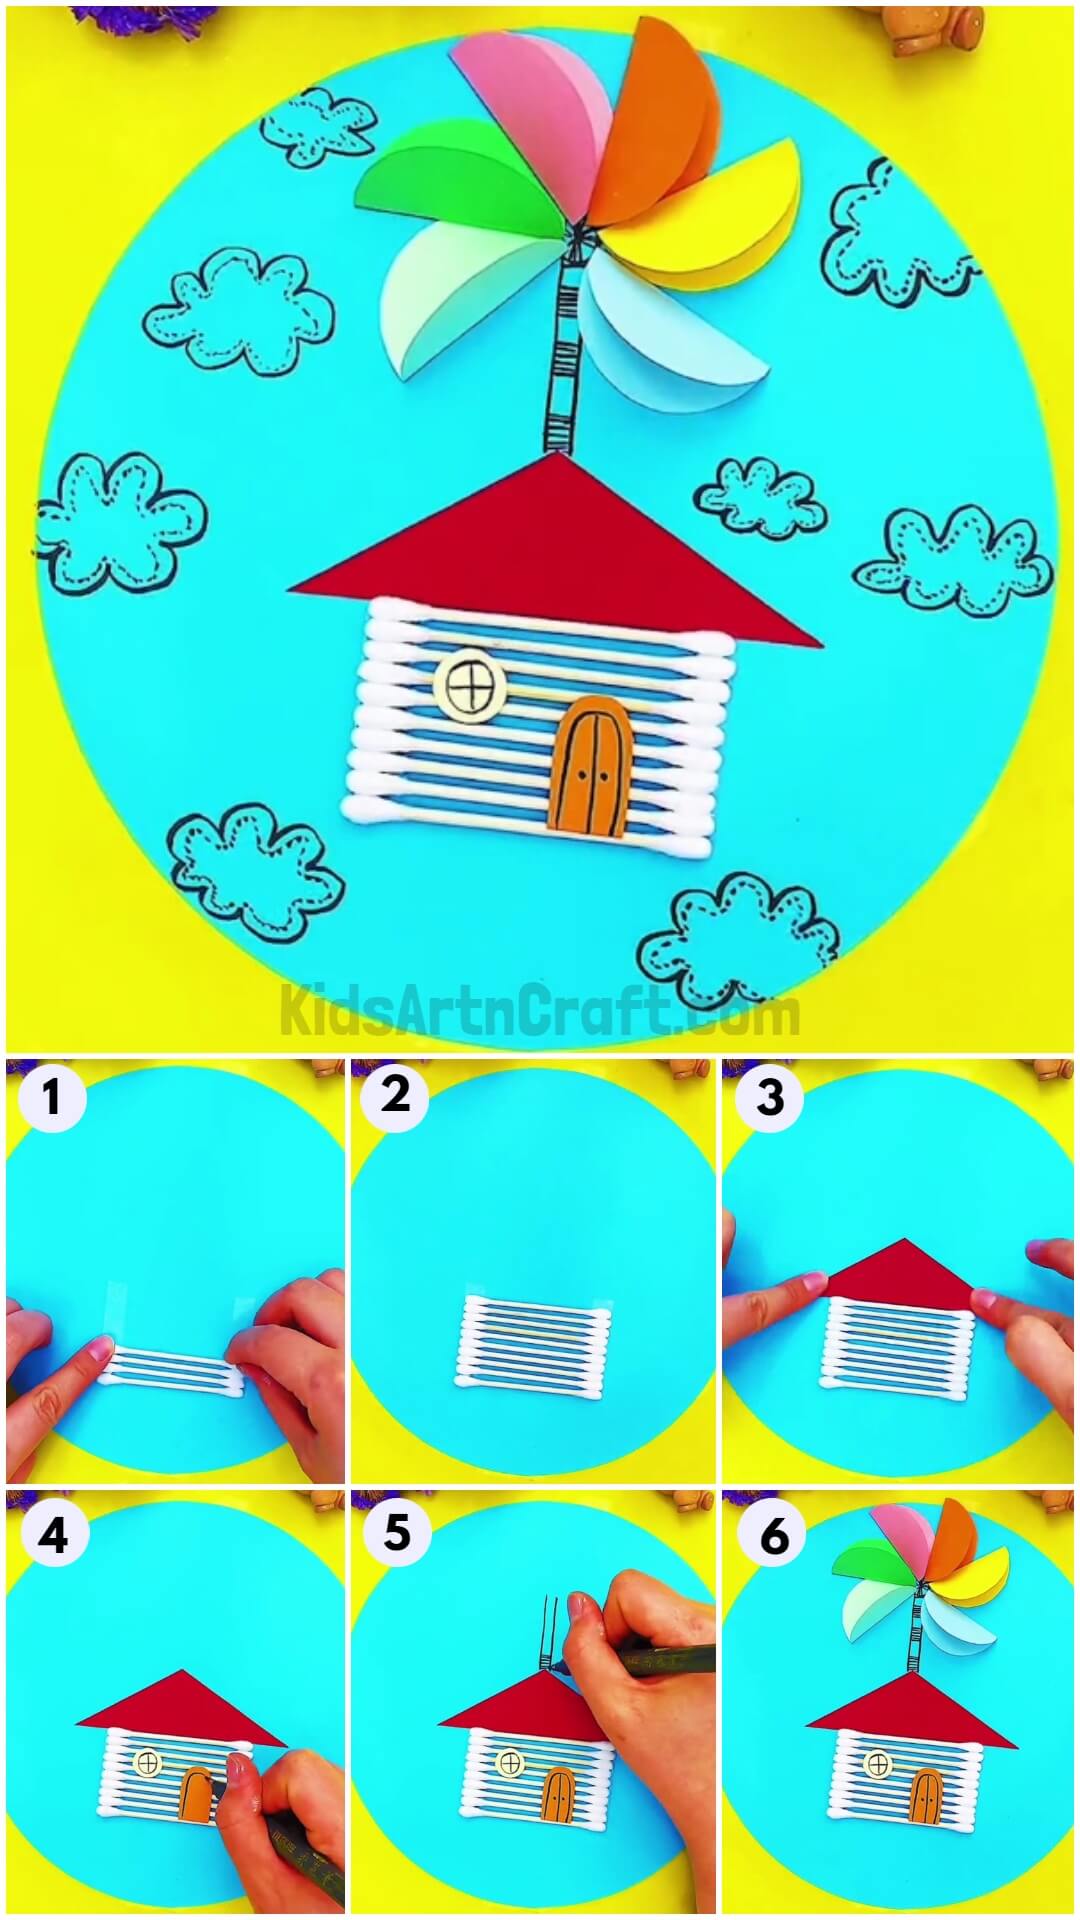
In this tutorial, we will teach you how to make a nice flying house cotton bud craft. You just need a few materials, and with our step-by-step guide, you’ll be able to make a piece of DIY craft that you’ll be proud to show off in your home. All the instructions and materials you need are included in this guide.
Welcome to this step-by-step tutorial on how to make flying house artwork craft. This craft is very simple and basic yet enjoyable for all kids, especially for those who enjoy making dreamy flying houses. This craft will require simple and basic drawing skills. This will require very basic materials which will be available easily in any art and craft store. So without further ado, let’s get started and let us make it together.
Flying House Cotton Buds Craft For Kids
Read More: DIY Recycled Sticks And Bottle Caps Ferris Wheel Craft Tutorial For Kids
Materials Required
- Double-sided Tape
- Cotton Buds
- Red craft paper
- Orange craft paper
- Yellow craft paper
- Pink craft paper
- Green craft paper
- Blue craft paper
- Black Sketch pen
Procedure
Step 1: Sticking The Double-sided Tape On Cotton Buds
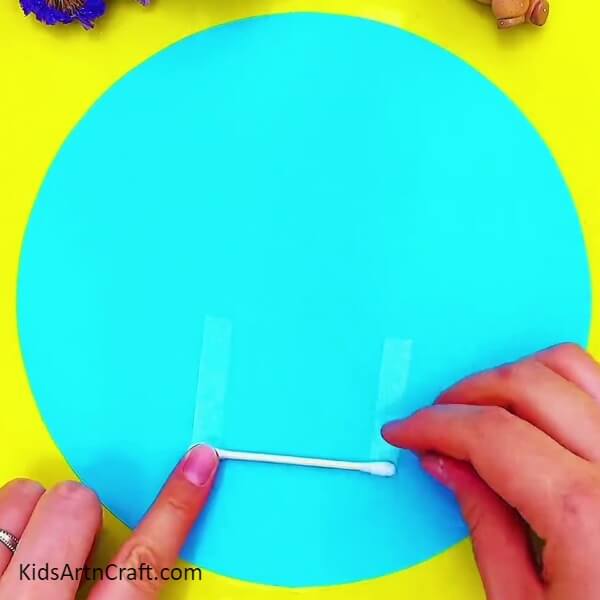
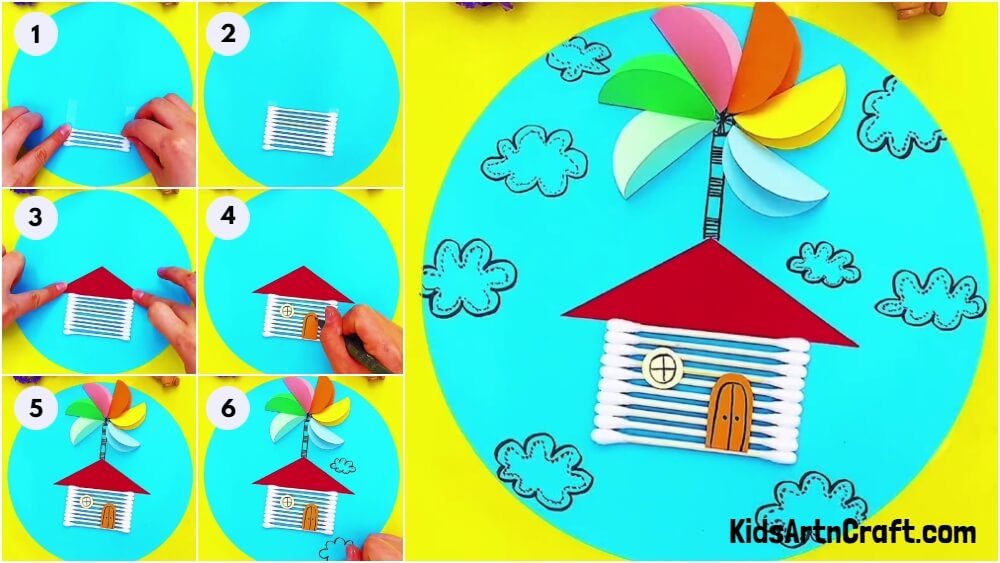
For this craft, start by sticking the double-sided tape on the paper. After sticking the tape start sticking the cotton buds above it as shown in the photo above.
Step 2: Sticking The Cotton Bud
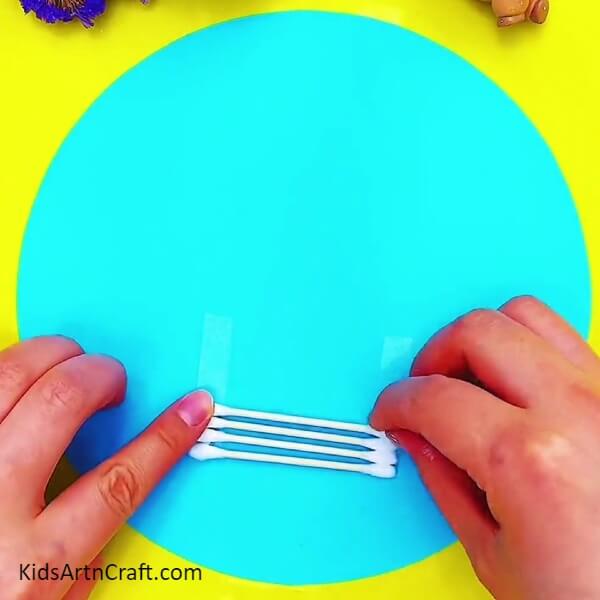
Now start sticking the cotton bud one beside one as shown in the photo above.
Step 3: After Sticking The Cotton Bud
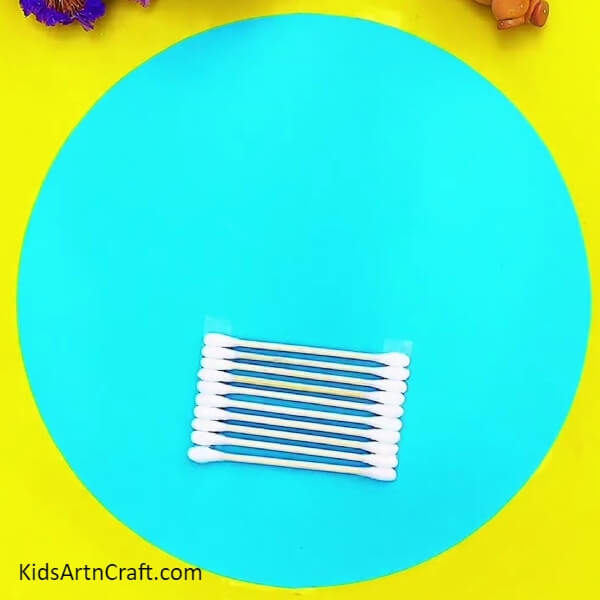
After sticking the 8-9 cotton bud one besides one , our craft will look like this as shown in the photo . Now it is ready to be formed into house.
Step 4: Making Ceiling Of The House
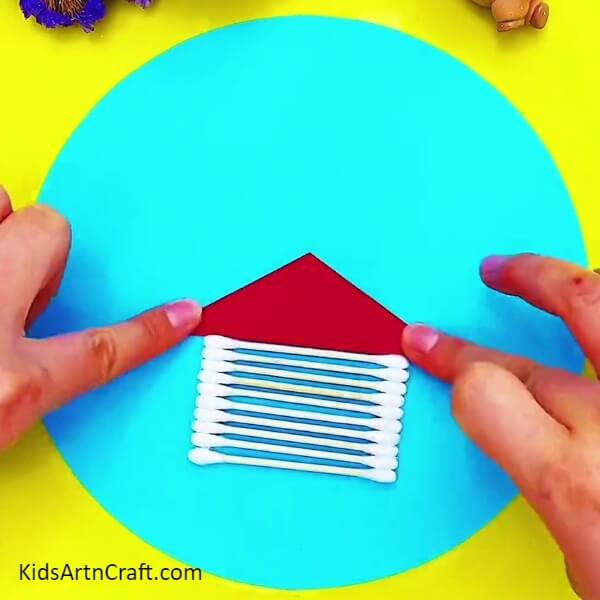
Now take red craft paper , cut it in shape of the triangle . Then stick it above the cotton buds with the help of the of the glue stick as shown in the photo above.
Step 5: Making Window And Door With Craft Paper
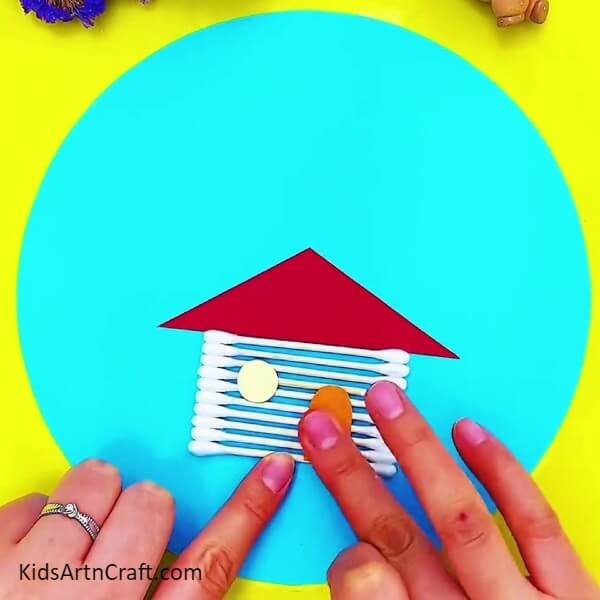
Now take cream colour craft paper . Cut it in the shape of the circle and stick it above the cotton buds. Again take orange craft paper cut out door shape from it . Again stick it above the cotton buds as shown in the photo above.
Step 6: Making Details Of The Window And Door
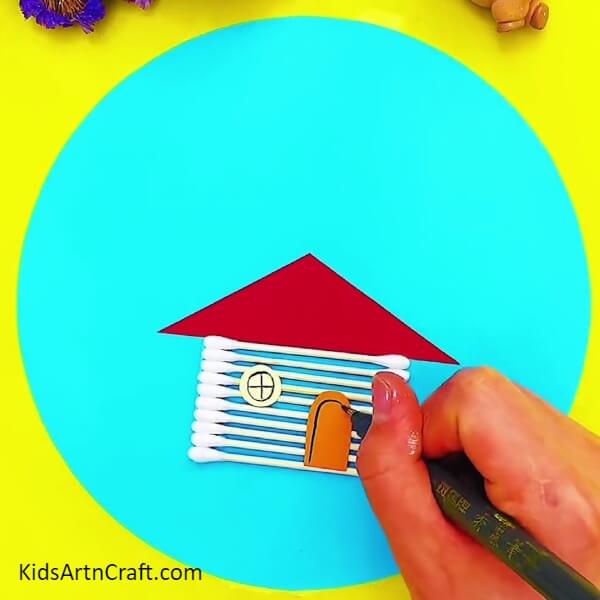
After sticking the window and door now its time to make some details of the door and window. For this take sketch pen and make details like making lines of the window. Then making details of the door with black sketch pen as shown in the photo above.
Step 7: Making A Tower Of Wind Fan Using A Black Sketch Pen

Now after making the house , its time to make it flying . For this make tower for wind fan .For this make make vertical lines and horizontal lines as shown in the photo above.
Step 8: Making Blades Of The Wind Fan
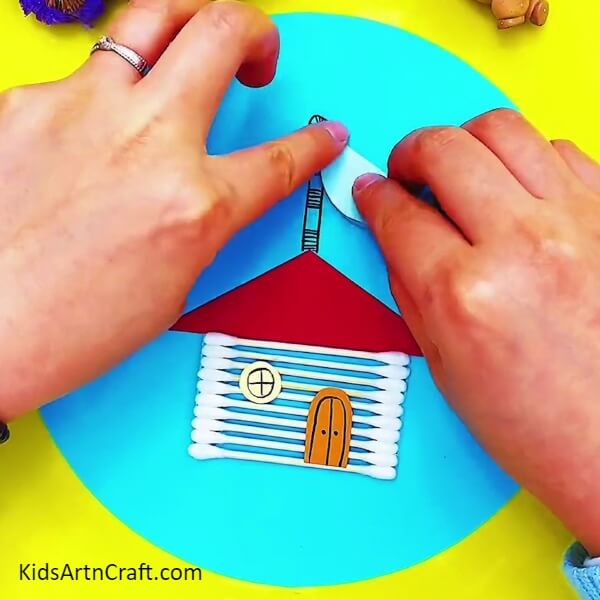
Now its time to make fans of the wind mill with different colour paper . Take different colour craft paper like light blue. Cut it in shape of circle then fold it from the middle then stick it above the tower as shown in the photo above.
Step 9: Making More Blades Of The Fan
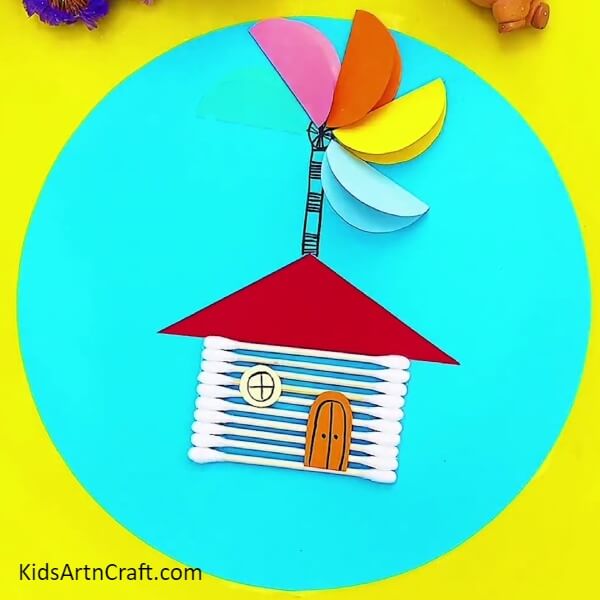
Now take coloured craft paper like red , orange pink etc to make more blades of the fan . cut out circle out of them , similarly fold them from the middle then stick in in circular way above the tower as shown in the photo above.
Step 10: Making Clouds With Black Sketch Pen
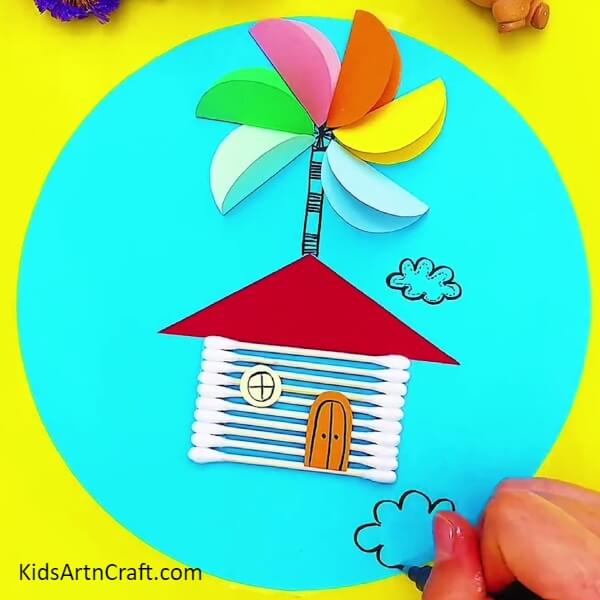
After completing the flying house , now its time to make some clouds . For this take black sketch pen and draw some clouds near the flying house as shown in the photo above. Make five to six clouds surrounding the flying house.
Tada! Our Beautiful And Dreamy Flying House Is Ready
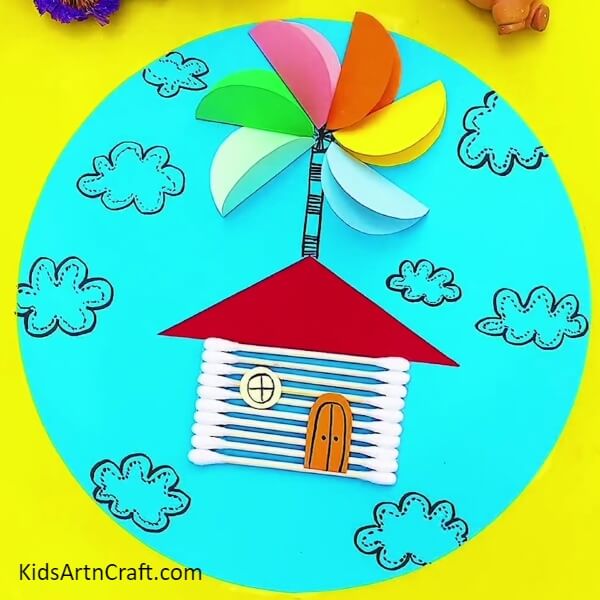
Tada! our beautiful and dreamy flying house is ready . This is the house which kids will love making. Make it in various colours and giving them for details with sketch pen. Don’t forget to make changes as per your liking. Try to be creative while making it. Also don’t forget to enjoy the process all along the way. Now its time for you to try them out and let us know in the comment section. This craft is very useful for all the kids who are starting their art journey and want to make easy crafts. Also let us know much you enjoy the process and how helpful you find the tutorial. We would love to read your comments.
Thank you for visiting our website!
Also make sure to visit other articles as well .
Follow us on Youtube for art and craft tutorials and much more.
More Articles from Kids Art & Craft
- DIY Flying House Using Leaves – Up Movie Inspo
- Easy Frog Puppet Toy Craft Using Paper Cup For Kids
- How To Make Leaf Butterflies Art Tutorial For Kids
- Easy to Make Doll with Yarn and Tissue Paper
- Bubble Wrap Printed Pomegranate Craft For Kids
Related posts:
- DIY Flying House Using Leaves – Up Movie Inspo
- Easy Frog Puppet Toy Craft Using Paper Cup For Kids
- Best Out of Waste Paper Girl Craft Tutorial For Kids
- Smiling Pineapple Recycled Craft Idea For Kids
- How To Make Leaf Butterflies Art Tutorial For Kids
- Butterfly Leaf Craft For Kids To Try At Home
- Table Lamp Craft From Paper cup For Kids
- Easy Paper Mouse Finger Puppet Craft Tutorial For Beginners


