Recycled Crafts
How To Make Mini Origami Paper Bag For Kids

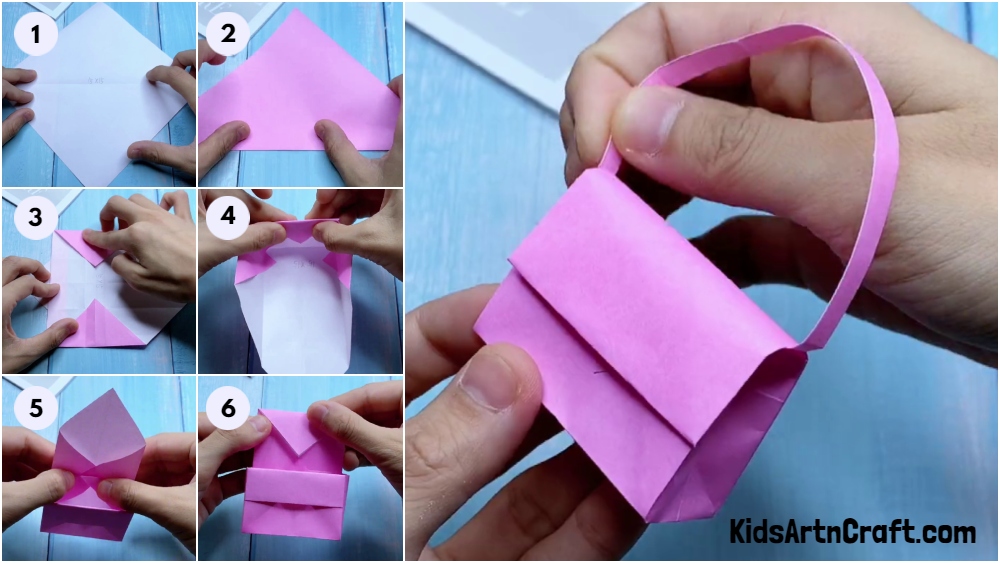
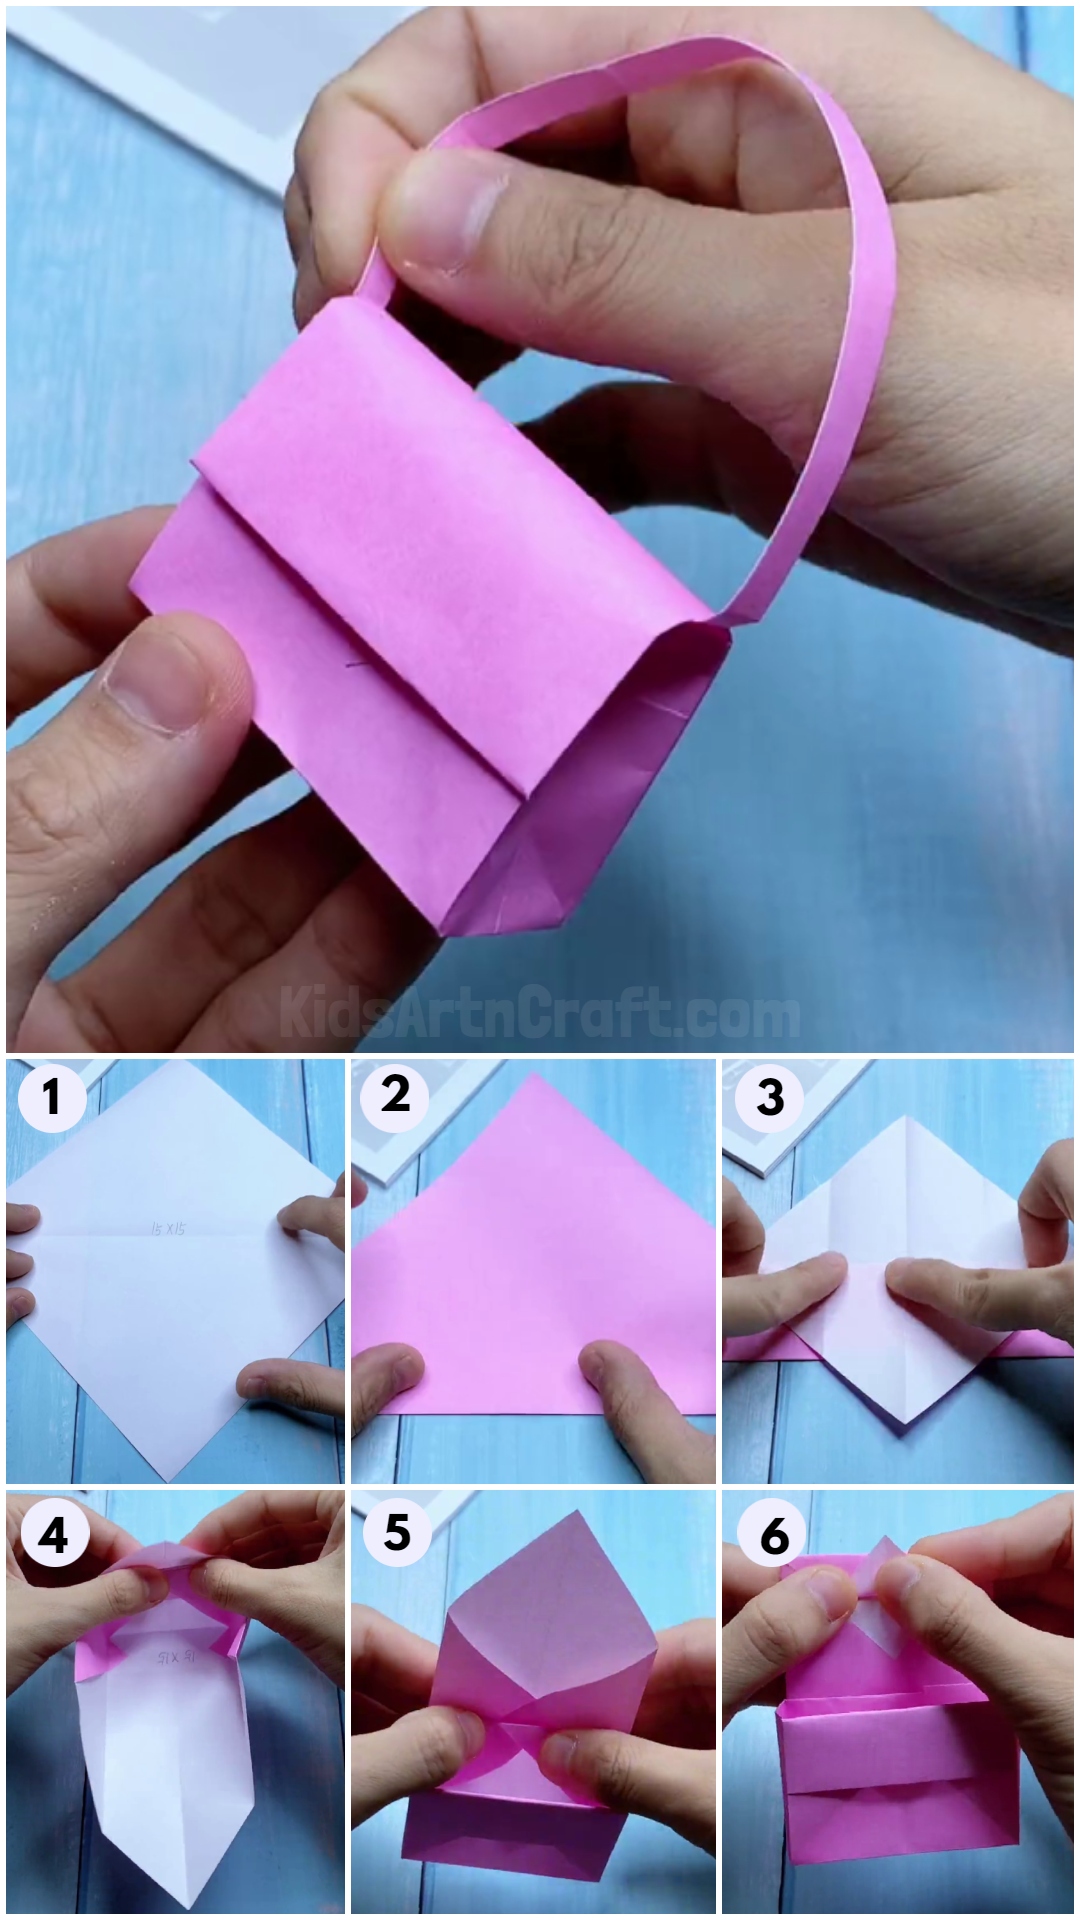
Make your kids’ day extra special with this easy-to-follow tutorial on how to create an adorable mini origami paper bag! This hands-on craft project is perfect for children of all ages and requires only a few simple materials. Get started today and give your kids a fun and creative activity to enjoy!
Origami is a great activity for both children and adults. It is an inexpensive craft that requires minimal supplies and can be done almost anywhere. Origami teaches patience and concentration, and it is a great way to relax and unwind. With the right instruction, anyone can make beautiful origami creations.
Welcome to this tutorial on how to make mini origami paper bags for kids! Origami is a fun and creative way to make a variety of items. It is a great project for kids to get creative and learn a new skill. In this tutorial, we will show you how to use origami to make a simple mini-paper bag. With a few simple steps, you’ll be able to make your own mini paper bags, perfect for holding small items or as a fun craft project for kids. We’ll walk you through all the steps, from folding the paper to assembling the bag, so that you will have the perfect mini origami paper bag in no time. Let’s get started!
Mini Origami Paper Bag Craft For Kids To Make
Materials Required:-
- Origami Paper
- Glue
Read More: Origami Heart Craft To Make At Home – Simple Tutorial
Step 1: Taking Origami Paper
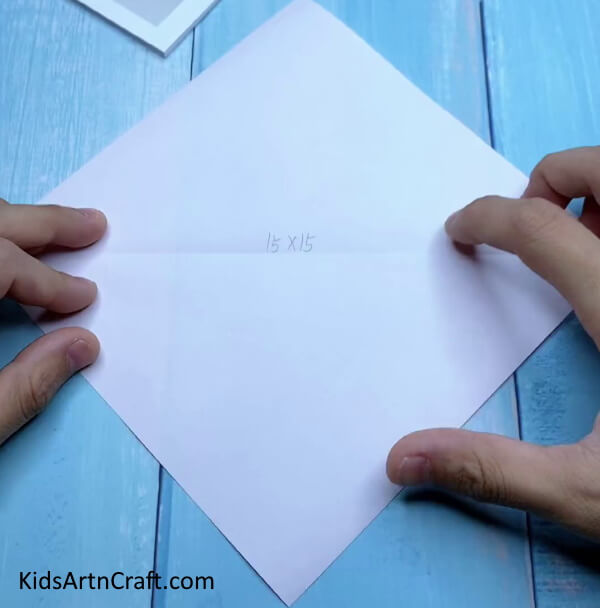
As a first step, take one side of the pink-colored square paper of size 15*15 cm to make a mini paper bag craft.
Step 2: Folding Paper In Half Diagonally
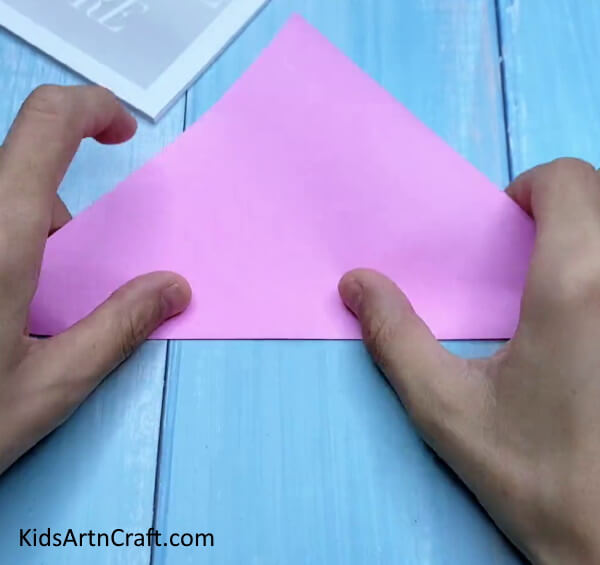
Fold the square paper half diagonally to make a triangle shape. The pink-colored part should be visible outside. Crease it well and unfold it.
Step 3: Making Creases
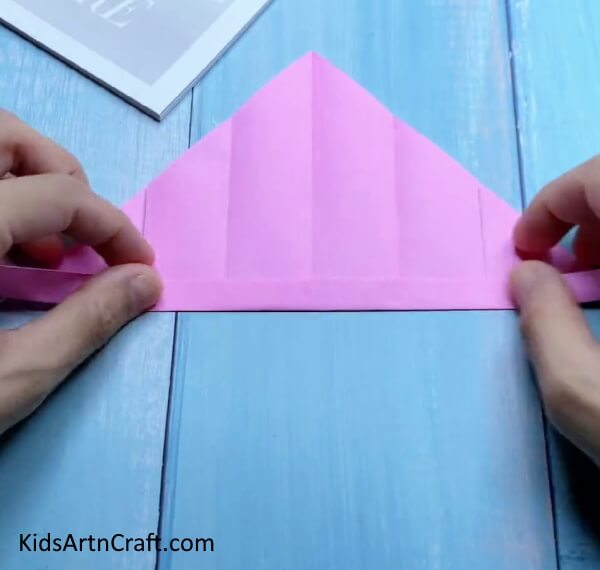
Now, place the paper in a diamond shape. Fold the right corner to the middle crease. Repeat the same with the left corner of the diamond shape. Crease them well and unfold them.
Bring the right corner to the left crease formed. Crease it well and then unfold it. Repeat the same by bringing the left corner to the right crease.
Again, fold the paper in half but in opposite diagonal. Fold the base of the triangle about 0.5 cm upwards.
Step 4: Folding Corners Of The Triangle To The Creases
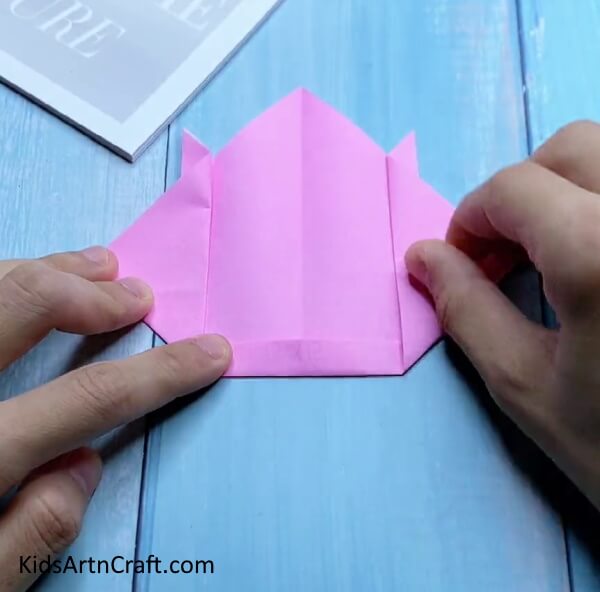
Now, fold the right corner of the triangle upwards to the 2nd right crease in such a way that the corner touches the side of the triangle. Repeat the same with the left corner by folding it upwards to the second left crease.
Step 5: Folding Triangle Upper Layer Downwards
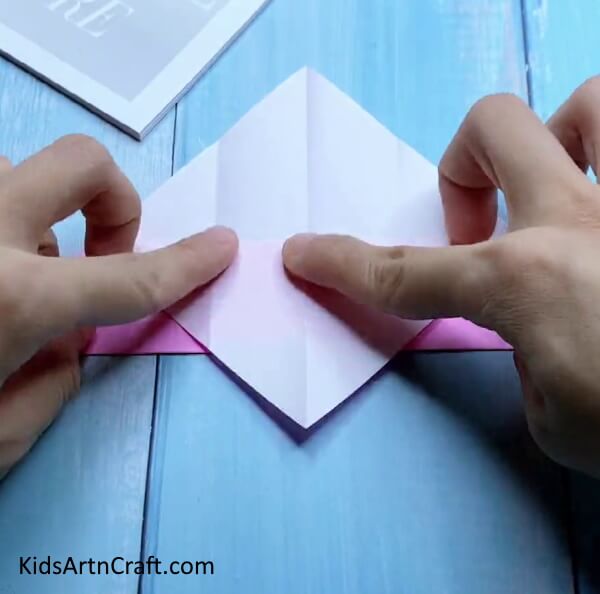
Unfold the last two creases made in the previous step. Fold the outer layer triangle downwards and crease it well.
Step 6: Folding Triangle Upwards
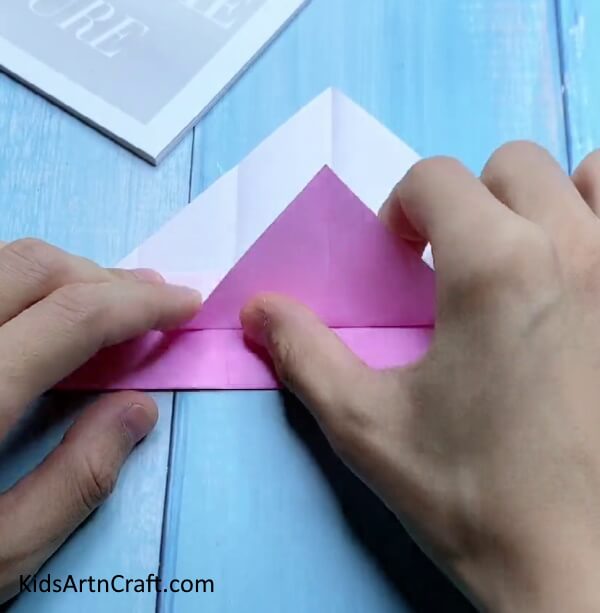
Again, fold the same triangle in the upper direction by leaving some space at the previous crease.
Step 7: Folding Triangles
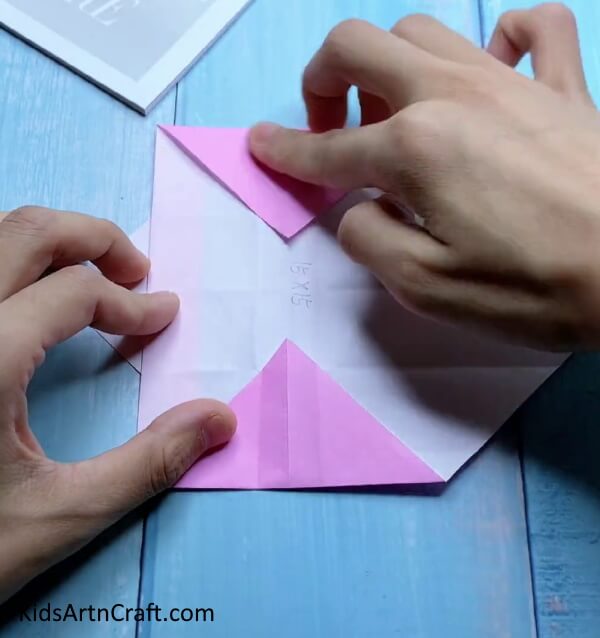
Unfold all the creases except the left side crease. Fold the top and the bottom corner to form triangles. Crease them well.
Step 8: Pushing in The Left Corner
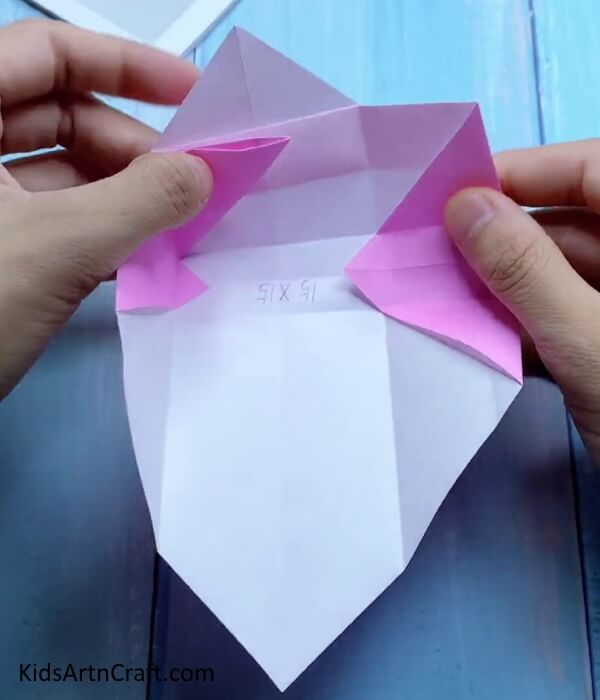
Along with the creases made, push in the top left corner as shown in the above image.
Step 9: Folding Right Top Corner Inside
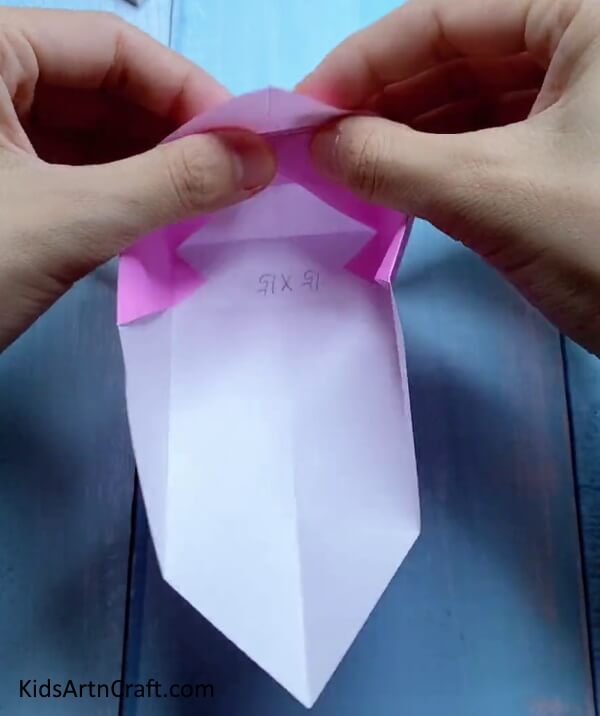
Repeat the previous step in the top right corner.
Step 10: Folding Top Triangle
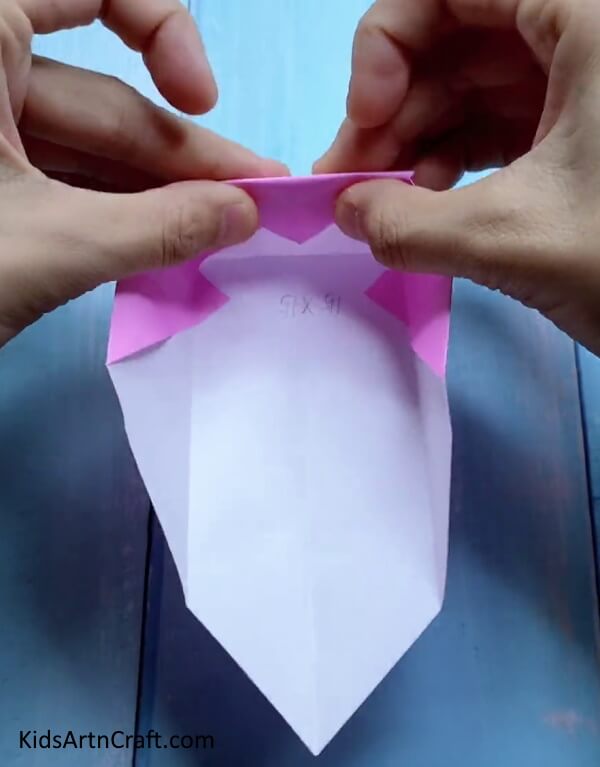
Fold the top triangle downwards. You can secure the creases with glue.
Step 11: Folding Side Triangles
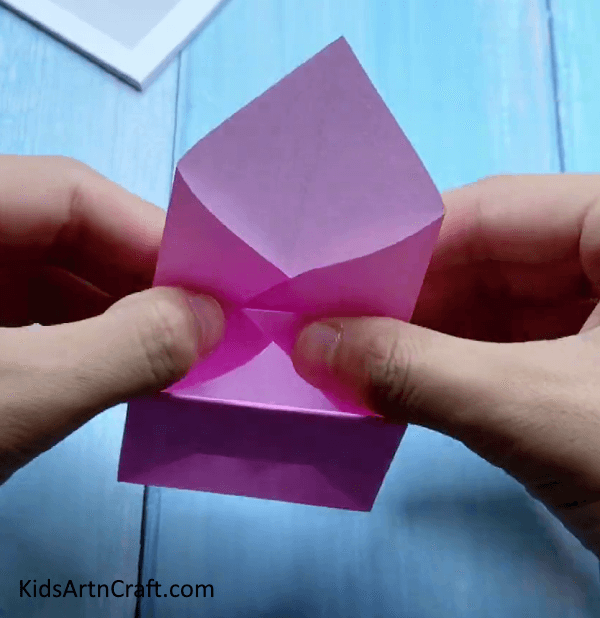
Now, turn the model upside down and fold the right and left sides to form triangles.
Step 12: Folding Top Triangle
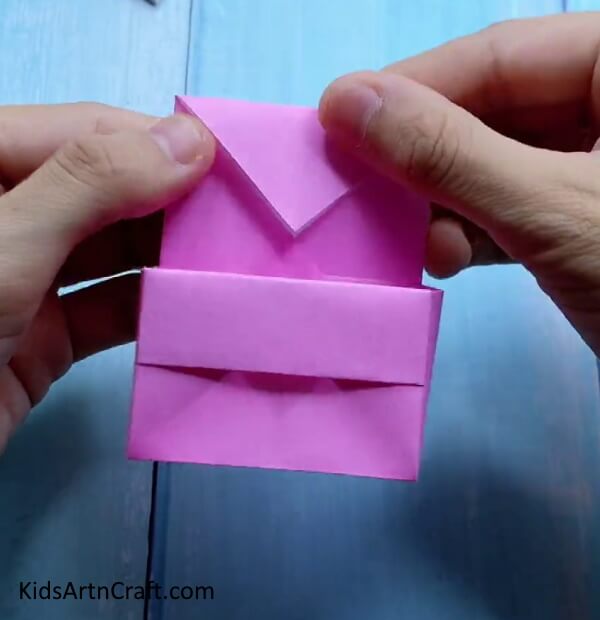
Fold the top triangle downwards
Step 13: Folding Triangle Upwards
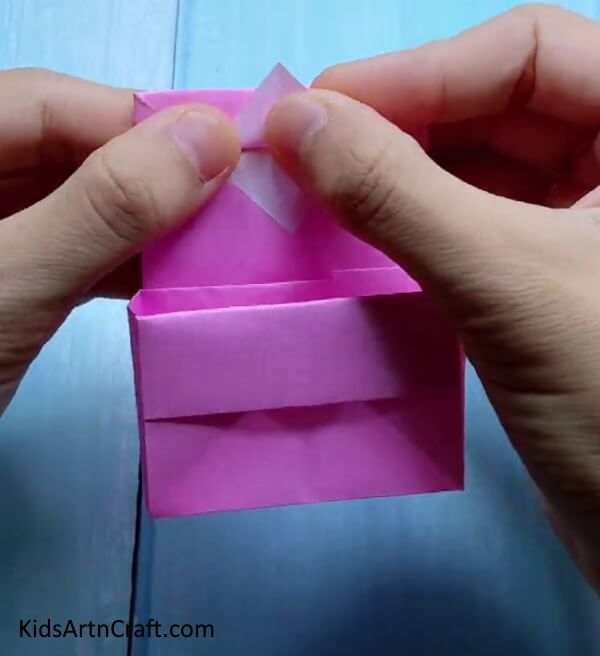
Fold the corner of the triangle folded in the previous step upwards.
Step 14: Closing The Bag
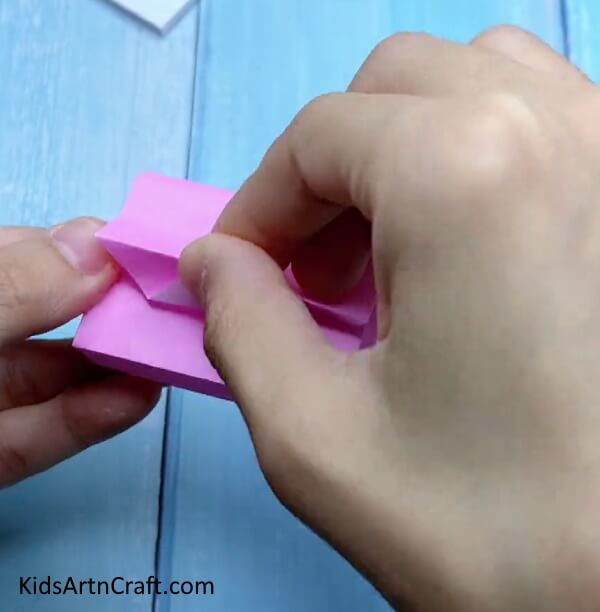
Fold the top of the bag downwards to close the bag.
Step 15: Attaching Handle
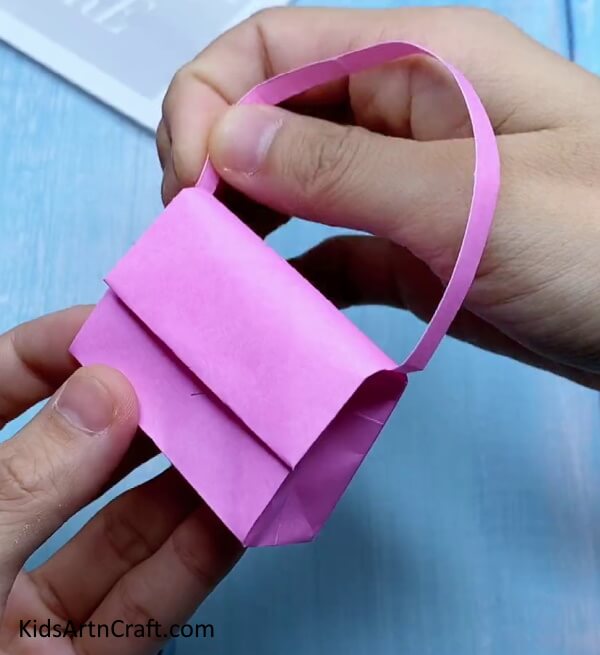
Make a thin pink paper strip and attach it inside the paper bag using glue to make the handle of the bag.
Mini Paper Bag Origami Craft Is Ready!
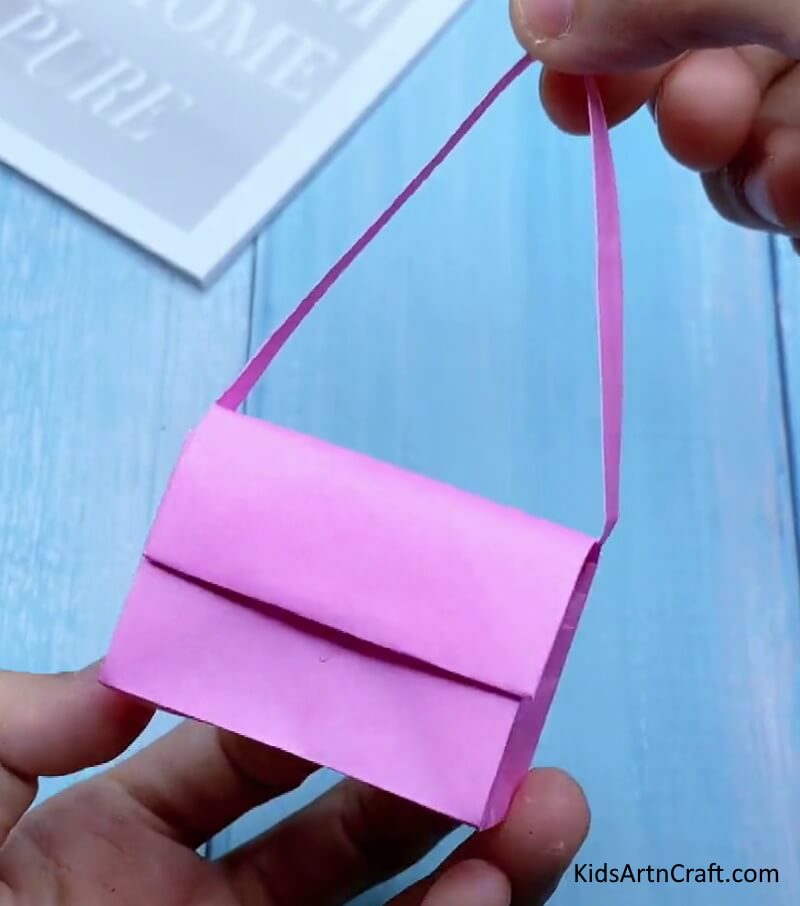
Your mini origami paper bag is now ready to use! You can fill it with treats, small toys, or anything else your child might enjoy. This project is a great way to get creative and practice origami skills. With your new paper bag, you can create unique decorations, store small items, and more. Let your imagination run wild with what you can do with your mini paper bag. Enjoy!
Some More Paper Bag Craft Tutorial
Simple To Make Bag Craft for Kids
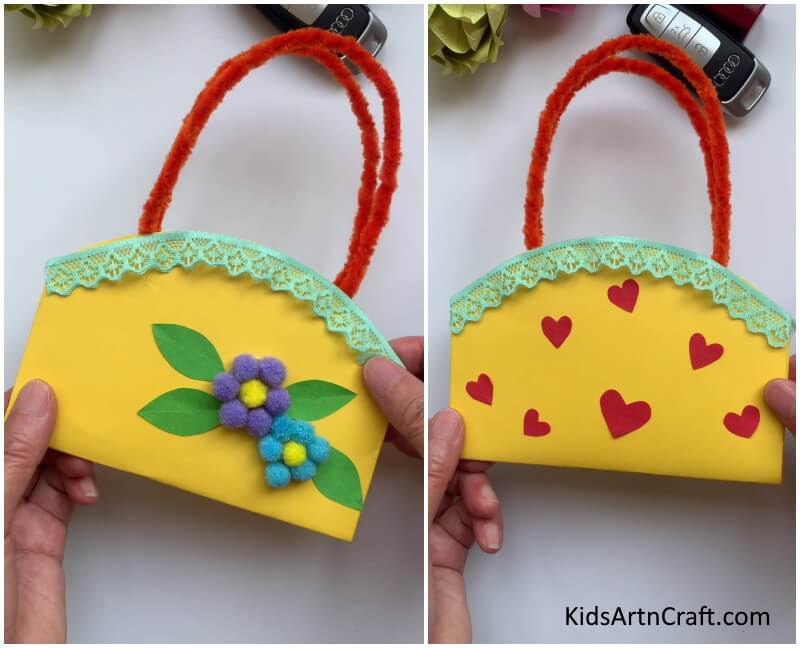
Image Source/Tutorial: Kids Art & Craft
This Simple To Make Bag Craft for Kids is an easy and fun activity for kids of all ages. It encourages creativity and can be used to store small toys or other items. It’s a great way to keep your kids busy and entertained.
FAQs How To Make Mini Origami Paper Bag For Kids
1. What materials do I need to make a mini origami paper bag for kids?
You will need a square sheet of paper and glue.
2. Is it difficult to make a mini origami paper bag?
No, it is fairly easy to make a mini origami paper bag.
3. What size paper should I use to make a mini origami paper bag?
You should use a square sheet of paper that is 15 cm by 15 cm.
4. How long does it take to make a mini origami paper bag?
It typically takes about 20 minutes to make a mini origami paper bag.
5. How can I make the bag more decorative?
You can decorate the bag with stickers, markers, glitter, or other decorative items.
6. What can I put in the mini origami paper bag?
You can put small items such as candy, toys, jewelry, and more.
7. Can I make a mini origami paper bag with normal paper?
Yes, you can use normal paper to make a mini origami paper bag.
8. Do I need any special tools to make a mini origami paper bag?
No, just a square sheet of paper and glue.
9. How can I make the mini origami paper bag more durable?
You can use thicker paper or use a stronger adhesive.
10. What other shapes can I make with origami paper?
You can make a variety of shapes such as animals, flowers, and more.
Making mini origami paper bags for kids can be a fun and creative way to keep them entertained. With a few simple supplies and some basic origami folding techniques, you can create a unique and useful item that your kids will love.
Follow us on Youtube for art and craft tutorials and much more.
More Articles from Kids Art & Craft
- Super Easy Craft Activities Video Tutorial At Home
- Easy Origami Cat Folding Craft for Preschool Kids – Step-By-Step Tutorial
- Cool & Easy Craft Ideas for Kids
- Easy DIY Origami Ideas For Kids
- Easy Craft To Make With Leaves


