Recycled Crafts
Walnut Deer Craft Using Leaves Step By Step Tutorial

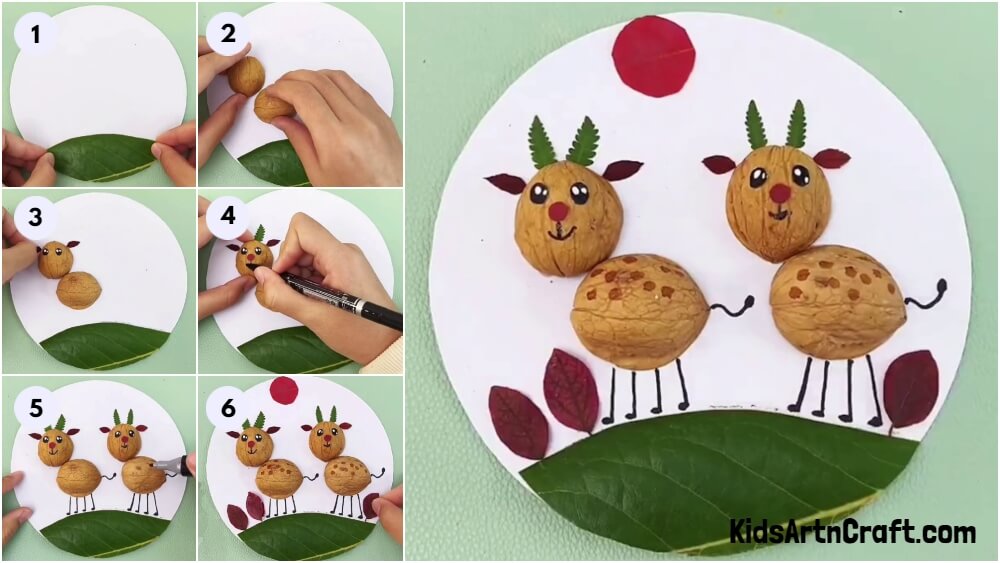
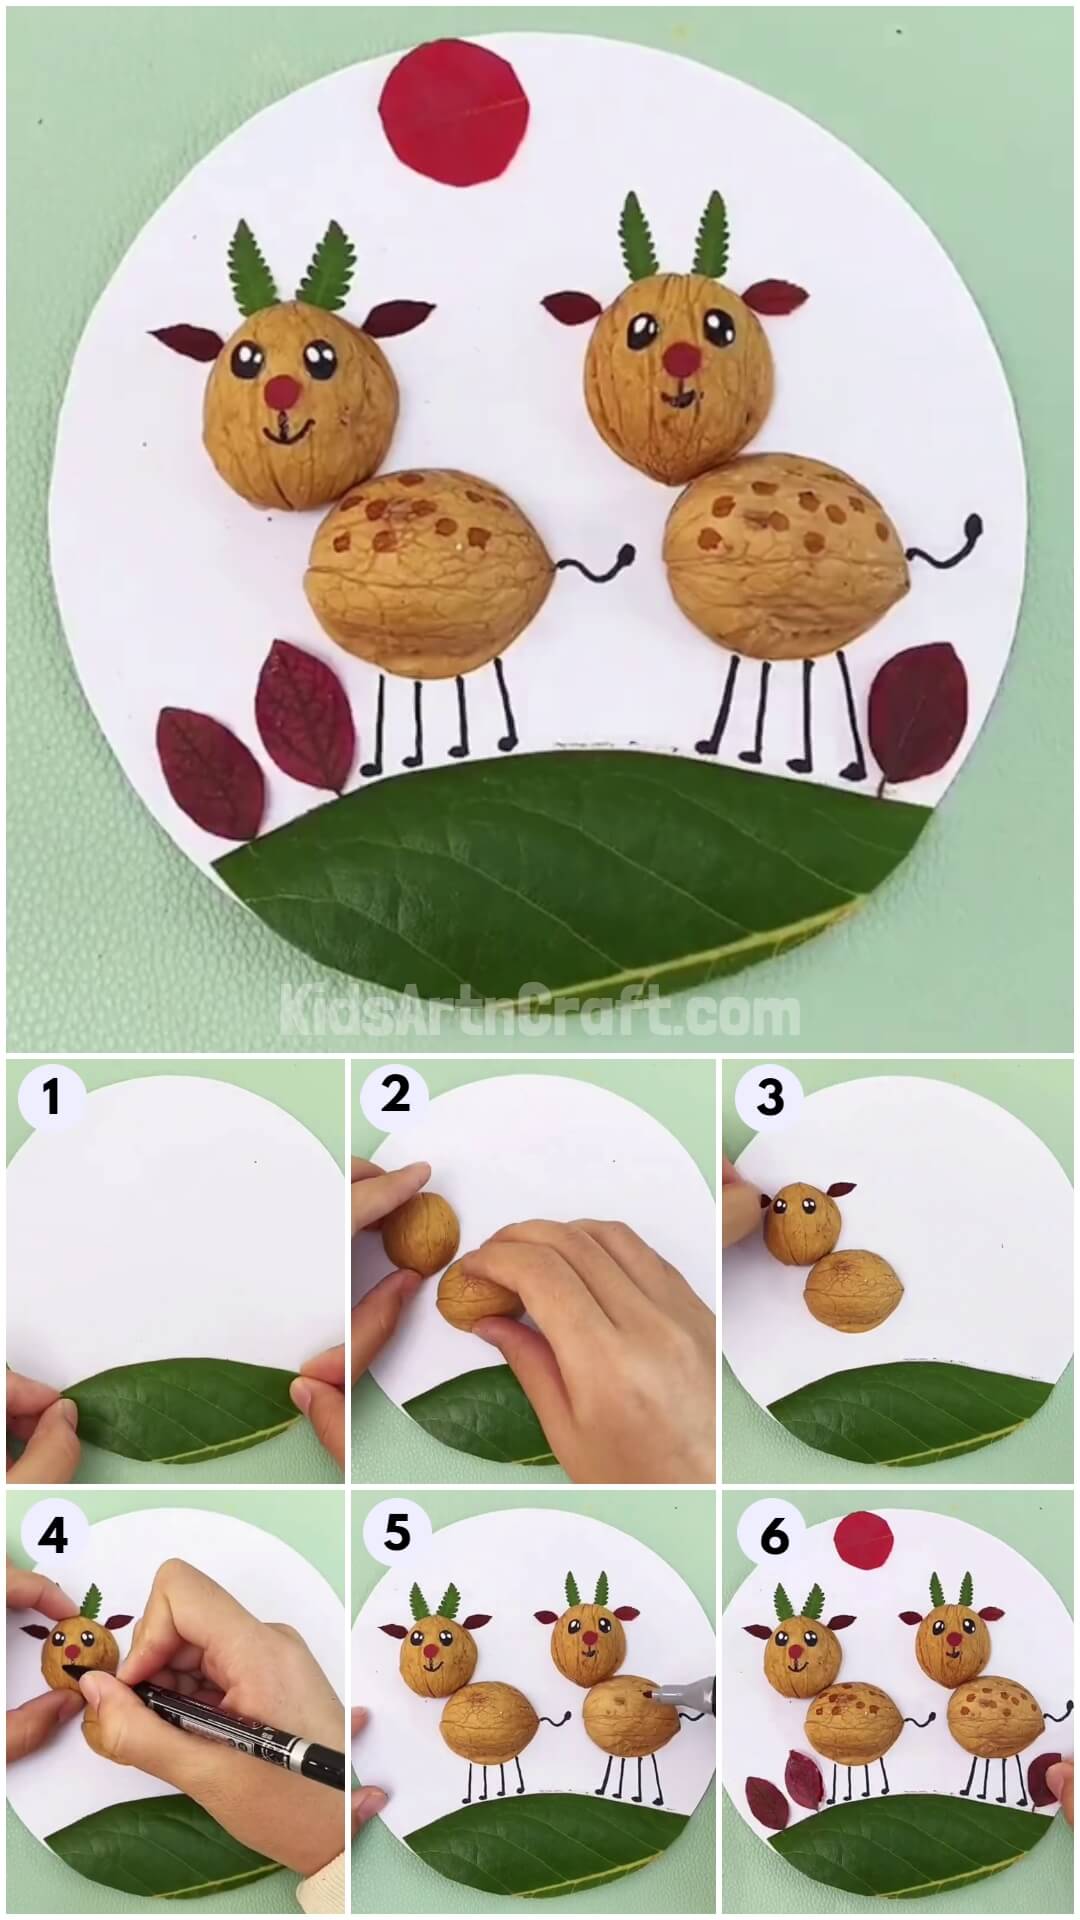
This tutorial will show you how to make a cute walnut deer craft using leaves! It’s easy and suitable for all ages, so it’s a great present or decoration.
Welcome to this tutorial on how to make a deer craft using walnut and leaves. This is a creative craft in which we make use of the best out of waste. We always think of creative ways to craft new ideas. This craft can be tried out by anyone. All you need is walnut and leaves for this tutorial. Let’s begin!
DIY Walnut Deer Craft With Leaves For kids
Read More: Egg Carton Caterpillar Craft Tutorial For Kids
Materials Required
- Walnut
- Leaves
- Scissors
- Paper
- Black marker pen
Procedure
Step 1: Cutting A Big Green Leaf
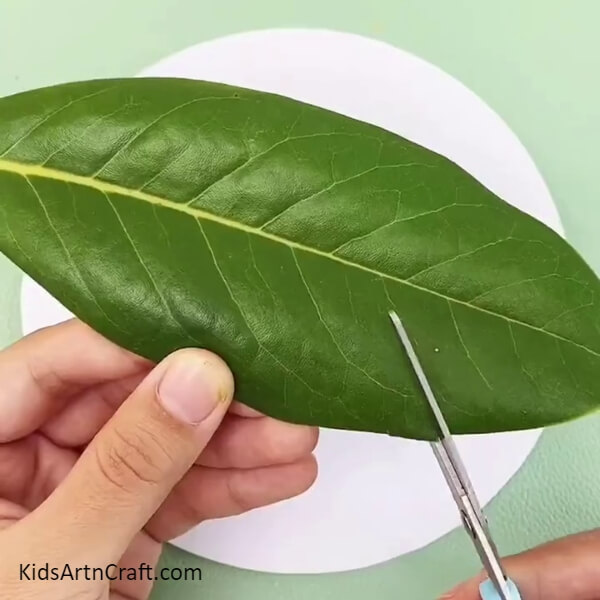
Using the scissors, cut one side of a big green leaf in a circular shape.
Step 2: Sticking The Green Leaf
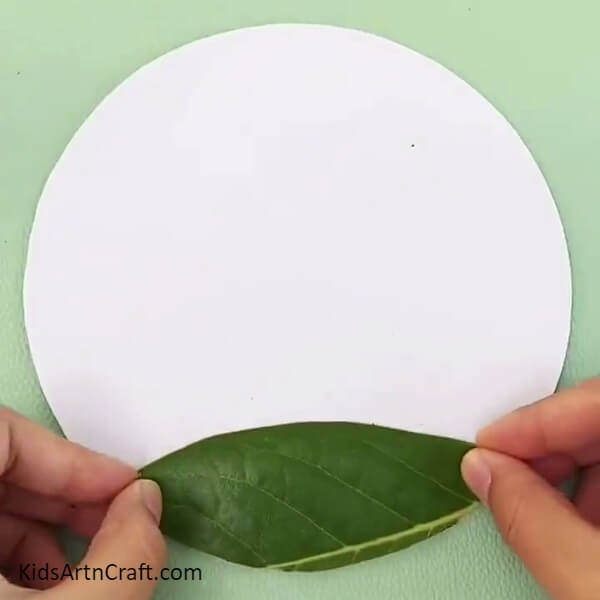
Stick the leaf to the base of our circular paper. Just like shown above.
Step 3: Placing The Walnut
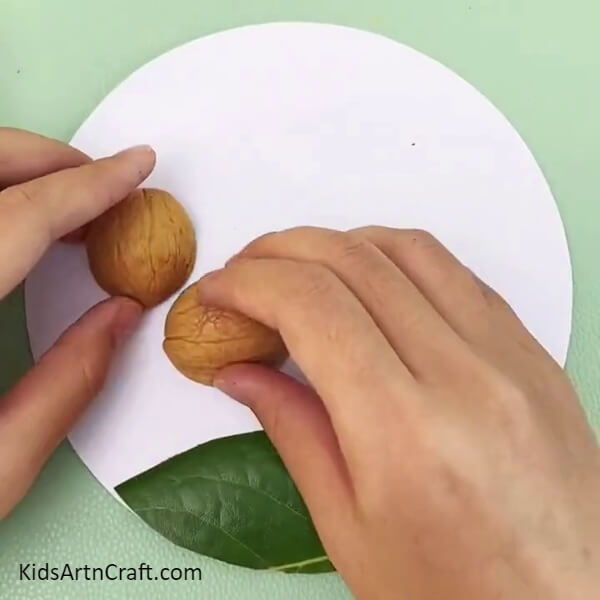
Place the walnut to form the body of the deer just like shown in the picture above.
Step 4: Eyes And Ears Of The Deer
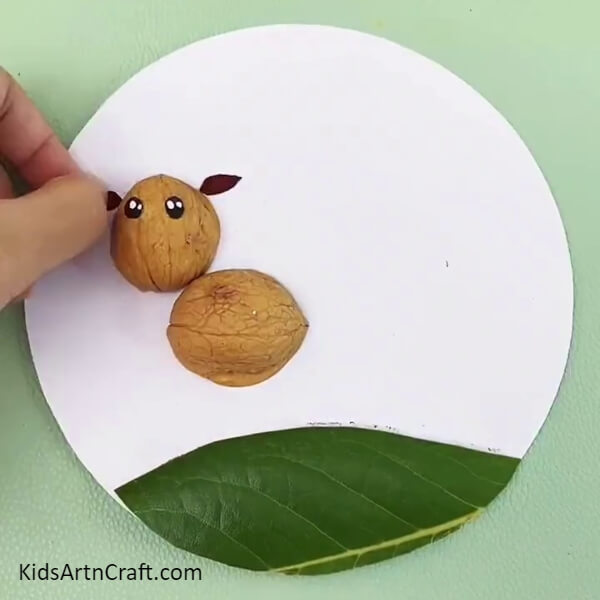
Draw eyes and ears of the deer on a paper, cut it and stick it to the walnut.
Step 5: Horns, Nose, and Mouth of the Deer
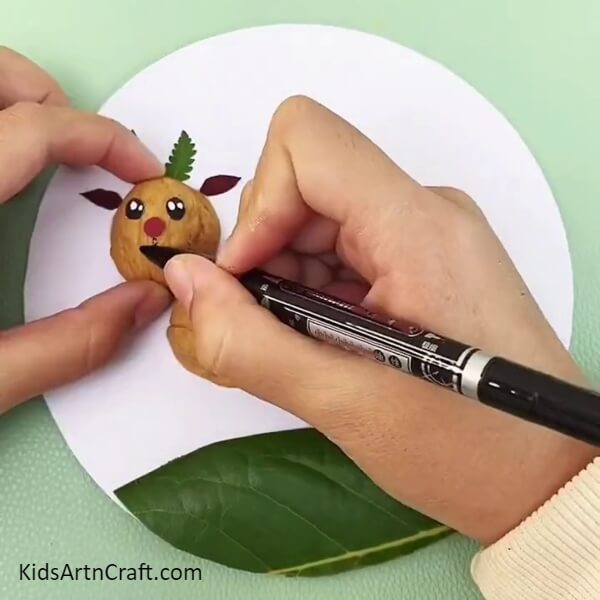
Use two small leaves and stick them as the horns of the deer. Stick the nose. Draw the mouth with the marker pen.
Step 6: Walnut Deer Is Prepared
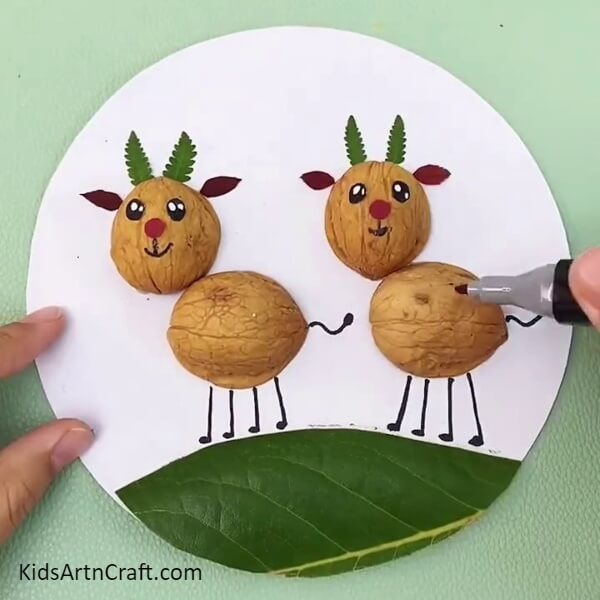
Similarly, craft another deer. Draw the hands, legs, and tail using the marker pen.
Step 7: Background Details
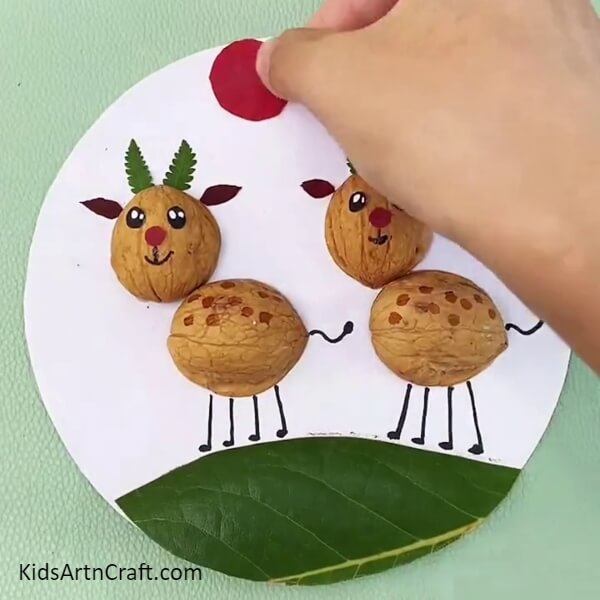
Using a brown pen, draw the spots on the deer. Stick a red paper as the sun in the background.
Step 8: Base Of Our Craft
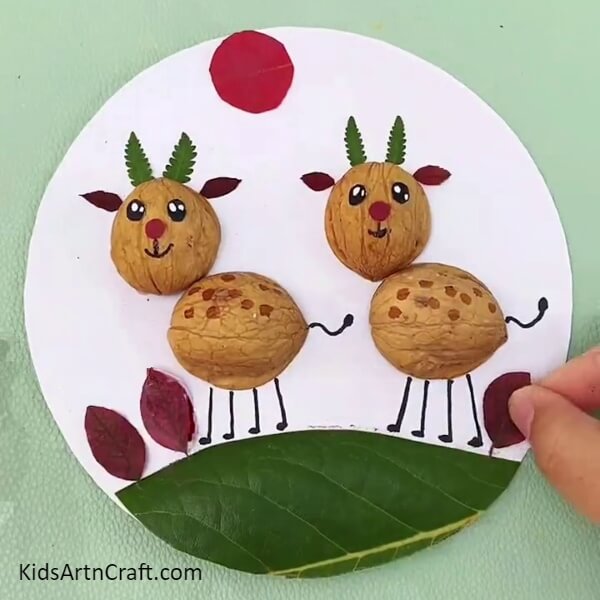
Stick some small colorful leaves at the bottom above the green leaf. Our base is ready.
Walnut Deer Using Leaves is Ready!
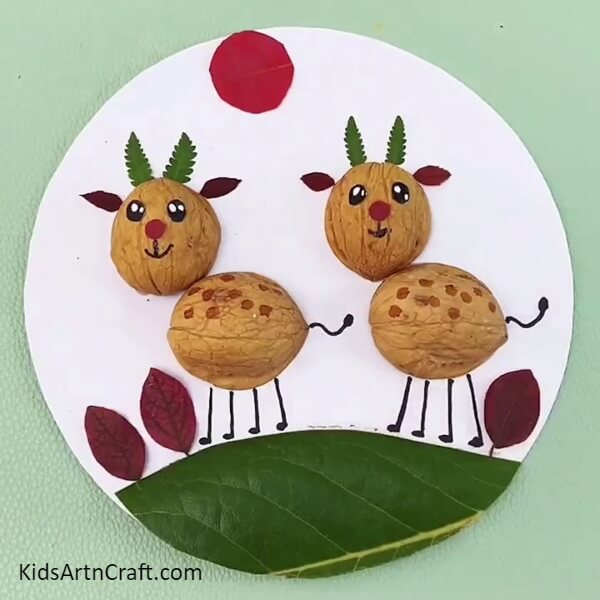
Good job! Our walnut deer craft using leaves looks amazing. This tutorial helps the kids to make fun animal crafts using out-of-the-box materials like walnut and leaves to create artistic crafts. We hope you had fun making this craft with us. There are always unique ways to learn new things!
Hope you like this article on how to make walnut deer using leaves. We would love to hear your thoughts on this article in our comments section below. Please do visit our website for other such fun and amazing articles on art and craft.
Thank you for visiting our website.
Follow us on Youtube for art and craft tutorials and much more.
More Articles from Kids Art & Craft
- Easy Leaf Art and Craft Step by Step Tutorial For Kids
- Easy Peanut Shells Giraffe Art and Craft For Kids
- Easy Balloon Face Art and Craft for Kids
- Easy Caterpillar Craft With Fresh Leaves
- Recycled Egg Tray Mushroom & Flower Craft – Step by Step Tutorial


