


DIY and Crafts
Easy Lion Craft Using Foam Net Tutorial For Kids

This fun and easy lion craft tutorial for kids uses a foam net as a main material. Learn how to make a lion craft using foam net and some basic tools. Perfect for kids of all ages to make in the classroom or at home.
Big, strong, mighty lions, are a symbol of pride and power. They rule the jungles with their roars and assertive walks. They have thick luscious hair around the face and their bodies have a rich fawn color. They camouflage into the bushes easily and have extreme agility which helps them to catch their prey easily.
It is one of the most significant elements of the entire animal kingdom positioned right at the top of the food web. Today, we will be making a lion using cardboard and foam net, both these objects are absolutely free of cost. Search for both these materials among the stuff you shopped recently and let’s get started.
DIY Lion Craft Made With Foam Net
Read More: Simple Paper Animal Craft Ideas Video Tutorial for All
Material Required
- A Cardboard Sheet
- A Black And a White Sheet Of Paper
- A Black Sketch Pen
- A Red And An Orange Crayon
- A Pair Of Scissors
- A Glue Stick
- Foam Net
- Double Sided Tape
Procedure
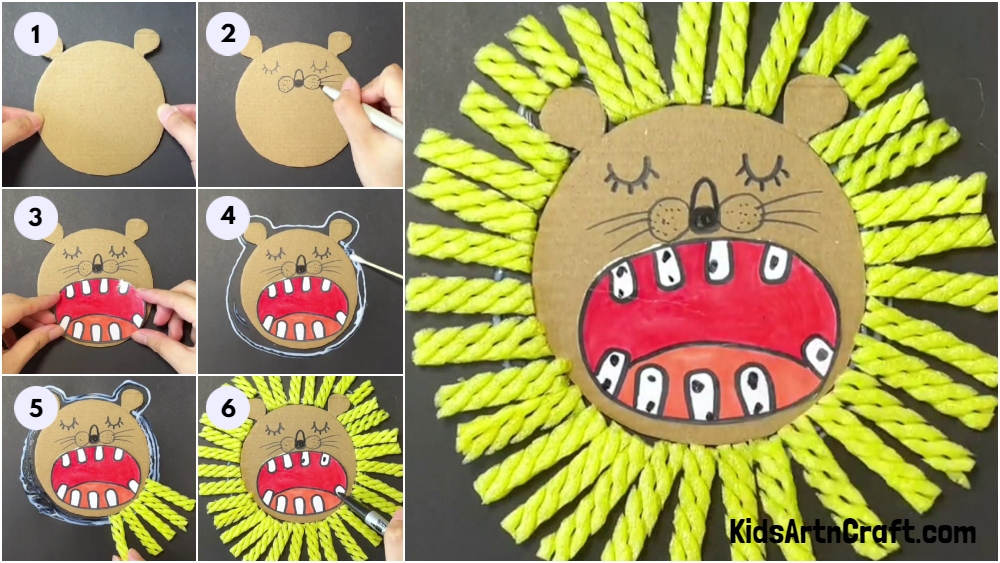
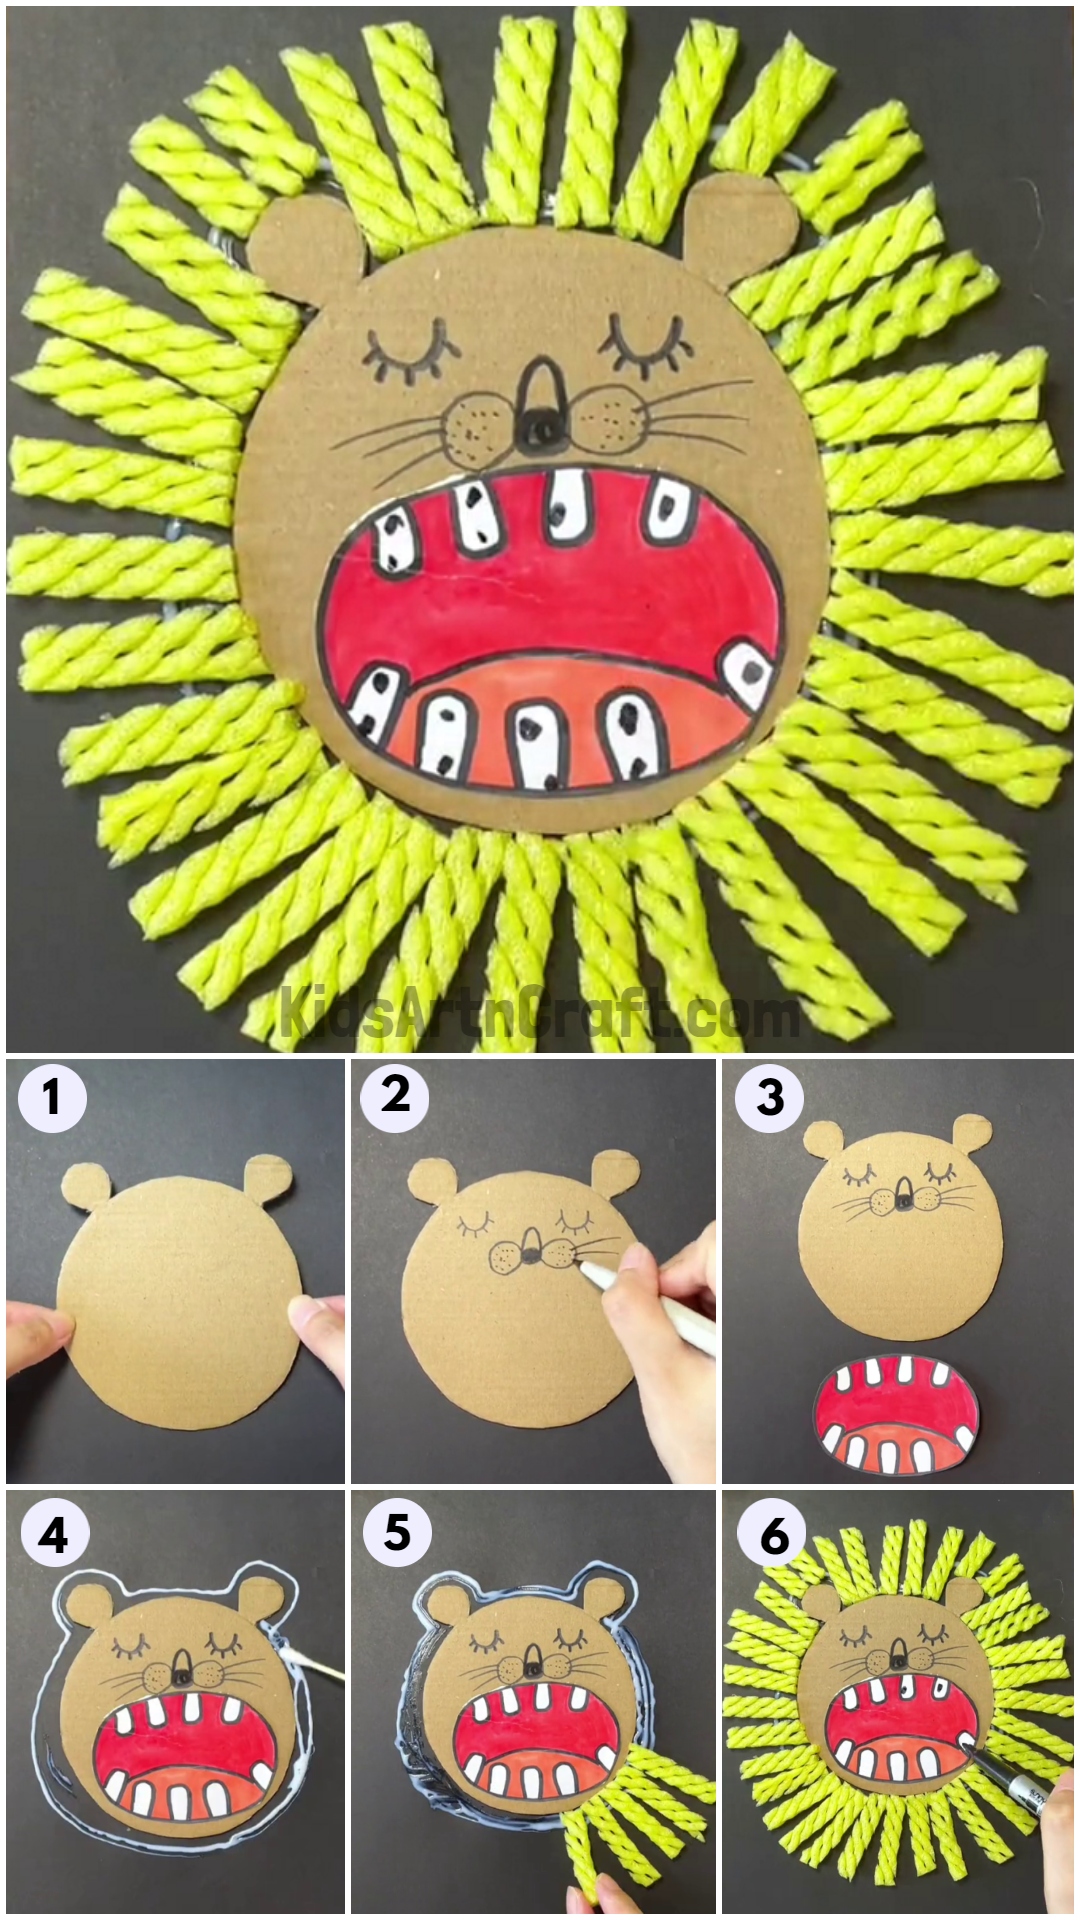
Step 1: Cutting The Cardboard Sheet
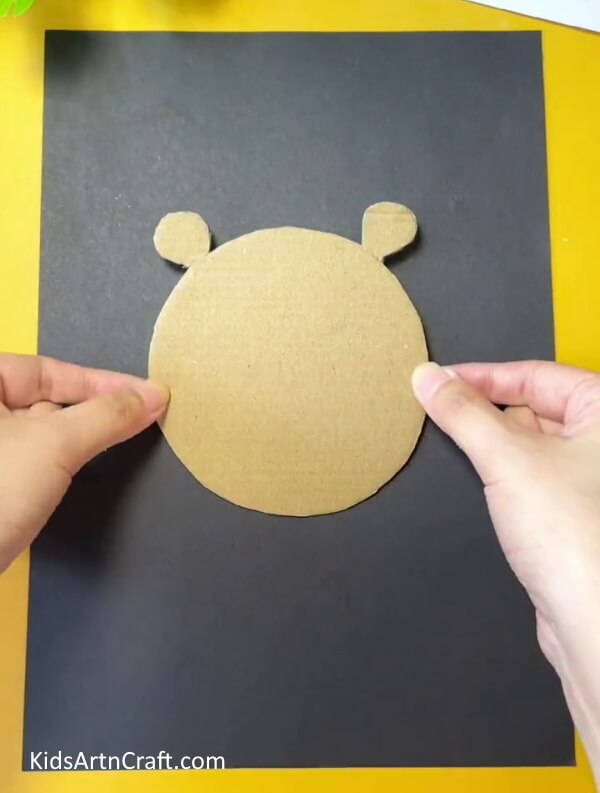
Take a cardboard sheet and draw a circle on it making two ears at the top of the circle. Cut the shape out as shown in the picture below. Take a black sheet of paper and place it on the table. Applying glue on one side of this shape which is going to serve as the basic structure of our lion’s head, paste it in the middle of the black sheet of paper.
Step 2: Drawing The Face Of The Lion
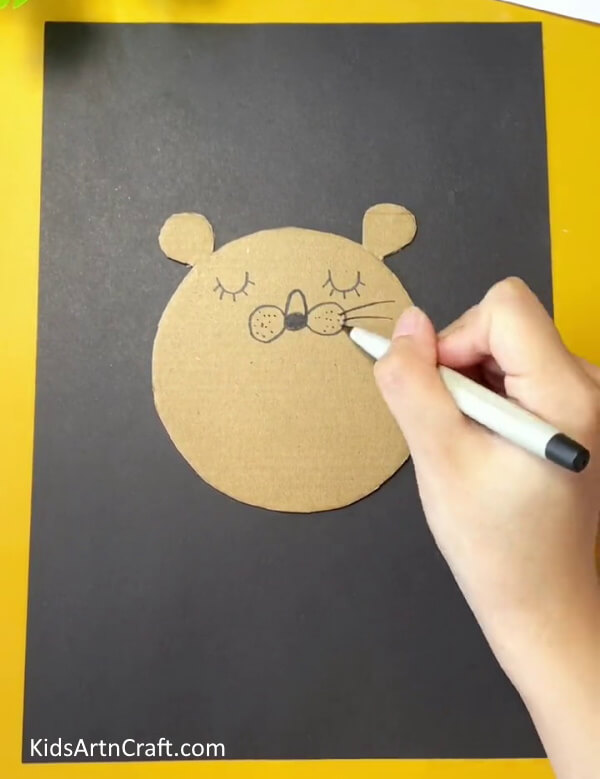
Now, with the help of a black sketch pen make two sleeping eyes at the top of the head right next to each other. You can do that by drawing two small, curved lines as shown in the picture below.
Draw tiny lines at the bottom of these eyes to add eyelashes.
Draw the nose below the eyes right in the middle by first making a cylindrical shape between two circles.
Make a small circle at the bottom of the cylinder in between and color it with the black sketch pen. Using the same pen, make light dots on both circles.
Finally, draw three lines on the sides of both circles. Observe the picture below for a thorough reference.
Step 3: Completing The Face
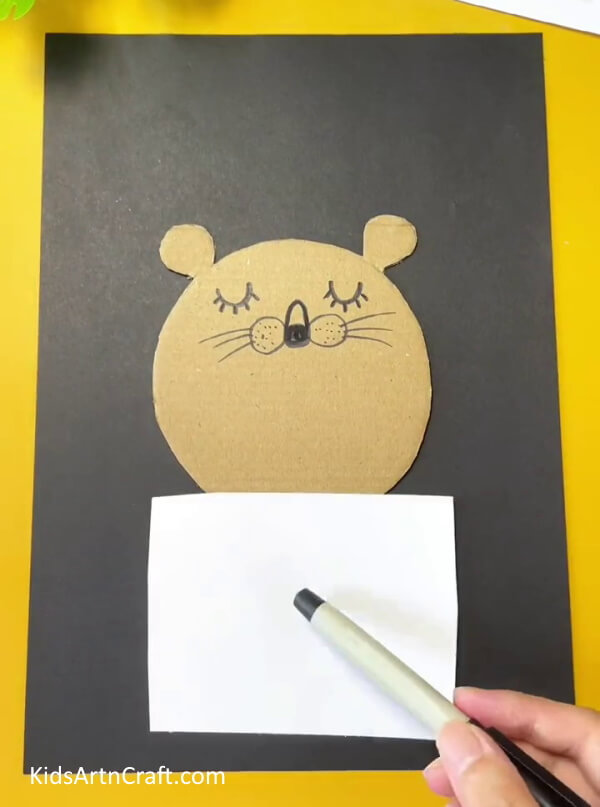
Outline all the facial features properly to make them prominent. Now, take a white sheet of paper and place it on the table.
Step 4: Coloring The White Sheet
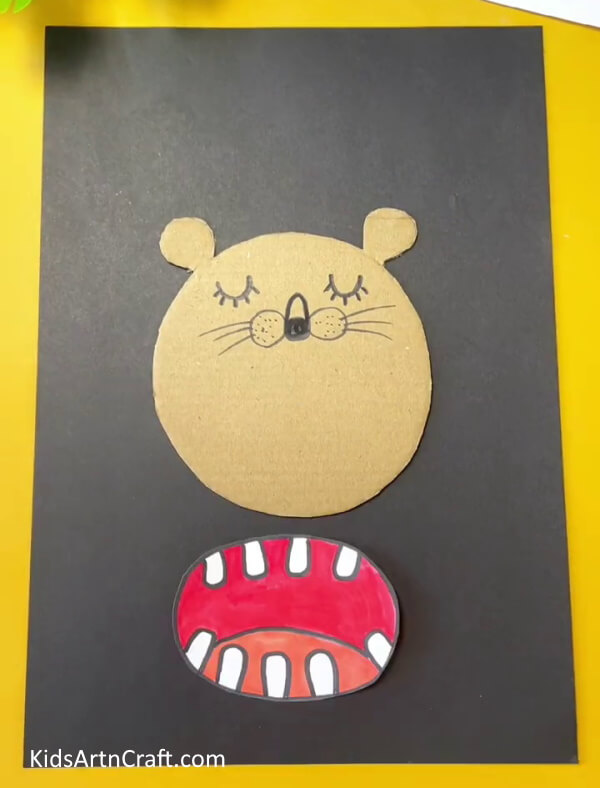
Take a sketch pen and draw an oval shape. This is going to serve as the mouth of the tiger. Draw four teeth at the top inner side of the mouth and five teeth at the bottom inner side of the mouth. Make a curved line connecting both teeth at the two extremes of the bottom side. This leaves us with two sections of the mouth. Color the upper section red with a crayon and the lower section orange with the same. Don’t color the teeth and leave them as they are.
Step 5: Sticking The Double Tape On The Mouth
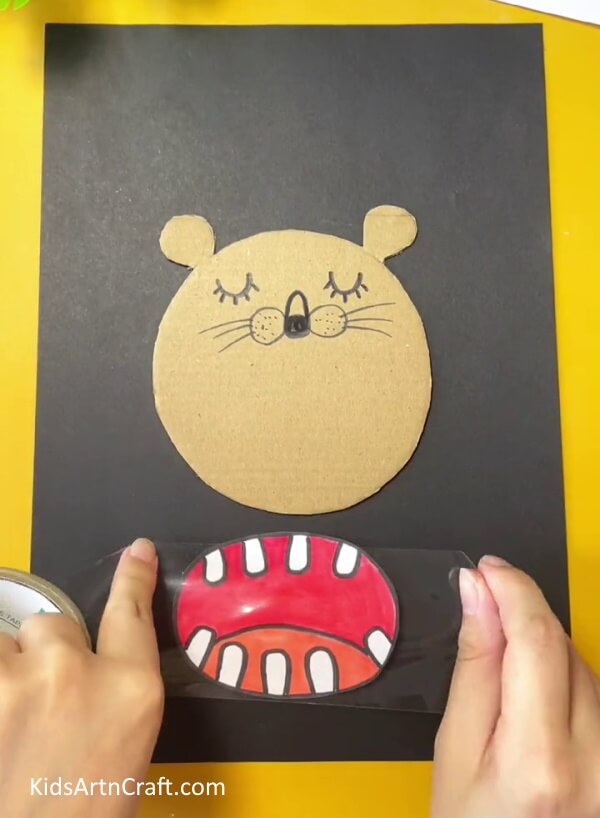
Cut a piece out of the double-sided tape and stick one side of the tape on the bottom of the head of this lion and peel the other side of the tape. Stick the mouth on it and seal it by pressing down on the mouth.
Step 6: Pasting The Mouth On The Head
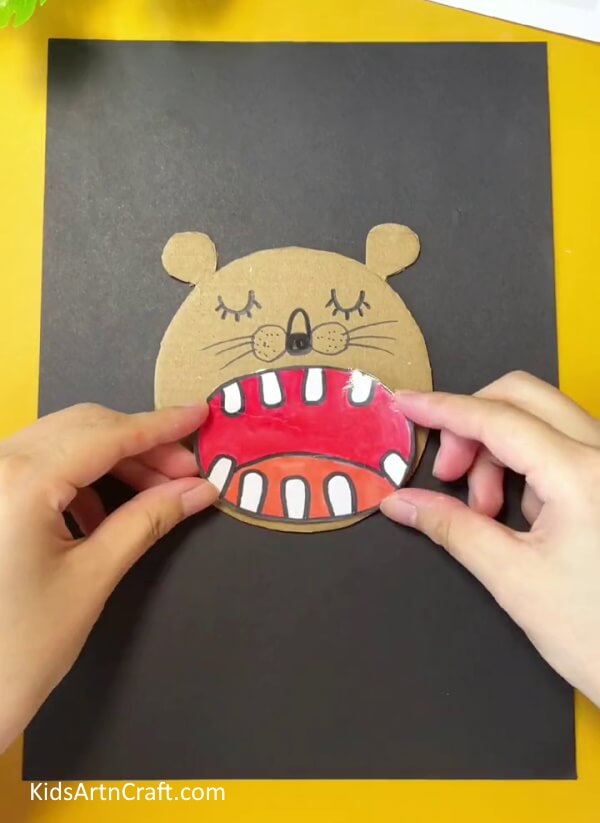
Stick the mouth on the peeled tape and seal it by pressing down on the mouth. This completes the process of making the head and the mouth as well.
Step 7: Shaping The Foaming Net
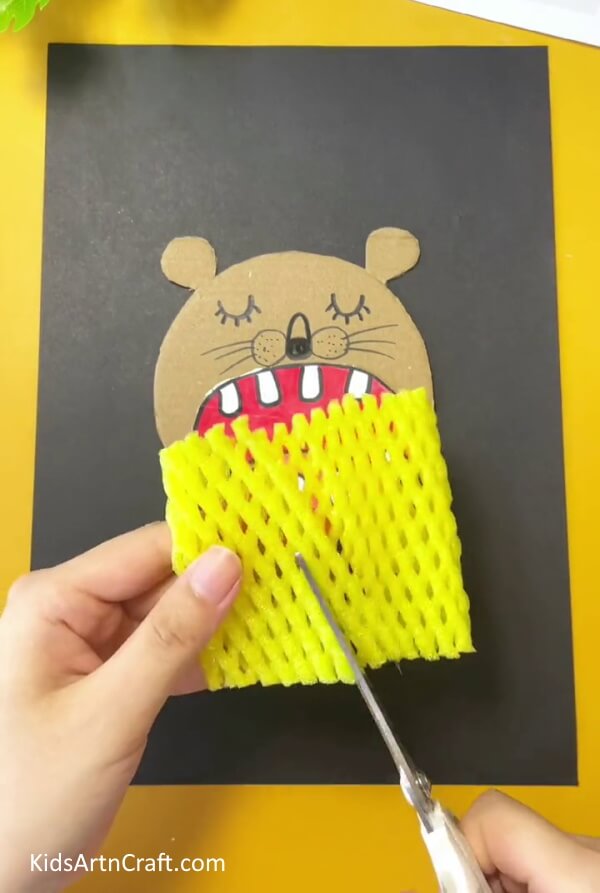
Take the foaming net and cut it into small strips. You can do that by cutting the net into strips and then chopping the strips into halves.
Step 8: Preparing The Head For Hair
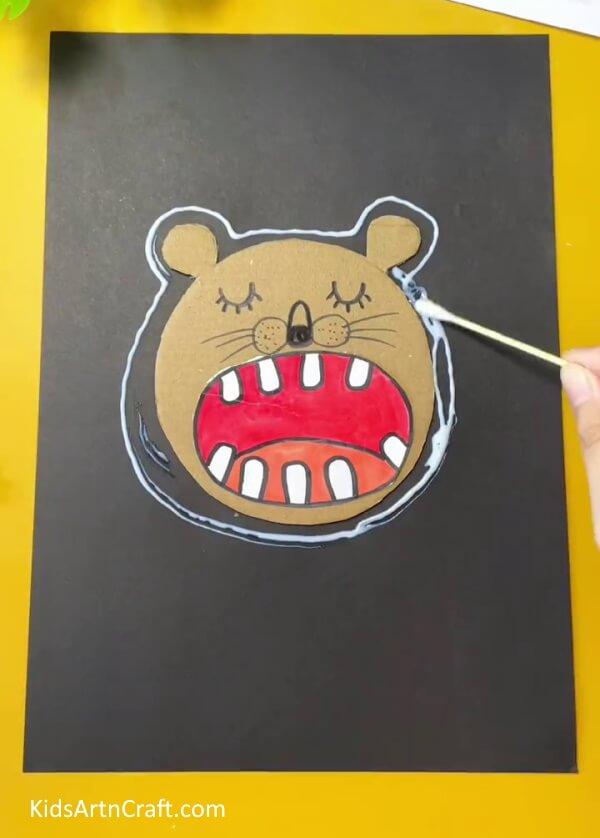
Apply liquid glue on the black sheet around the entire head of the lion as shown in the picture below.
Step 9: Pasting the Foam Strips On The Glue
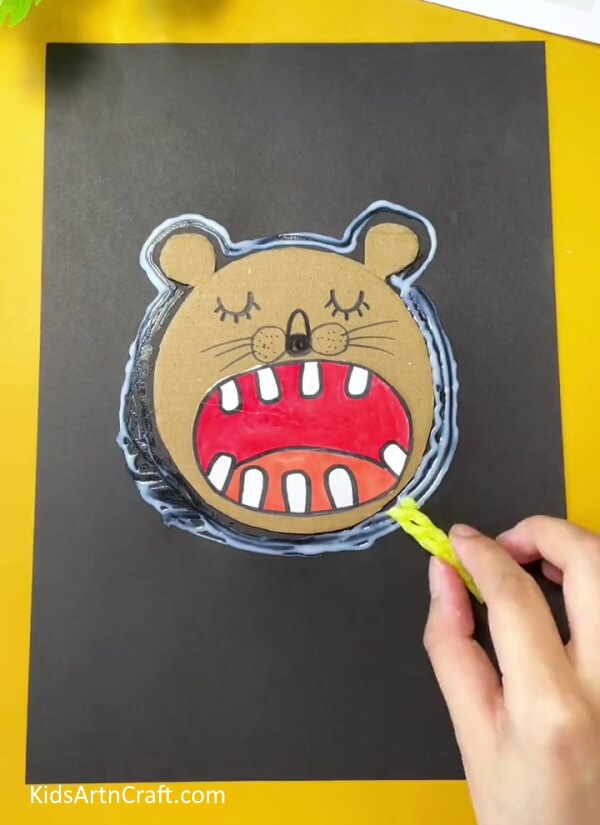
Take one piece of the foam strip and paste its top end on the glue. Press it down making it stick properly.
Step 10: Adding More Foam Strips

Paste another strip right next to the previous one leaving no space in between. Add more foams in a similar fashion.
Step 11: Add All The Foam Strips
Paste all the foam strips on the lines of the glue around the head leaving absolutely no spaces in between. See the picture below for reference.
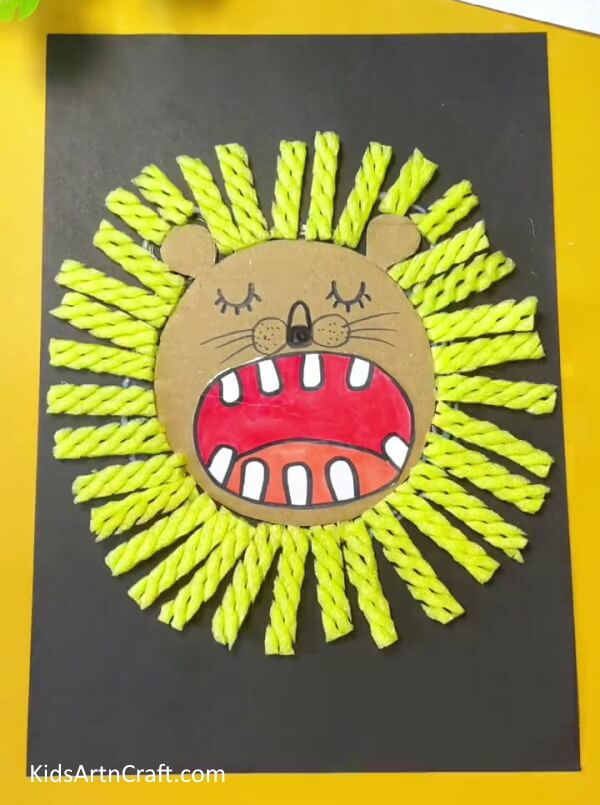
Step 12: Make Dots On The Teeth
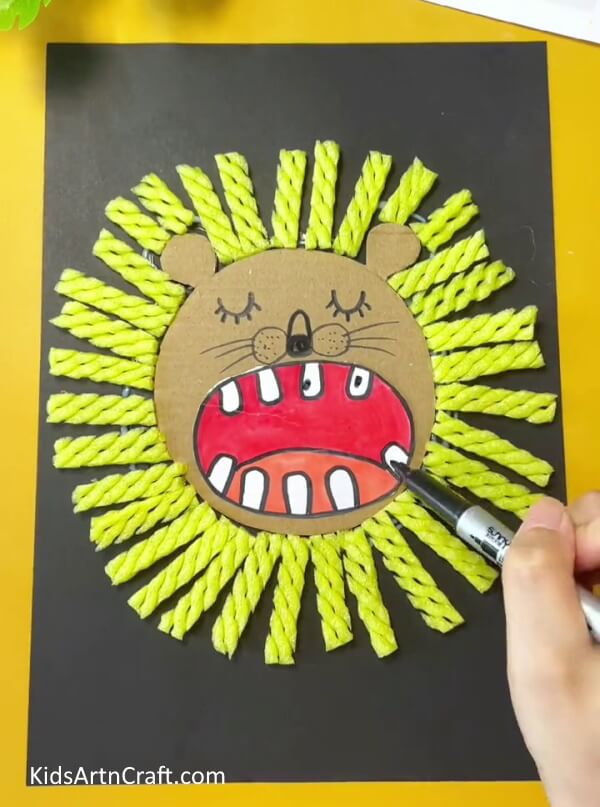
Make prominent dots on all the white teeth. Don’t make more than two dots on a single tooth.
Mighty, Happy Lion
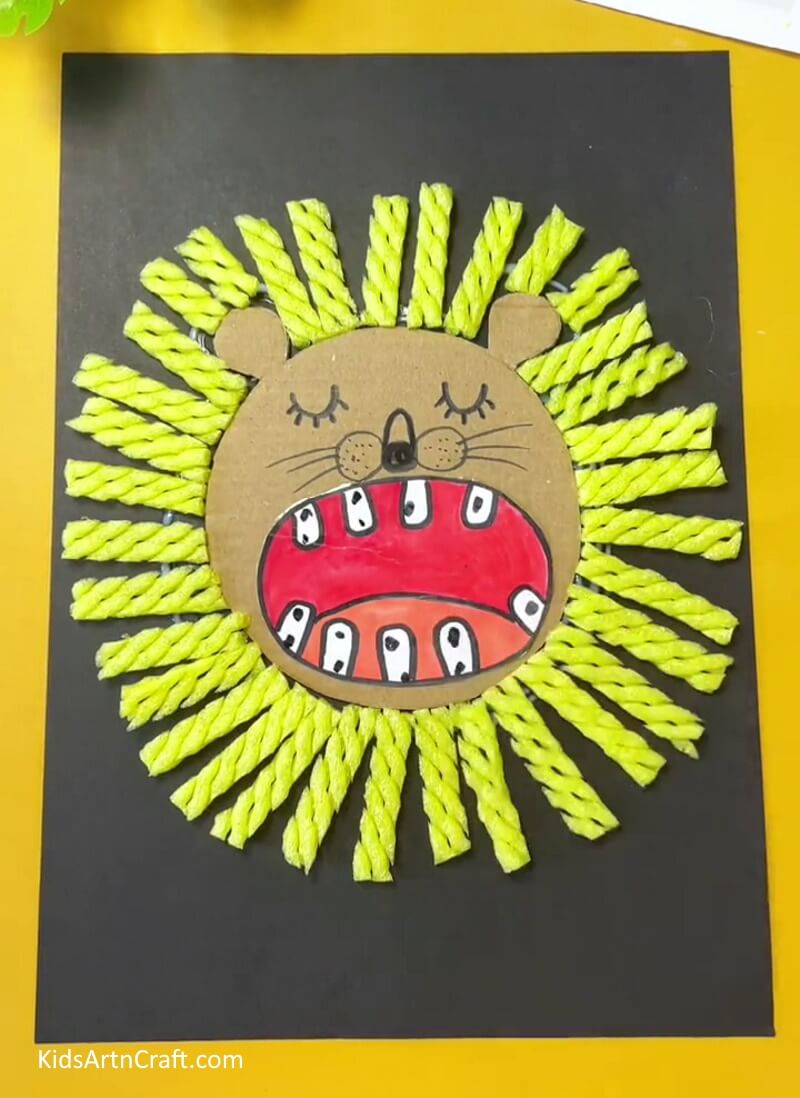
This completes all the steps to making this stalwart lion with luscious hair and mighty snores.
In this tutorial, we learned to work with a very different object, a foam net. We created wonderful art out of it and gave it a completely different look. Think of more such objects around you that you can turn into thoughtful and amazing art and craft. You can paste it in your art book, on the doors of your rooms or almirahs, or simply hang it on the walls of your home. You learned to color in the lines with a great finish and draw unique shapes as you did with the mouth of the lion. Make a list of animals whom you can make into through craft using similar techniques. Try using multiple techniques that you learn in all these tutorials to make some crafts. That way you will have a greater and deeper understanding of the craft and things related to it. Find more inexpensive and readily available material around you and try to create good art out of it. See you in the next tutorial. Till then, keep practicing and keep making your art grow. Best of luck. Goodbye.
Follow us on Youtube for art and craft tutorials and much more.
More Articles from Kids Art & Craft
- DIY Cardboard Tube Octopus For Kids
- Learn To Make Recycled Bottle Butterfly Tutorial
- DIY Flying House Using Leaves–Up Movie Inspo
- Learn To Make Paper Duck Craft Tutorial
- DIY Party Popper Step-by-Step Tutorial For Kids


