Paper Crafts
Paper Origami Butterfly Step-by-Step Craft Tutorial for kids

This step-by-step tutorial will guide kids through the process of creating a beautiful origami butterfly. With a few pieces of paper, they can make an impressive work of art that is perfect for room decoration or a handmade gift.
This tutorial will teach you to make an amazing origami butterfly using a lavender sheet of paper. The craft is easy to make and just needs some folding techniques in its creation. With a single sheet of paper, you can create this origami craft. It will definitely advance your origami skills. So, collect the little material required to make this craft, and let’s begin with making this craft.
Easy Paper Origami Butterfly Craft For Kids

Read More: Beautiful Kimono Japanese Dress Craft Ideas For Kids
Materials Required
- A Big Lavender-colored Sheet of Paper
- Small Lavender Sheets of Paper
- A Pen Refill
- A Pair of Scissors
Procedure
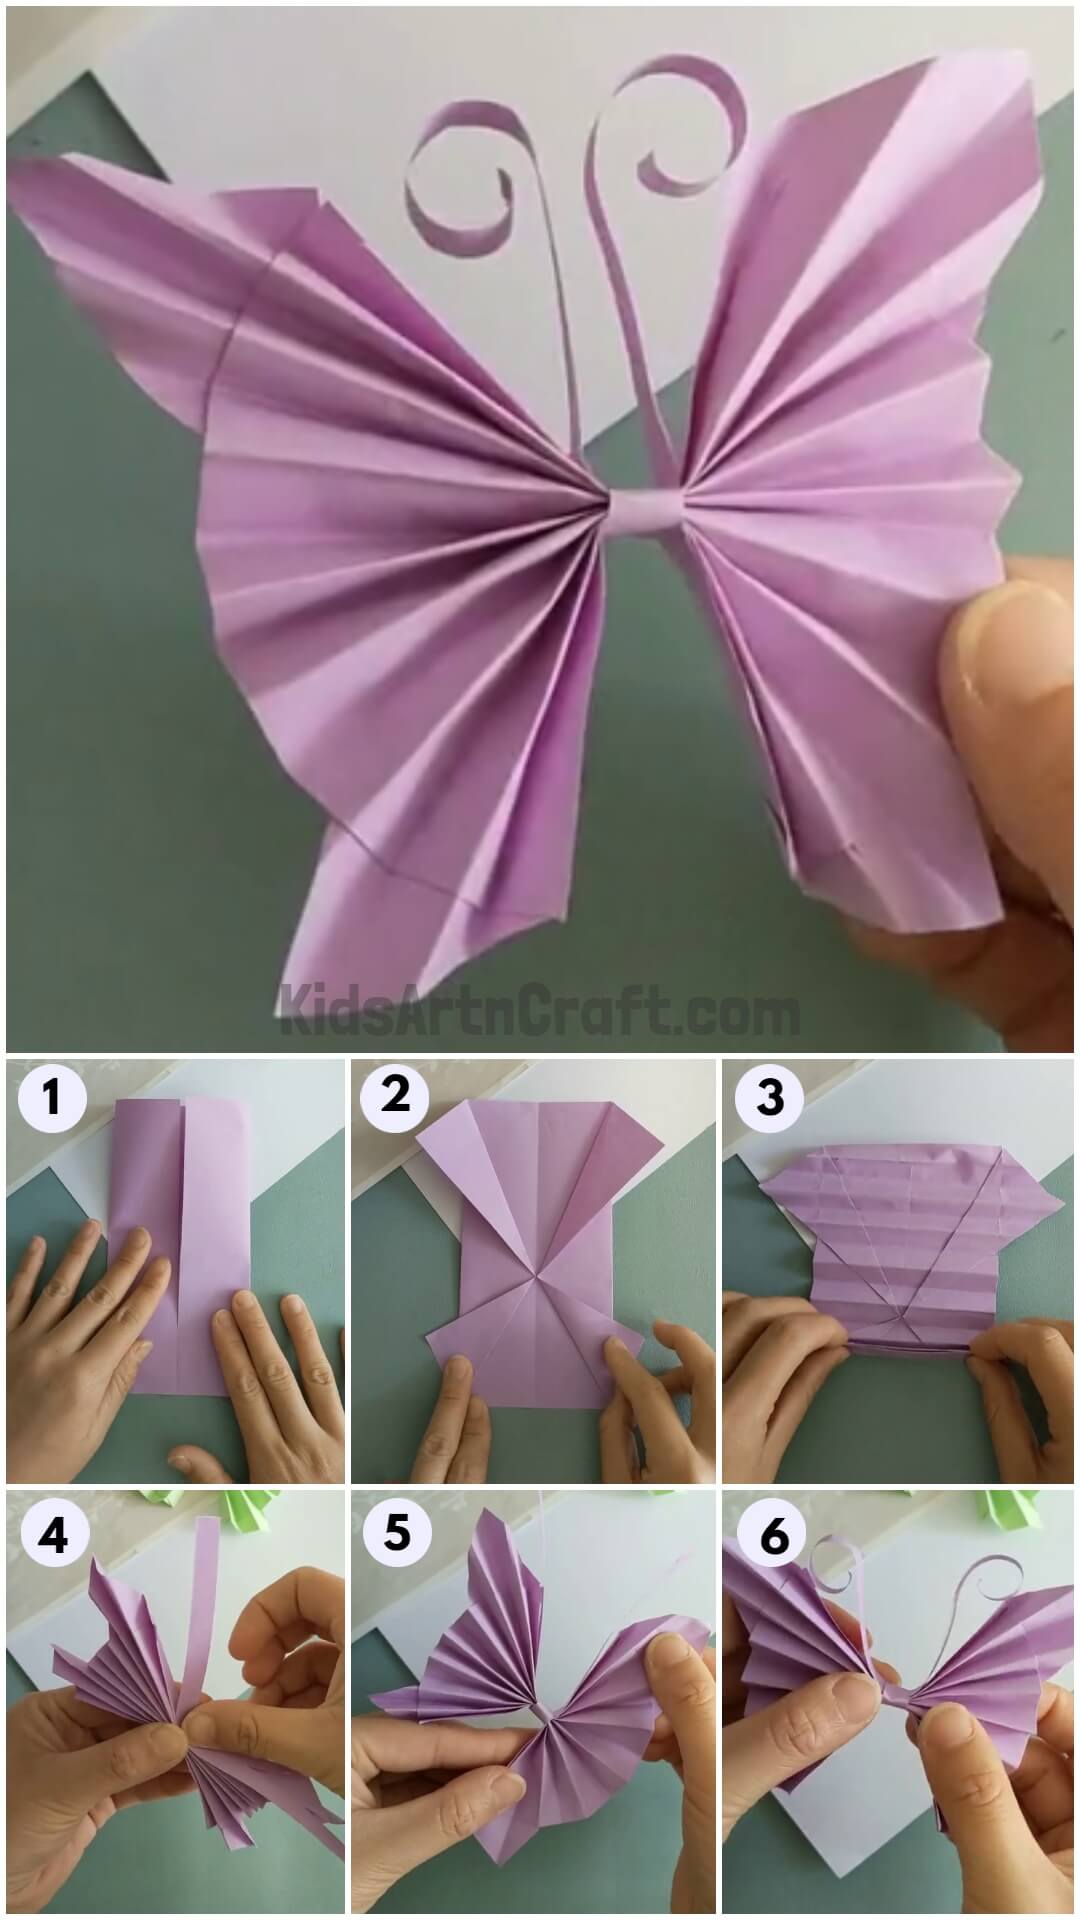
Step 1: Working On The Big Sheet Of Paper
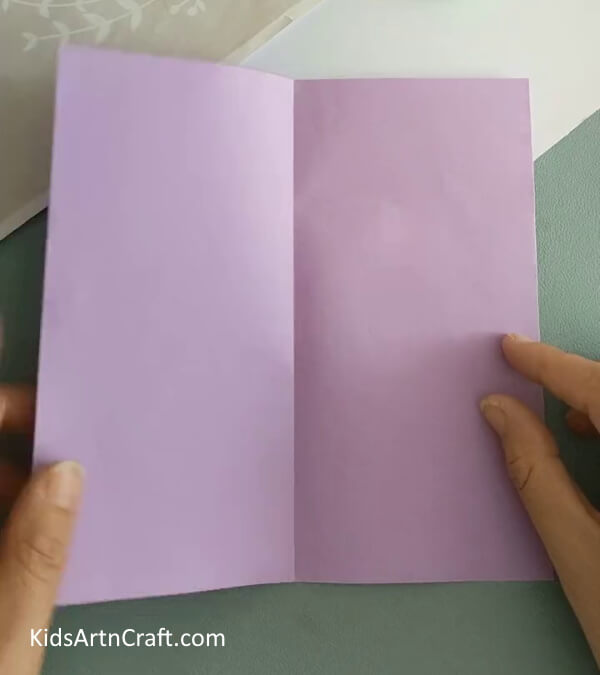

Take the lavender sheet of paper and place it on the table.
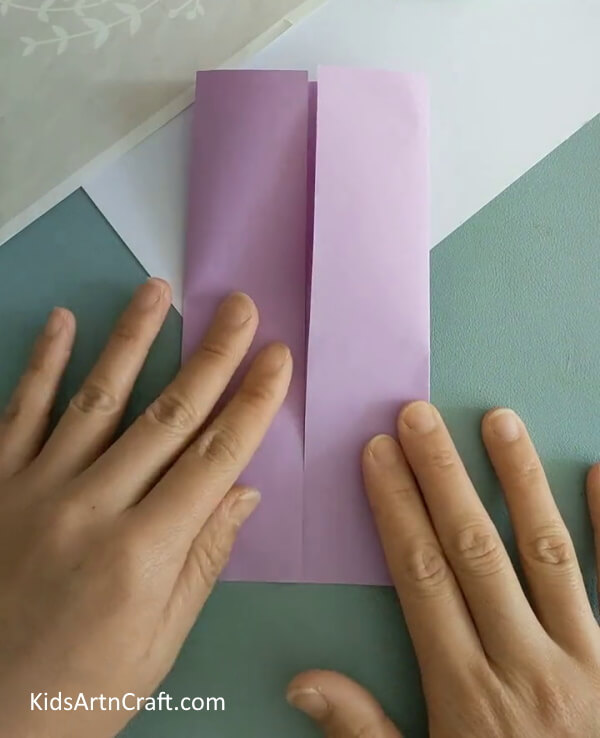
Step 2: Making The First Fold

Make a vertical fold in the middle of the sheet as shown in the picture below.
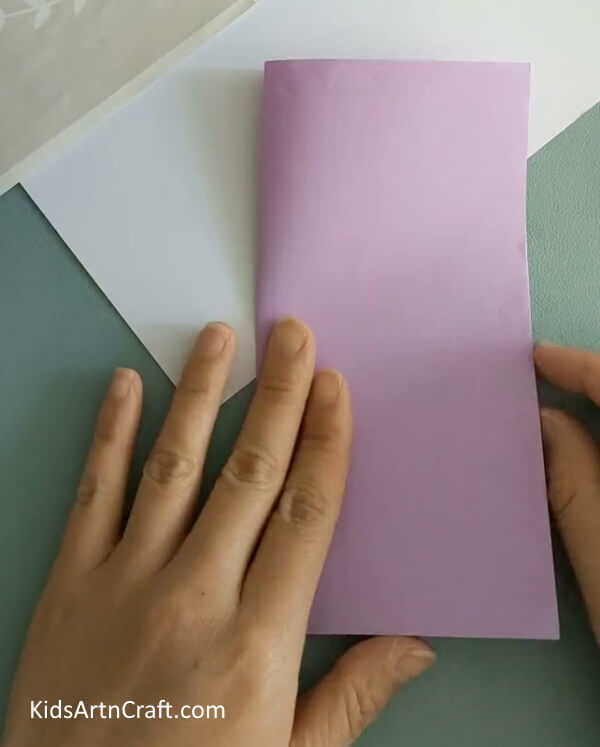
Step 3: Creating More Folds
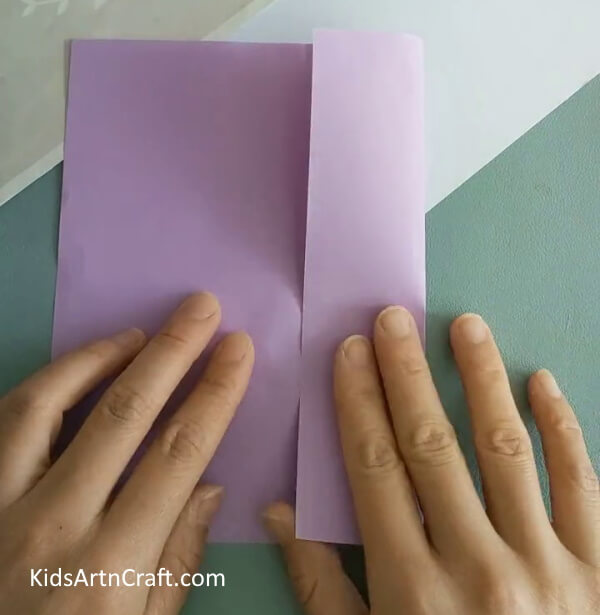

Open the fold and make a fold on the right side of the sheet, dragging it to the middle of the sheet. Press down on the sheet to seal the fold. See the picture below for reference.
Step 4: Repeating The Process On The Other Side

Repeat the process on the opposite side of the sheet dragging it to the middle of the sheet as well.
Step 5: Making Some Unique Folds
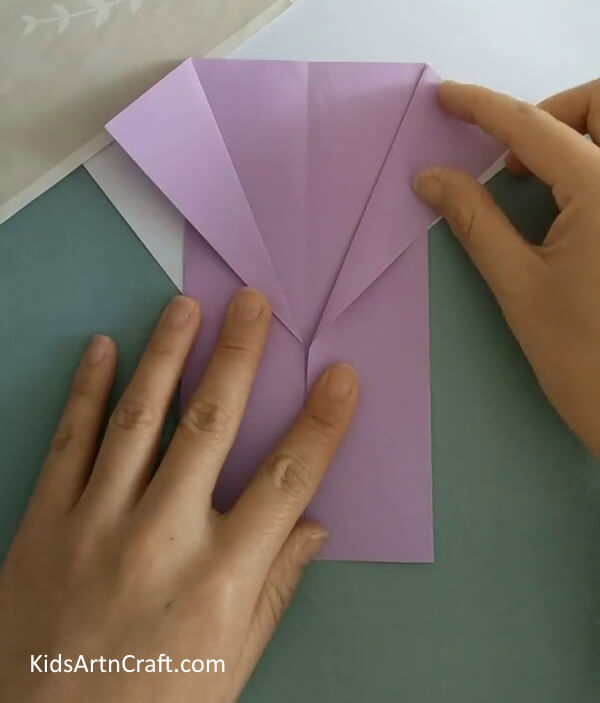

Make a fold on the top side of the sheet towards the outer side. The fold should resemble a shirt collar. See the picture below for reference.
Step 6: Making Folds On The Bottom Side As Well

Make similar folds at the bottom section of the sheet as well. The bottom fold should be smaller than the upper one as shown in the picture below.
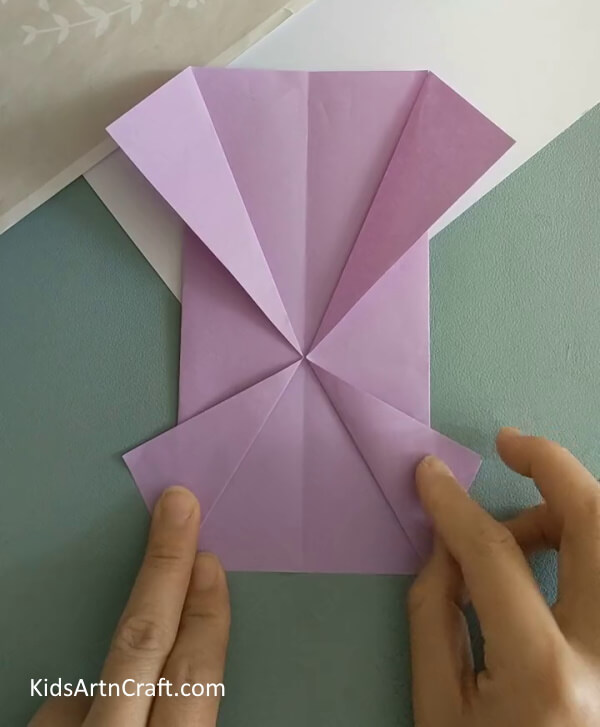
Step 7: Making A Horizontal Fold

Make a horizontal fold to the shape reducing it into half. See the picture below for reference.
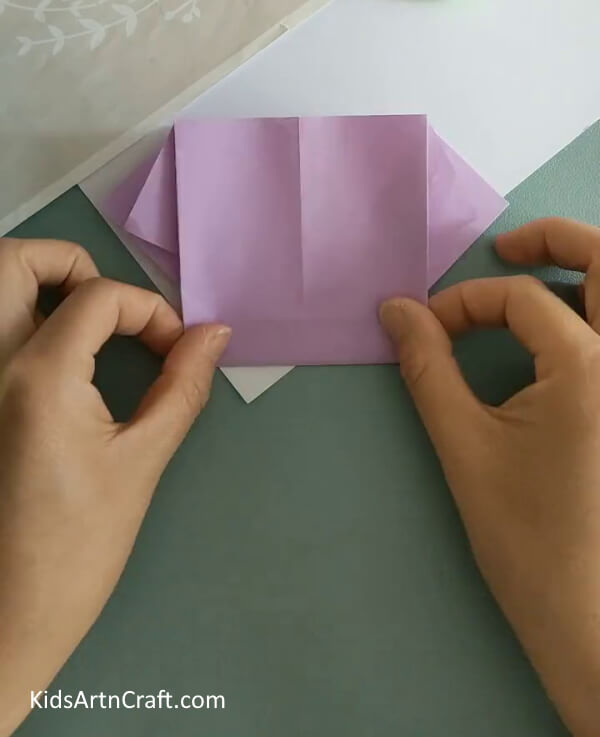
Step 8: Making Compressed Folds To The Sheet
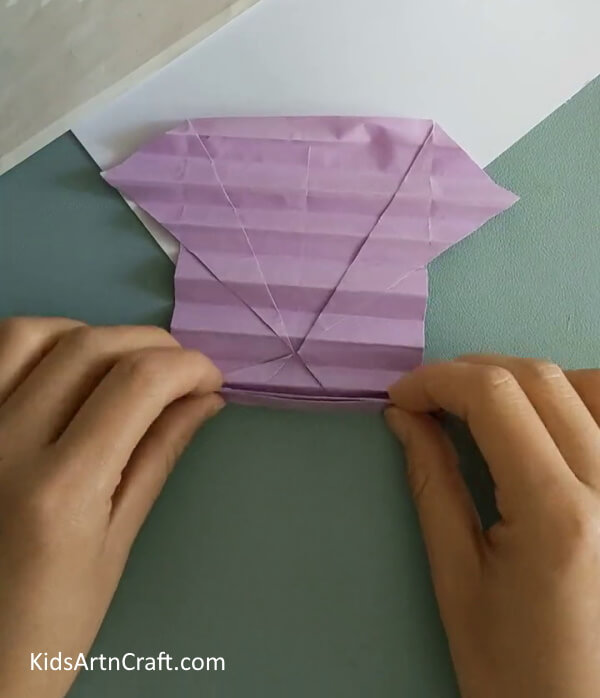

Open the fold and make tiny folds starting from the bottom of the sheet. The sheet needs to be compressed by making these folds. The compression should be neatly done. See the picture below for reference.
Step 9: Applying Pressure To The Middle Of The Compression
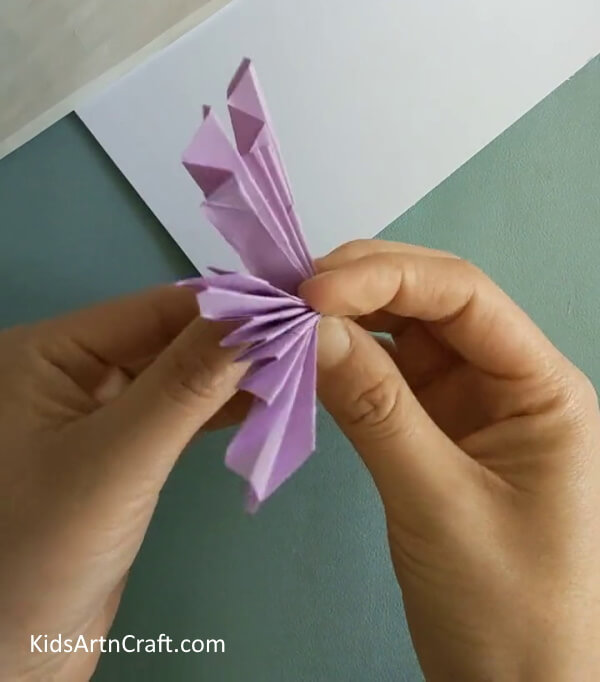

Apply some pressure in the middle of the compressed sheet to achieve the shape desired. Observe the picture below for reference.
Step 10: Cutting Out A Big, Thin Strip
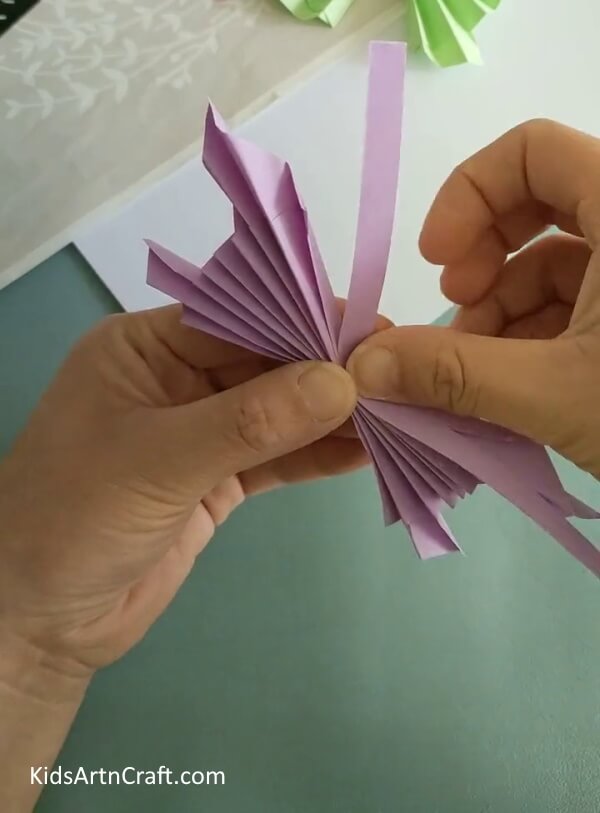

Cut a big and thin strip out of a lavender sheet and paste one of its ends on the sides of the shape as shown in the picture below.
Step 11: Rolling The Strip On The Shape
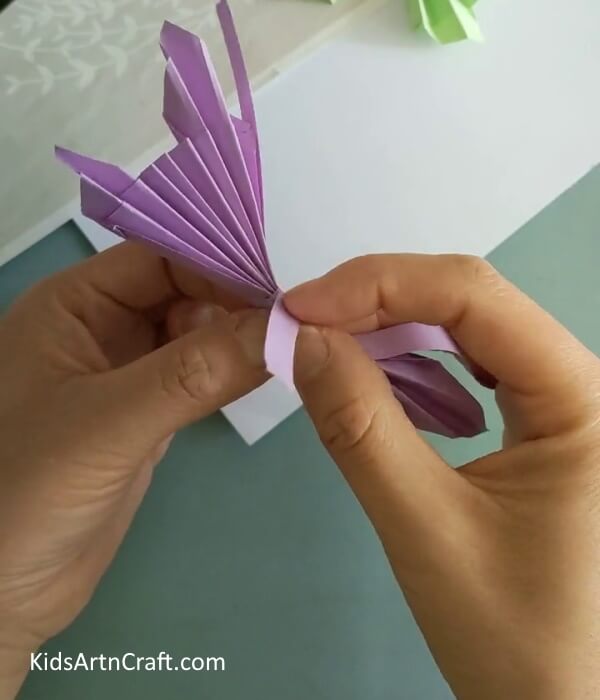

Roll the strip on the middle of the shape to achieve the wing-like shape desired. Check the picture below for reference.
Step 12: Pasting The Antennas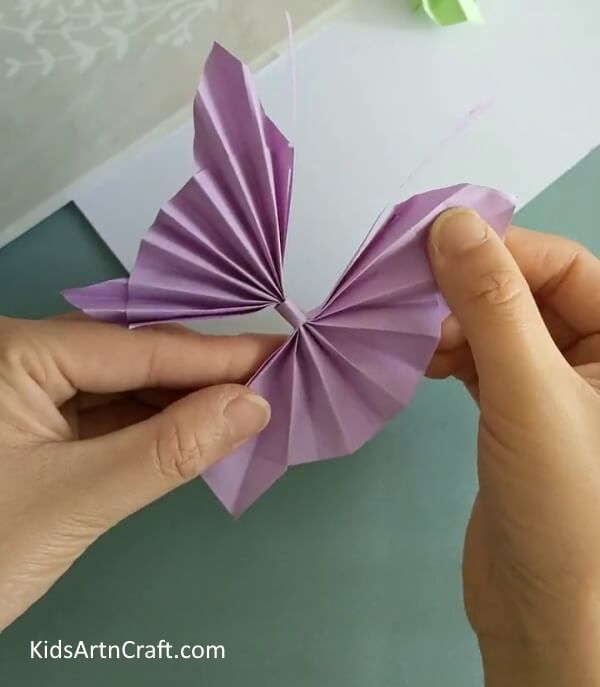

paste the end of the strip on the rolled strips below. Cut two thin strips out of the lavender sheet. Now, paste one strip on each side of the upper side on the inner sides of the wings. See the picture below for reference.
Step 13: Rolling The Antennas
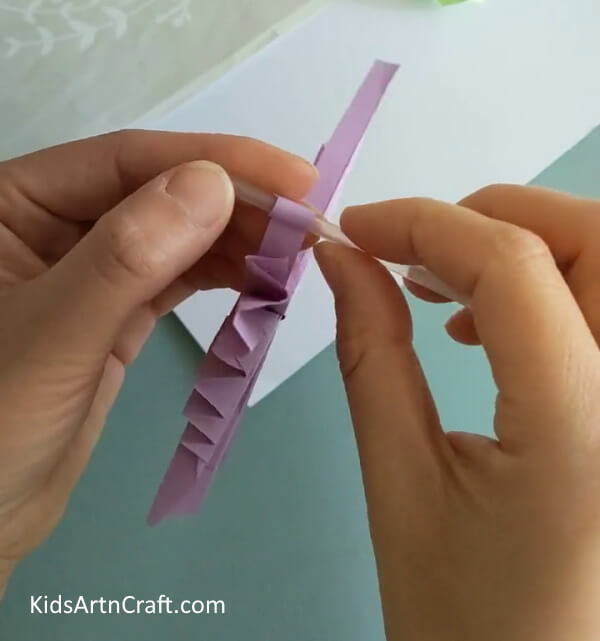

Take a pen refill and place it on the open end of the antenna and roll it up to the quarter of the strip. Take the strip out and repeat the process on the other strip as well. Follow the picture below for reference.
Step 14: Shaping The Sheet Properly
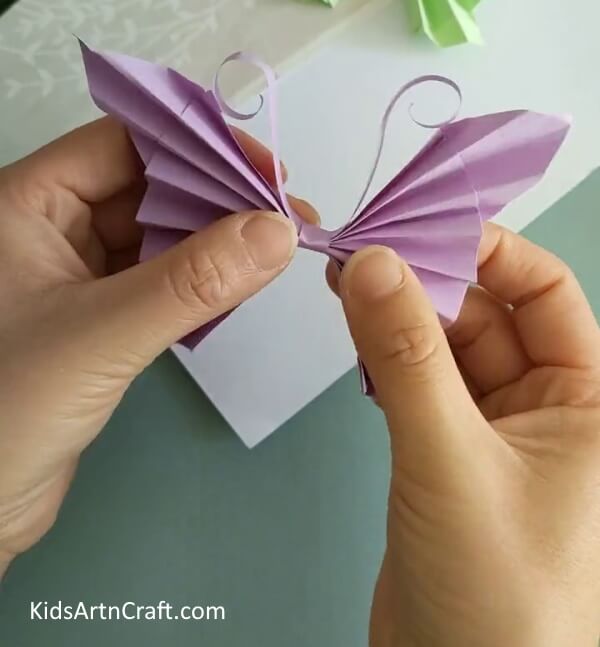

Adjust the wings properly to shape the wings of the butterfly and assemble the entire shape.
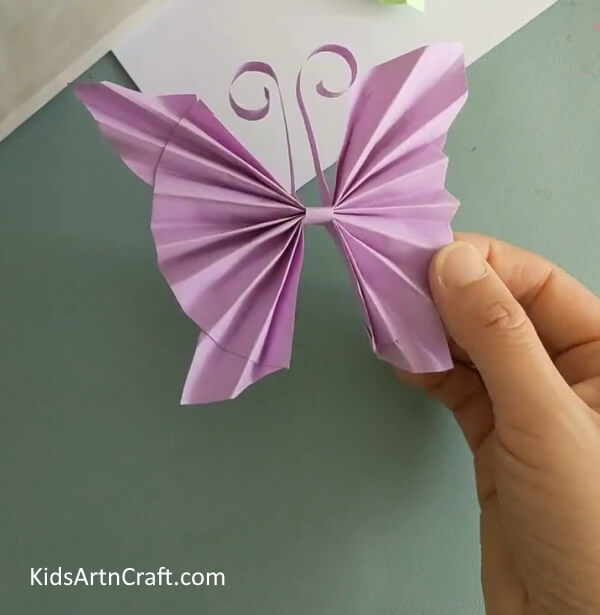
Finally, Origami Butterfly Craft is Ready!
Straighten the antennas adjusting them in the middle and making the lines look straight and aligned. See the picture below for reference.
This brings an end to the entire tutorial and we are left with lovely, lavender butterfly origami. You learned some great cutting, folding, and arrangement skills. You can hang it next to your window in your room with the help of a string. You can also paste it on the walls of your room. Practice the skills that you learn in these tutorials and keep inventing your own unique ideas to practice these skills and bring originality and authenticity to your craft. See you in another tutorial with yet another unique craft. Good luck and goodbye.
Thank you for visiting the website.
Follow us on Youtube for art and craft tutorials and much more.
More Articles from Kids Art & Craft
- Origami Ninja Star Craft Easy Tutorial For Kids To Play
- Paper Airplane Origami Step by Step Tutorial For Kids
- DIY Origami Dragonfly Easy Tutorial for kids
- Origami Crab Making Easy Tutorial For Kids
- DIY Paper Butterfly Easy Craft For Kids