


DIY and Crafts
How To Make Origami Moon Craft With Step By Step Tutorial

Moon is one of the most important celestial bodies when it comes to Earth’s relations to the galaxy. It maintains our gravity, helps in forming days, nights, and months, and is even responsible for creating tides in the ocean. The tutorial is inspired by this marvelous, planetary body. Today, we will be making an origami replicating the shape of a crescent. With a single sheet of paper and some folding, you can make this craft. So, collect the minimal stuff required to make this origami, and let’s get started.
How To Make Origami Moon Craft With Step By Step Tutorial
Read More: DIY Heart Shape Cat Craft for Valentine’s Day
Material Required
- A yellow sheet of paper
Procedure
Step 1: Placing Sheet On the Paper
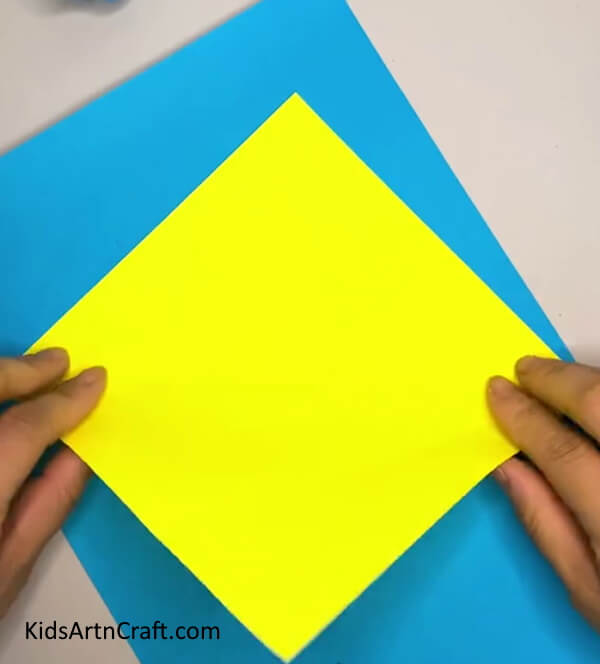
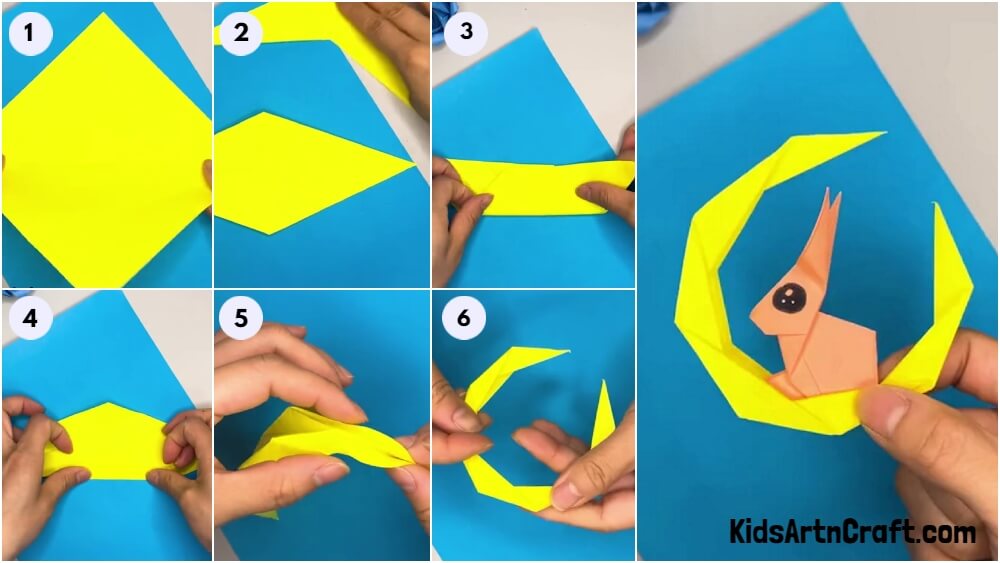
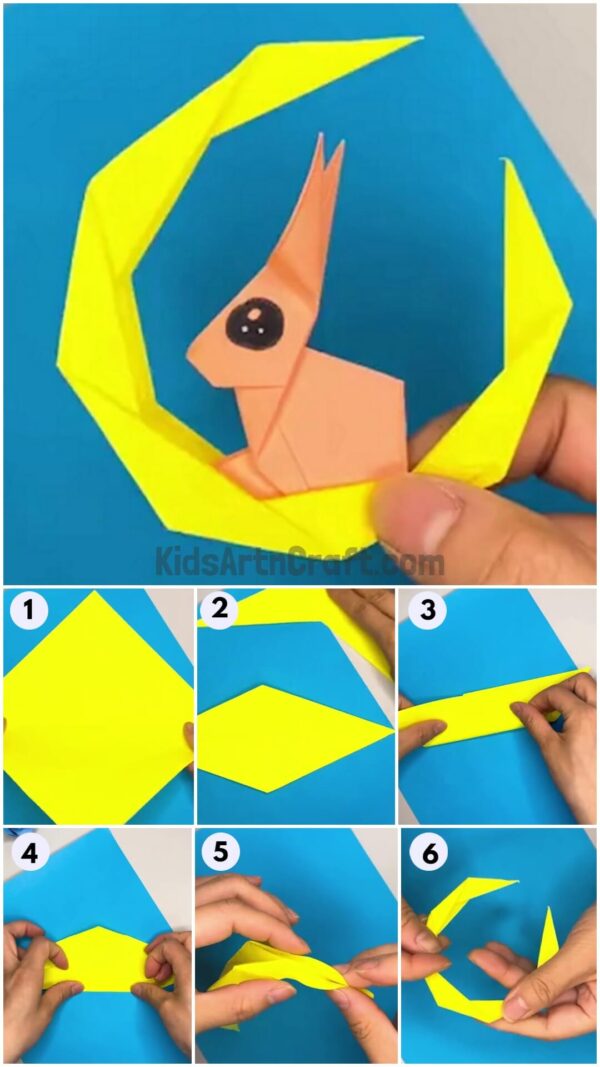
Place the sheet on the table like the shape of a rhombus. Fold this rhombus in the middle making a triangular shape. See the picture below for reference.
Step 2: Making Two More Folds
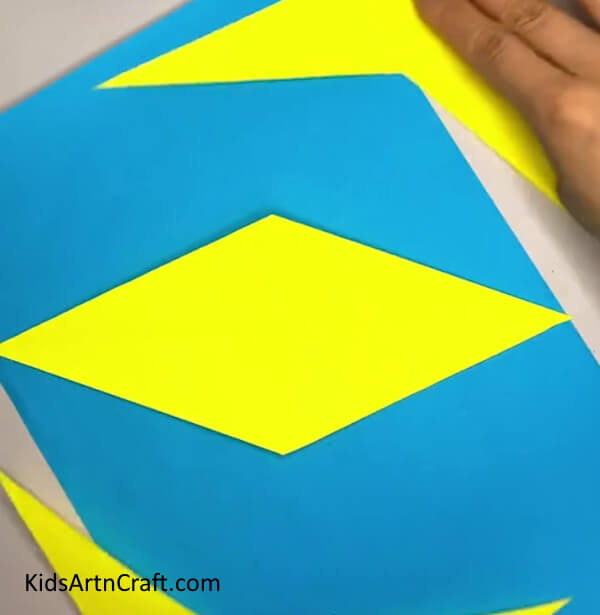
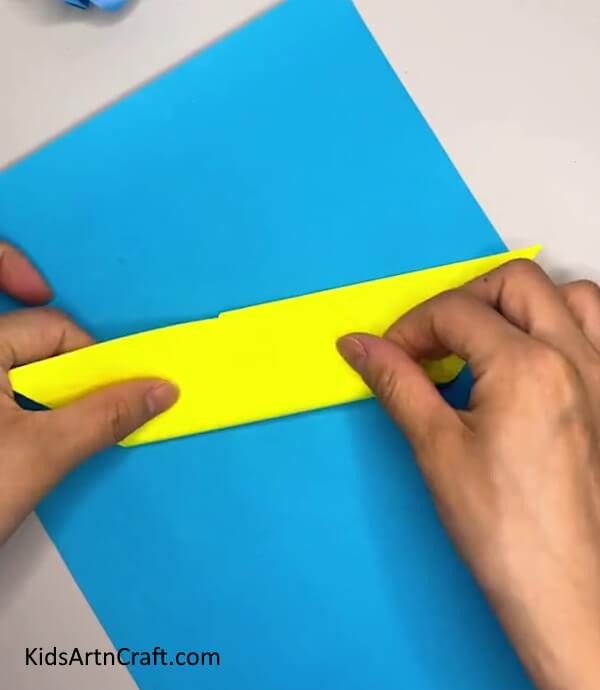
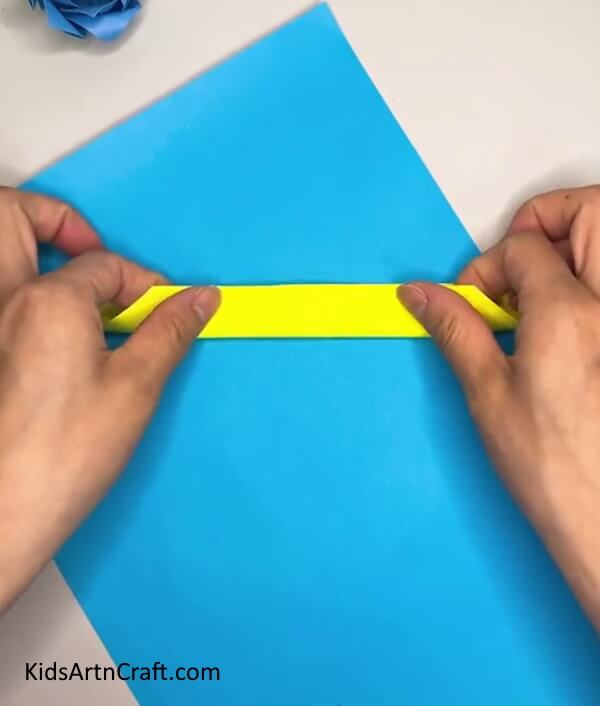
Open the fold you just made and make a new fold on the surface line lying on the left side of the top corner. This fold needs to be made upto the mark in the middle of the rhombus. Make a similar fold on surface line lying on the right side of the top corner. Repeat the process on the bottom part of the rhombus as well. Now, open all the folds you made and cut the sheet on the lines of the creases made by these folds. See the picture below for reference. This leaves us with a diamond shaped sheet.
Step 3: Folding the Diamond Shape
Fold the surface line on the right side of the top corner of the diamond making it merge with the surface line on the right side of the bottom corner of the diamond. Now, unfold the sheet and fold the sheet back from the same side, dragging it to the mark made by the previous fold. Do the same with the surface line on the left side of the bottom side of the diamond. Undo the folds again. Now repeat the entire step on the other side of the diamond as well.
Step 4: Making Many More Folds
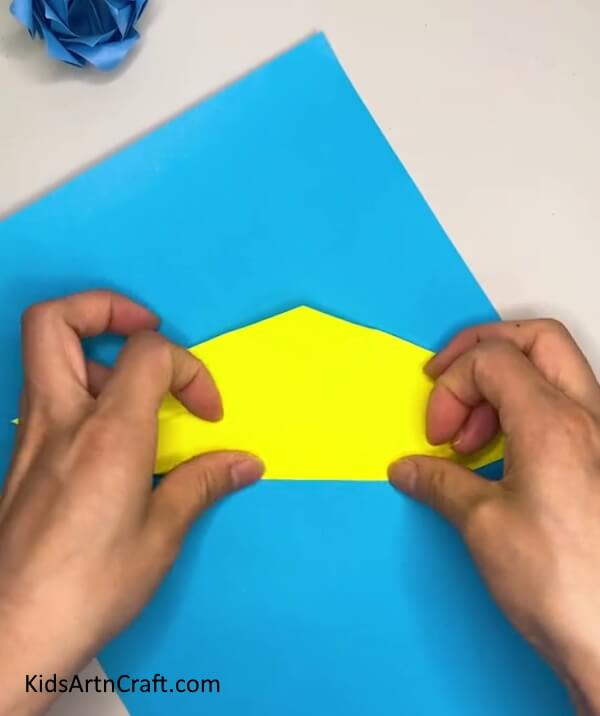
Opening all the folds, you can now see that the sheet has many imprints resembling small diamonds. Fold the bottom corner upto the mark in the middle and do the same with the top corner as well. Undo the folds and make another little fold to the diamond sheet on the bottom corner upto the first horizontal fold mark. Open the fold and make another fold on the same corner by dragging it a little beyond the middle fold, leaving a quarter of the sheet around the top corner of the diamond. Repeat the process on the top corner as well.
Step 5: Making Last Folds On the Diamond
Undo the folds and make another little fold to the diamond sheet on the bottom corner upto the first horizontal fold mark. Open the fold and make another fold on the same corner by dragging it a little beyond the middle fold, leaving a quarter of the sheet around the top corner of the diamond. Repeat the entire step on the top corner as well. Finally, undo all the folds. You now have all the creases necessary to give the desired shape to the diamond.
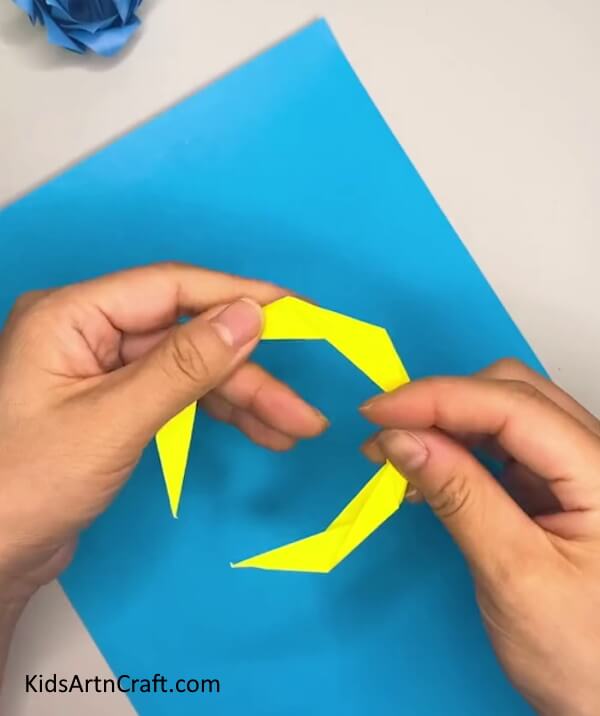
Step 6: Shaping the Creases on the Diamond
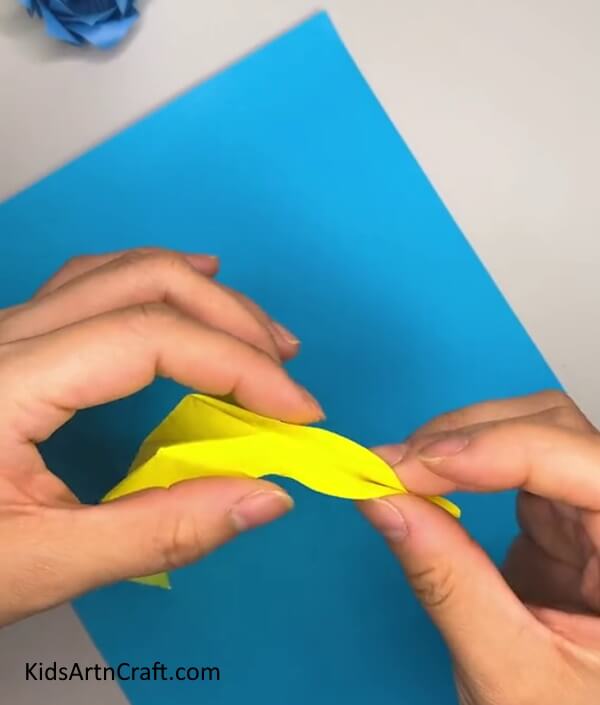
Hold the sheet in your hands and make the two corners lying on the horizontal lines of the diamond folded up with the help of the creases. Patiently, compress the diamond on the sides folding on the creases made by the folds you made earlier. Keep the marks of the small diamond shapes in your mind while folding the sheet. The folds on the compressed sheet need to fall in symmetrical shapes in accordance with the creases made. Do not crush the sheet haphazardly. See the picture below for reference.
Step 8: Pressing the Shape Down to Seal it
Press down on the entire crescent shape you just created to seal it and to perfect the creases and folds inside. See the picture below for reference.
Beautiful Crescent Moon with a Rabbit Sitting In
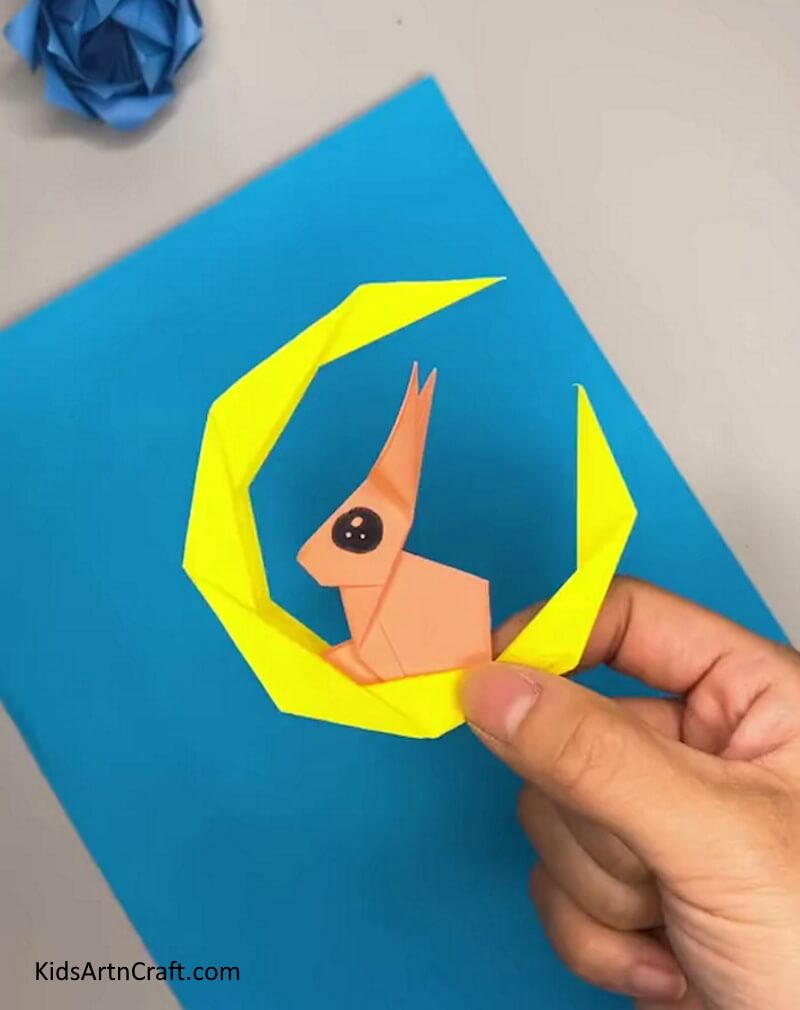
You can also make a little rabbit origami using a sheet of paper and implementing some folding techniques. Expand the crease a little without disturbing the fold lines. Now, place the rabbit you just made in the middle of this crescent.
This completes this intricate crescent origami which took us plenty folds to make. It taught you great folding skills and creating creases to make origamis. You also learned the significance and use of compressing folded sheets to create craft. You can hang this origami on the walls of your room or next to your window. Keep practising the techniques you learned in this tutorial to strengthen your basics of art and craft. Keep inventing new ideas to use these techniques on. Good luck.
Follow us on Youtube for art and craft tutorials and much more.
More Articles from Kids Art & Craft
- How to Make Paper Umbrella Craft for Kids Tutorial
- How to Make Easy Paper Snowflakes Tutorial
- Origami Star Flower Easy Step-by-Step Tutorial
- DIY Star Wand Ideas for Kids
- Colorful Fish Paper Craft To Make With Kids


