Painting
Easy Kandinsky Circle Tree Landscape Art Tutorial For Kids

When you were a kid, I’m sure you must have scribbled everywhere, whenever you got a crayon or marker/sketchpen. When you were a kid you didn’t know what is right and what is wrong, so you unintentionally do things without knowing the consequences. But today you can scribble as much as you want but there is a twist, you can only scribble in circular motion.
So, let’s begin our fun scribbling session with a little challenging twist. Just bring all the materials that are mentioned below and follow this easy and teeny tiny steps.
DIY Kandinsky Circle Tree Landscape Art
Read More: Easy Tulip Flower Painting Tutorial For Kids
Materials Required
- White craft paper
- Marker/sketch pen (Light Green, Dark Green, Yellow, Orange, Blue, Dark Brown, Light Brown)
- Different colour clay
Procedure
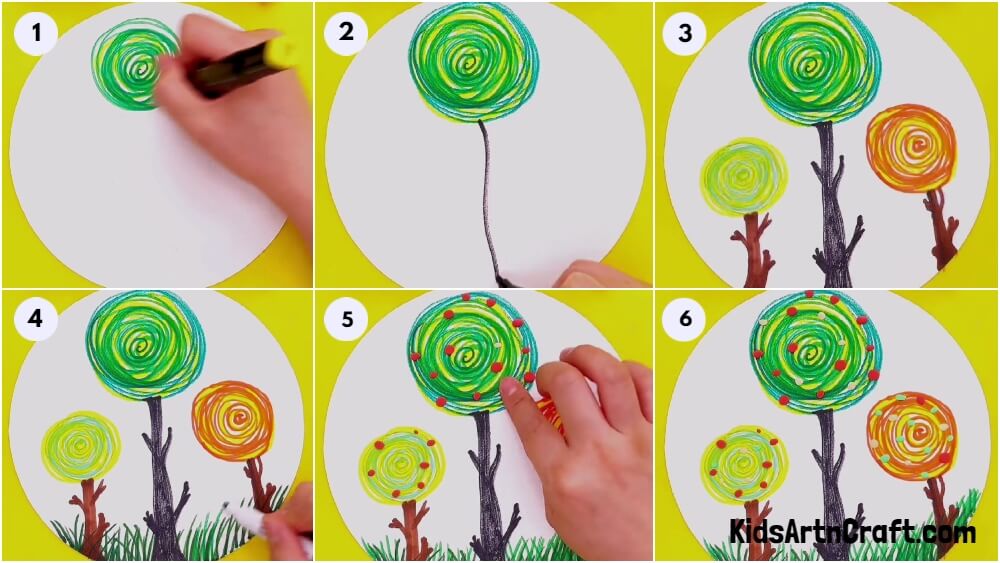
Step 1: Drawing a spiral with green marker/sketch pen
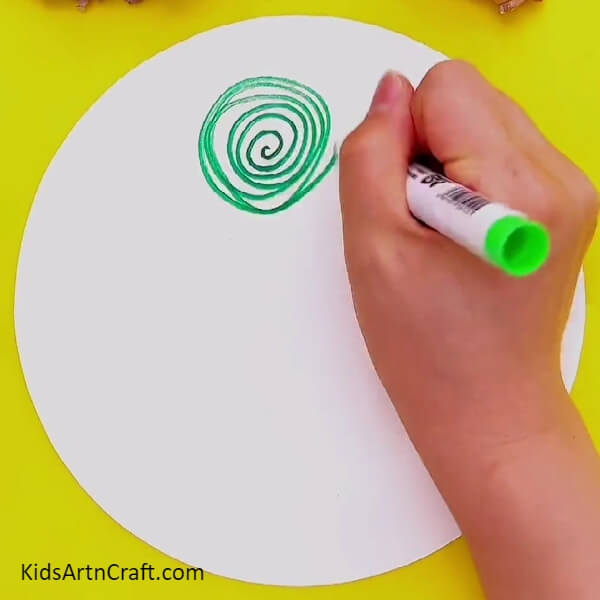
First step is to take a white coloured craft paper. The white coloured craft paper should be in circle shape. Then, take light green marker/sketch pen and make a spiral on the top middle part of the white coloured craft paper.
Step 2: Making a spiral from yellow marker/sketch pen
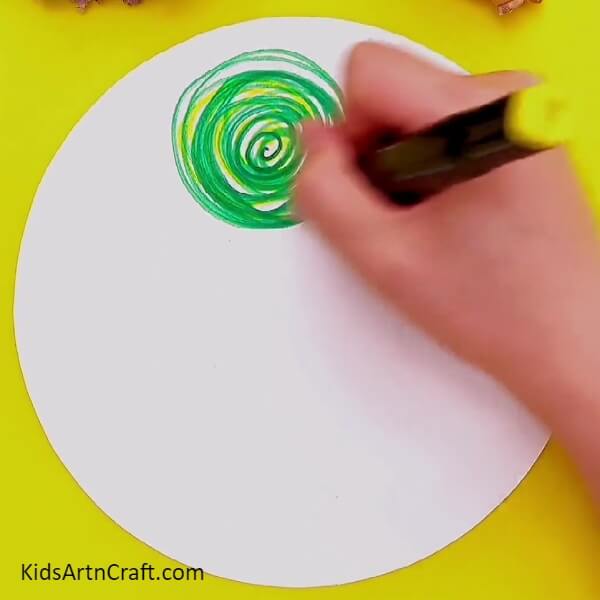
Now, take a yellow marker/sketch pen and make a spiral on the already made green coloured spiral. Keep overlapping the spiral from yellow marker/sketch pen till it gets merged in green coloured spiral.
Step 3: Making a curve line from dark brown marker/sketch pen
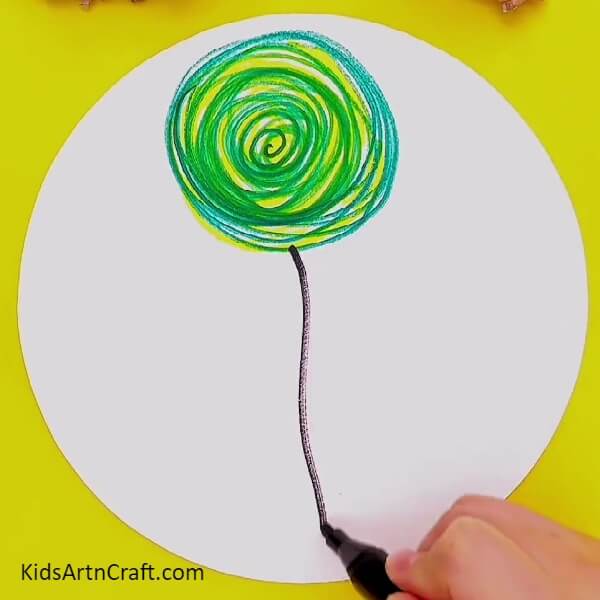
Take a dark brown marker/sketch pen and make a curve line starting from the bottom of the yellow and green coloured spiral till the bottom of the white coloured craft paper.
Step 4: Making three trees by similar method
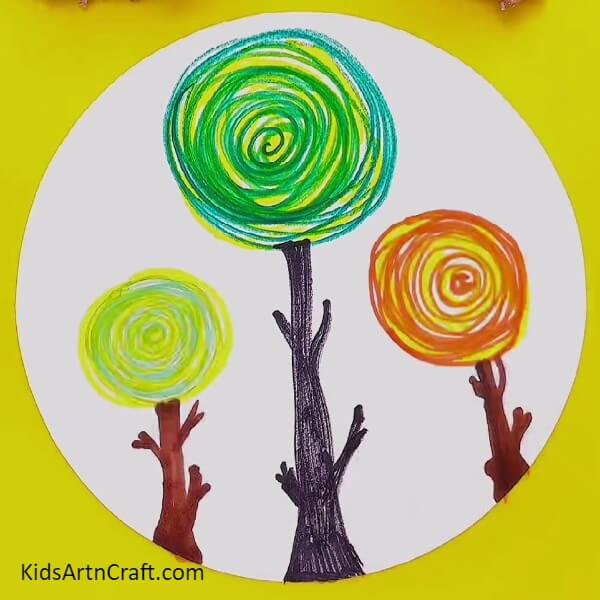
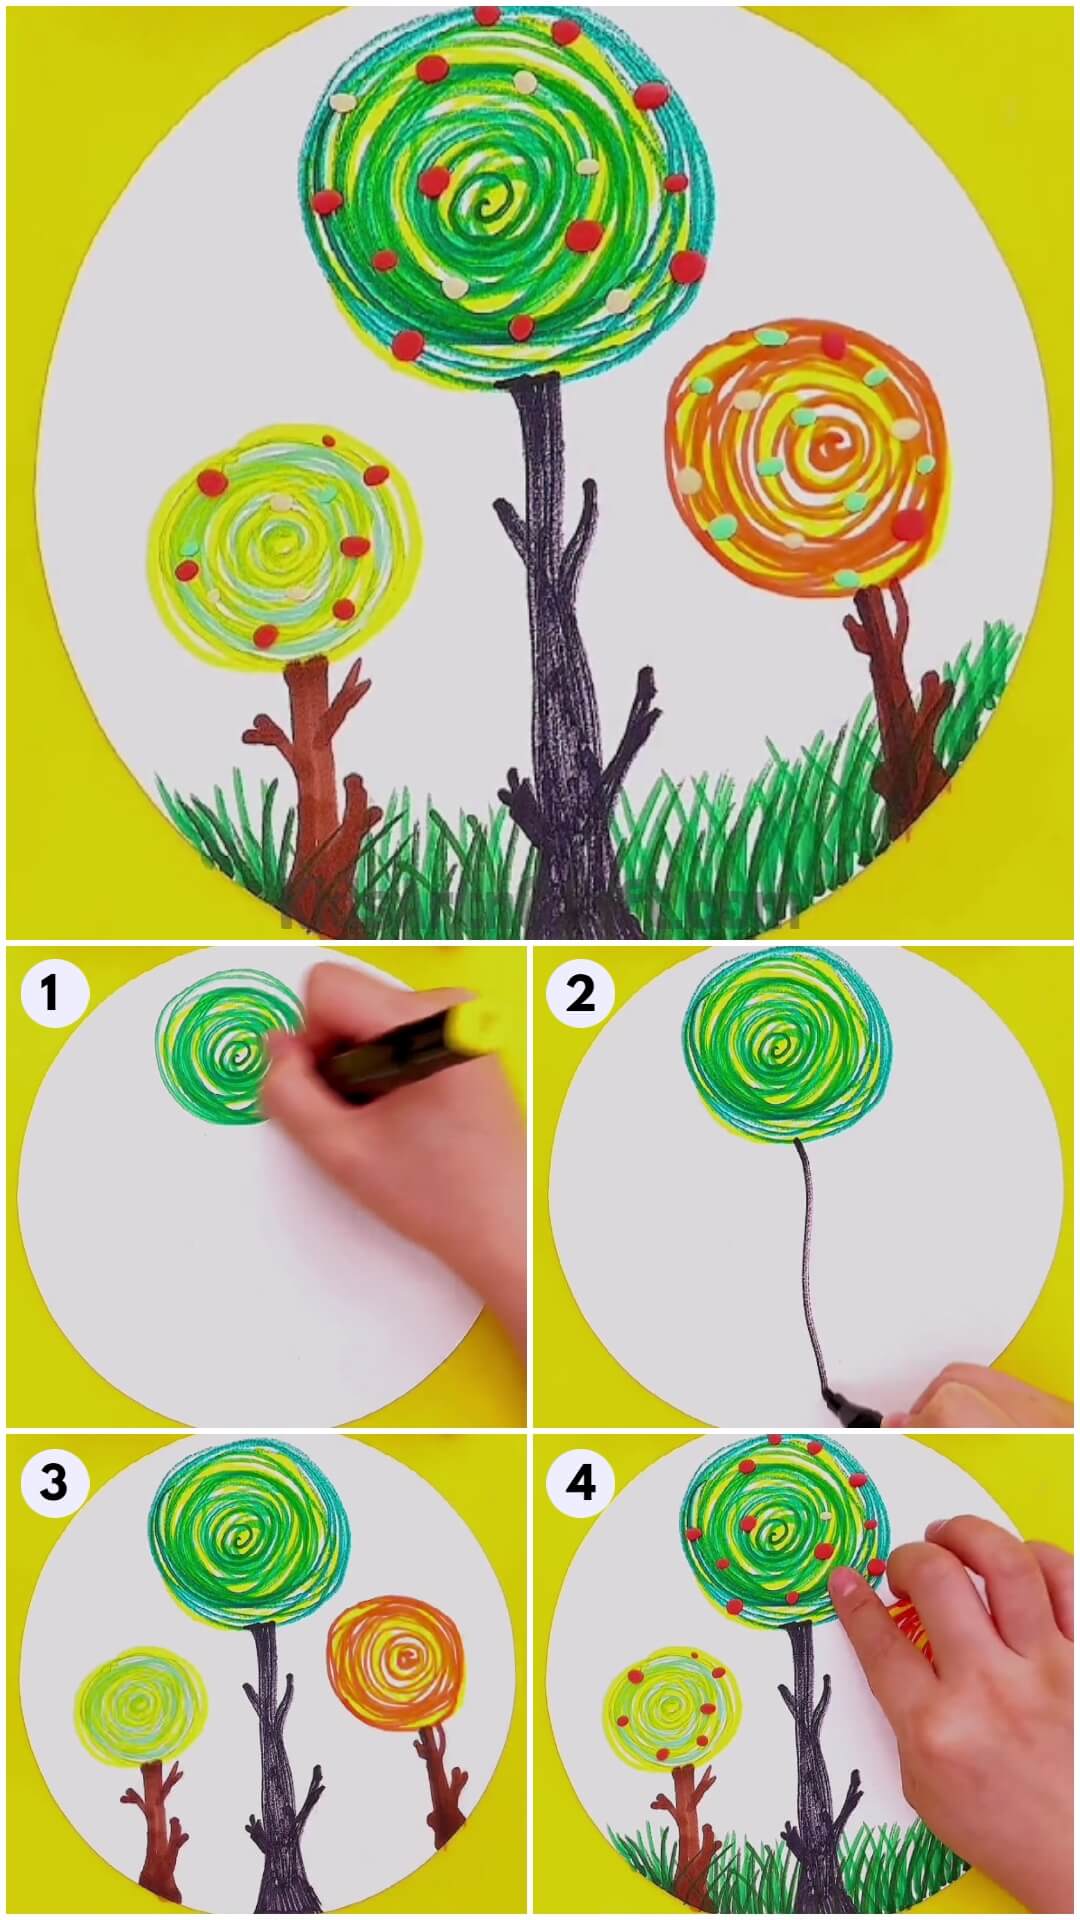
By repeating the same process as above, make two more spiral trees with the help of markers/sketch pens and make two more tree trunks with the help of light brown marker/sketch pen on the white coloured craft paper. Remember that the middle tree should be bigger than the two trees which are on either side of the middle tree as shown in the picture.
Step 5: Making grass with green marker/sketch pen
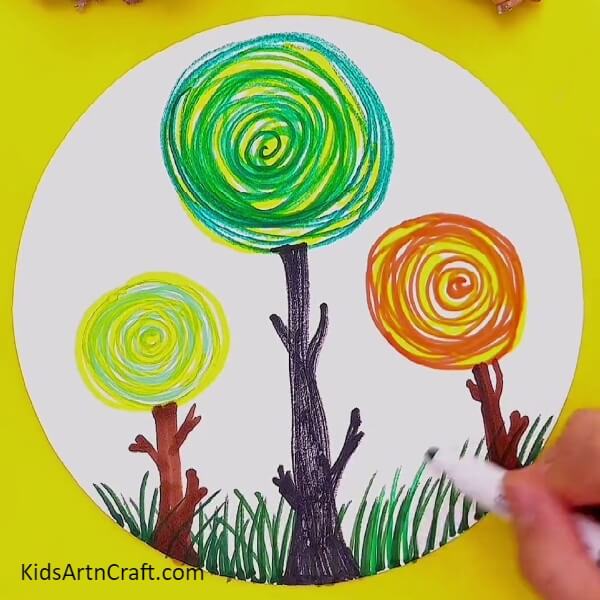
Now, with the help of light green marker/sketch pen and dark green marker/sketch pen, make grasses on the bottom of the white coloured craft paper as shown.
Step 6: Making the grass a little dense
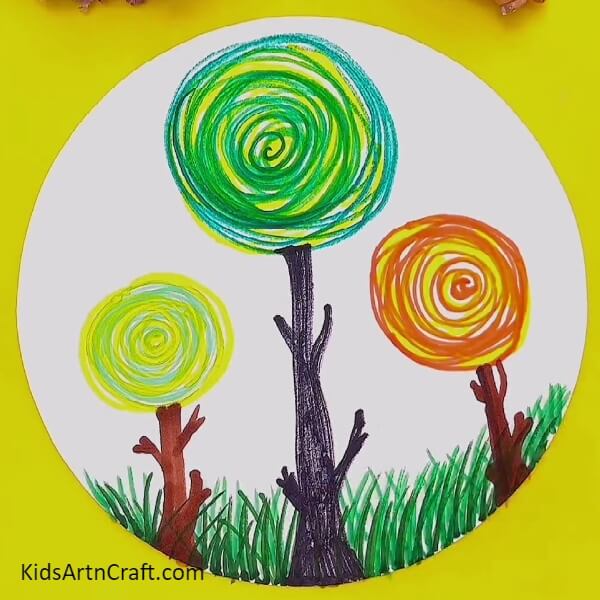
With the help of light green marker/sketch pen and dark green marker/sketch pen make the grass a little dense on the bottom of the white coloured craft paper. Remember to merge the light green colour and dark green colour properly as shown.
Step 7: Sticking small clays on each tree
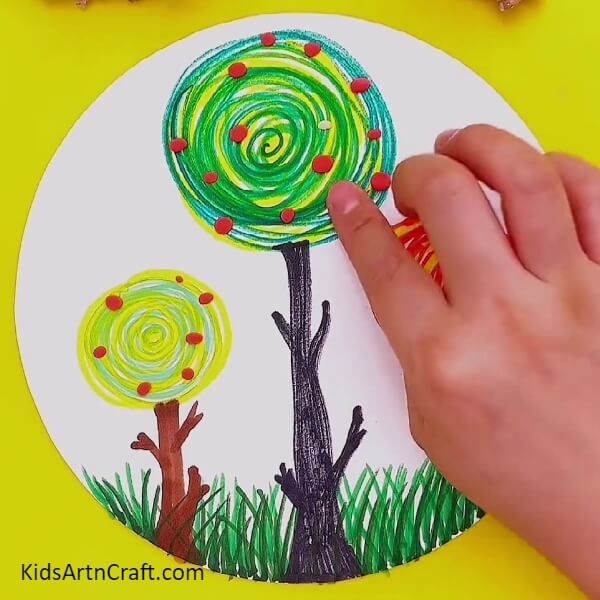
Now, take different colour of clay of your own choice. Then, make very small small circles of the different colour clays. After making circles, stick the circles on each of the three tree. Take the colour of clay in such a way that it contrasts/seems suitable with the colour of each tree.
Your Craft Is Ready!!
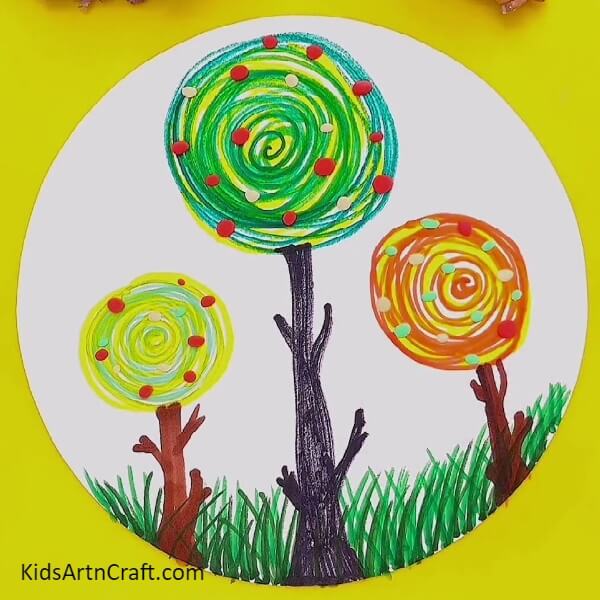
Finally your unique and creative tree landscape is ready to take a walk in. Doesn’t this art looks great. This is a really very unique way to teach your kids different kinds of art and materials used in it. This craft will really teach the kid a thing or two. If anyone wants to know this kind of spiral scribbling art is called kandinsky. This is an abstract kind of art. You can even frame this art as it is that good.
So, to make your own Kandinsky art, follow these steps and follow your heart and you will probably make something great as it is that no one has ever seen before.
Follow us on Youtube for art and craft tutorials and much more.
More Articles from Kids Art & Craft
- Colorful Lion Artwork Craft Tutorial For Kids
- Easy Flower Stump Painting Art Tutorial for Kids
- Beautiful Way To Make Tree & Bird Paste Painting With Peanut Sells
- DIY Mushroom Painting Art With Seeds – Step by Step Tutorial
- Easy Painting Video Tutorial for Beginners


