Paper Crafts
Paper Bookmark Corner Craft For Kids

This step-by-step tutorial will teach and guide you on each and every step for making a pretty leaf-pattern bookmark corner, papercraft!
A warm welcome to you in this step-by-step tutorial on making a leaf pattern paper bookmarked corner! It will help you learn the basic folds that involve in most crafts, which later take a more advanced form, but this is foundational. The list of materials is given below. It requires very less materials and is very fun to make. It is not at all time-consuming, but it will definitely compel you to have a look at some other craft tutorials after finishing this one. So, let’s begin!
DIY Paper Bookmark Corner Craft

Read More: Easy Paper Flower Toy Craft Tutorial For Kids
Materials Required
- Floral Pattern Origami Paper
- Glue
- Craft Rose Bead
Procedure
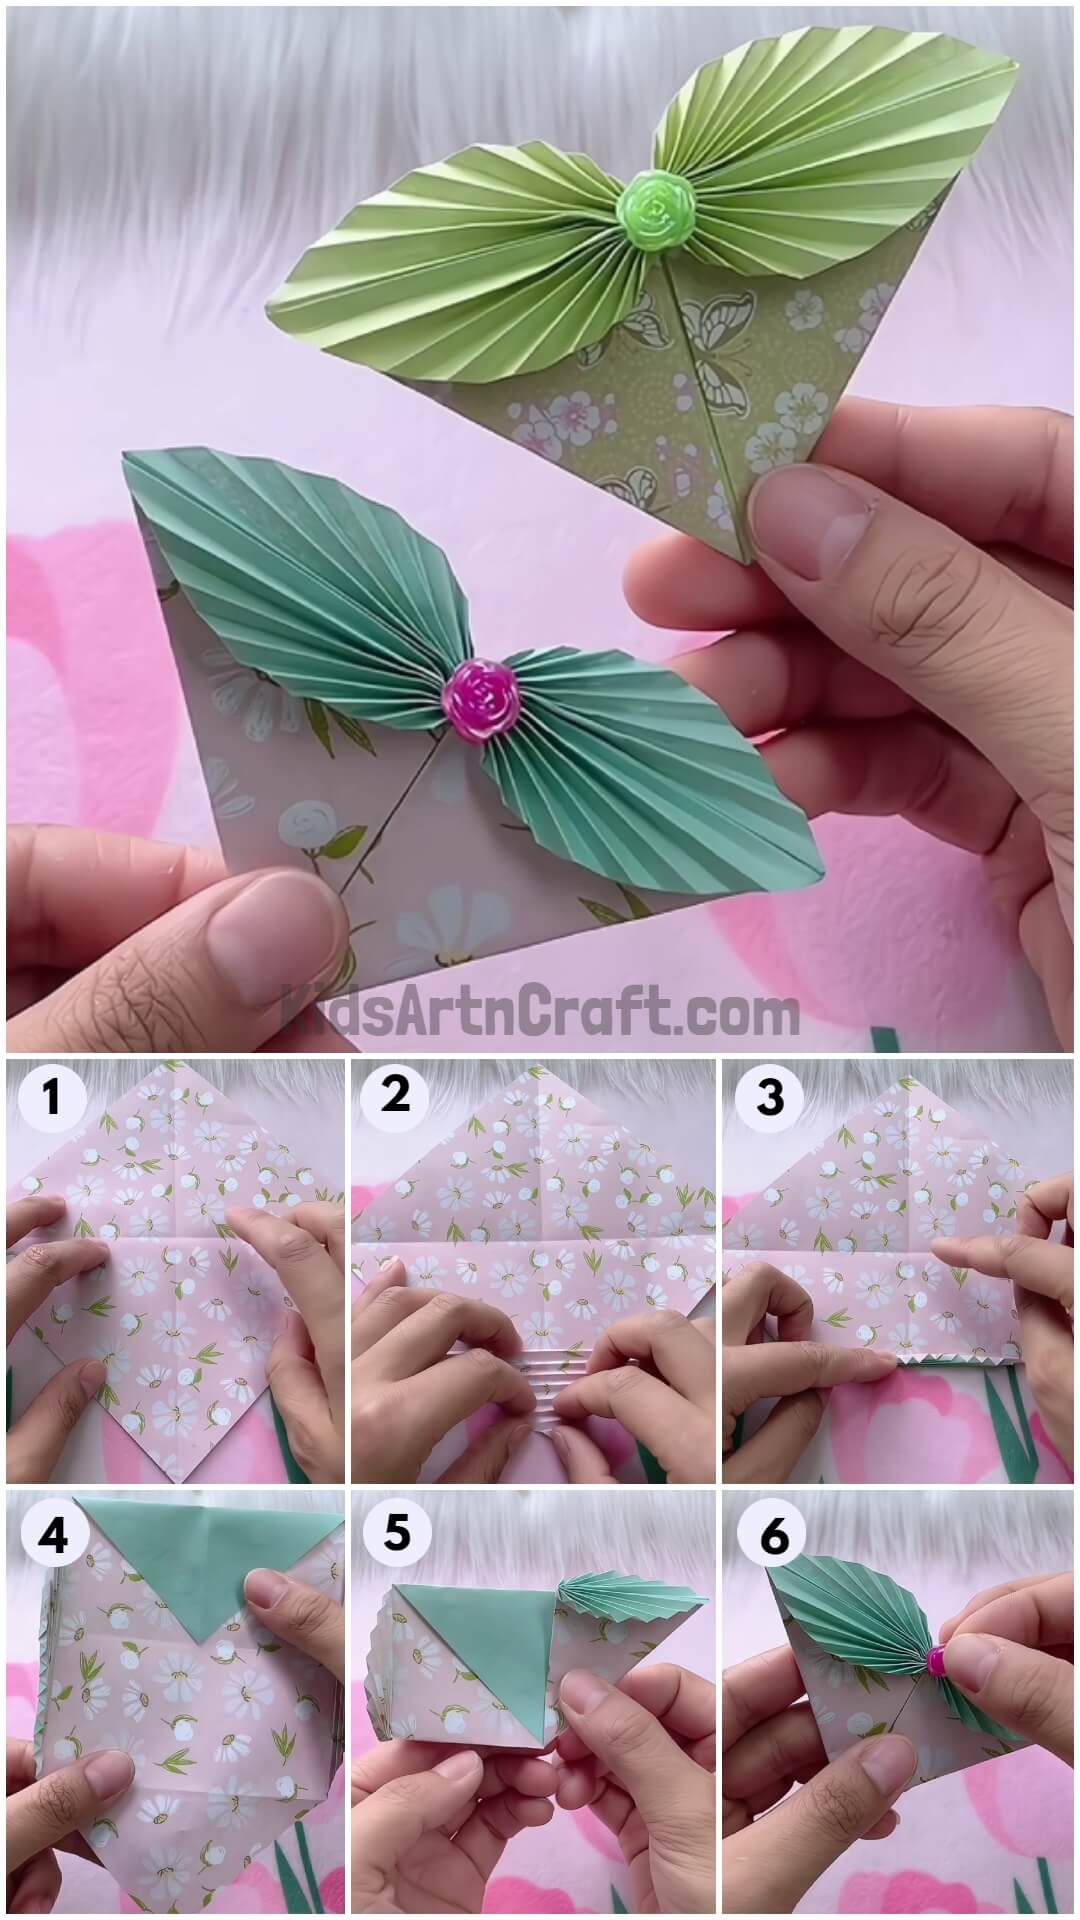
Step 1: Making ‘+’ Creases On A Diamond
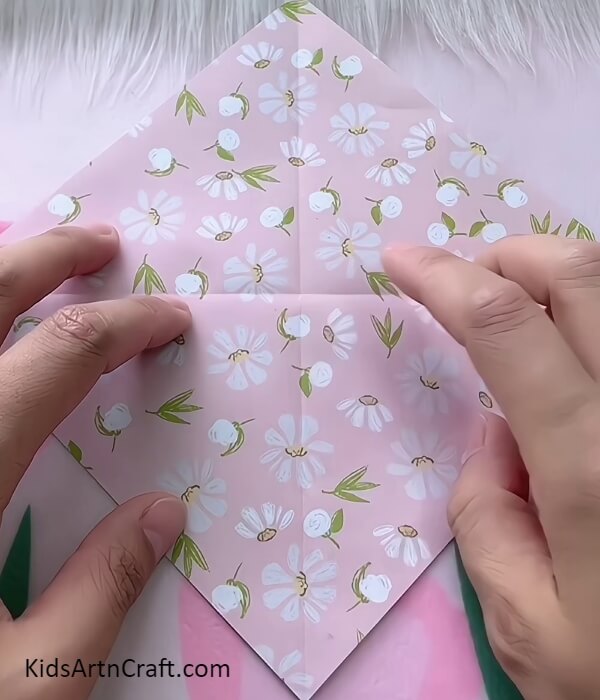

Take a floral print origami paper and turn it to keep in a diamond shape. Now, fold the corners of the shape over the opposite ones and unfold again to form ‘+’ creases over it.
Step 2: Folding The Below Corner To The Crease
Fold the below corner of the diamond to the intersection of the creases and make a small crease and unfold the paper.
Step 3: Make Zig-Zag Strips Till The Small Crease
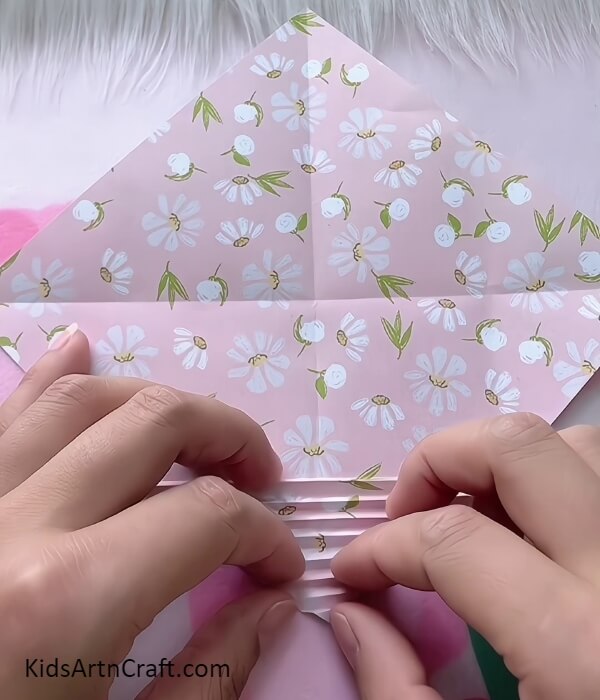
From the corner start folding the paper into thin zig-zag strips till you reach the small crease and unfold again.
Step 4: Collecting The Zig-Zag Strips
Along the creases, collect your zig-zag strips as shown in the image.
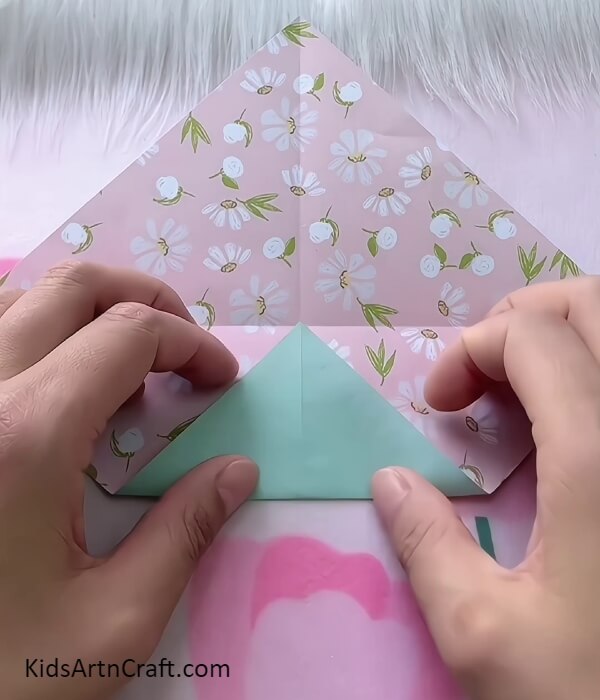
Step 5: Making Another Zig-Zag Strips And Small Creases
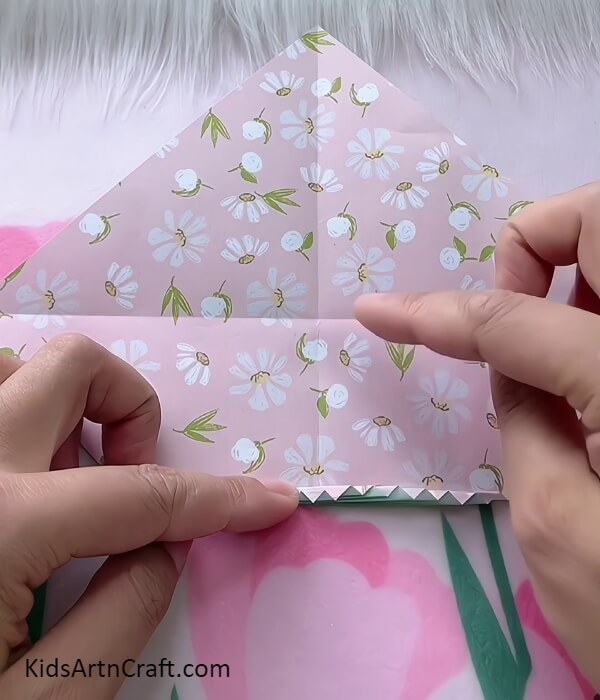
Do the same to make zig-zag strips on the opposite corner of the already made one and then turn the paper to keep these strips sideways. Now, from the bottom corner, fold the paper to the intersection of the ‘+’ creases but to the back of the paper. Fold the top corner to the intersection of the ‘+’ creases from the front only. These folds will give you 2 more small creases
Step 6: Folding Along The Creases

Now, fold your bottom corner along the crease and your top corner along the crease to keep the bottom back of the paper and the top in the front to see a triangle. Now, from the horizontal ‘+’ crease, fold the paper and also the zig-zag strips along the horizontal ‘+’ crease.
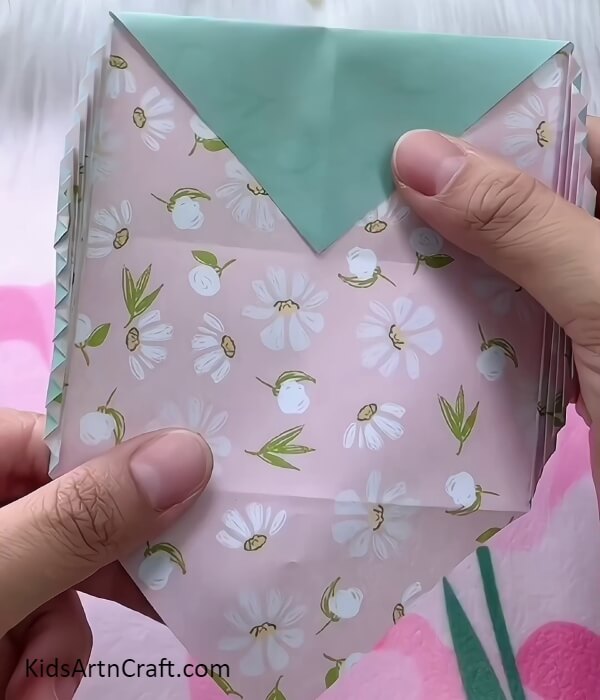
Step 7: Folding Along The Triangle Sides
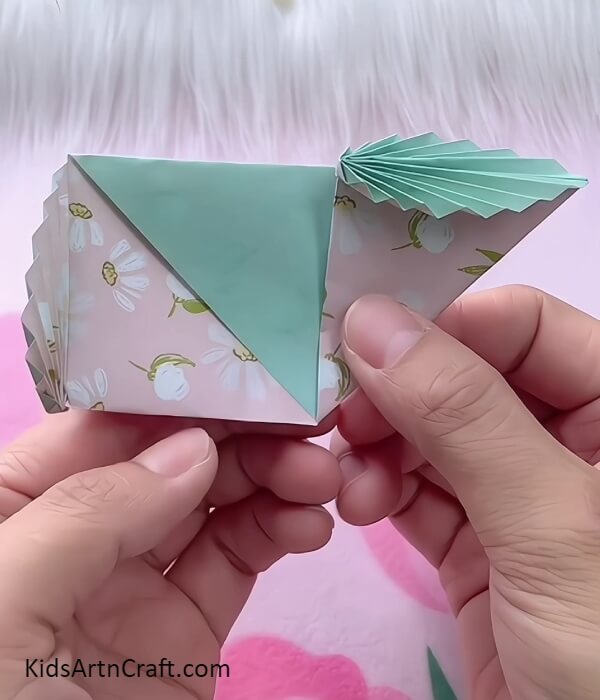
Fold the paper’s folded corners along the triangle sides to enclose your figure into a bookmark corner.
Step 8: Pasting A Craft Rose Bead To Secure The Fold
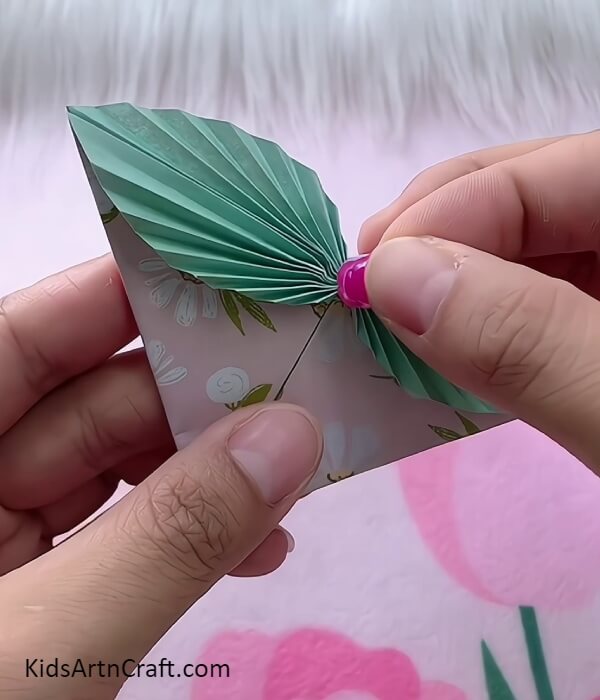
Over the leaf pattern, you made by folding the paper, paste a craft rose bead over the intersection of it using glue to secure the folds.
Your Paper Leaf Bookmark Corner Is Ready!
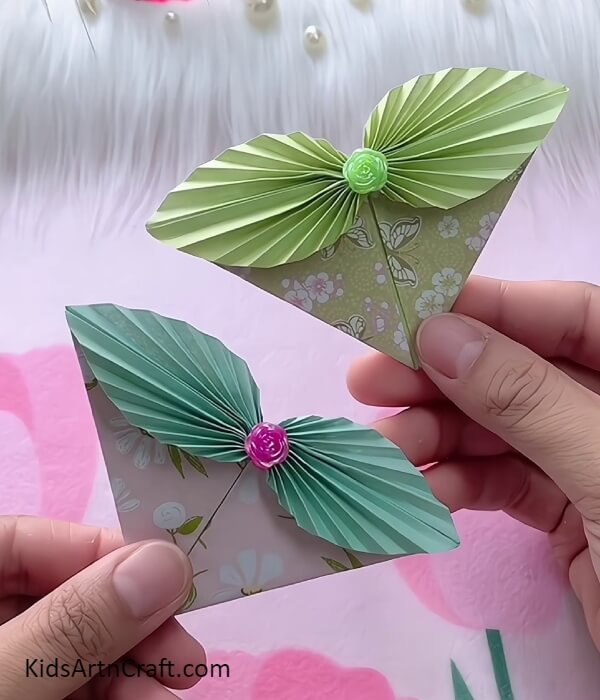
Woohoo! Look at the astonishing results of your bookmark corner!
You can take a minute to admire your creation! This brings an end to the tutorial and your creation is ready in time! You can now put it in your workbook, textbook, diary, or even your novels! It will enhance the beauty of them! This craft is perfect for any origami beginner as it is very easy and will help in developing confidence within themselves to create more such pretty crafts that everyone will admire and love!
We are hoping you liked the article, if so, give it a like and hare it as much as you can! Also, give your feedback in the comments section!
Follow us on Youtube for art and craft tutorials and much more.
More Articles from Kids Art & Craft
- Learn To Make Easy Heart Shaped Paper Mouse Craft
- DIY Easy Paper Airplane Easy Tutorial For Kids
- DIY Paper Fish Craft Easy Tutorial for Kids
- DIY Easy Origami Paper Shark Toy Tutorial For Kids
- How to Make Easy Paper Fish Craft For Kids