Paper Crafts
Cute Paper Cup Frog Craft Step-by-step Tutorial For Beginners

This tutorial will show you how to make a cute frog out of paper cups. Even if you are a beginner, you can do this fun craft with your kids of all ages!
Greetings kiddos! Don’t know what to do with the excess paper cups you have? Here is a unique beginner-friendly craft idea with a step-by-step tutorial for kids of all age groups. Let’s jump into the Creative Action!
Cute Paper Cup Frog Craft For Kids

Read More: Paper Butterfly Craft Easy Tutorial for Kids
Materials Required
- A Paper Cup
- Green paint
- Green craft paper
- White craft paper
- Red craft paper
- Green and Black markers
- A Scissor
- Glue
Procedure
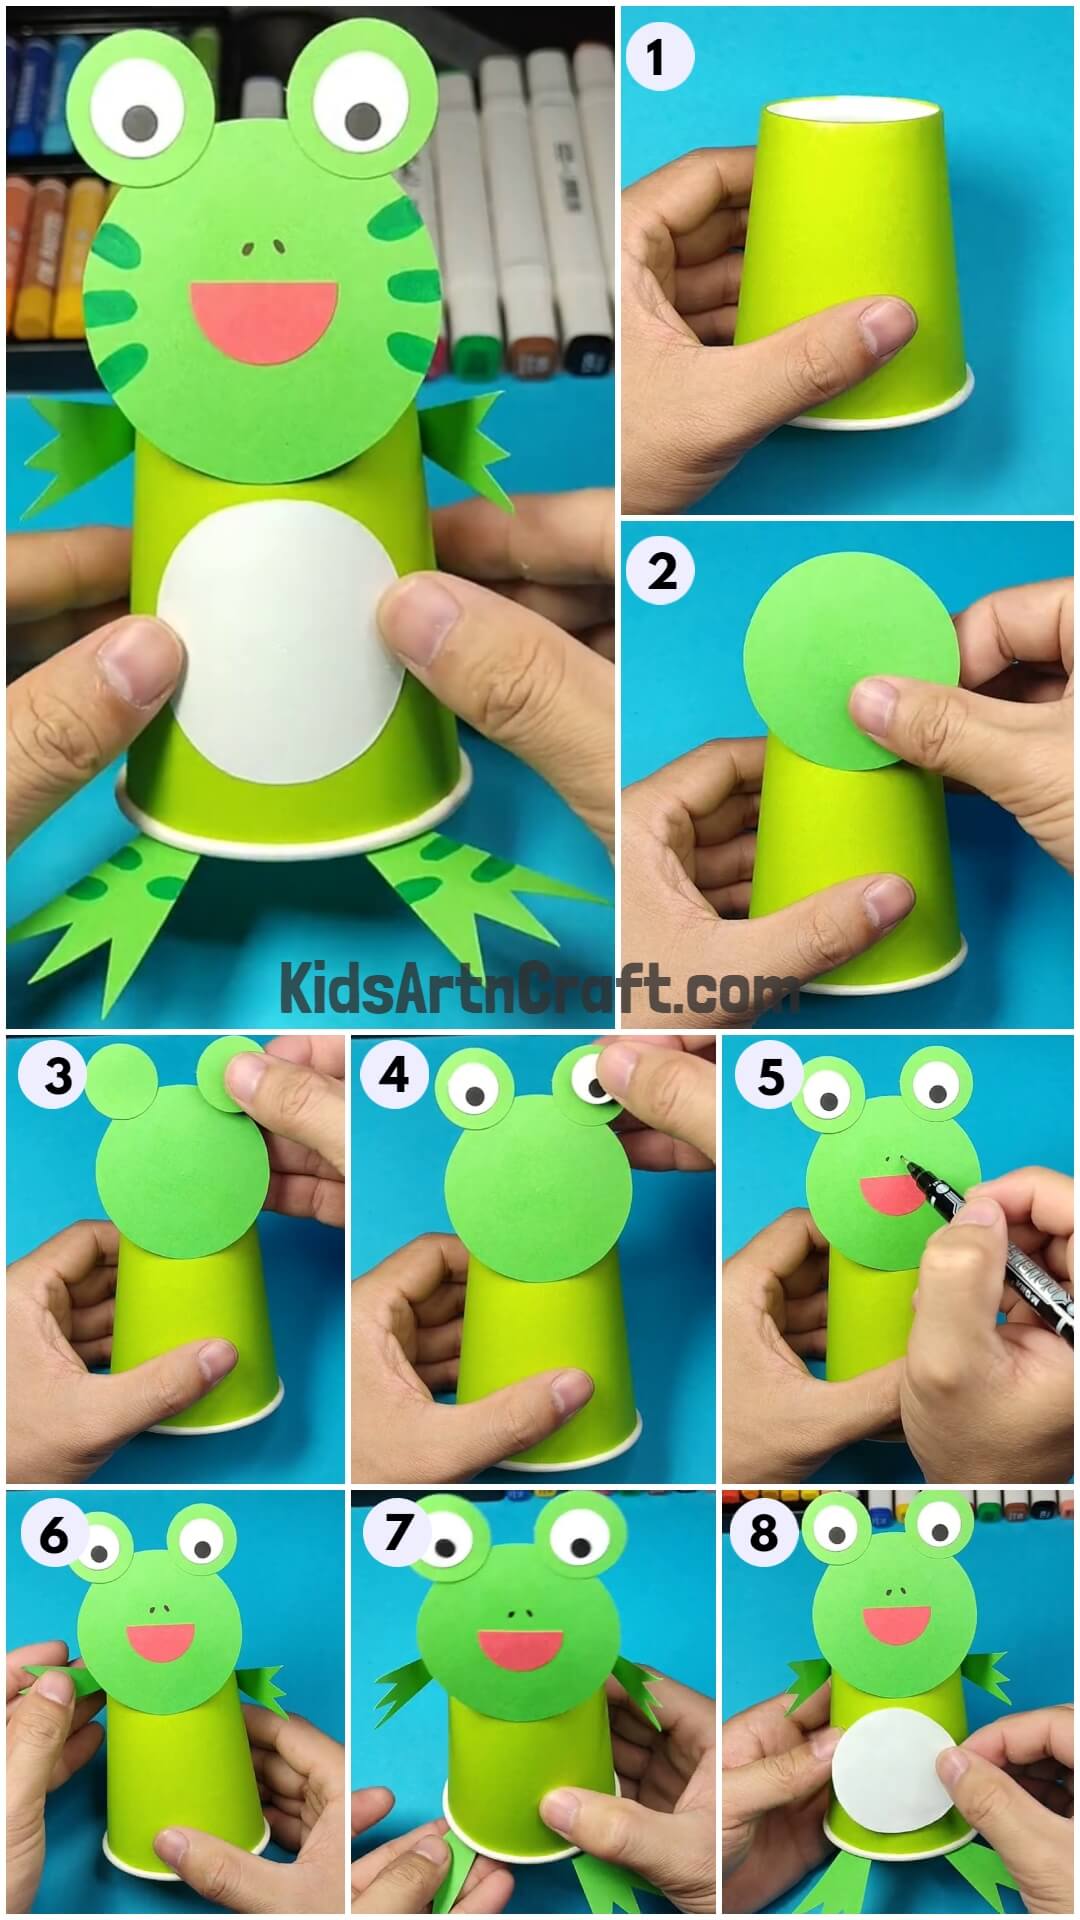
Step 1: Paint The Paper Cup In Green Color
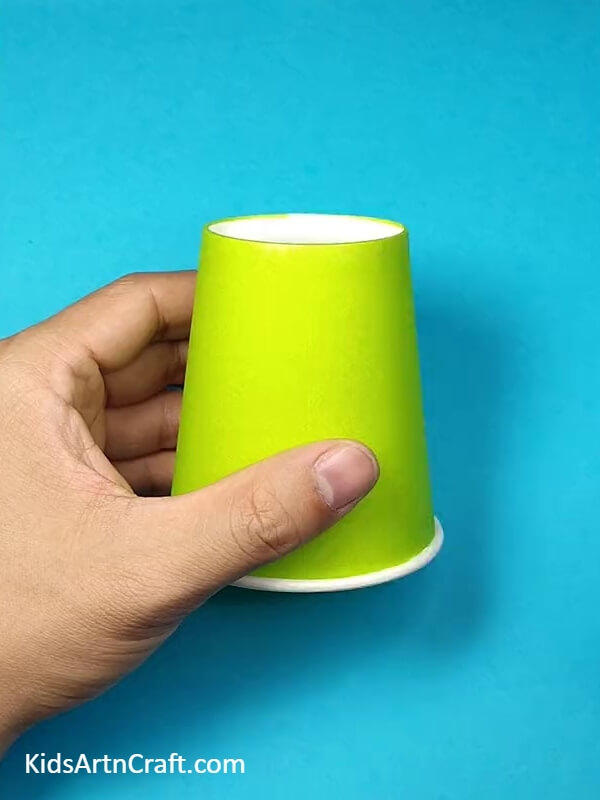

Let’s start with the paper cup, and this paper cup is going to be the base and body for our cute froggy friend. Now cover the whole cup in green paint.
Step 2: Paste The Froggy’s Head
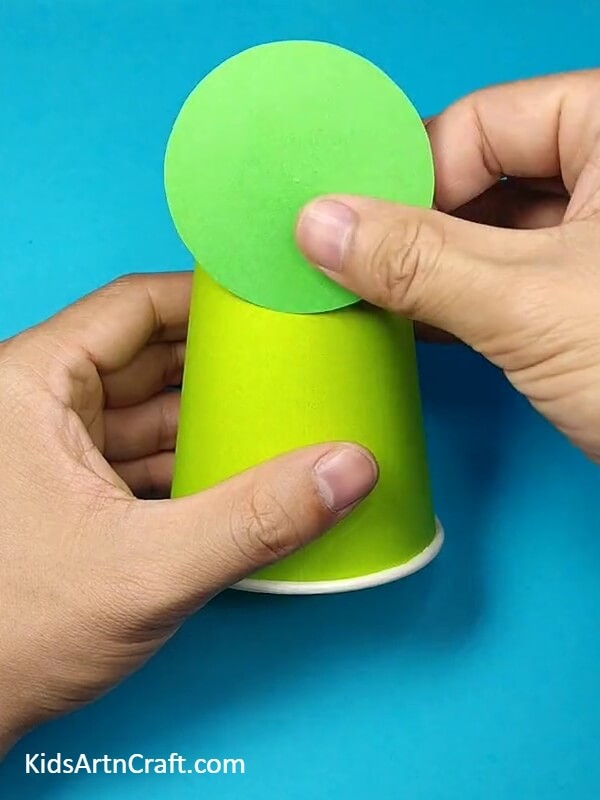
Next, take a piece of green craft paper, draw a circle of the size shown in the image below, and cut it out. Turn the cup upside down and paste the green circle on the top as displayed below. Now this is going to be the head of the frog.
Step 3: Paste The Froggy’s Eyes
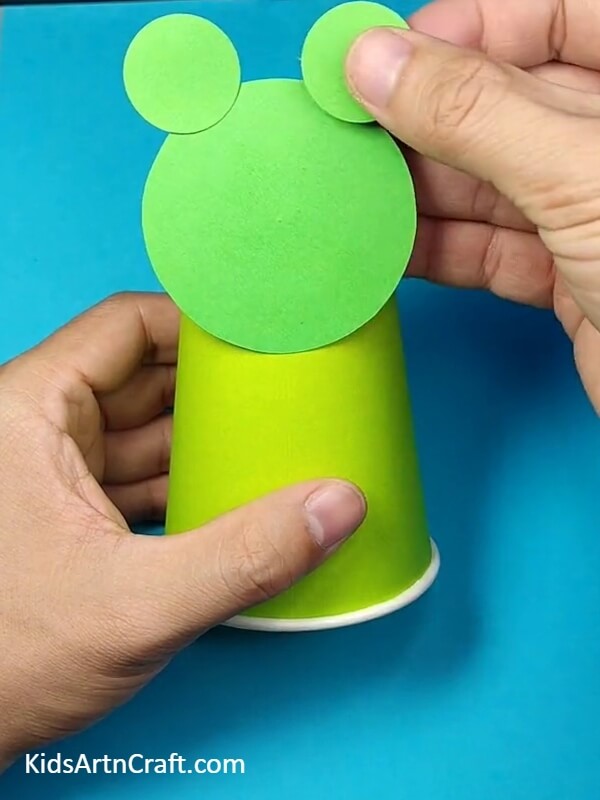
As done before take a piece of green craft paper and draw a smaller pair of circles for the eyes and cut it separately. Paste the eyes just above two corners of the circles as displayed in the image below.
Step 4: Paste The Froggy’s Eyeballs
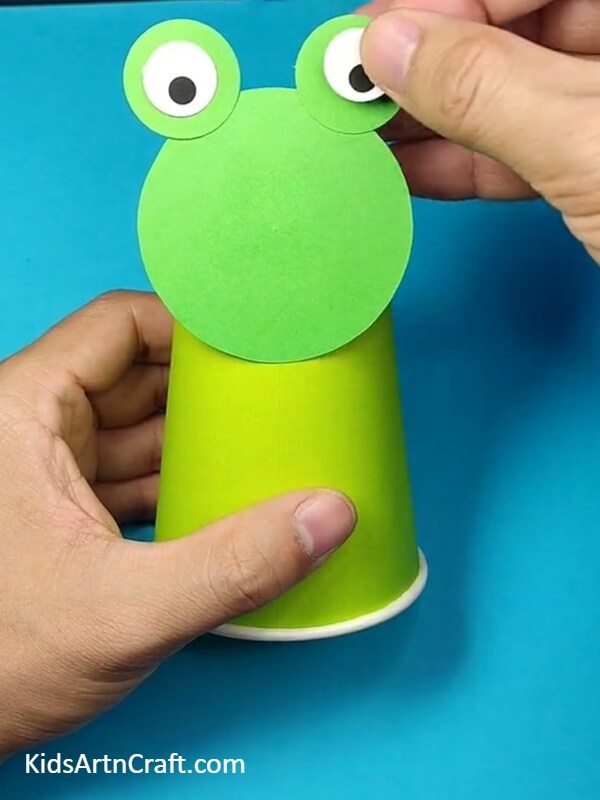
Then, take another piece of white craft paper and draw much smaller ones than the previous one, and cut them out individually. To add extra details to the eyes take a black marker and draw small dots in the middle of the white eyeballs to represent the pupils of the frog. Now paste them at the center of the green circles.
Step 5: Paste The Froggy’s Red Mouth
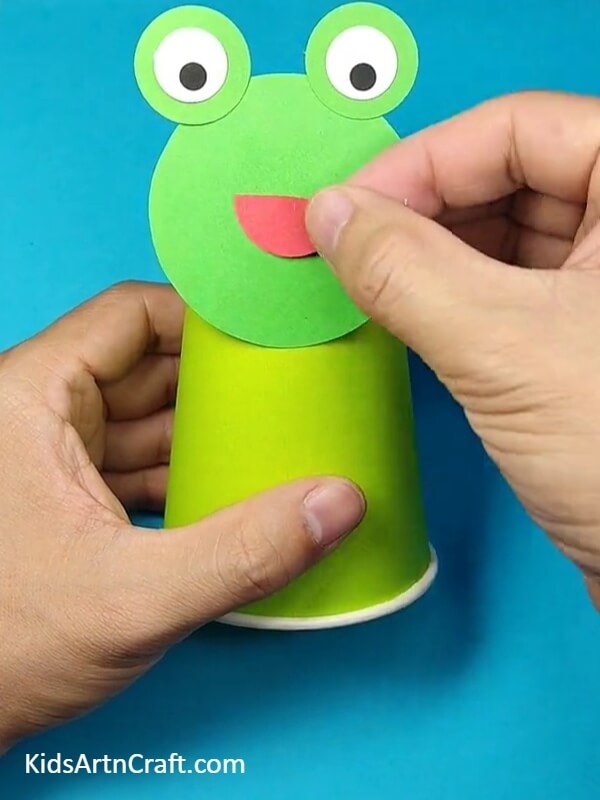
Further, take a piece of red craft paper and outline a mouth, and cut it out carefully using the scissors. Paste it in the middle of the Frog’s green face using glue.
Step 6: Add Small Details

For further detailing put small two dots just above its mouth to represent the Frog’s nostrils.
Step 7: Stick The Froggy’s Hands
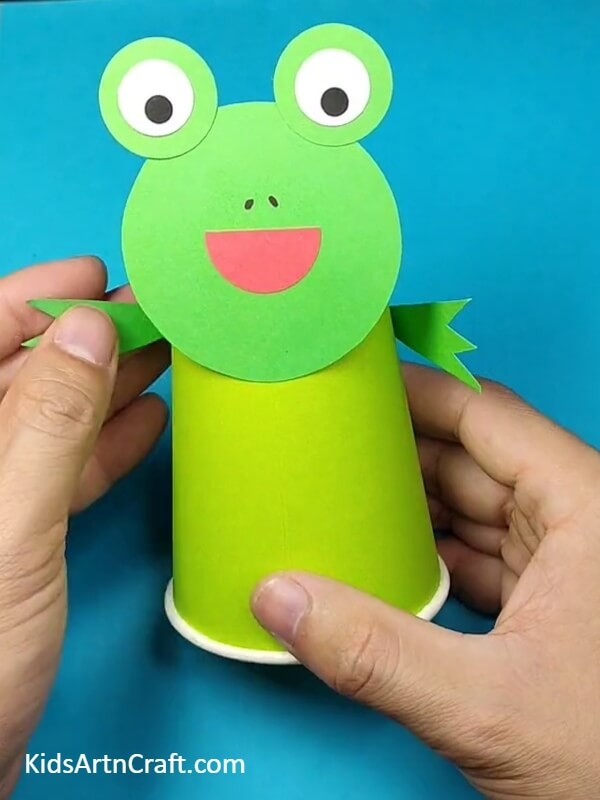
Once again take the green paper and draw two pairs of limps for both hands and legs with three sticky fingers and cut them out neatly. Next, stick them on both sides of the paper cup or the body of the Frog.
Step 8: Add Froggy’s Long Legs
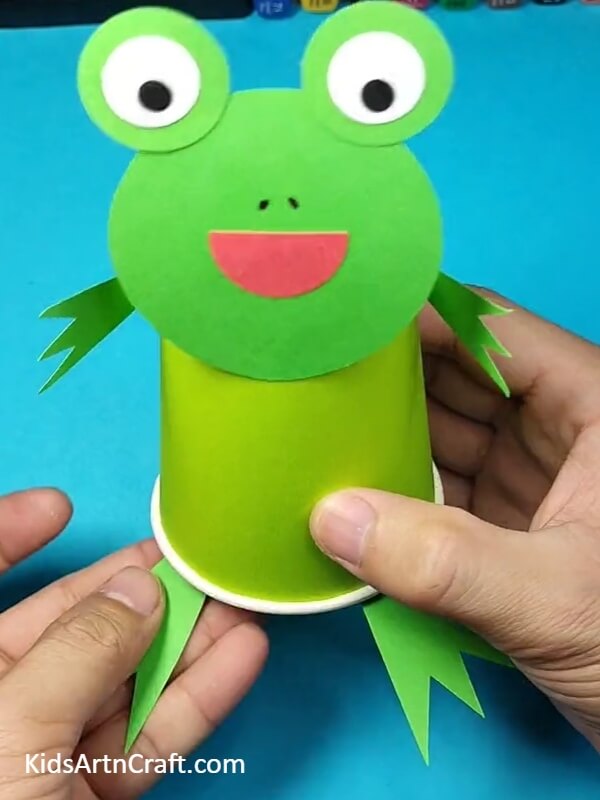
Repeat the same and stick a pair of legs at the bottom of the cup. While pasting the legs fold the front of the leg and paste the folded paper on the inner side of the cup.
Step 9: Add Details To The Froggy’s Body
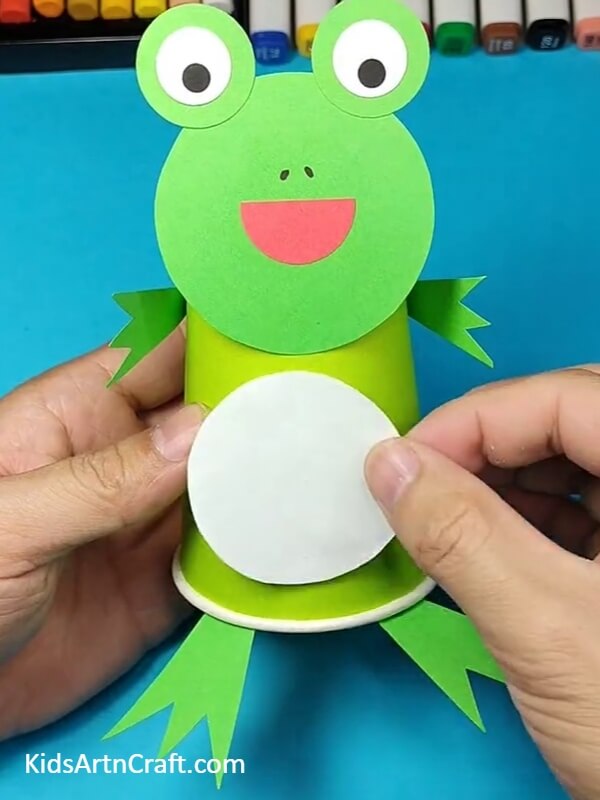
To represent the detailings on the Frog’s body, cut out a circle from white paper and paste it on the middle of the green paper cup.
Tadda!! Our Cute Froggy Friend Is Ready
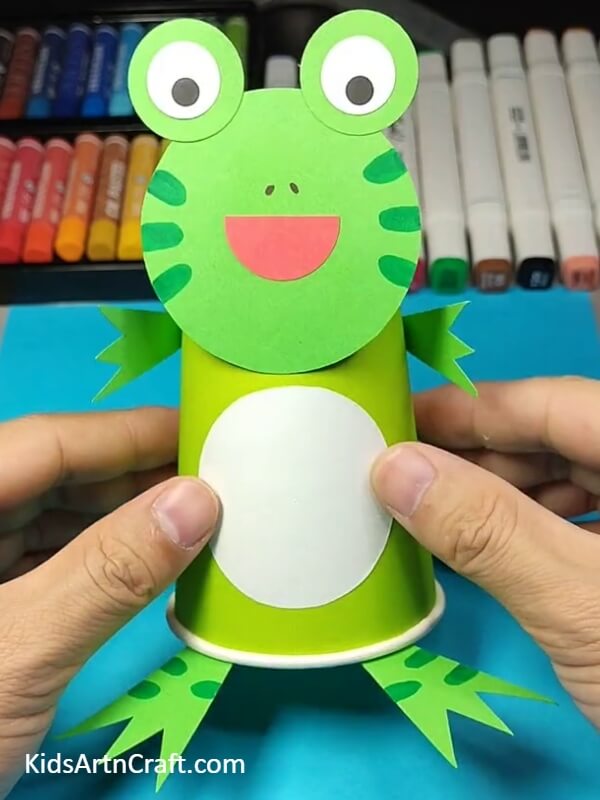
Tadda!! Our cute Froggy friend is ready to display. To make it more attractive add details like small stripes using a green marker on its cheeks and legs.
Thanks for visiting our page. Visit more often to get many more ideas like this on how to Recreate and Reuse boring items into exciting materials. See you again!
Follow us on Youtube for art and craft tutorials and much more.
More Articles from Kids Art & Craft
- DIY Easy Paper Chick Craft For Kids
- DIY Heart Shape Cat Craft for Valentine’s Day
- Heart Shaped Paper Mouse Craft Step by Step Tutorial
- How to Make Easy Paper Snowflakes Tutorial
- DIY Paper Tree Crafts for Kids Easy Tutorial