


DIY and Crafts
Easy Paper Lobster Craft Tutorial For Kids

They look like crabs and are eaten too! Yes, they are lobsters! Create on your own this 3D lobster craft with the help of our step-by-step tutorial!
This tutorial brings to you yet another aquatic creature. It has two big claws in front with eight walking legs, two antennas, and a tail at the back. But, we will be taking liberties in creating its legs as craft gives us the freedom to do that. With a sheet of paper and some good cutting skills, you can easily create this craft. It’s extremely simple to make and beginner friendly as well. It can be made by little kids or people new to art and craft and it will take ten to fifteen minutes for you to make it. So, collect the few materials required to make it, and let’s get started.
DIY Paper Lobster Craft Tutorial For Kids To Make

Read More: DIY Origami Dragonfly Easy Tutorial for kids
Materials Required
- A peach-colored sheet of paper
- A pair of scissors
- A pencil
- A black sketch pen
- A white sheet of paper
Procedure
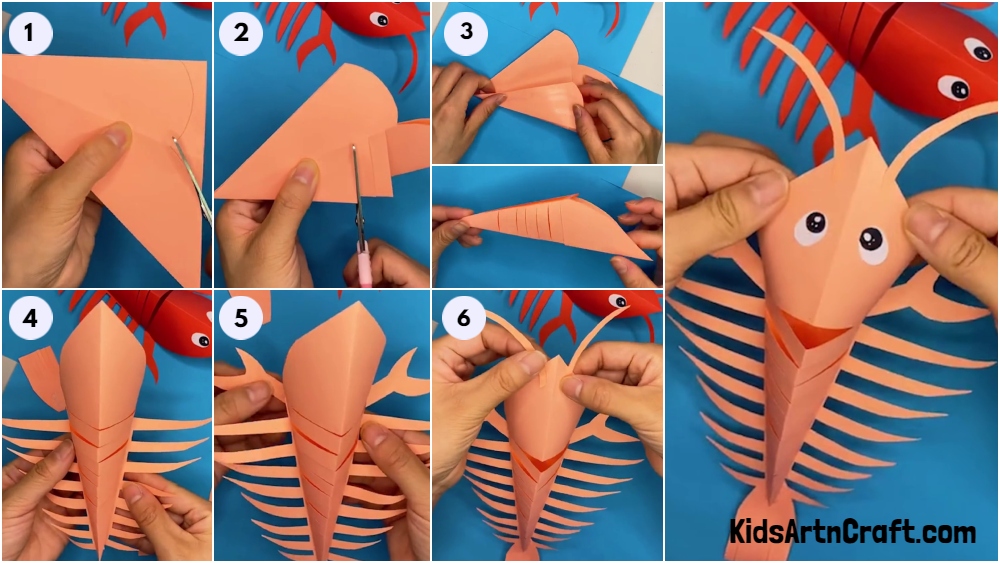
Step 1: Starting With a Sheet of Paper
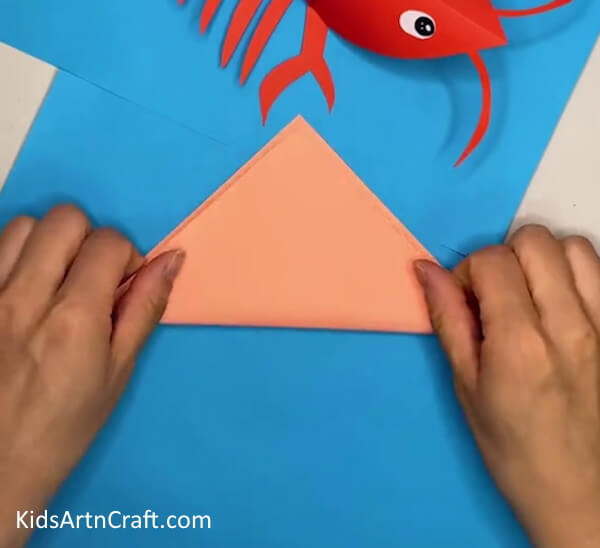
Take a square, peach-colored sheet of paper and fold the two corners standing opposite to each other as shown in the picture below. The size of the sheet should not be too big. The fold will give a triangular shape to the sheet. Now, make another fold to this triangular sheet in the middle. Press down on the fold and open it retrieving back the triangle shape.
Step 2: Make Drawings on the Sheet
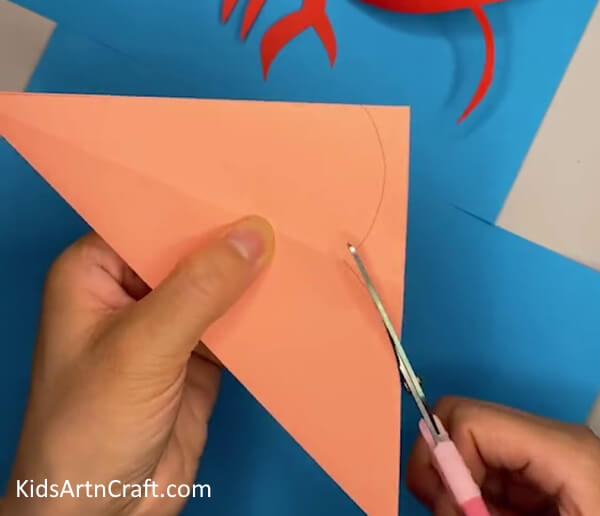
With the help of a pencil, make two curved lines on the right side of this triangular sheet. These curved lines need to be connected in the middle as shown in the picture below. Now, using a pair of scissors, cut the side of this sheet into the shape drawn. Pay close attention to the point where the two line meet.
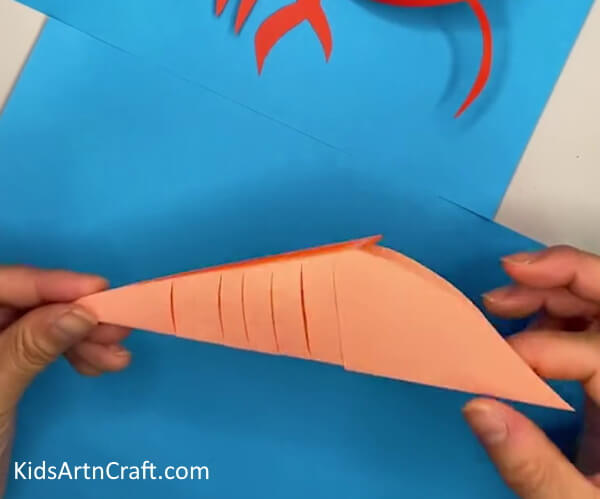
Step 3: Making More Cuts
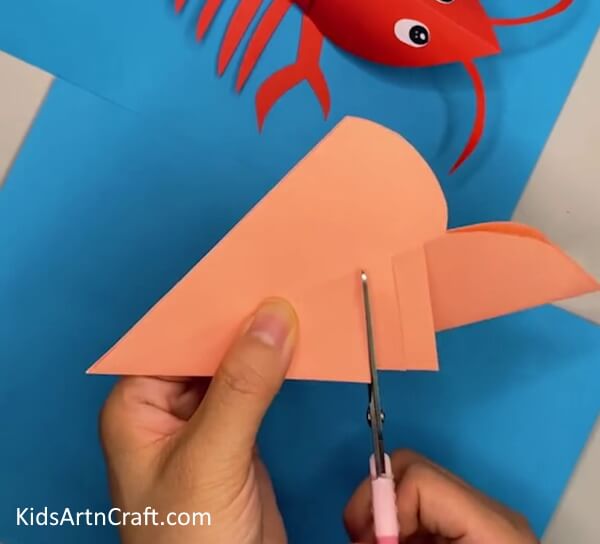
Make vertical cuts at the bottom of this folded sheet. These cuts should be made up to the marks of the second fold made in the first step as shown in the picture below. Seven cuts should be made in total.
Step 4: Opening the Entire Sheet
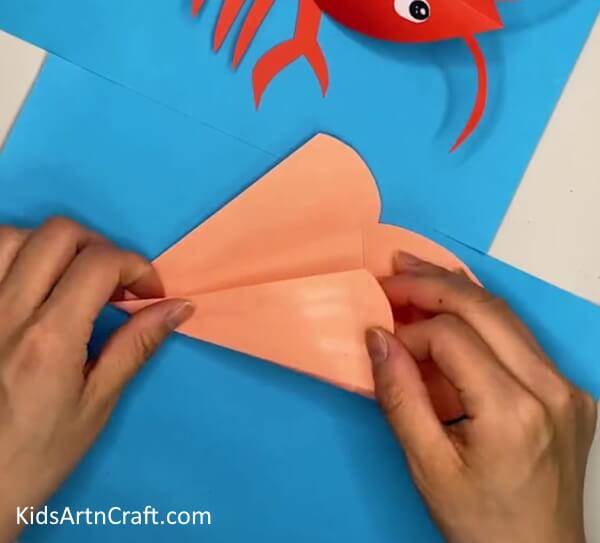
Open the entire triangle shape to reveal the whole shape made after the cutting process which now, contains a corner on one side and four curved lines on the other side. Now, fold the sheet back following the folding mark at the top and the folding mark at the bottom. Do not fold on the lines of the folding mark in the middle. See the picture below for reference.
Step 5: Pasting the Sides Together
Apply some glue on the folds and take the bottom fold and paste it on the surface of the top fold. Press it down to seal the two sides together. This now leaves our lobster with a base. See the picture below for reference. Open up the pointed marks of the fold on top to reveal the shape of its head and body.
Step 6: Working on More Sheets of Paper
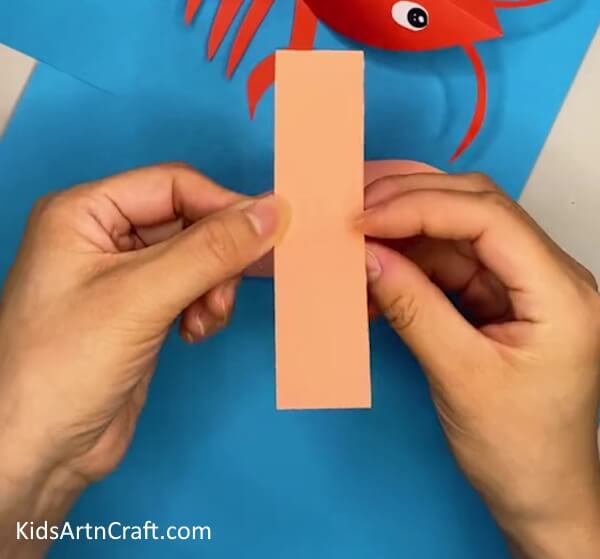
Take a sheet of paper in the same color and cut a strip out of it as shown in the picture below. Cut three such strips in total.
Step 7: Making the Tail of the Lobster
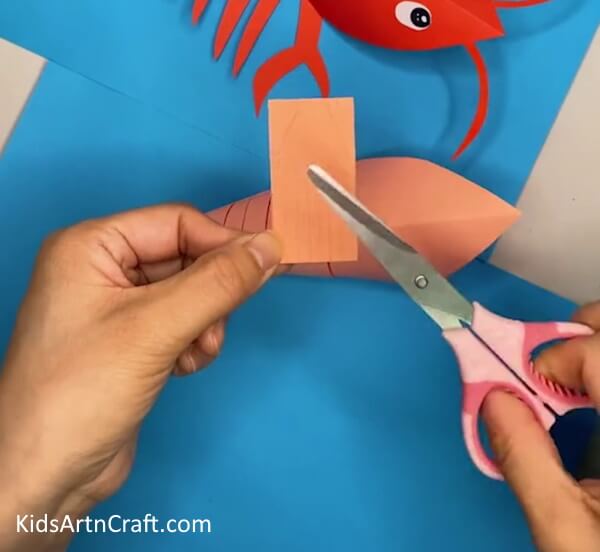
Take one of the strips and cut it in half. Now, make cuts at the bottom side of this strip, covering half of the area of this strip. Finally, cut the sides of the top of this strip making them slanted with a flat tip. This shall be the tail of the lobster. See the image in the eighth step for reference.
Step 8: Make all the Other Parts of the Lobster
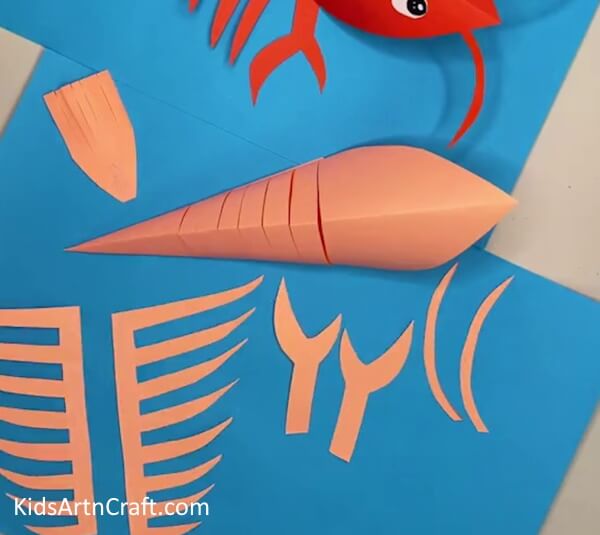
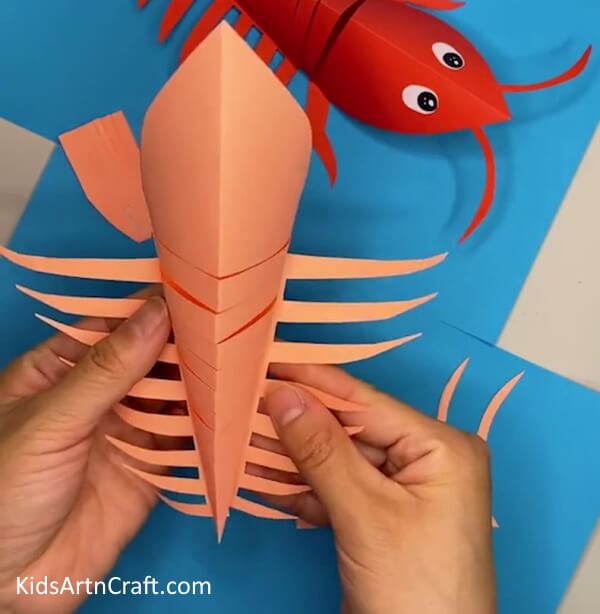
Take the other two strips and cut them into shapes resembling the claws of a lobster. Also cut two antennas out, using the same sheet of paper. Now, take another sheet of paper in the same color and cut out two big strips. Working on these strips, cut one of the sides of both strips in the shape of a ribcage with each rib decreasing in size from the previous one. These will act as the legs of the lobster. See the picture below for reference.
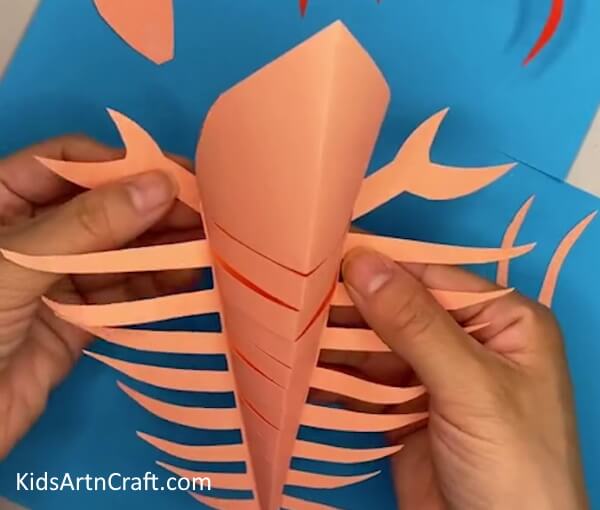
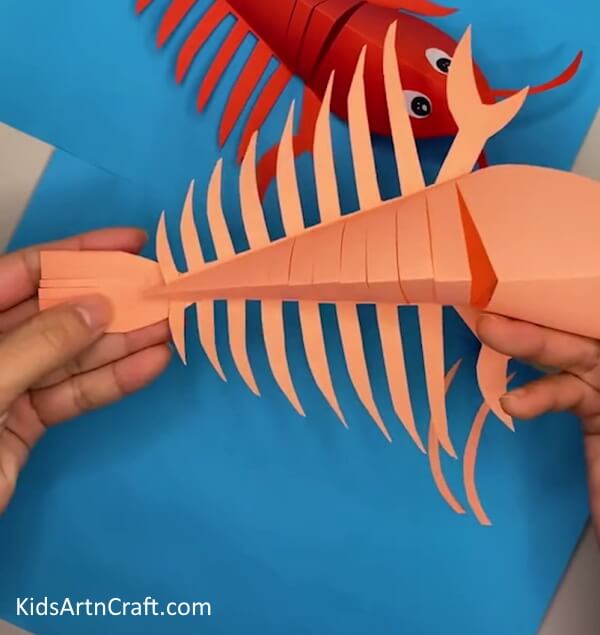
Step 9: Pasting the Legs on the Lobster
Take the legs of the lobster and paste them on the sides connected to the bottom corner of the body of this lobster. They should be pasted on the flat base of the lobster as shown in the picture below.
Step 10: Pasting the Claws on the Lobster
Paste the claws of the lobster in front of the legs you pasted in the previous step. These claws should also be pasted on the base of the body of this lobster. See the picture below for reference.
Step 11: Pasting the Tail
Paste the tail you made earlier on the end of the body of the lobster. Paste it on the base of the back like you did with all the other parts. Remember to paste the side containing the tip as shown in the picture below.
Step 12: Pasting the Antennas
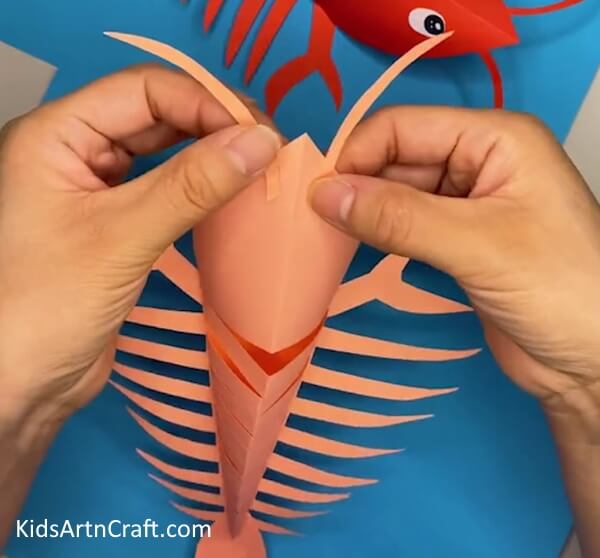
Paste the two antennas at the top of the head of the lobster, one on each side of the pointed tip in the front. See the picture below for reference.
Step 13: Pasting the Eyes of the Lobster
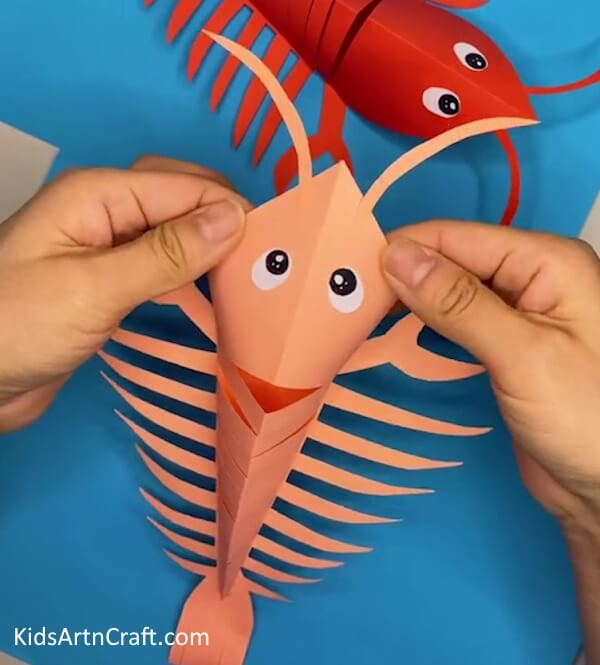
Take a white sheet of paper and cut two small circles cut. Now, make two circles at the top of these white shapes using a black sketch pen leaving a small round space uncolored inside as shown in the picture below. Finally, paste the two circles, next to each other, right below the pasted antennas.
The Complete Final Picture
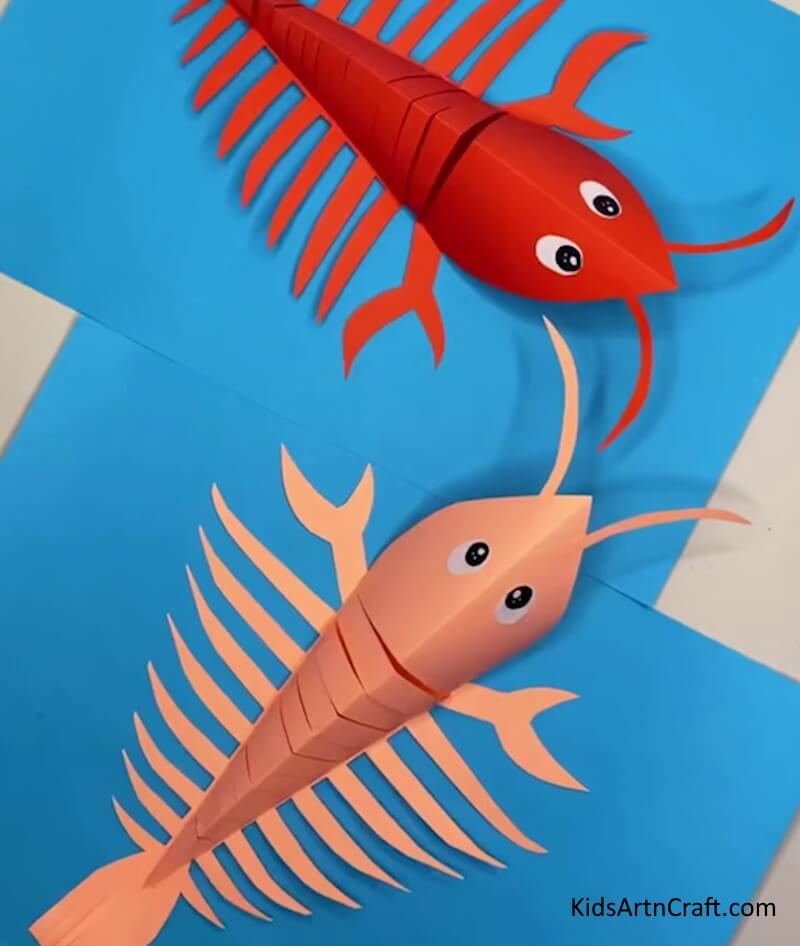
This completes the process of making this lobster. You can make another one using a red sheet of paper as shown in the picture below.
This tutorial taught you some great cutting skills which will surely help improve your craft. You learned about the different body parts of a lobster and how to make them through craft. You can place it on your study table as a piece of decoration or submit it as an art project in school. You can even play with it by stretching it a little to make parts of its abdomen separate from each other yet connected at the bottom. Now, how cool is that! Keep practicing these techniques and keep inventing new ideas. Good luck
Follow us on Youtube for art and craft tutorials and much more.
More Articles from Kids Art & Craft
- How to Make Paper Umbrella Craft for Kids Tutorial
- How to Make Easy Paper Snowflakes Tutorial
- DIY Paper Butterfly Easy Craft For Kids
- DIY Easy Paper Cactus Craft Tutorial for kids
- DIY Easy Paper Chick Craft For Kids


