DIY and Crafts
How to Make Origami Dragon Fruit Tutorial for Kids

Create a dragon fruit paper origami craft easily with the help of this step-by-step tutorial that will guide you through the process!
Origami is a traditional Japanese art form that has been around for centuries. It is a type of paper craft that involves folding paper into intricate shapes and designs! Making dragon fruit with origami paper is a fun and relaxing activity that anyone can do. The result will be stunning and will serve as a unique addition to your origami collection! In this article, we will show you how to make a fun dragon fruit origami with just a paper in a few easy steps! Let’s begin!
Easy Dragon Fruit Made With Origami Paper

Read More: How To Make Sunflower Clock Craft Using Paper
Materials Required
- Colored Papers (Pink, Black, and White)
- Glue
- Green Sketch Pen
- Scissors
- Black Marker
Step 1: Making ‘+’ Creases
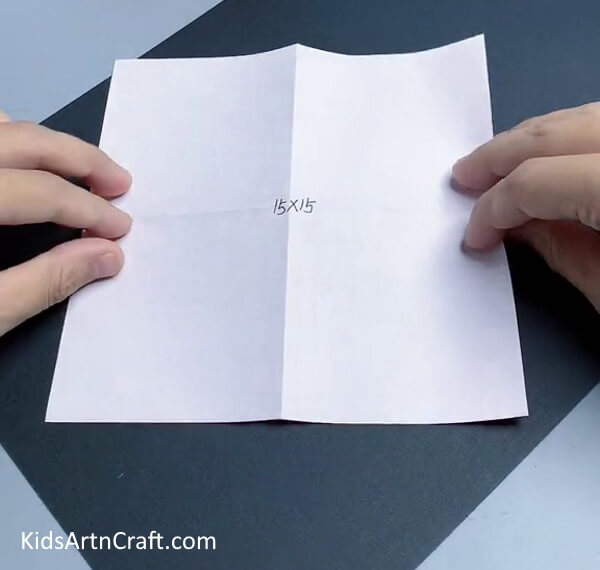

First of all, take a 15X15 cm square pink paper. Fold the sides of the paper to their opposite one to make ‘+’ creases over it and unfold it.
Step 2: Making Diagonal Creases And A Triangle
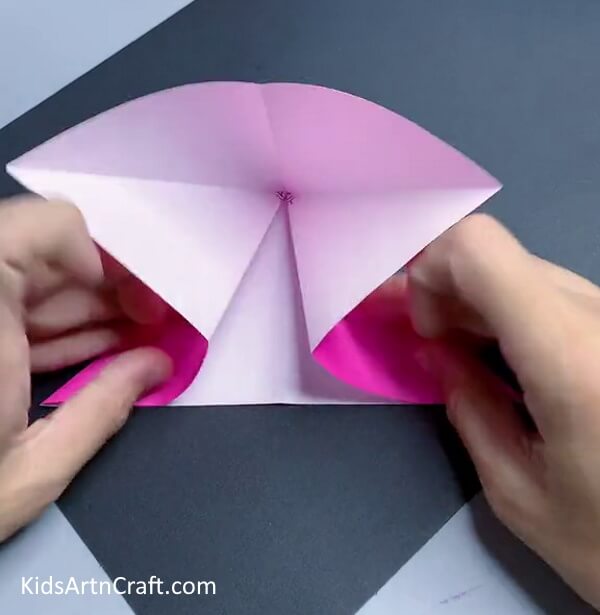

Fold the corners of the paper over the opposite ones to form diagonal creases over the paper and unfold again. Now, hold the bottom corner of the diagonal crease and along the horizontal ‘+’ crease push in the paper, and fold the overcoming flap along the upper-half diagonal creases to form a triangle shape.
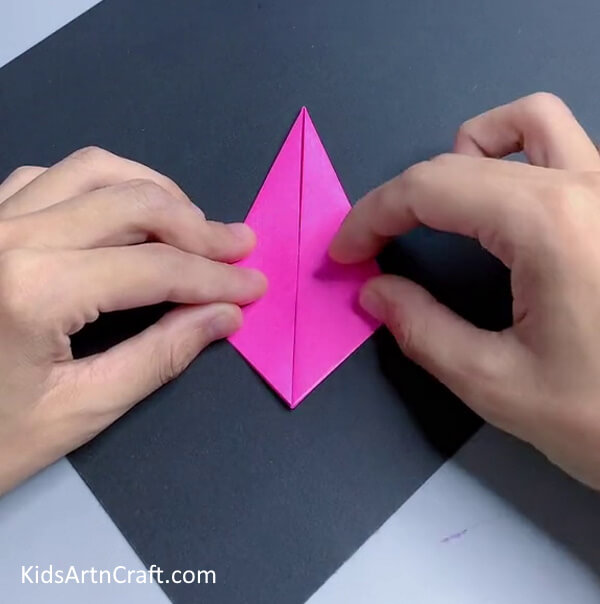
Step 3: Folding The Triangle Sides
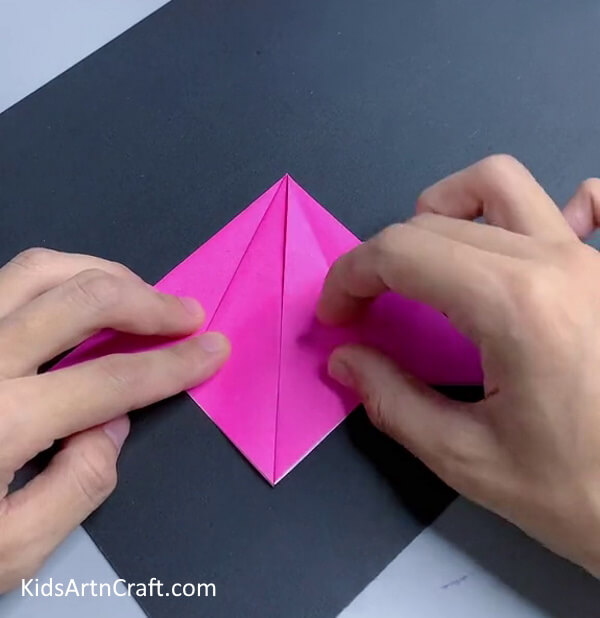

Fold the left and right sides of the triangle to the middle and form a kite shape on it with a partition.
Step 4: Making The Kite Shape

Flip the triangle to the other side and perform the same previous step over it too, to convert the whole triangle into a kite shape.
Step 5: Folding The Kite Sides
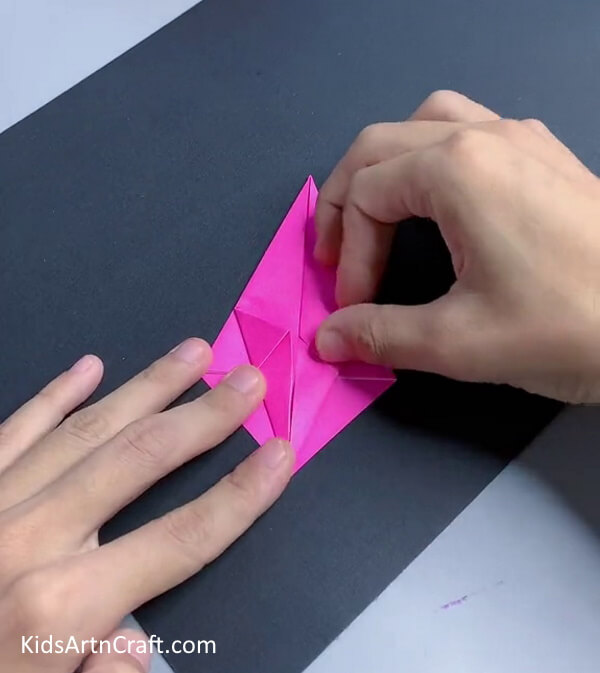

Fold the kite’s small sides to the middle partition.
Step 6: Making A Diamond Shape


Flip the figure and again fold the smaller sides of the kite to the middle partition and convert the kite into a diamond shape.
Step 7: Folding The Ends Outwards
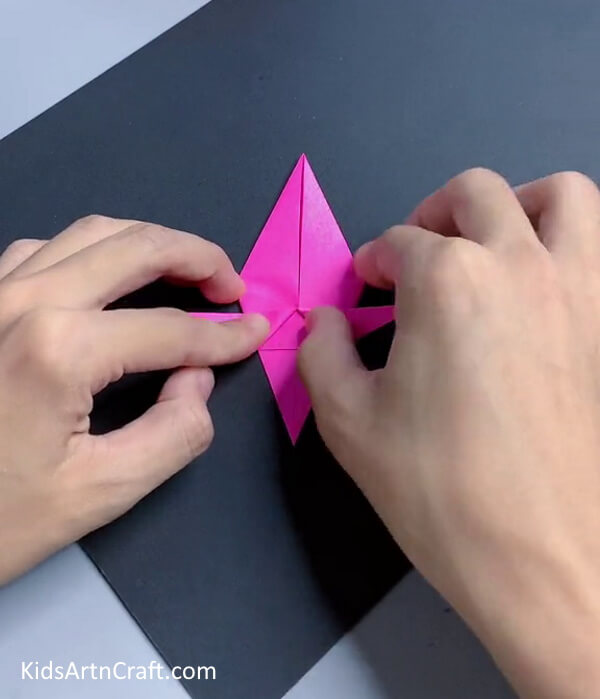

Fold the bottom ends of the diamond shape from the partition outwards horizontally along the small slanting partition you can see in your figure.
Step 8: Flipping And Repeating

Flip your figure and do the same i.e. fold the bottom ends of the diamond shape from the partition outwards horizontally along the small slanting partition. The middle big part will be your fruit and the folds that you have made recently outwards, will be the leaves of your fruit.
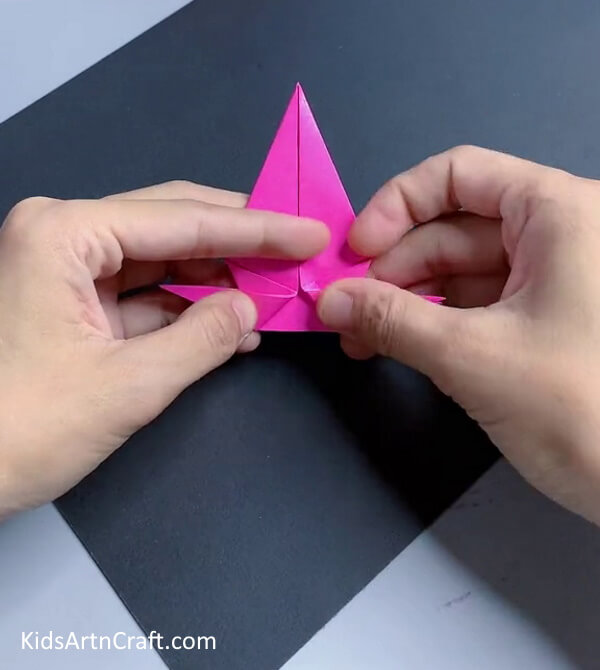
Step 9: Shaping The Leaves And Fruit
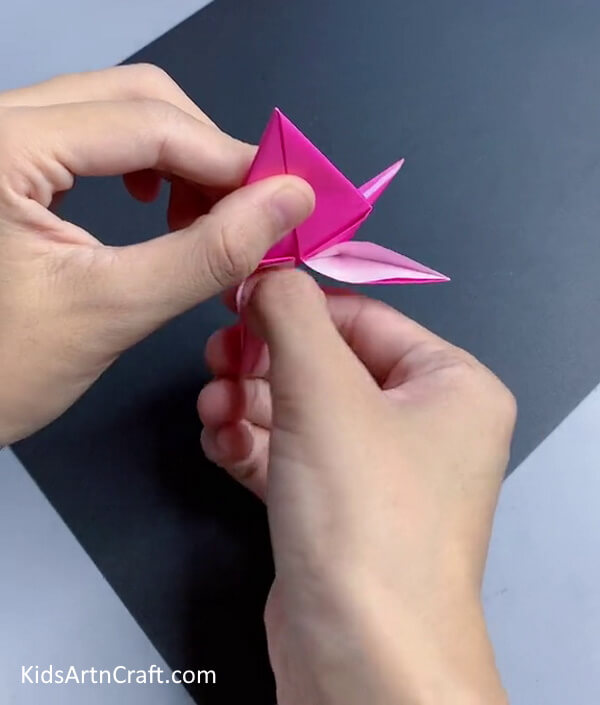

Open the leaves from the middle to see the white part of the paper along the creases and give them a 3D look. Now, from the bottom, insert your finger into the middle of the fruit and give it a push outwards to convert your 2D fruit into 3D.
Step 10: Coloring The Leaves
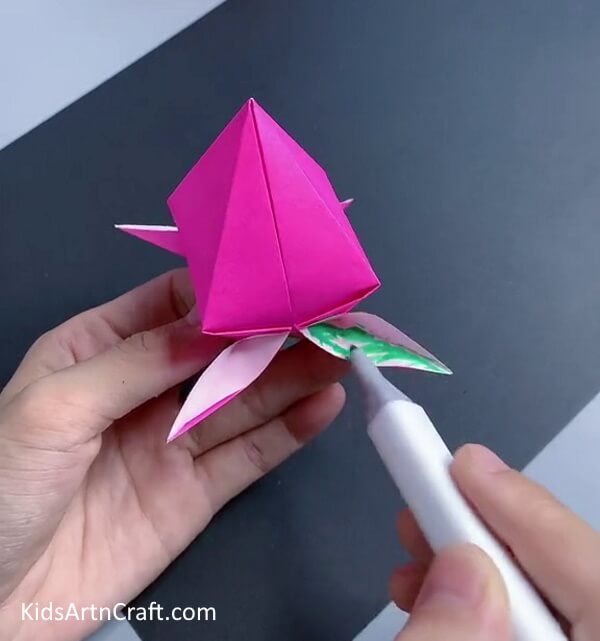

Using a green sketch pen, color the white part of the leaves green.
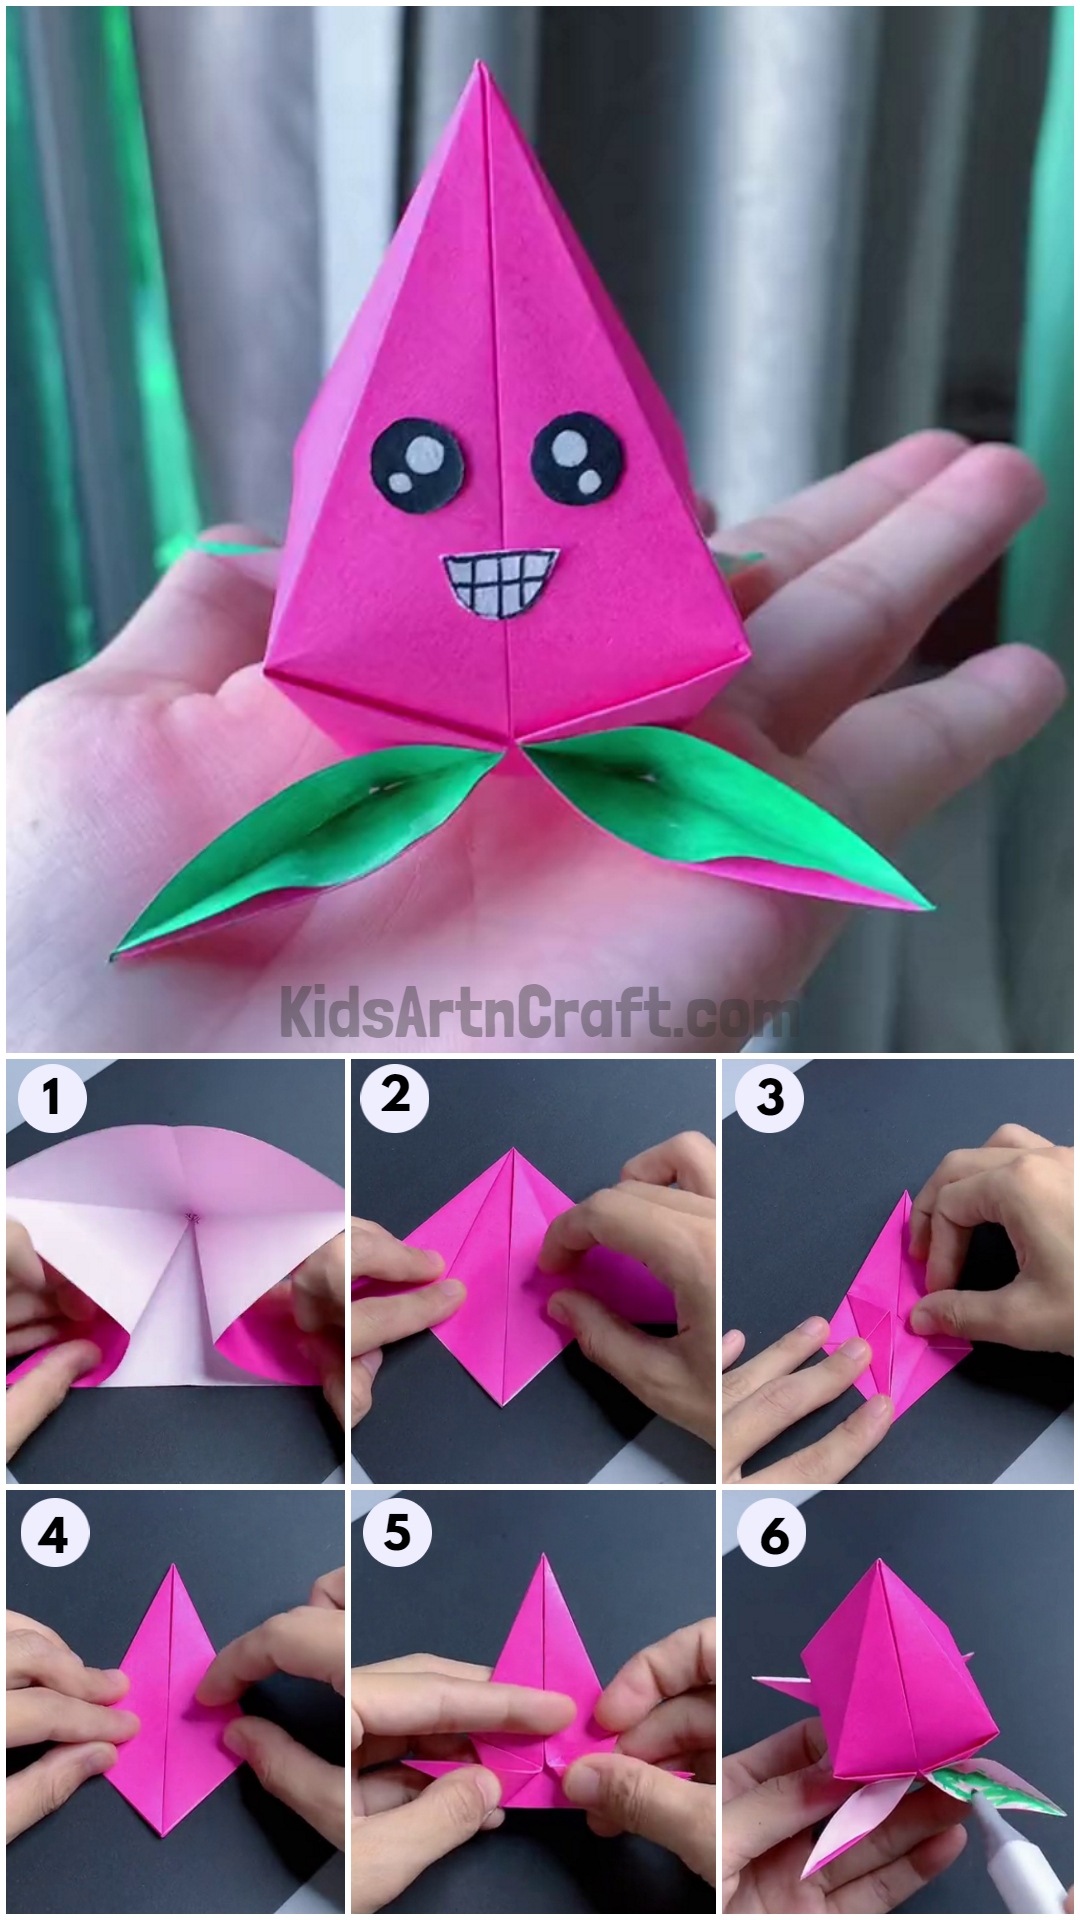
Your Paper Dragon Fruit Craft Is Ready!
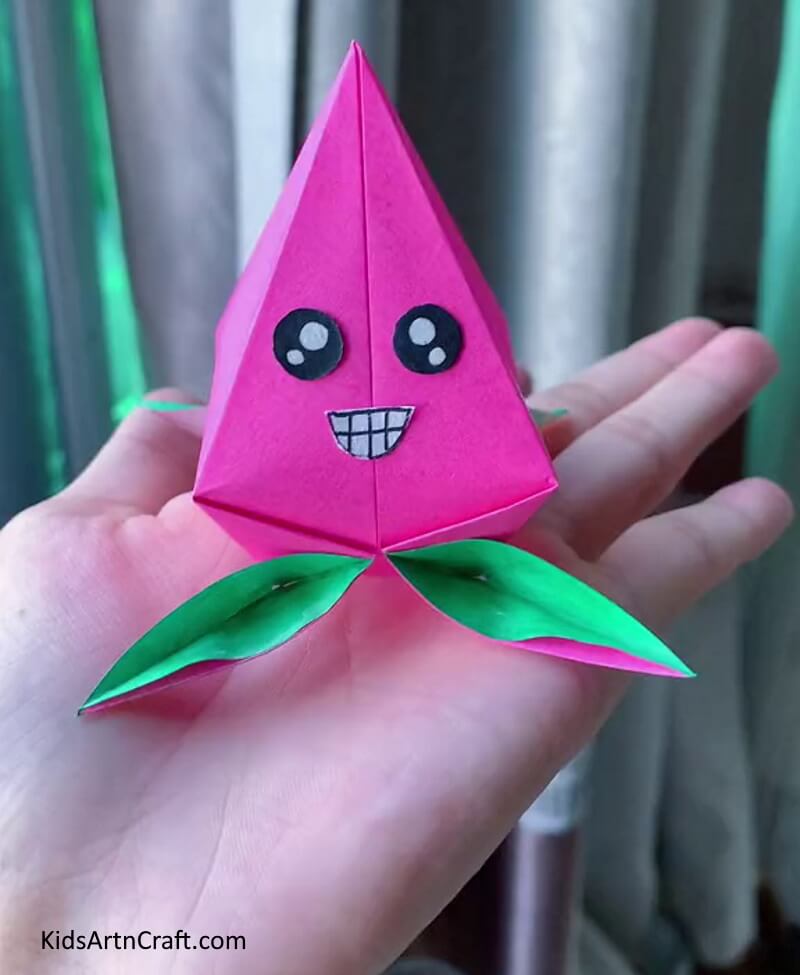

For the last step, cut out a semi-circle and 2 small circles from a white paper sheet using scissors. Using the black marker, outline the semicircle and make vertical lines over it to make the mouth showing teeth. Also, color the 2 color circles with the marker, leaving 2-2 circles in them to make them look like shining eyes as shown in the image. Paste the eyes side by side on the fruit and the mouth below and in between them using glue.
Voila! You have finally completed making your DIY origami 3D dragon fruit like a pro!
You can now use your fruit to play pretend. It is way better than the plastic fruits you can find in the market, it is budget-friendly and the kiddos will enjoy making this on their own while not knowing that they are actually learning! You can even decorate it in the kitchen and show it off to everyone who visits your house and let them know your talent! This craft will definitely be a piece of admiration by anyone who looks at it! If not made yet, try it now and add a unique addition to your origami collection!
Hope you liked the article and the description in it, if so, give it a like and share with your friends! Don’t forget to give your feedback in the comments sections to motivate us in keep bringing such crafts for you!
Follow us on Youtube for art and craft tutorials and much more.
More Articles from Kids Art & Craft
- Fun To Make Paper Chick Craft
- Paper Lollipop Craft – Learn to Make Origami Paper Candy with Step-By-Step Tutorial
- Easy Paper Toy Crafts Make At Home Video Tutorial for Kids
- Simple Paper Crafts Anyone Can Make Video Tutorials for All
- Make DIY Origami Paper Envelop Craft For Kids