Painting
Cute Penguin Hand Outline Painting Tutorial For Kids

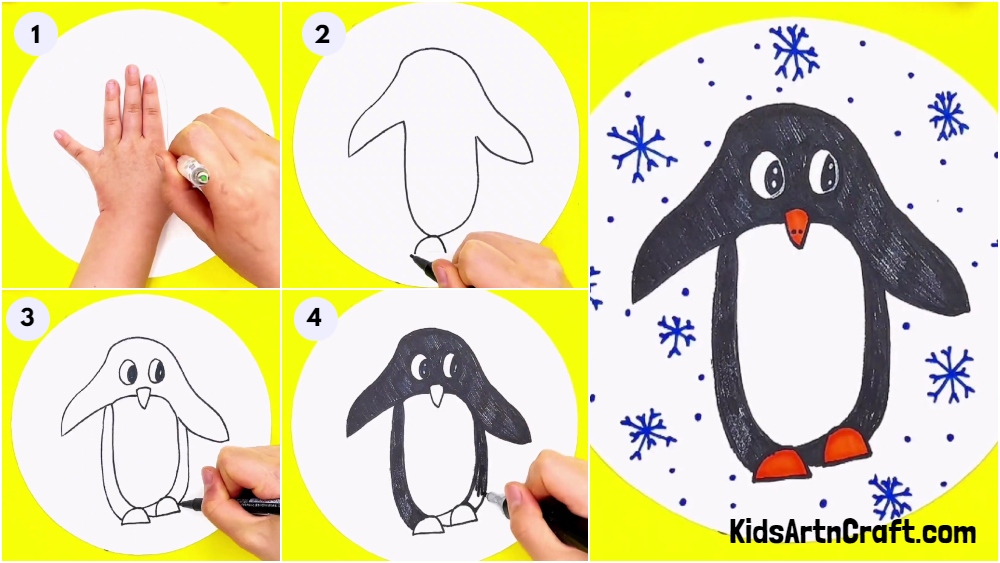
This tutorial will teach children how to make a lovely painting of a penguin! It provides step-by-step instructions and helpful advice, so kids can create their own special artwork.
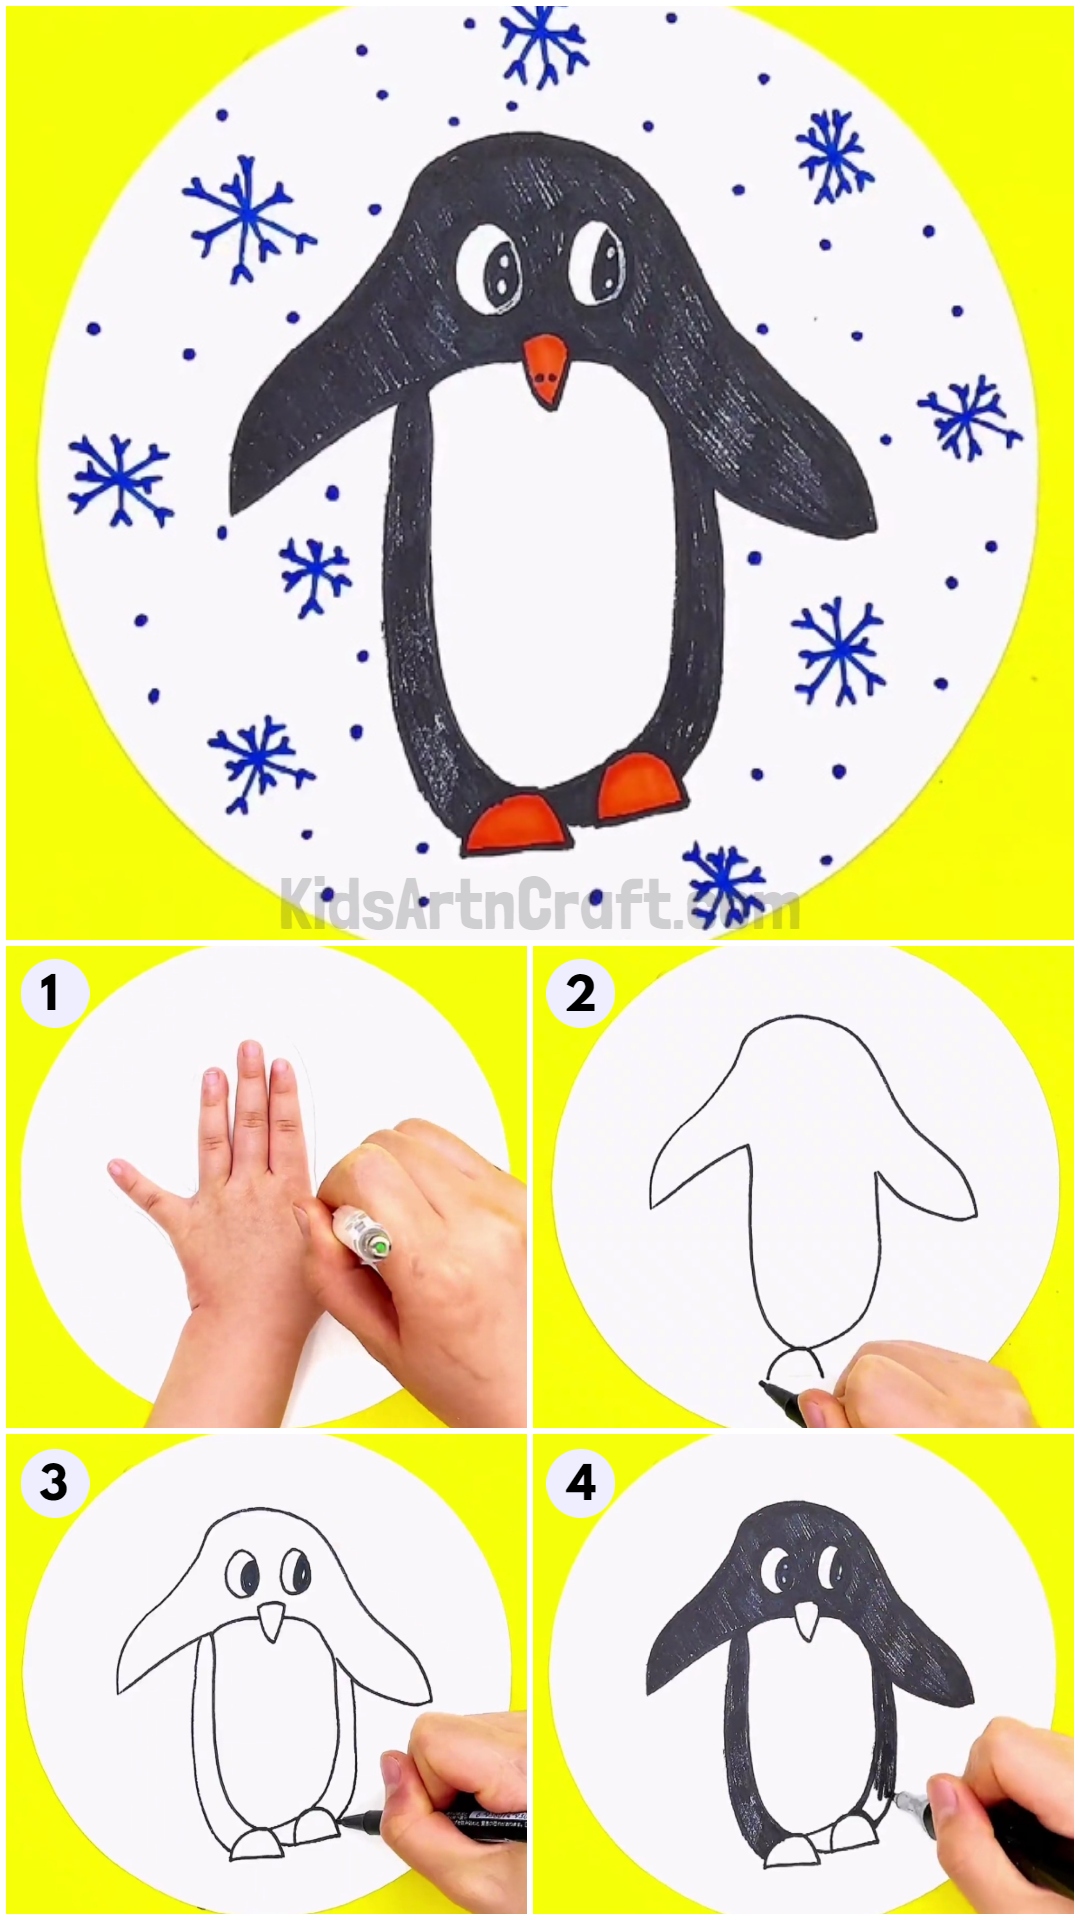
This penguin art will definitely leave you in awe! Do you know? Penguins are birds that cannot fly! Anyway, they are the cutest birds living in the coldest regions! Today, we brought you this adorable penguin drawing which can be made easily by outlining your palm, we will guide you to it! You will definitely love the results and show them off to your friends and family! You can also flaunt your drawing skills in front of everyone by making this artwork. The snowflakes around the penguin give the whole drawing a suitable look. You can even customize the snowflakes with different textures and use dual colors to make them look more pretty!
Simple Cute Penguin Hand Outline Painting
Read More: Handmade Rainbow Painted Rock Ideas
Materials Required
-
- White Circular Paper Sheet
- Colored Sketch Pens (Black, Orange, And Blue)
- Pencil
Procedure
Step 1: Placing The Palm Correctly
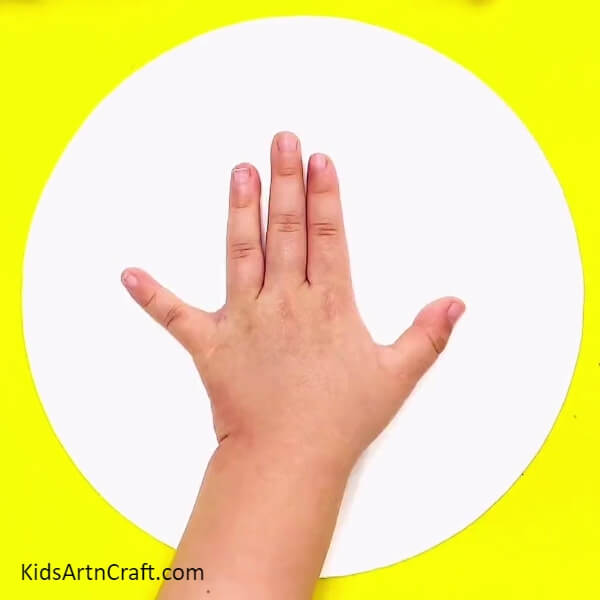
Let’s start this drawing by taking a white circular paper sheet and placing your palm over it in a way that your pinky finger and thumb are stretched away and the 3 fingers are close.
Step 2: Drawing A Penguin Shape
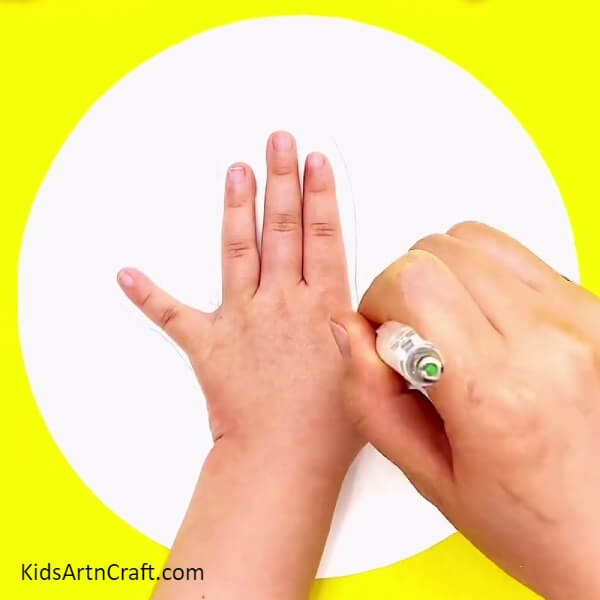
Using a pencil, roughly outline your palm to make a penguin shape. Make sure to draw a curved shape over the 3 middle fingers.
Step 3: Overdrawing Pencil With Sketch Pen
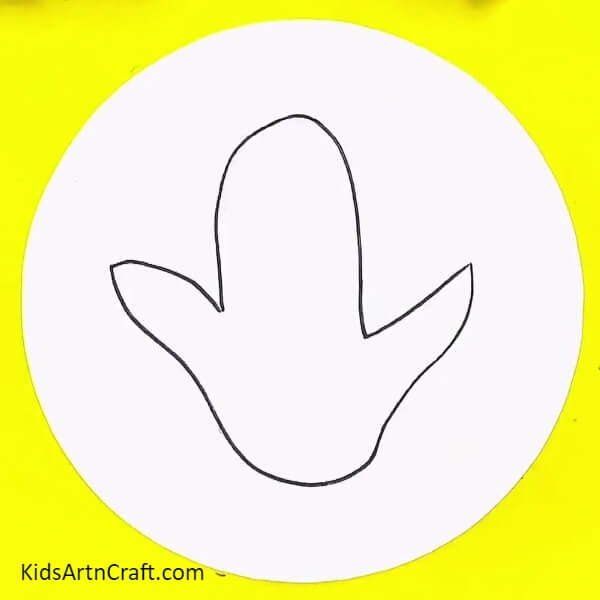
Using a black sketch pen, overdraw the pencil penguin figure, also, draw a curved line to attach both the ends of figure together.
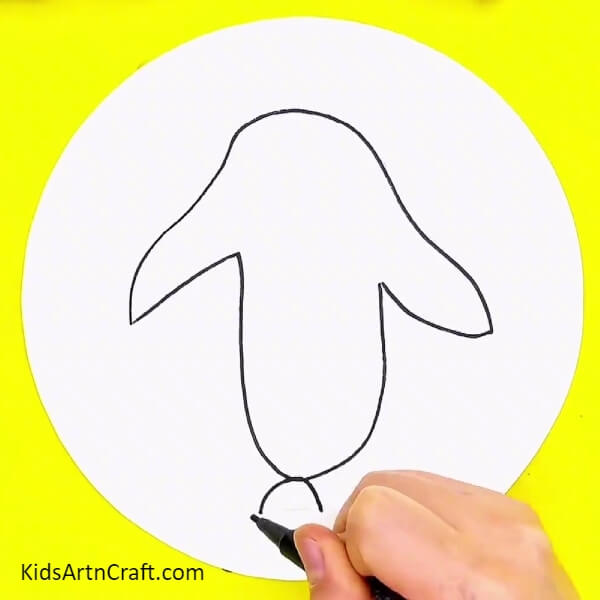
Step 4: Making Legs Of Penguin
Turn the drawing 180 degrees and at the end draw the semicircled legs of the penguin using the black sketch pen as shown.
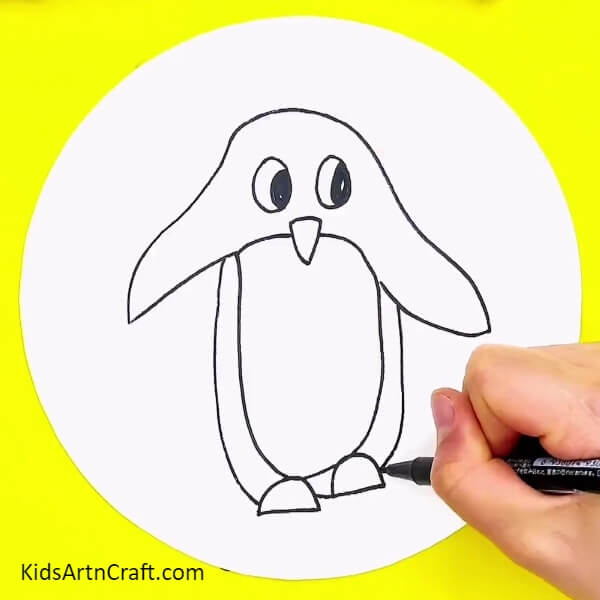
Step 5: Making All The Features Of Penguin
Using the black sketch pen, make all the features of the penguin as shown, the eyes, beak, and the detailing of the penguin.
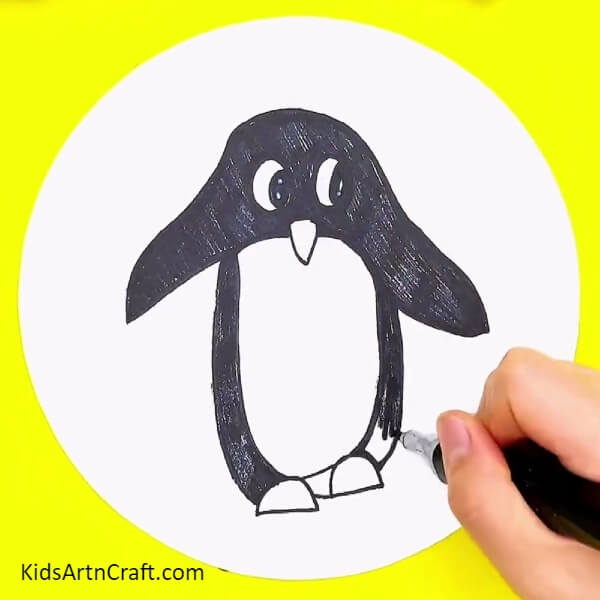
Step 6: Coloring The Body Of The Penguin
Color the outer part of the penguin using the black sketch pen covering the face and hands of the penguin too.
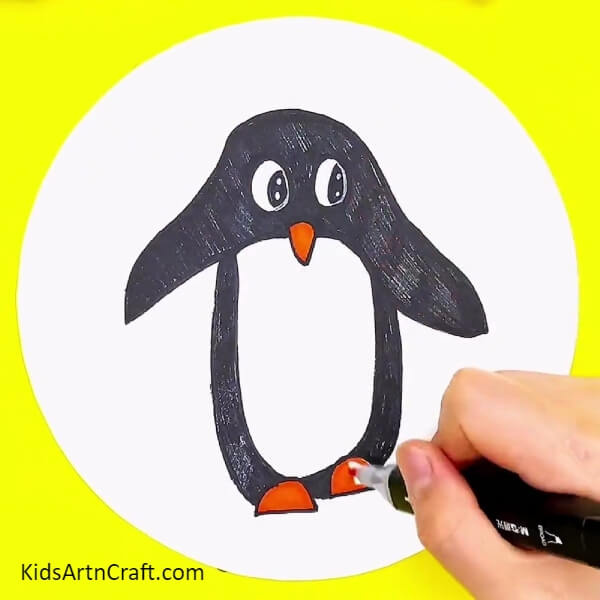
Step 7: Coloring The Beak And Legs Of The Penguin
using an orange sketch pen, color the beak and the legs of the penguin.
Step 8: Making Snowflakes
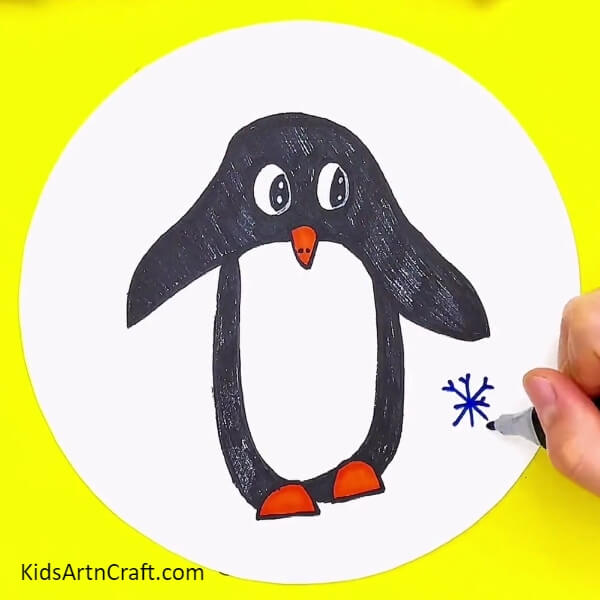
Using a blue sketch pen, draw the snowflakes around the penguin.
Congratulations! The Final Look Of Your Penguin Drawing
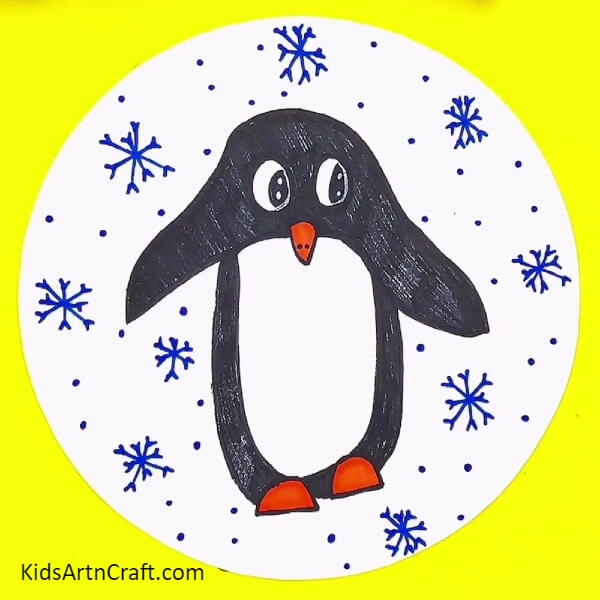
Congratulations! Your penguin art is ready to be displayed! Decorate it more by making random dots from the same sketch pen around the penguin.
The artwork looks just perfect as the penguin shape and color are just as the original ones, moreover, the snowflakes falling give the whole chilling polar region vibes! What are you waiting for? Create this artwork today and stun everyone with your amazing creation! You can also make a full family of penguins small to big to make your artwork more unique!
Follow us on Youtube for art and craft tutorials and much more.
More Articles from Kids Art & Craft
- Flower & Honey Bee Painting Tutorial with Foam Net for Competitions 2023
- Silhouette Landscape Paintings
- Silhouette face paintings
- How to Make Handmade Straw Fan Tutorial for Kids
- Easy Paper Snail Craft tutorial For Kids


