


Paper Crafts
Cute Tigers Paper Craft Step by Step Tutorial

This easy step-by-step tutorial will be a fun guide for you to convert ferocious tigers into adorable ones with our imagination and crafting skills!
Tigers are one of the most ferocious and dangerous-looking animals found on earth, but what if they turned out cute?! Ever imagined, a dangerous carnivorous animal is cute looking? Well, if not then we will show you to make it today! Yes, today we brought you this cute and adorable tiger paper craft that combines 3 adorable tigers that will leave you in awe! All you will need is some basic crafting materials to make this craft and will be able to complete it in no time with our easy step-by-step instructions tutorial! Unleash your creativity and imagination with this tiger craft journey with us!
DIY Cute Tigers Paper Craft
Read More: Simple Paper Crab Craft – Step-By-Step Tutorial
Materials Required
- Colored Paper Sheets (Blue And Orange)
- Black Sketch Pen
- Scissors
- Glue
- Colored Clay (White, Orange, And Yellow)
Procedure
Step 1: Pasting A Tiger’s Body
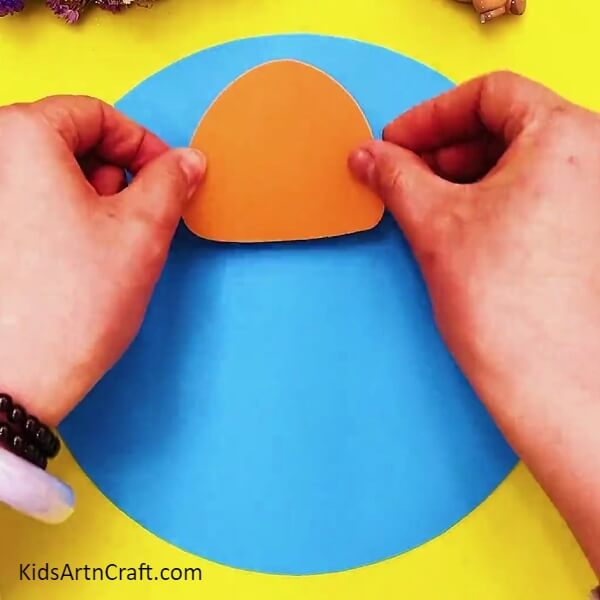
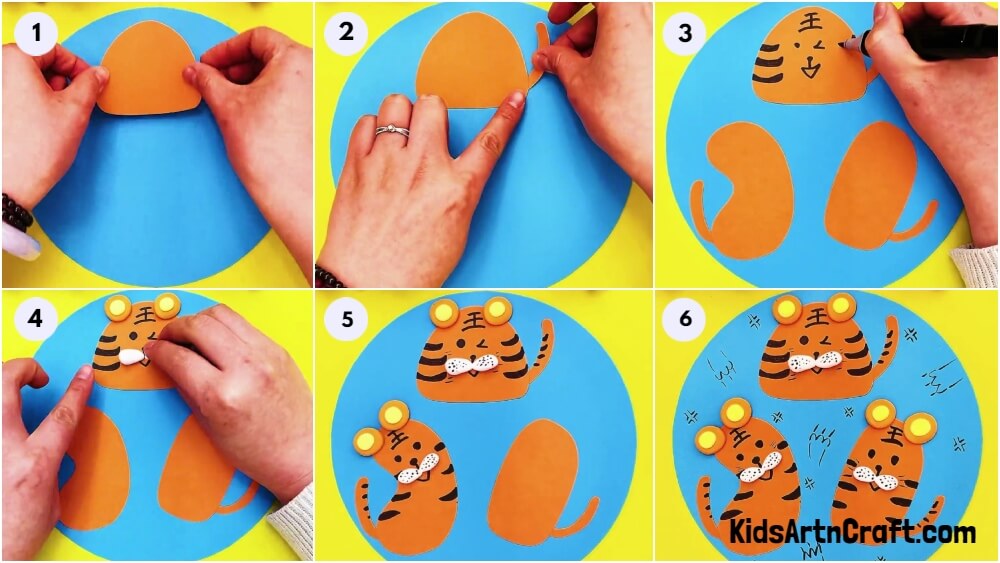
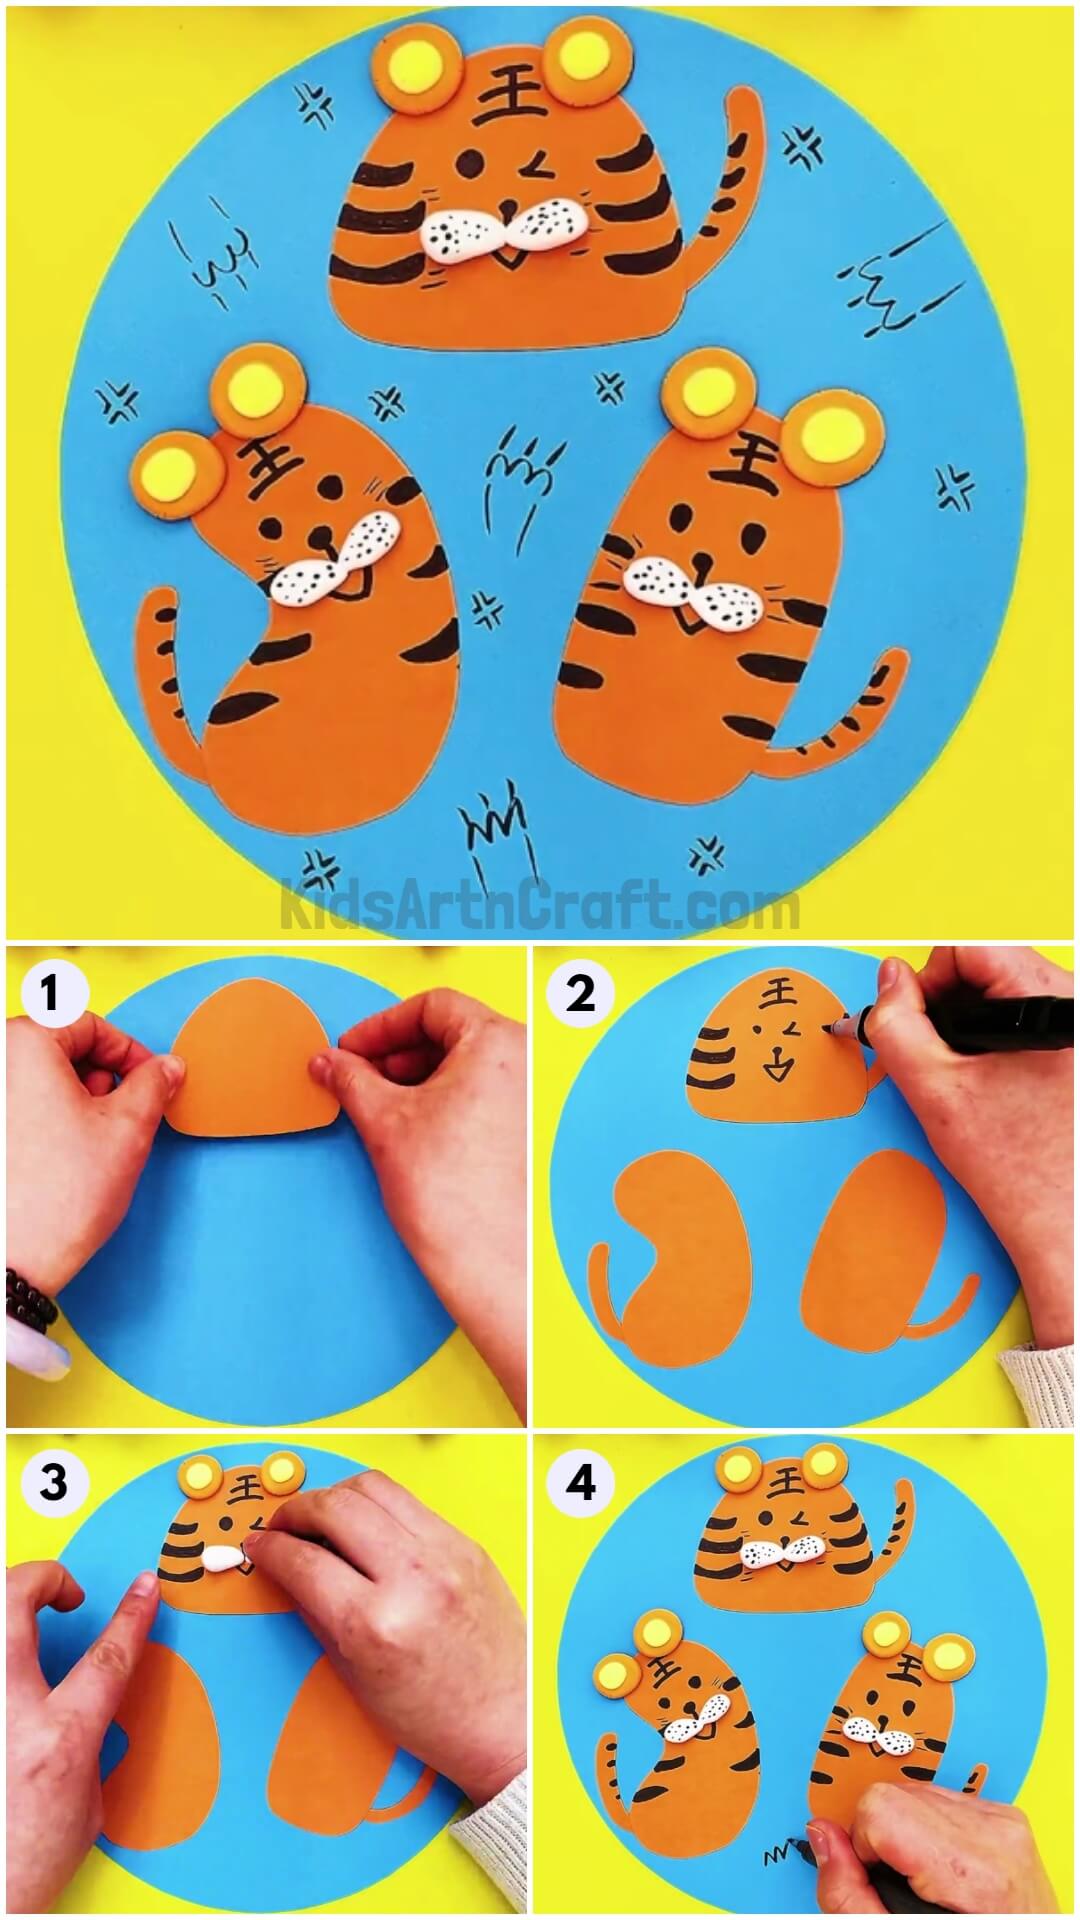
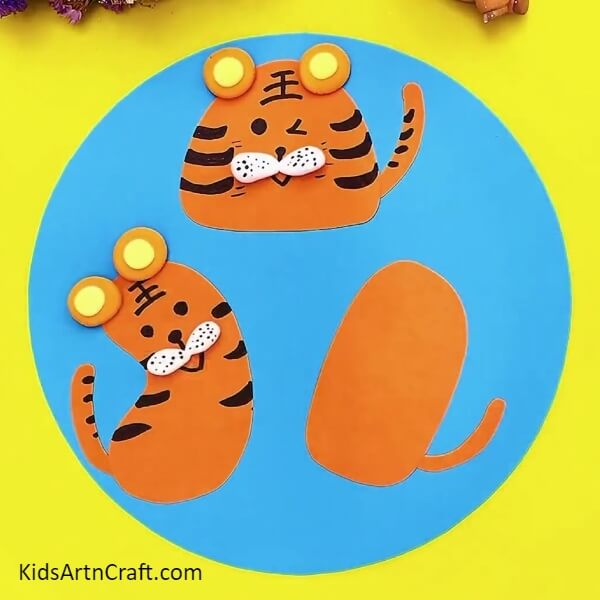
For the first step, take a blue-colored and orange-colored paper sheet, using scissors, cut down the blue-colored paper into a circle for the base, and cut out a tiger’s body as shown in the image from the orange-colored sheet. Paste the tiger’s body on the mid-top of the blue base using glue.
Step 2: Adding A Tail
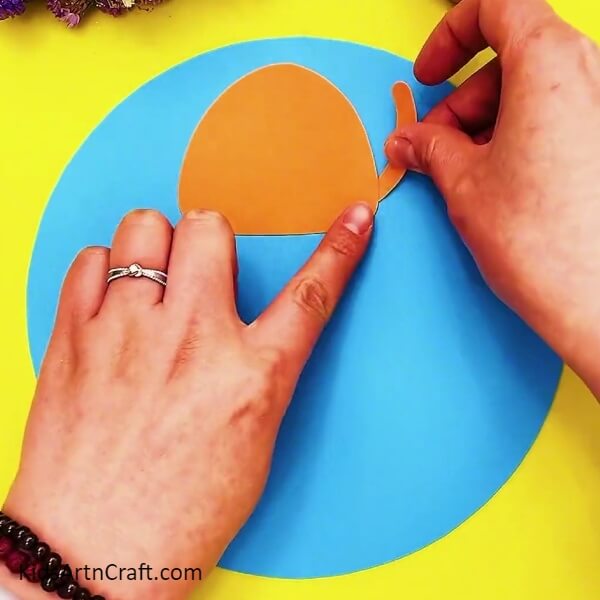
Using scissors, cut out a thin curved tail from the orange sheet and paste it to the right side of the tiger’s body using glue.
Step 3: Drawing Face And Features Over The Body
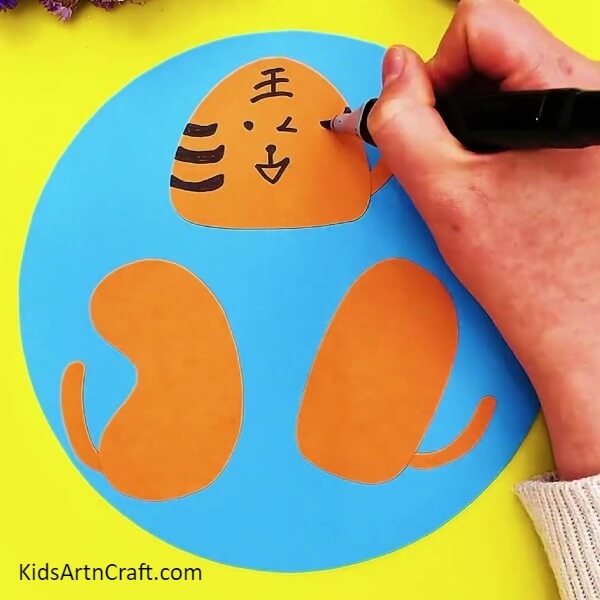
Using the black sketch pen, draw the facial features and tiger stripes on the sides and over tail, as shown in the image. Also, cut out and paste 2 more tiger bodies and tails from the orange sheet as shown in the image.
Step 4: Making Ears
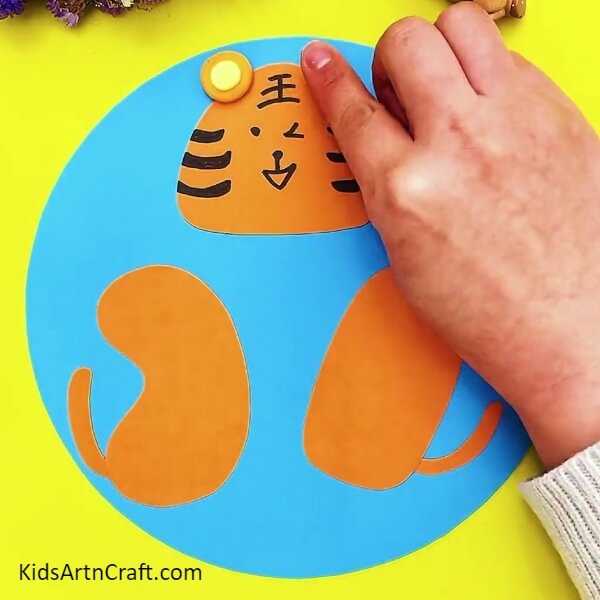
Dough orange clay into small balls and dough yellow clay into further small balls. Place the yellow ones over the orange and press them over the head of the tiger to make flatten them and make them stick to the paper. This will be the ears of the tiger.
Step 5: Making Mouth Of The Tiger
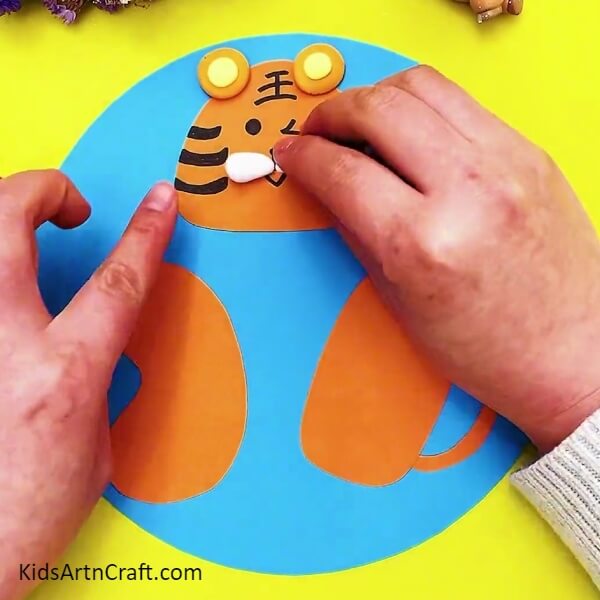
Dough white clay into 2 oval shapes, place and press them side-by-side below the nose to make the mouth of the tiger.
Step 6: Drawing Whiskers Of The Tiger
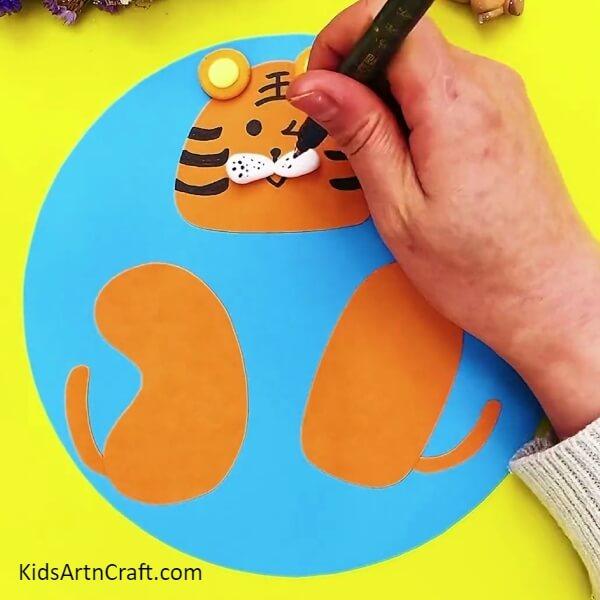
Use the black sketch pen and make random dots over the clay ovals to make the whiskers of the tiger.
Step 7: Making The Other Tigers
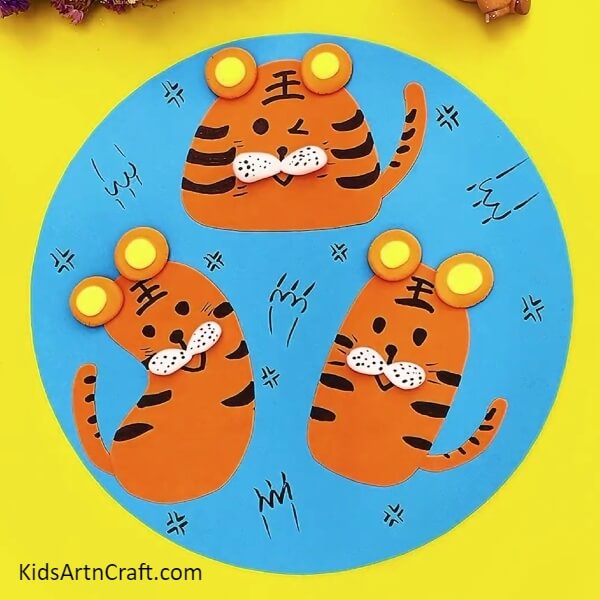
Follow the same above steps to make the other tigers. Make sure to give different facial expressions to them as shown in the image.
Step 8: Drawing Paws And Cross Designs On The Base

Using the black sketch pen, make the paws and cross designs randomly all over the blue base.
Finally, Your Tiger Paper Craft Is Completed!
Stun everyone with your amazing creation! Let them admire your creativity and innovation skills through this craft-making! These adorable tigers can now be the piece to display over the wall of your room! This tiger craft can also be used to teach your kiddos about tigers! This craft-making is a fun learning activity in the boring afternoon hours! You can make this c aft with your kiddos to spend quality time together in a productive activity!
Some More Tiger Craft Tutorial
Create a Tiger Using a Paper Cup for Kids
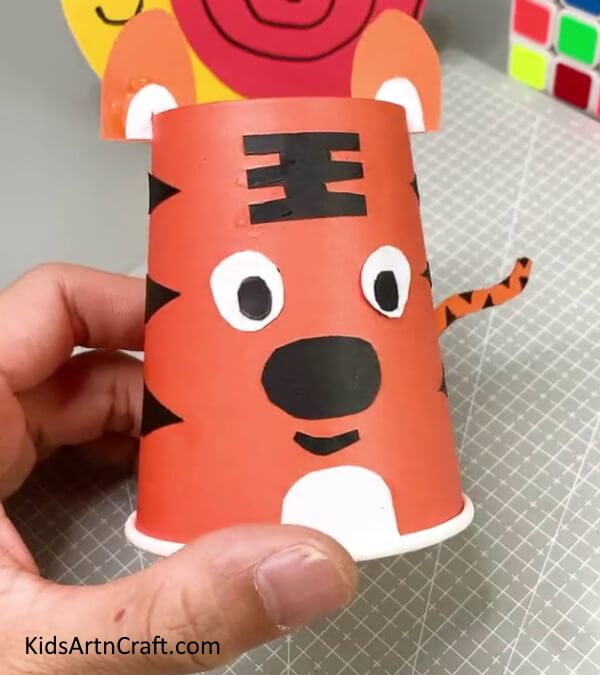
Image Source/Tutorial: Kids Art & Craft
This fun craft project for kids teaches them how to make a tiger out of a paper cup. They will need to draw and cut out the tiger’s facial features, glue them onto the cup, and then color it in. Kids will have a blast creating their own tiger with this craft activity
Follow us on Youtube for art and craft tutorials and much more.
More Articles from Kids Art & Craft
- Learn To Make Easy Heart Shaped Paper Mouse Craft
- How To Make Cute Paper Fish Craft Tutorial
- Handprint Paper Rocket Craft for Kids
- How to Make Easy Paper Snowflakes Tutorial
- Paper Strip Rainbows Cloud Craft Easy Tutorial


