Drawing
Ants Taking Watermelon Creative Painting Tutorial For Beginners

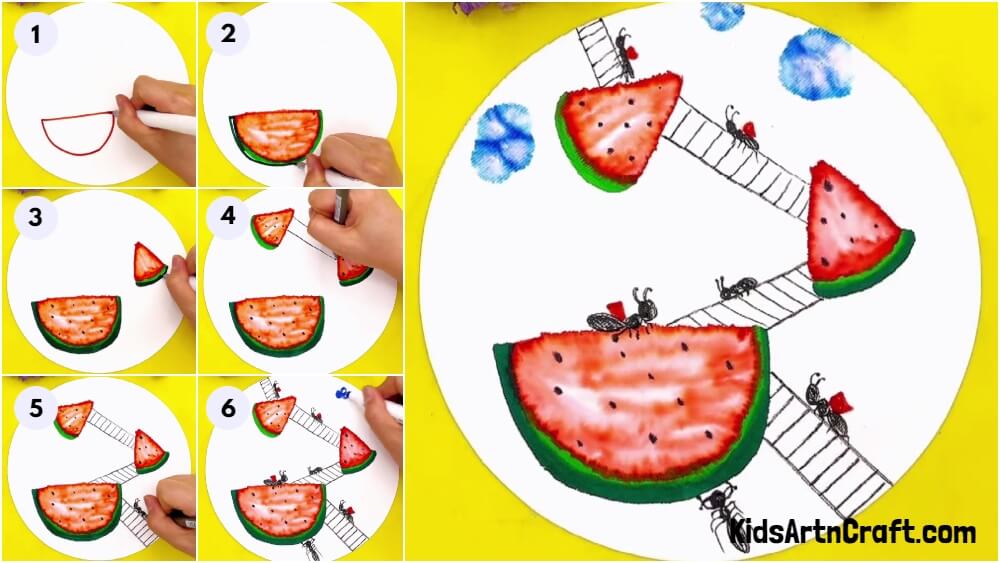
Learn how to paint an imaginative watermelon scene featuring ants with these simple, creative painting ideas for beginners. Follow along for step-by-step instructions.
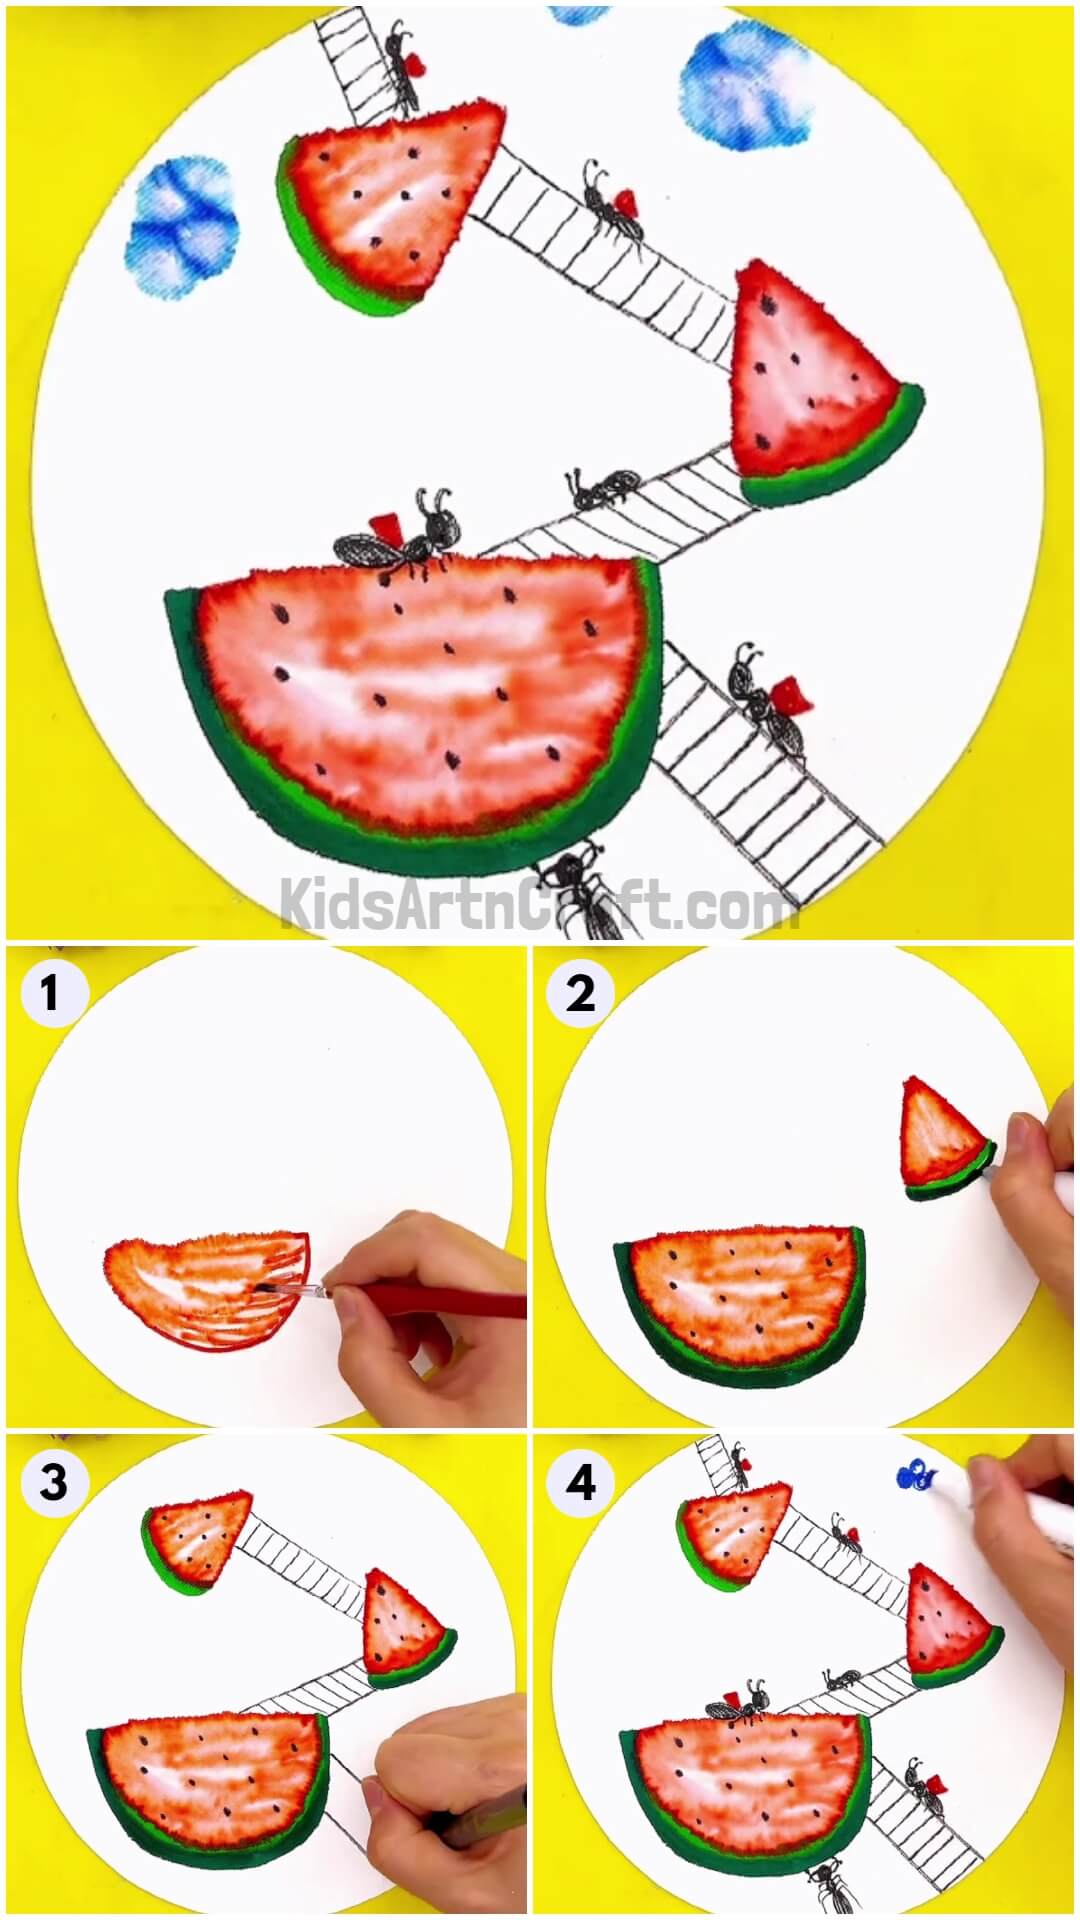
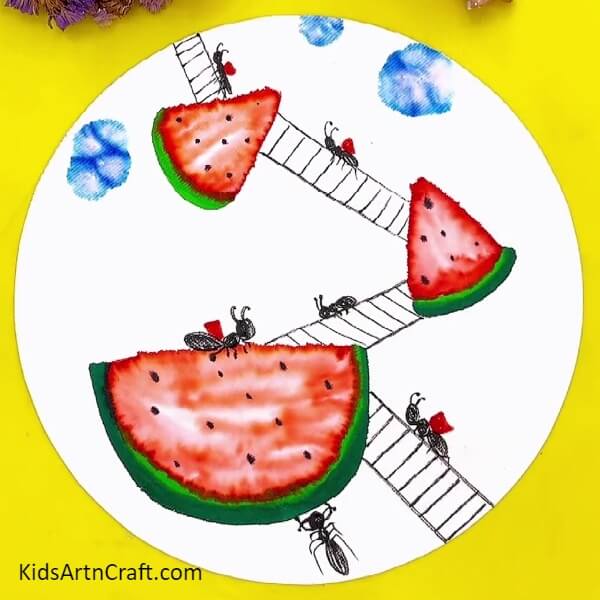
Today, we will be making art depicting ants and watermelons. Ants carrying watermelon bits to their colonies with greaThis art will use sketch pens as paints to make it look more realistic and unique. With some sheets of paper and highly pigmented sketch pens, you can make this painting. It’s very simple and fun to make and will take hardly fifteen minutes to complete. So, collect all the material required to make it, and let’s get started.
Ants Taking Watermelon Drawing Idea
Read More: How To Make Ostrich Easy Tutorial For Kids
Materials Required
- A white sheet of chart paper
- Sketch pens
- Paint brush
- Water
- A pair of scissors
Procedure
Step 1: Making A Drawing On A Sheet Of Paper
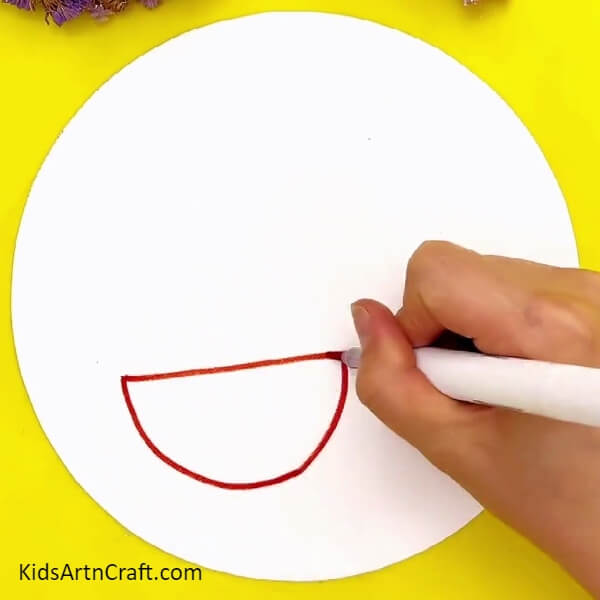
Take a white sheet of chart paper and cut a big circle out of it. Place the circle sheet on the table. Now, take a red sketch pen and draw a semi-circle at the bottom left side of the sheet as shown in the picture below. Draw some lines across the insides of this semi-circle as well.
Step 2: Working With The Paint Brush
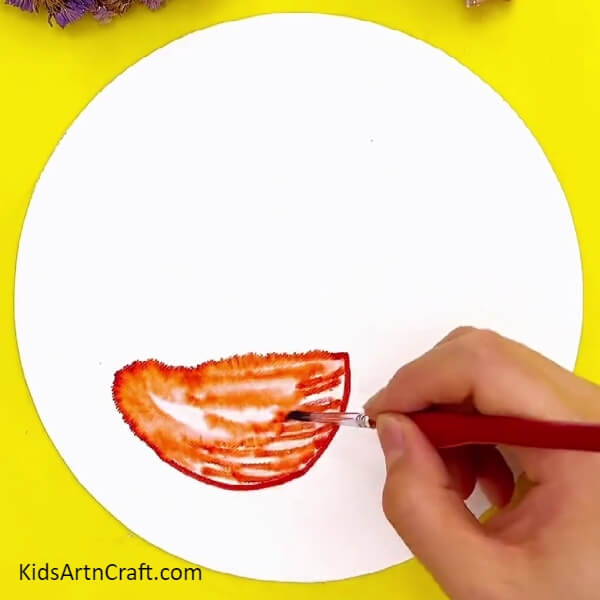
Take a paintbrush and dip it in some water. Take this wet brush and start stroking on the lines drawn inside the semi-circle you just made. They will start losing color instantly. Drag this color around and cover the entire semi-circle with it. See the picture below for reference.
Step 3: Using Green And Black Sketch Pens
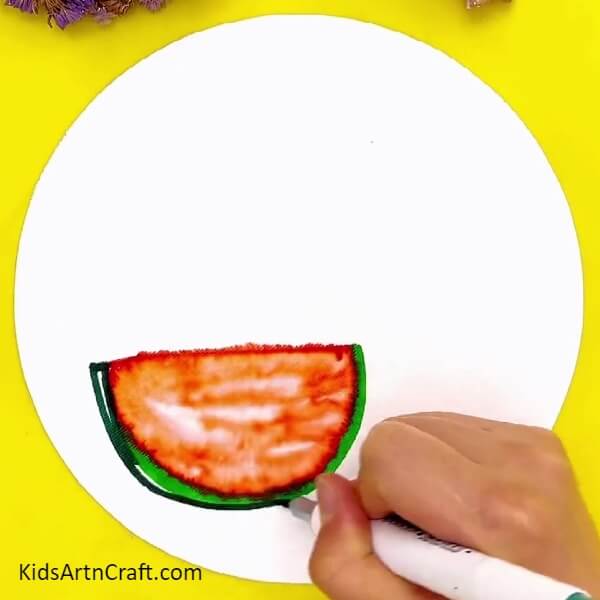
Take a green sketch pen and make a thick outline around the circumference of the semi-circle. Do not outline the flat surface of the semi-circle. Finally, take a black sketch pen and outline this green thick line. See the picture below for reference. Carefully, use some wet brush strokes on it as well.
Step 4: Making Seeds On The Watermelon
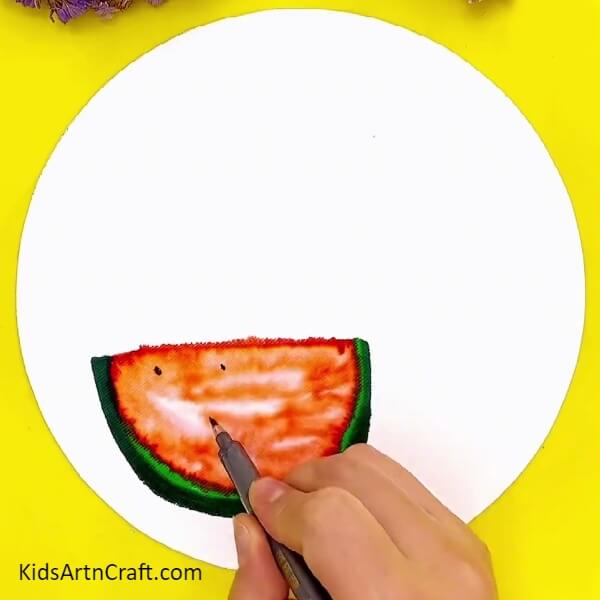
Take the same black sketch pen and make some dots on the red surface of the watermelon you just made. This completes our first watermelon with its flesh, shell, and seeds.
Step 5: Making A Smaller Watermelon Piece
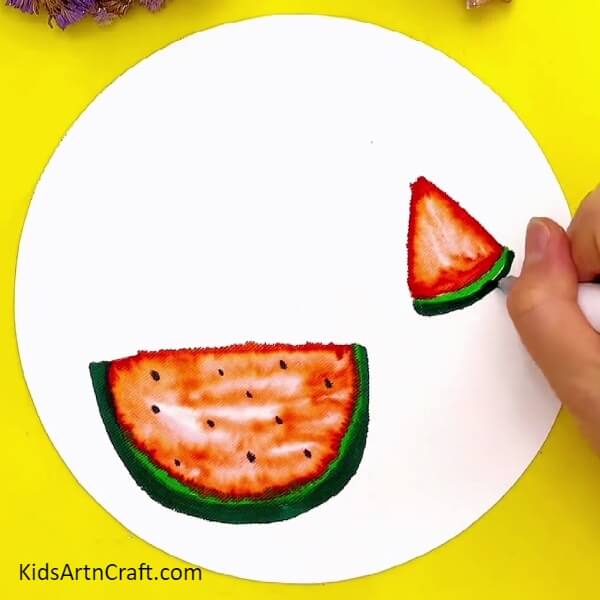
Take a red sketch pen and draw a triangle on the right side of the sheet. Draw some lines inside this triangle. Make a thick outline around the bottom of this triangle with a green sketch pen. Now, outline this green line with a black sketch pen. Finally, stroke the triangle with a wet brush to scatter the color. See the picture below for reference.
Step 6: Drawing One More Watermelon Piece
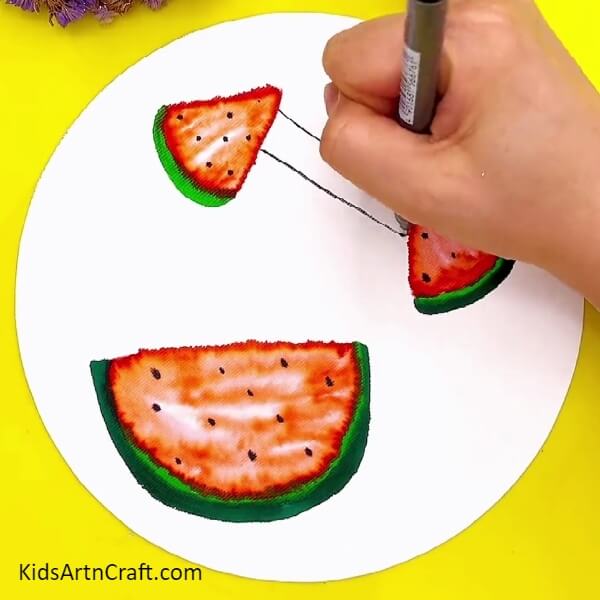
Draw one more such triangular watermelon piece on the top left side of the sheet as shown in the picture below. Don’t forget to add some dots inside both triangles. These dots will serve as the seeds of the watermelon. Finally, connect the two triangular pieces by drawing two parallel lines between them as shown in the picture below.
Step 7: Making Ladders Between The Watermelon Pieces
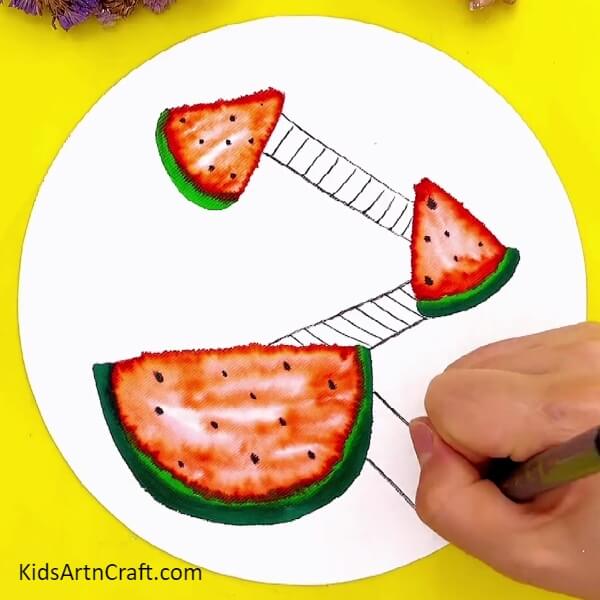
Draw horizontal lines between these parallel lines you just drew. This shall act as the ladder between the pieces which will assist the ants in reaching the watermelon. Draw another such ladder between the bigger watermelon piece and the piece in the middle. Finally, draw the last ladder between the big watermelon and the circumference of the sheet on the right side. See the picture below for reference.
Step 8: Drawing The First Ant
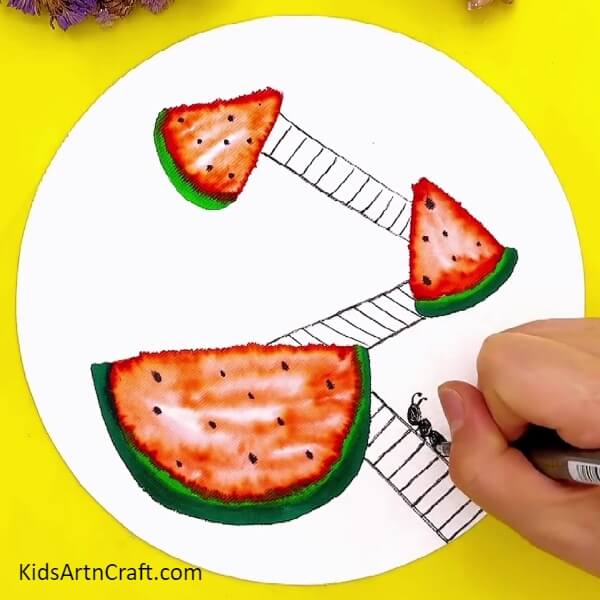
Using a light sketch pen, draw an ant standing on the ladder at the bottom as shown in the picture below. To do that, draw two connected prominent dots with an oval dot at their back. Draw some legs and a set of antennas on the front dot.
Step 9: Drawing More Ants
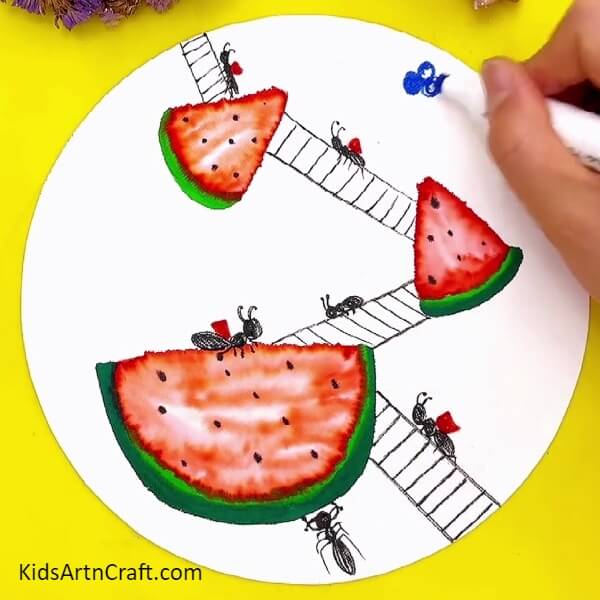
Repeat the process and draw four more ants, one on each ladder and two on the big watermelon, one on the top of it and the other at the bottom. Now, draw a ladder connecting the watermelon piece at the top with the circumference of the sheet. Draw an ant on this ladder as well. Finally, draw red chunks of watermelon on the back of all these ants except the ant at the bottom of the big watermelon piece. See the picture below for reference.
Step 10: Painting The Sky
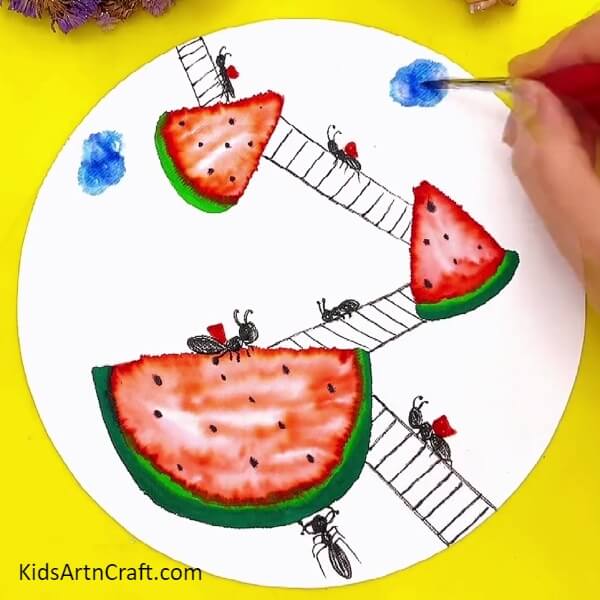
Take a blue sketch pen and make a circle at the top left and the top right sides of the sheet. Holding a wet brush stroke the blue circles to scatter the paint. This will serve as our clear blue sky.
Finally, Making The Final Blue Circle
Make the last circle at the top right circumference of the sheet and dab it with the wet brush to release the color as shown in the picture below.
This completes the process of making this painting and we are left with the picture of ants working hard to collect food and transport it to their destination. You learned unique painting skills today which taught you to work without paints and is less clumsy overall. You also learned great sketching skills. You can hang it on the walls of your room or paste it into your art book. Keep practicing these techniques and keep inventing new ideas to use them. Good luck.
Follow us on Youtube for art and craft tutorials and much more.
More Articles from Kids Art & Craft
- Beautiful Tree Painting Using Leaf Impression Step-by-step Tutorial For Kids
- Easy Drawing Video Tutorial for Kids
- Watermelon Crafts For Kids Easy Tutorial
- Easy Drawing Tricks Learn At Home Video Tutorial for Kids
- Clay watermelon ice cream easy craft tutorial


