


Children's Day
Cute Bunny Landscape Paper Craft Step-by-step Tutorial

Create a beautiful paper craft landscape featuring a cute bunny! This step-by-step tutorial will help you make your own unique paper craft scene with easy-to-follow instructions. Get creative and have fun!
Bunnies are cute little animals that are adored by everyone, be it a kid or an adult. Everyone loves bunnies. The way they hop and nibble and their food, says a lot about their cuteness. So, today we are going to make an animal that is adored by everyone. Let’s get started!
To make your own adorable bunnies, grab all these materials and follow the given steps.
DIY Bunny Landscape Paper Craft For Kids
Read More: How to Make a Paper Bunny Easy Tutorial for Kids
Materials Required
- Craft paper (Blue, Green, White, Yellow)
- Marker/sketch pen (White, Pink, Black, Dark Blue, Brown, Yellow, Orange)
- Scissors
- Glue
Procedure
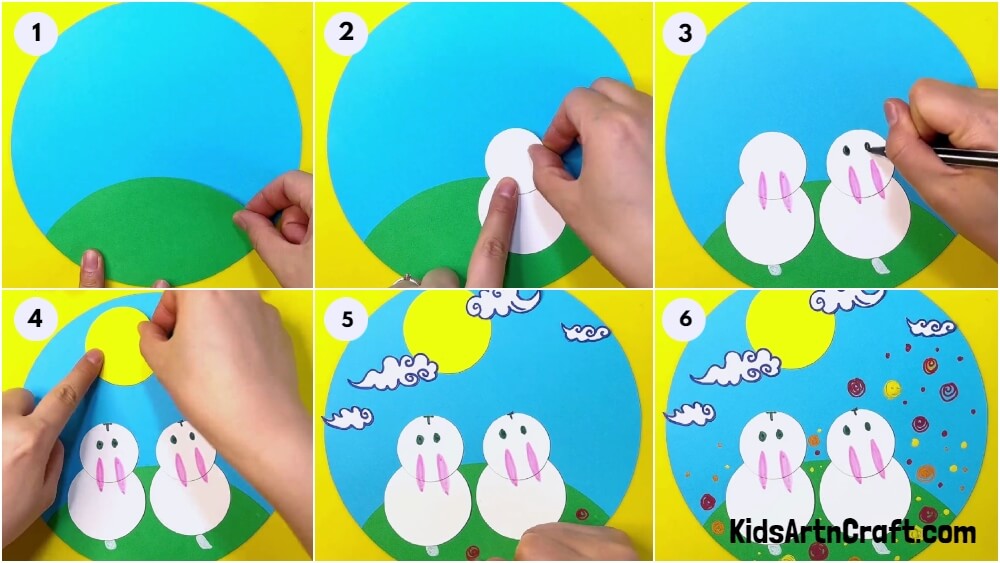
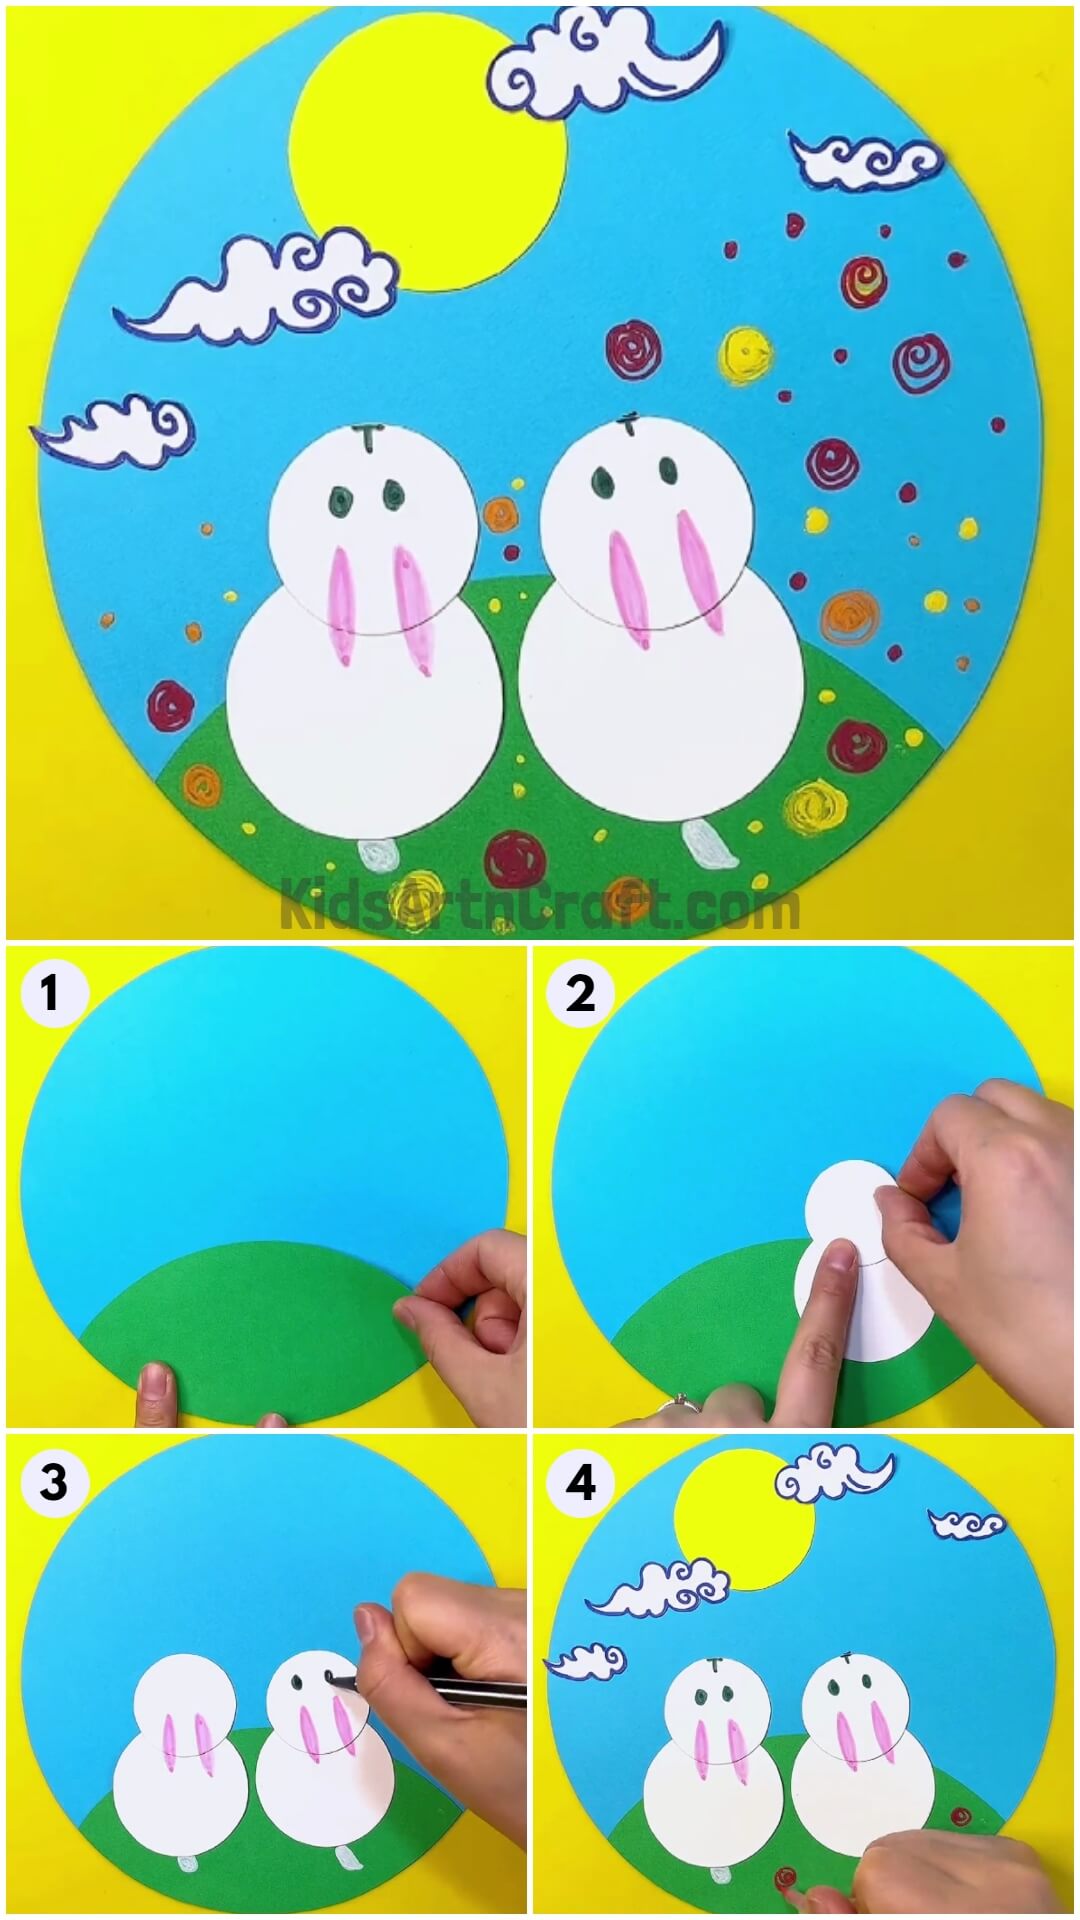
Step 1: Sticking Green Craft Paper On Blue Craft Paper With Glue
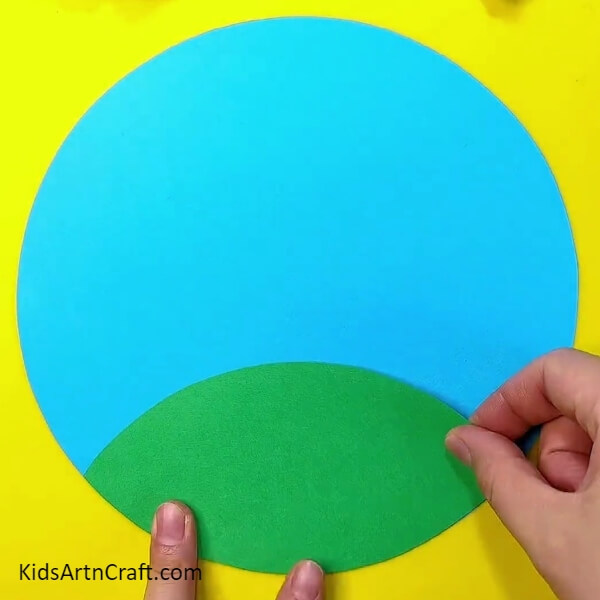
Your first step is to take a blue coloured craft paper. The blue-coloured craft paper should be circular in shape.
Then, take a green coloured craft paper. Make a broad leaf-type shape with the help of green coloured craft paper. After making a broad leaf-type shape, stick it on the blue coloured craft paper with the help of glue. Remember to stick the green coloured craft paper on the very bottom of the blue coloured craft paper as it should touch the circumference of the blue coloured circle.
Step 2: Sticking White Craft Paper With Glue
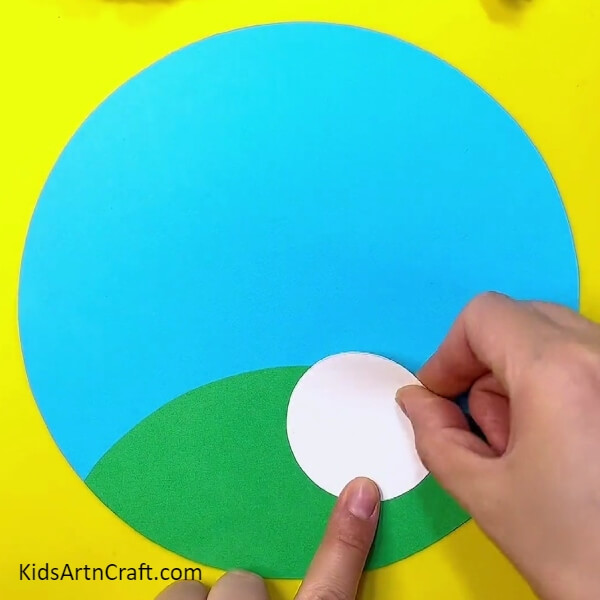
Now, take a piece of white coloured craft paper. Make the white coloured craft paper into a circle with the help of scissors. Then, with the help of glue, stick the white coloured circle in between the green coloured craft paper and blue coloured craft paper as shown. Stick the white coloured circle on the right side.
Step 3: Making Another Circle With Scissors
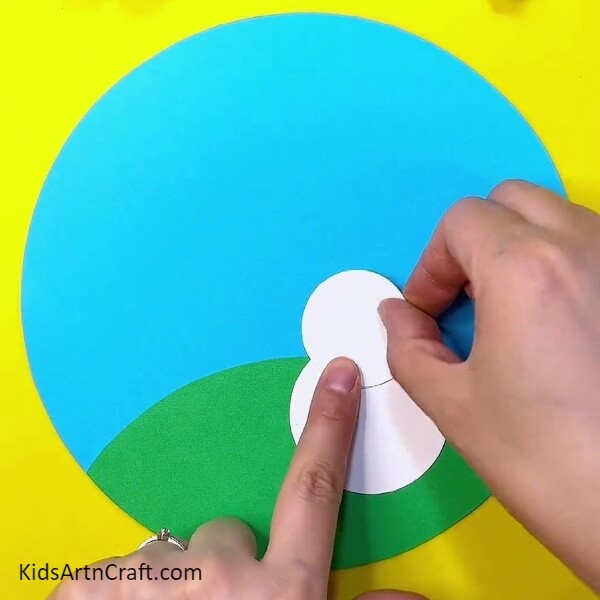
With the help of white coloured craft paper, make another circle but this time make the size of the white coloured circle a little smaller compared to the previous size. After making a white coloured circle, stick it with the help of glue by overlapping it on the previous white coloured circle which you have stuck between the blue and green coloured craft paper.
Step 4: Making Similar Circles On The Left Side With White Craft Paper
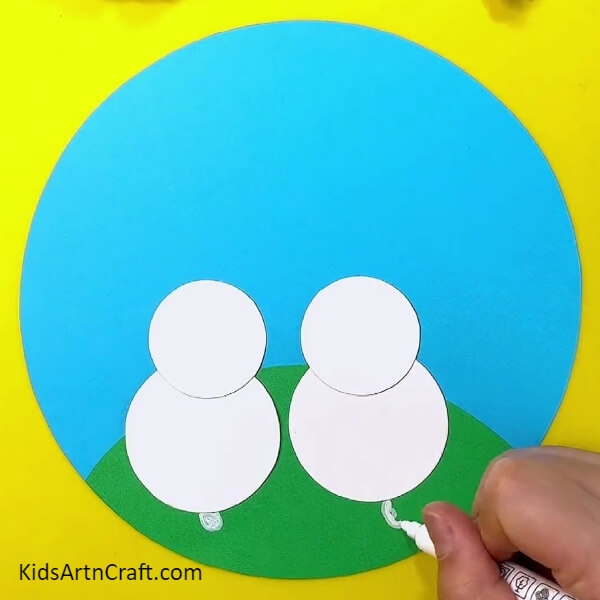
By repeating the above step, make another two white coloured circles same as on the right side which you have stuck. After making two white coloured circles, stick them on the right side, same position as the right side.
Then, with the help of a white marker/sketch pen make a very small semicircle on both the bottom of the big white coloured circle which you had stuck previously as shown in the picture.
Step 5: Making A Thin Oval With A Pink Marker/sketch Pen
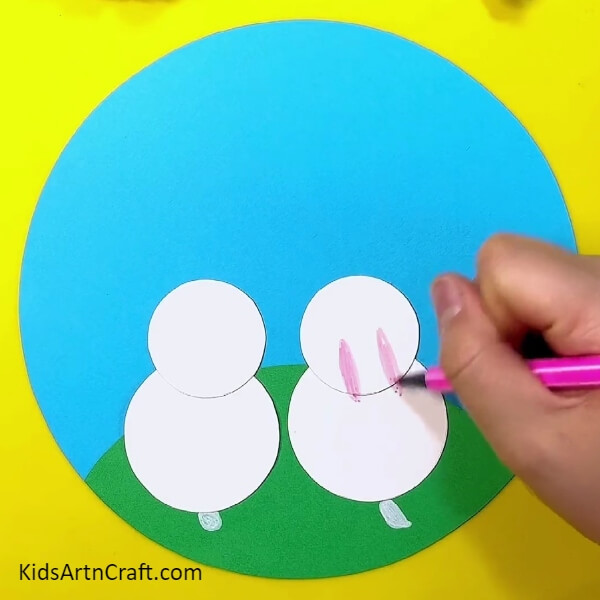
Now, with the help of a pink marker/sketch pen, make thin white ovals from the middle of the small white coloured circle which you had stuck previously on the big white coloured circle. On each white-coloured circle, make two thin ovals with the help of a pink marker/sketch pen. So, you have to make a total of four
Step 6: Making Black Dots With A Black Marker/sketch Pen
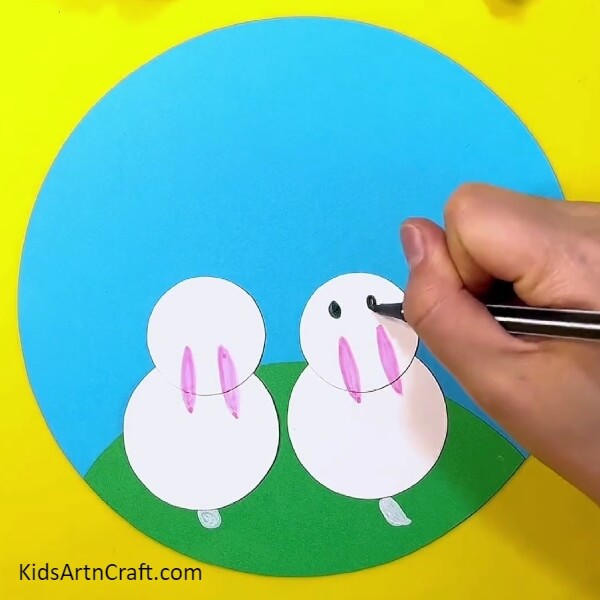
Now, with the help of a black marker/sketch pen make black dots on both the white-coloured small circle which you have stuck. Remember you have to make two black dots for each white coloured circle. So, in total, you have to make four black dots on a white coloured circle.
Step 7: Making A Letter ‘t’ With Black Marker/sketch Pen
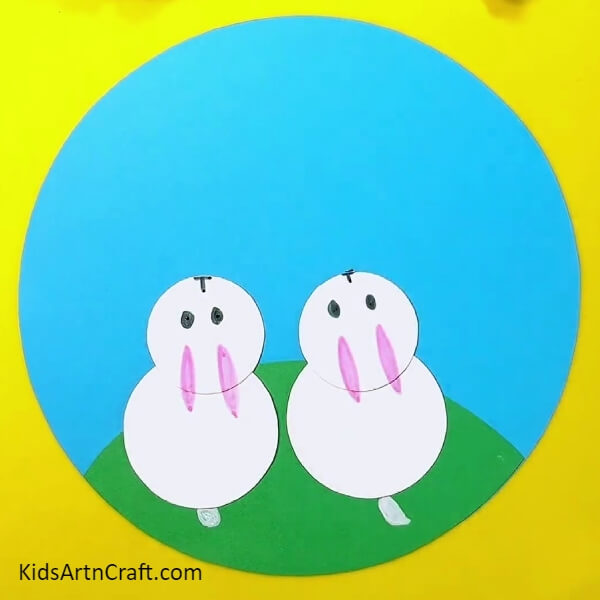
Now with the help of a black marker/sketch pen, make a letter ‘T’ on both the circumference of the small white coloured circle as shown.
Step 8: Making A Circle With Yellow Craft Paper
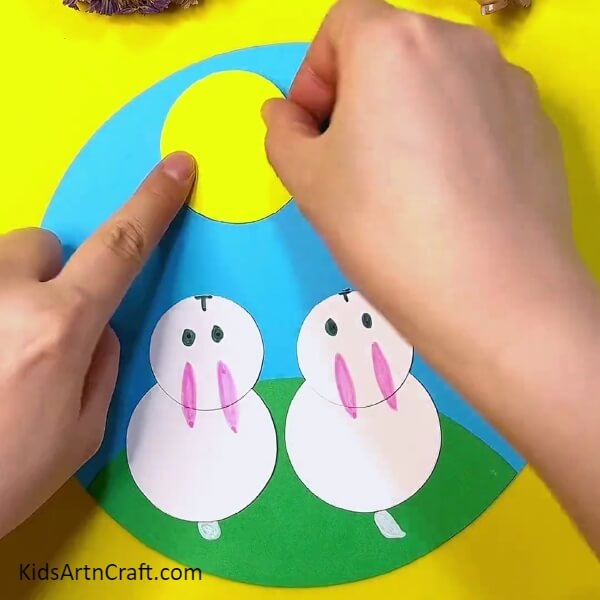
Take a yellow coloured craft paper. Make it into a circle with the help of scissors. After making the yellow coloured craft paper into a circle, stick it with the help of glue on the top left corner of the blue coloured craft paper.
Step 9: Making Clouds With White Craft Paper
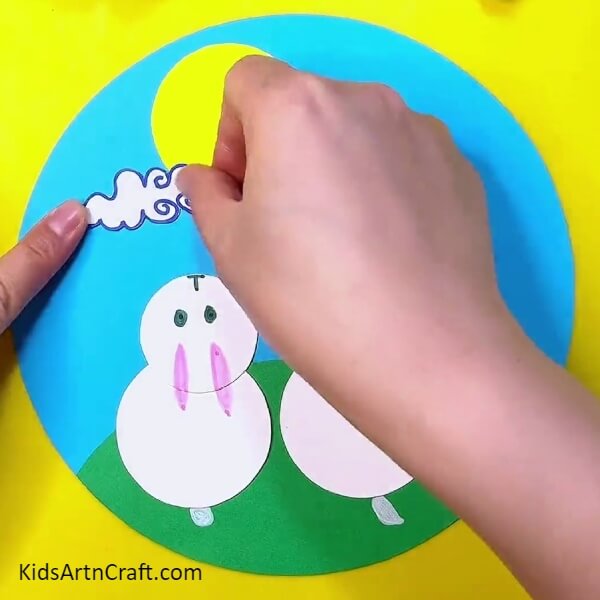
Now, with the help of white coloured craft paper, make a cloud shape.
After making a cloud shape with the help of white coloured craft paper, take a dark blue marker/sketch pen and trace the outline of the white coloured clouds with a dark blue marker/sketch pen.
Then, with the help of glue, stick the cloud shape all around the blue-coloured craft paper. You have to make more clouds to stick all over the blue-coloured craft paper.
Step 10: Making Spirals With Different Markers/sketch Pen
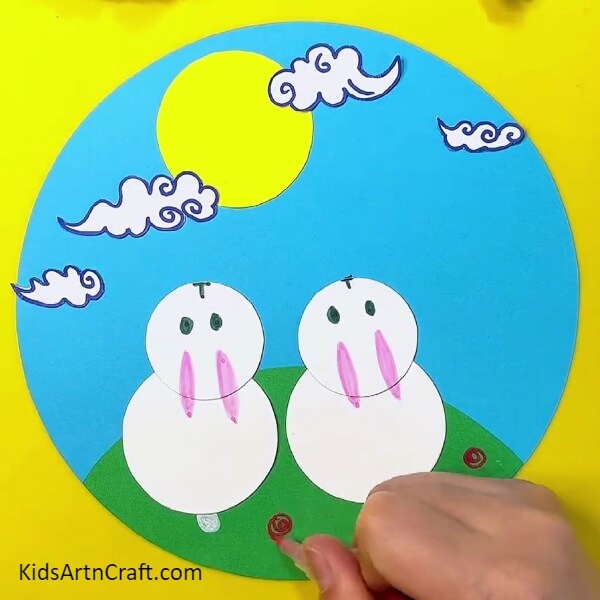
Take red, orange and yellow marker/sketch pen and start making spirals all over the green and blue coloured craft paper. After making spirals you also have to make dots with the help of red, orange and yellow marker/sketch pen, all over the blue and green coloured craft paper.
Your Craft is Ready!!
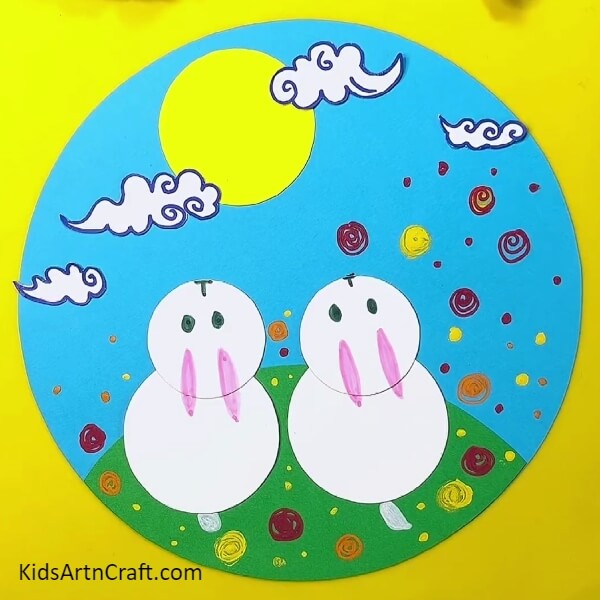
Finally, your animal that you adore so much is ready to play with you in their bunny land. This craft is actually looking so cute. Even you can try this easy and simple craft. This craftwork literally requires no hard work and it is even inexpensive to make. So, it is a win-win situation. From this craft, kids can learn more about shapes and colours in a fun way.
So, what are you waiting for, go and make this simple and easy craft now and have fun in the bunny landscape with your bunny buddies.
Follow us on Youtube for art and craft tutorials and much more.
More Articles from Kids Art & Craft
- Learn To Make Easy Heart Shaped Paper Mouse Craft
- DIY Bird Nest Paper Craft For Kids
- Easy Paper & Popsicle Cloud Rainbow Craft For Kids
- Learn To Make Paper Rabbit Craft For Kids
- How to Make Easy Paper Snowflakes Tutorial