Clay Crafts
Clay Flower Landscape Scenery Artwork Tutorial For Kids

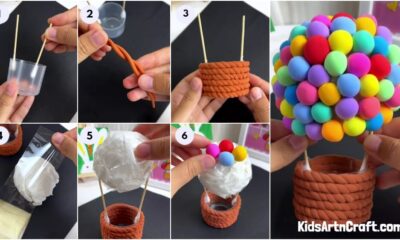
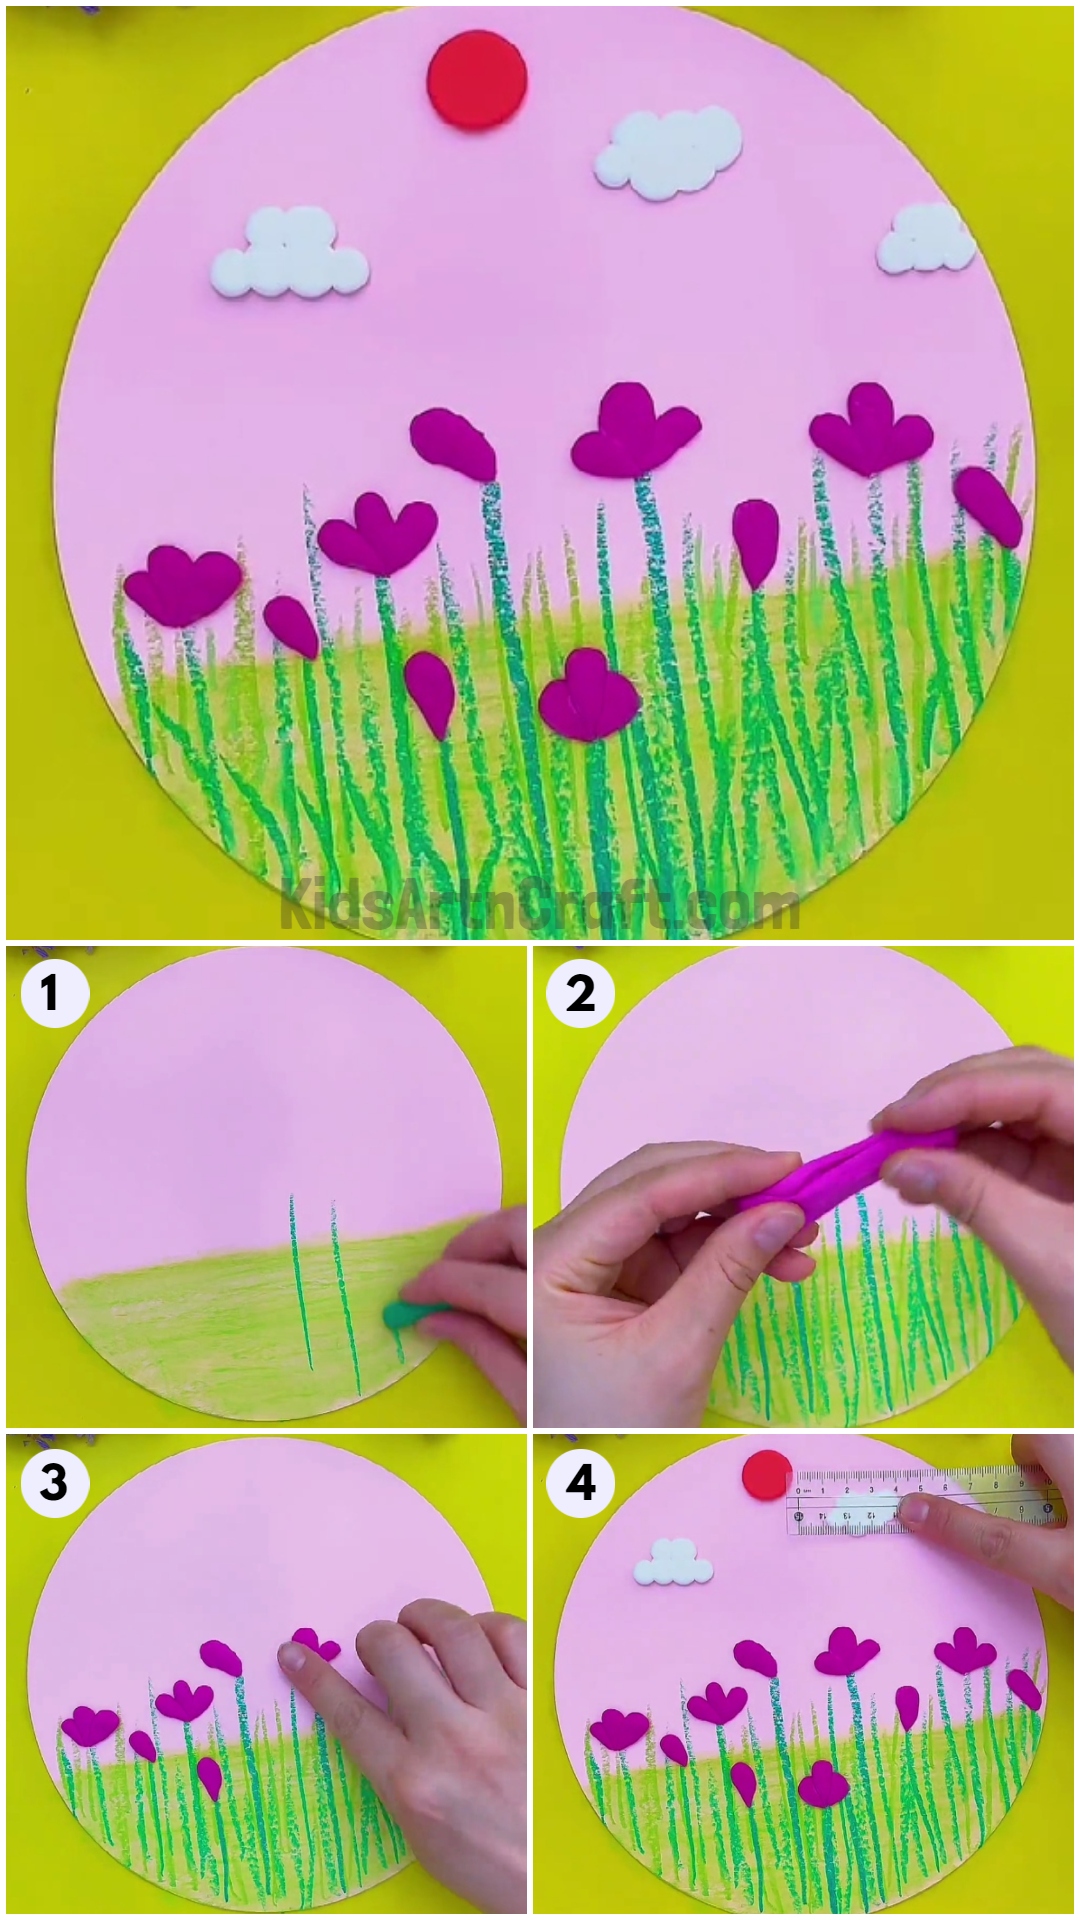
This clay flower landscape tutorial will teach kids how to craft a beautiful 3D artwork! With easy step-by-step instructions, they will learn how to create a unique and colorful flower landscape to display with pride. Perfect for inspiring creativity and imagination!
Learn how to create clay flower artwork with the help of our step-by-step tutorial. Using a few craft and art materials like colored clay, colored craft paper, glue, and crayons you can create cute and simple artwork without any effort. This clay flower artwork is super easy to make which is suitable for kids.
Clay Flower Landscape Scenery Artwork
Read More: Tissue Paper Flower Artwork For Kids
Materials Required
- Color Clay (Red, Pink, and White)
- Craft Paper (Pink Color)
- Crayons ( Light & Dark Green and Blue)
- Crafting Knife
- Glue(If Needed)
- Rulers and Tissue Paper
Procedure
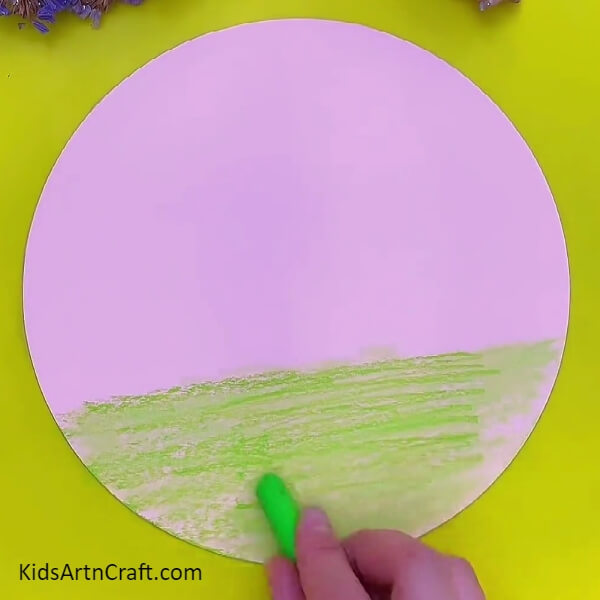
Step 1: Coloring Green Color On Pink Color Craft Paper
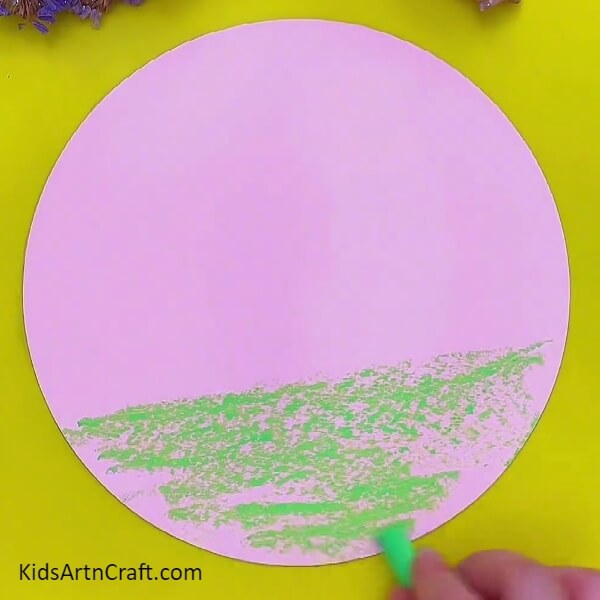
Cut a big circle from pink color craft paper, then take your light green color crayon and color half the bottom of your pink craft paper.
Step 2: Wiping On Green Colored Area With Tissue Paper

Tear a small piece of tissue paper and wipe lightly on the green color area that we colored before with that piece of tissue paper to create grass.
Step 3: Highlighting Grass With The Use Of Green Crayon
To highlight the grass, once again lightly color the grass area with a green color crayon and draw some light lines to create a wavy illusion. And also, wipe it with a piece of tissue paper.
Step 4: Drawing Small Lines With Dark Green Color Crayons

Now, take your dark green color crayon and draw a small line from bottom to top with some gaps in the grass area to create some plants.
Step 5: Drawing More Plants On Grass
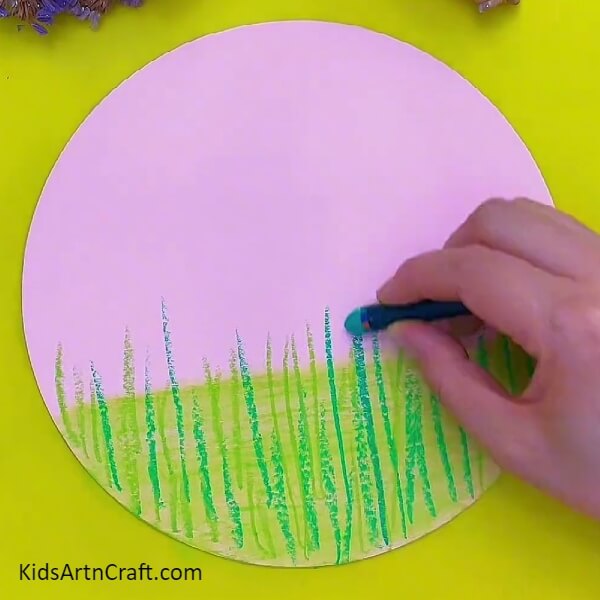
Randomly draw some more lines with light green color crayons on the grass and also draw some blue lines in between all those green lines with the use of blue color crayons.
Step 6: Cutting Small Pieces Of Clay From Pink Color Clay
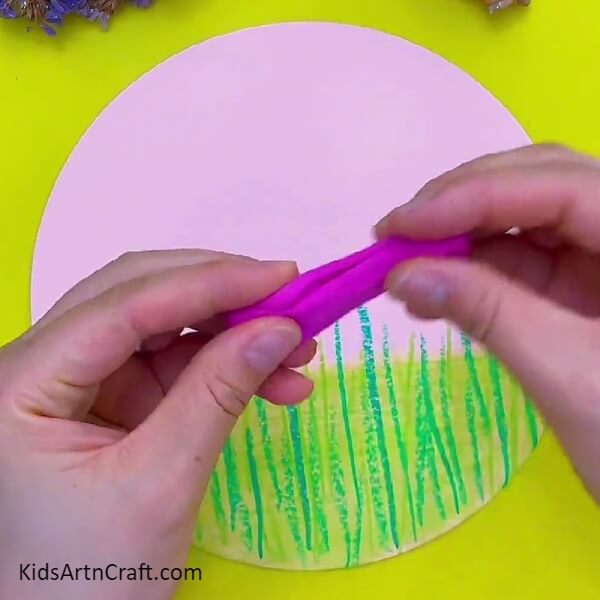
Cut some small pieces of clay from your pink color clay to create flower petals and roll all those pieces of clay into a little long oval shape.
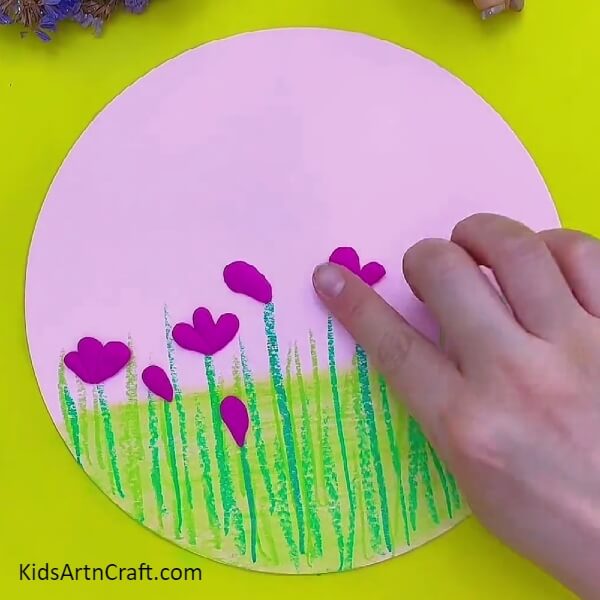
Step 7: Pasting Pieces Of Clay Above Some Green Lines
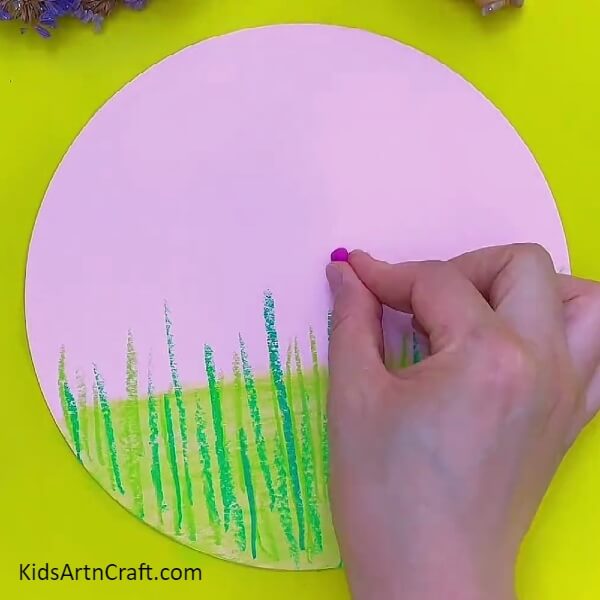
Take one piece of oval-shaped clay and place it on top of any green or blue line, make sure to place the narrow side of the clay face down, then lightly press that clay with craft paper. Then take two pieces of oval-shaped clay just the first one, and place one on the left and another one on the right side of the clay that we paste before to create a flower.
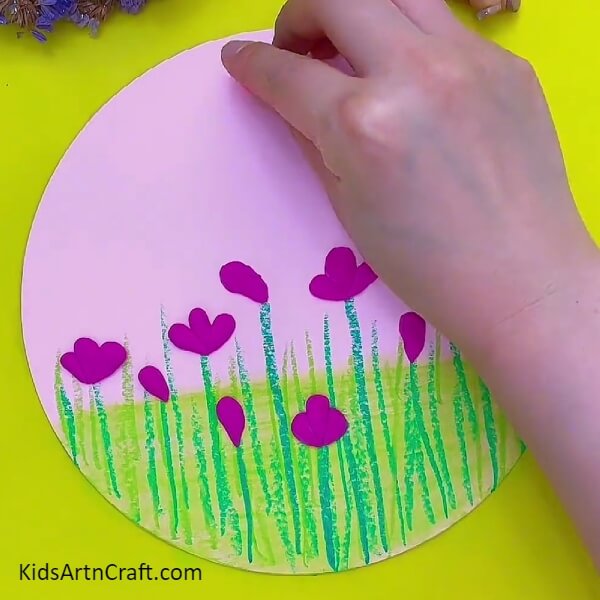
Step 8: Pasting More Clay To Create Flowers
Just like the first flower, create three or more flowers using oval pieces of pink color clay and for some plants just paste only one petal (oval-shaped clay) to create buds.
Step 9: Creating A Sun With The Use Of Red Color Clay
Take some red clay and cut a small amount of clay from it, then roll it into a round shape. Now, place that piece on top of pink craft paper.
Step 10: Pressing Red Color Clay With Ruler
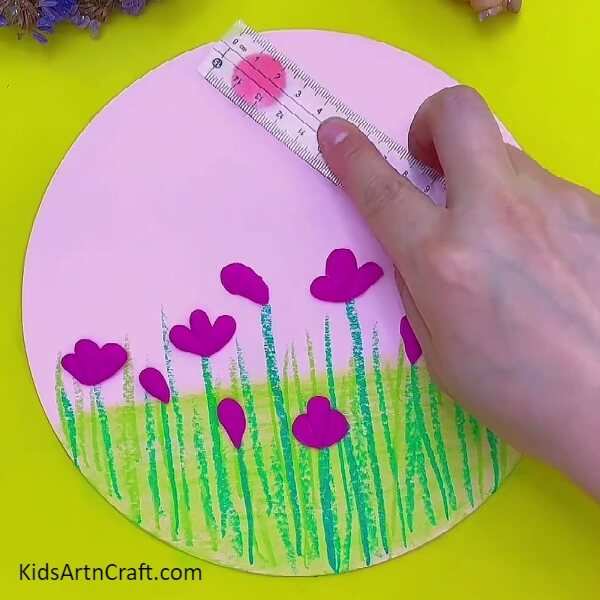
Grab your ruler and give some little pressure on the red color clay with the flat side of your ruler to create the cute little red sun.
Step 11: Creating White Clouds With White Clay
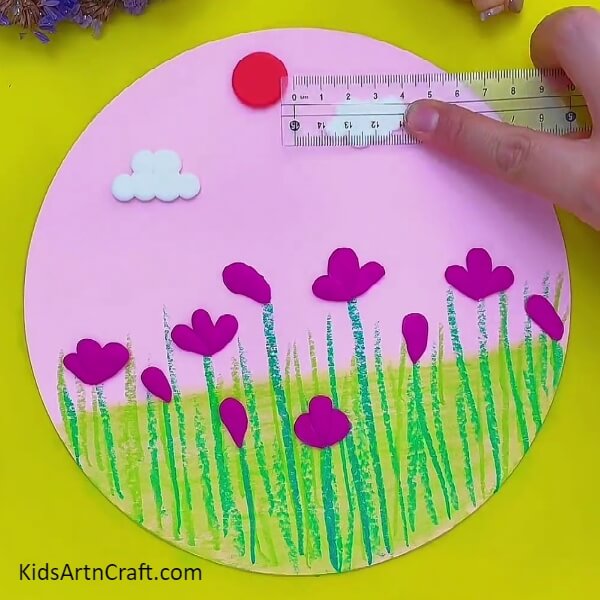
Cut some very small 15 to 20 pieces from your white clay and then roll all those pieces into a round shape. Then separate 5 to 6 pieces. Place and press all those 5 to 6 pieces closely under the red sun as shown in the image to create clouds, using the same pattern to create more clouds.
Colorful Clay Flower Scenery Artwork Is Completed
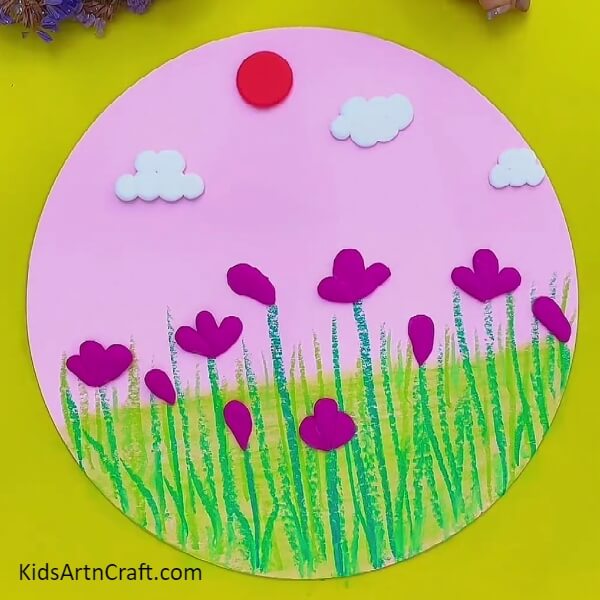
That’s all! Our clay flower art is ready! This craft is such a super easy craft to create, right? Within 10 minutes anyone can create this cute artwork with zero effort.
We hope you found this tutorial useful, we like to read your thoughts in the comment section. Looking for more crafts and arts? Have a visit to more projects from our website.
Thank you for visiting our website.
Follow us on Youtube for art and craft tutorials and much more.
More Articles from Kids Art & Craft
- Simple Way To Make Paper Flower Tree Craft
- Clay watermelon ice cream easy craft tutorial
- DIY Bees Clay Art Tutorial for Kids
- Paper & Flower Hat Craft for Kids – Step-by-Step Tutorial
- Easy Finger Tips Flower Art & Ladybug Craft With Step by Step Tutorial