


Clay Crafts
Beautiful Doll Face Craft Step-by-step Tutorial For Kids

This step-by-step tutorial will show you how to create a beautiful doll face craft with your kids. Easy-to-follow instructions and materials list included. Perfect for a fun and creative activity!
This tutorial will teach you how to make a doll face using sheets of paper and some craft materials. The doll is going to have curls made out of clay dough so you will be needing a lot of clay. By the end, it will look like a beautiful portrait with small flowers on its frame. Collect all the materials required to make this doll face and let’s begin the process of crafting!
Beautiful Doll Face Craft For Kids
Read More: DIY Paper Car Scenery drawing easy tutorial for kids
Materials Required
- Craft papers
- Sketch pen(Black, Red)
- Glue
- Scissors
- Clay(Yellow)
- Tape
Procedure
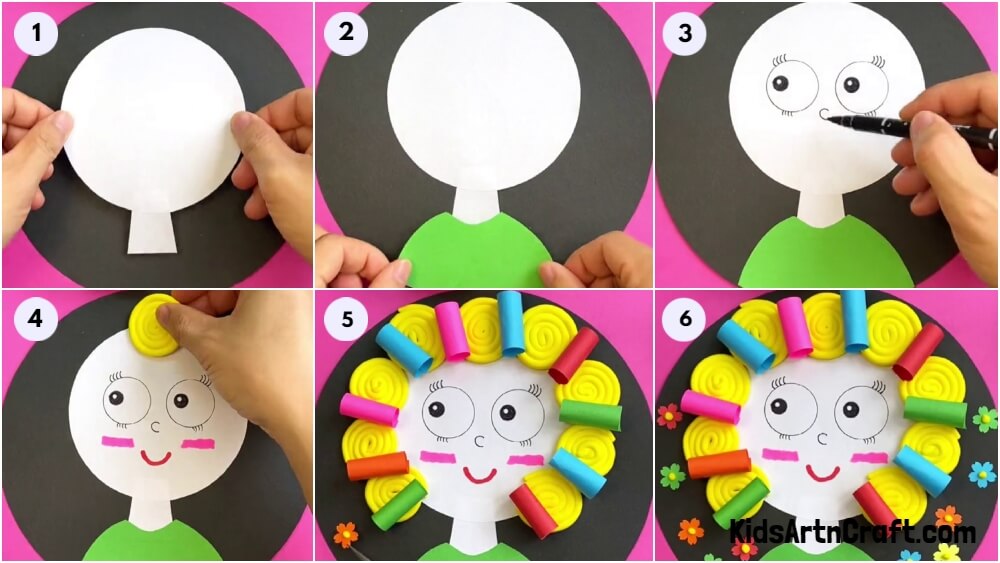
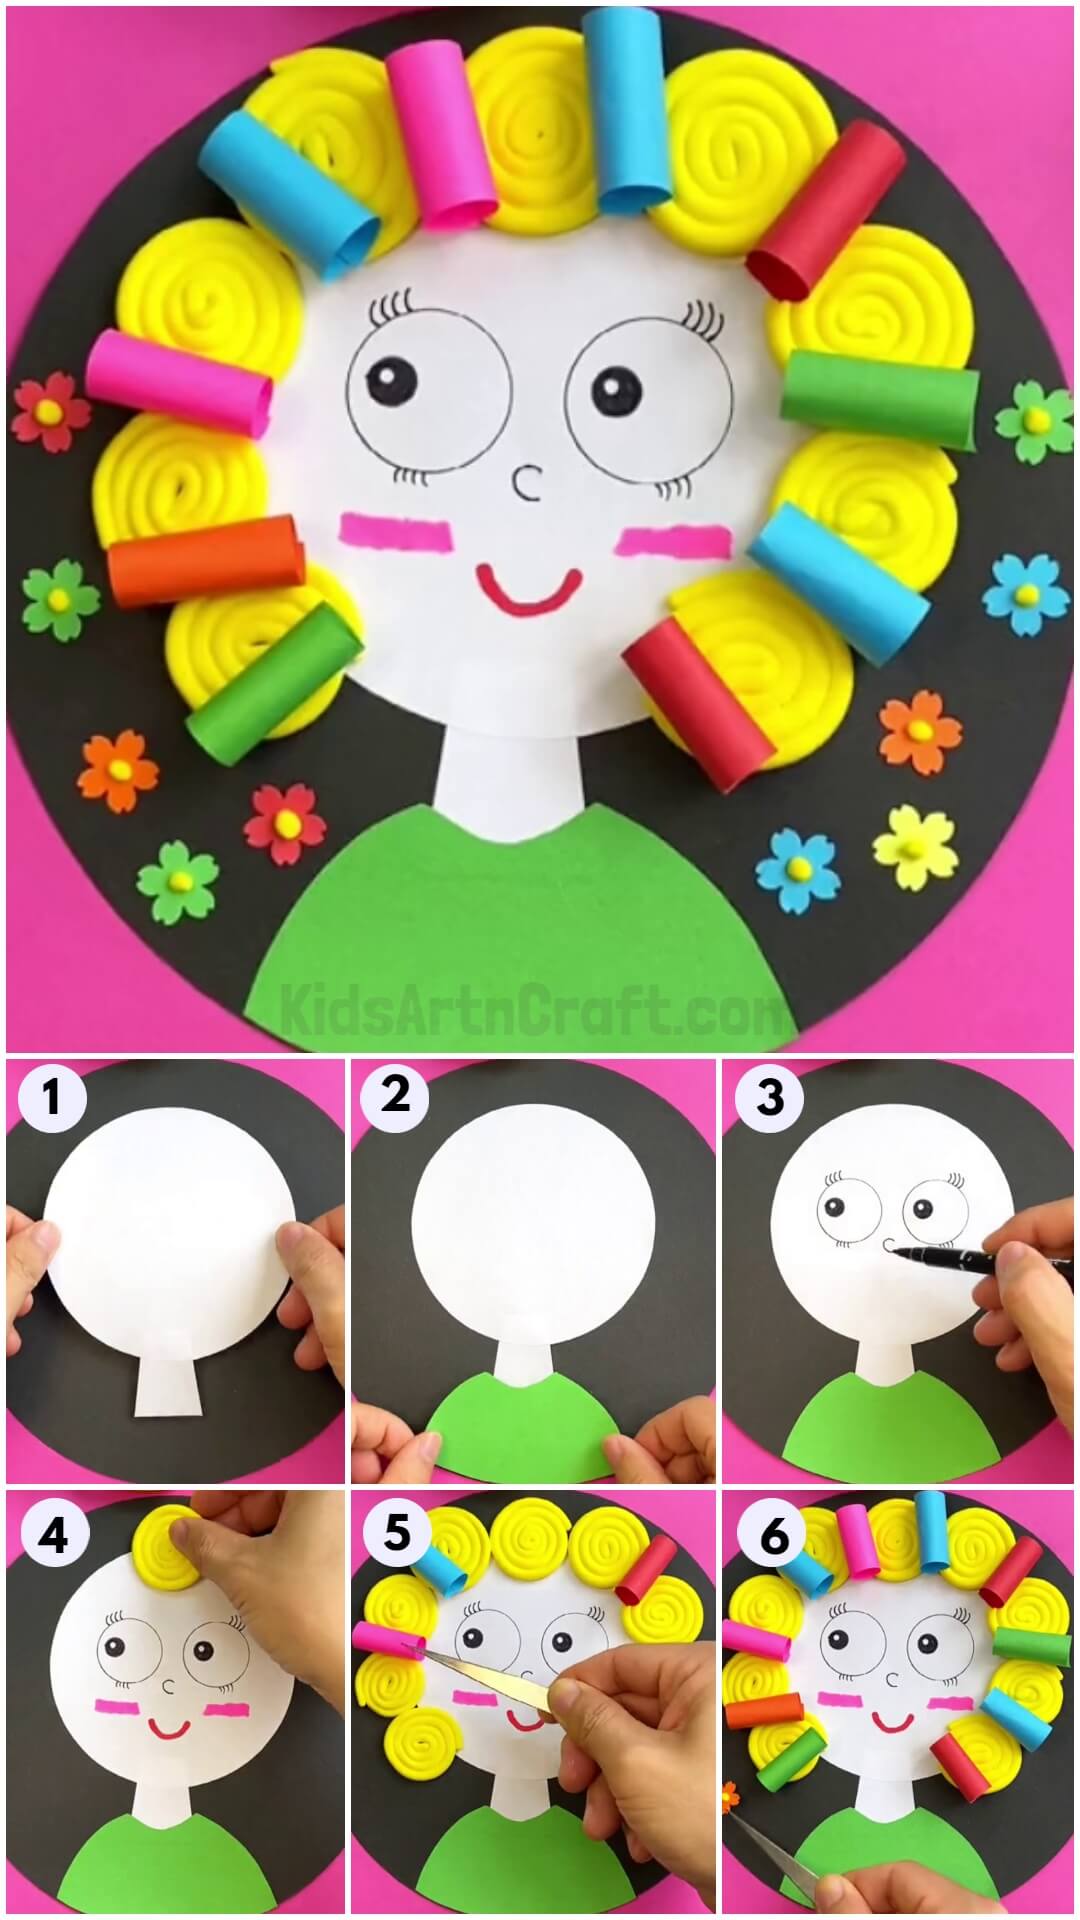
Step 1: Making The Doll’s Face And Neck
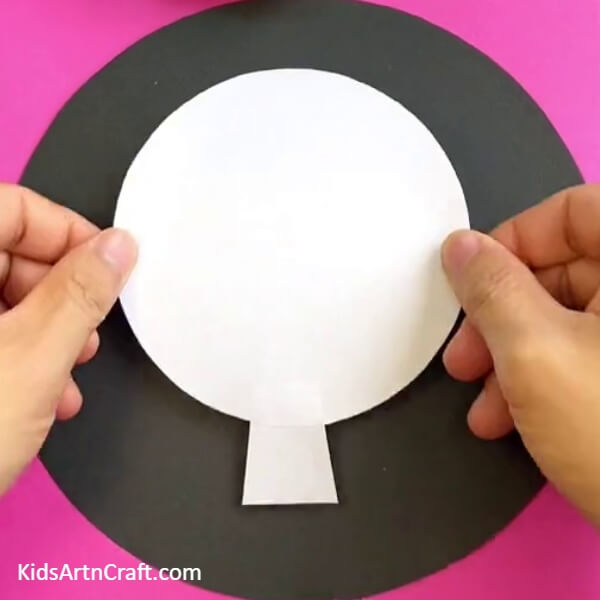
Take a black sheet of paper and cut it into a circular shape. Now, take a white sheet of paper and cut a circle out of it as well. Also, cut a small strip out of the same white sheet and paste it at the bottom of the white circle as shown in the picture below. This strip will act as the neck of the doll and the white circle as the head. Paste them on the black circle.
Step 2: Pasting The Doll’s T-shirt

Take a green sheet of paper and with a pencil draw the shirt shape shown in the picture below with shoulders and a round neck. Cut the shirt shape out and paste it at the bottom of the white neck as shown in the picture.
Step 3: Drawing The Eyes And Nose
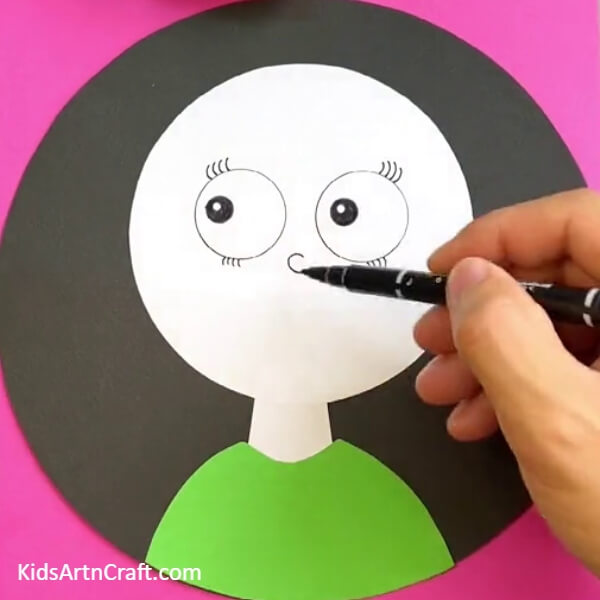
Take a black sketch pen and draw the eyes and nose on the doll’s face as shown.
Step 4: Making The Cheeks

Take pink paper and cut two rectangular trips with slightly uneven edges and paste them on the doll’s face as shown. This will add some blush to the doll’s face.
Step 5: Adding A Smile
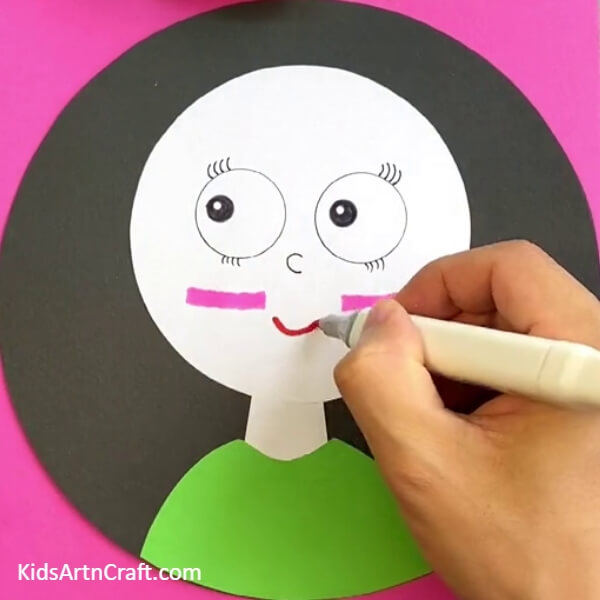
Take a red sketch pen and draw a curved line below the blush right in the middle as shown in the picture below. This will add a cute smile to the face.
Step 6: Making A Clay Spiral
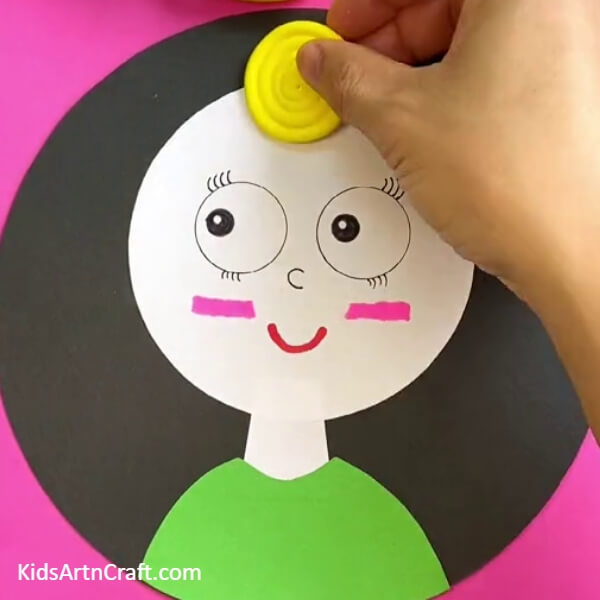
Take yellow clay dough and roll it into a spiral shape as shown in the picture. Stick it on the top of the doll’s head.
Step 7: Making More Spiral Clay Doughs
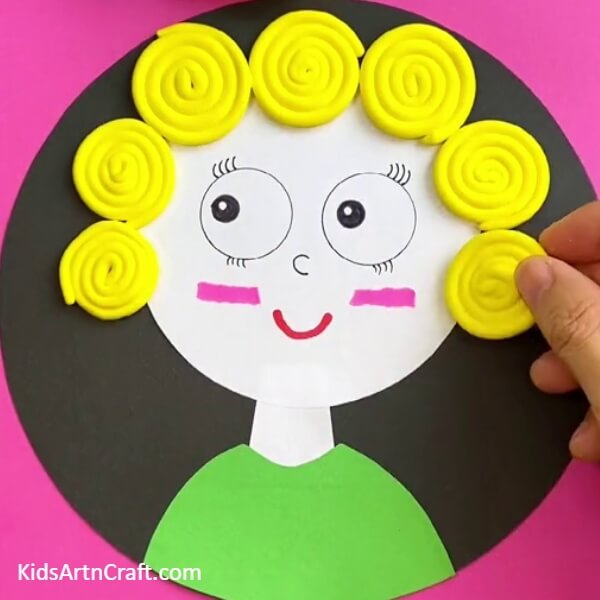
Take more clay and repeat the process and make eight more such spiral shapes and stick them on the circumference of the entire head as shown in the picture.
Step 8: Making Paper Rollers
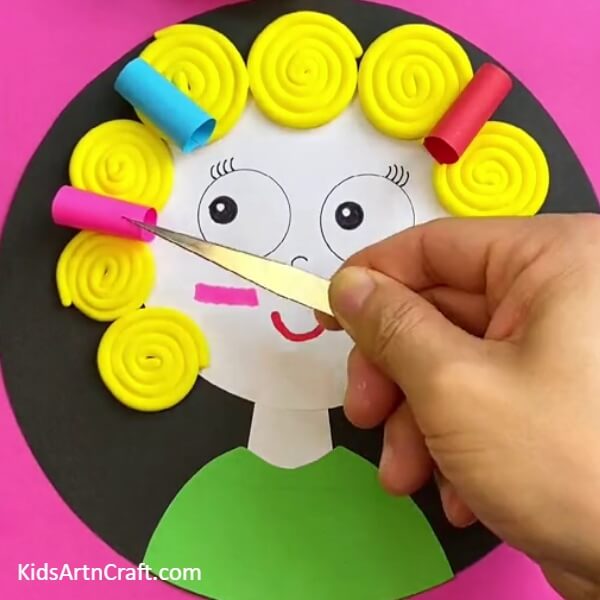
Take small colored rectangular sheets of paper and roll them to make a cylindrical shape. Paste the ends of these cylindrical sheets to seal the shapes. Make three in red, two in green, three in blue, and two in pink. Paste them on the intersection of the clay spirals as shown in the image.
Step 9: Pasting All The Cylindrical Rollers
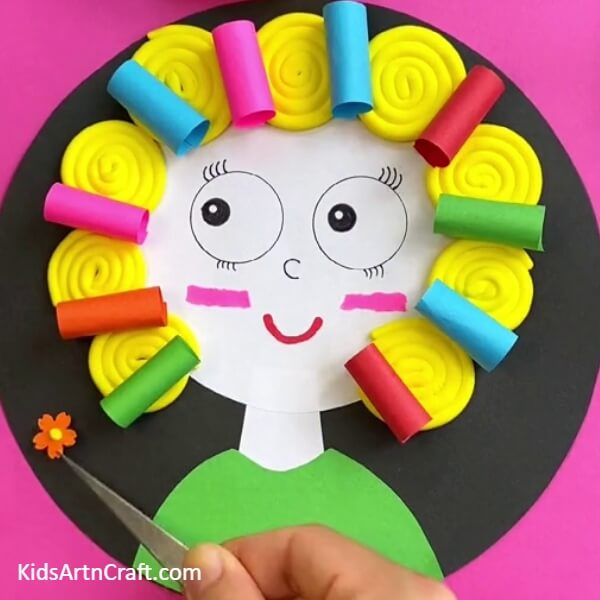
Paste all the cylindrical sheets you just made on the intersections of the clay spirals. The clay spirals will act as the hair curls of our doll and the cylindrical sheets as the rollers on the curls. Make small flowers from the colored sheets and then place a small ball of yellow clay dough to make the center of each flower. Finally, take the small paper flowers and paste them on the black sheet.
The Doll Face Craft Using Paper And Clay Is Ready!
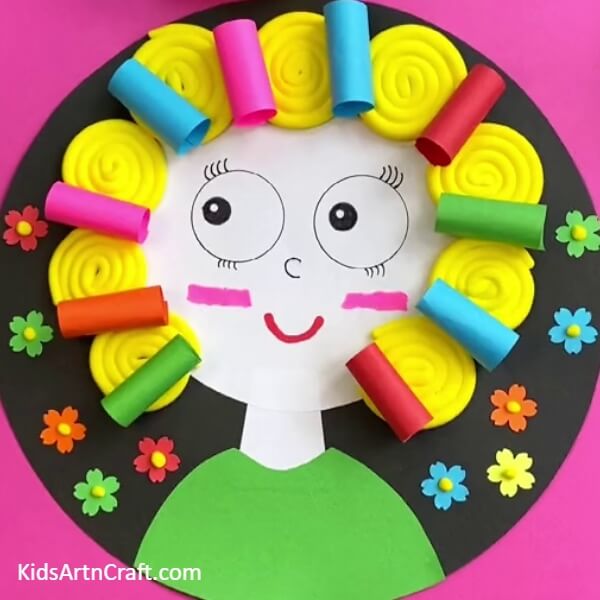
Paste more paper flowers on both the left and right sides of the black sheet as shown in the image.
This brings an end to this beautiful tutorial which taught you to work with a variety of craft materials ranging from clay to paper flowers. You learned good cutting and pasting skills and great drawing skills as well. You can paste it on your art book or gift it to someone. Use these techniques on your own and create unique ideas to make your art more attractive and unique. Keep practicing and keep learning. Good luck!
Some More Doll Craft Tutorial
Fun To Make Paper Cup Doll For Children
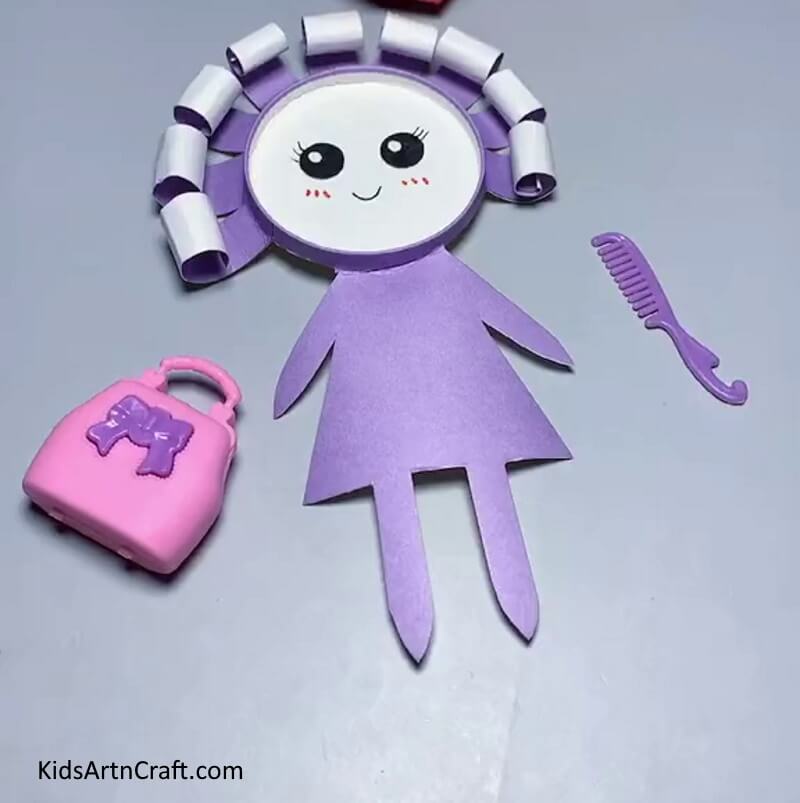
Image Source/Tutorial: Kids Art & Craft
Making paper cup dolls is a fun task for children. It helps to develop their creative thinking and hand-eye coordination skills. With a bit of imagination and some craft supplies, kids can make cute and colorful paper cup dolls of their own.
Follow us on Youtube for art and craft tutorials and much more.
More Articles from Kids Art & Craft
- DIY Miniature Clay Cake Craft Activities for Kids
- DIY Clay Giraffe Step by Step Tutorial For Kids
- DIY Creative Clay Craft Activities Video Tutorial for Kids
- Paper Fish Easy Craft tutorial for Kids
- Easy and Colorful Paper Flower Craft For Kids To Make