


DIY and Crafts
How to decorate a Party with Paper Crafts

Paper craft decorations are one of the most budget-friendly, eco-friendly, and creative ways to transform any party space. Whether you’re planning a birthday, classroom celebration, or festive gathering, Paper crafts allow you to design unique décor using simple materials like colored sheets, origami paper, and recycled items.
Unlike store-bought decorations, DIY paper crafts give a personalised touch and can be easily customised
based on themes, colours, and age groups. Since paper is affordable and easy to shape, fold, and cut, it’s widely used
for creating both 2D and 3D decorative items.
Social occasion! Social occasion! Social event! Everybody loves to party!
Whether or not it is you organising the party or setting off to someone else’s social event, it doesn’t matter! If you are the one who will have a get-together, then it surely matters. There are tremendous heaps of things that you should coordinate before the social occasion begins if you have to guarantee that everybody will remember the get-together for how great it was. Other than the standard things that you have to manage, for instance, food and refreshments, there are a variety of things that you ought to remember.
There are unlimited reasons to throw a party, and there are significantly more ways to deal with decoration for such a party. Whether or not you aren’t astute, contributing some energy to make your place more joyful and beautiful will add to the success of the party that you’re throwing.
These DIY party decorations are best for both a wide and a small gathering. Each party decoration idea will increase the beauty of your surroundings without costing you an immense heap of money all the while.
How to Decorate a Party
1. DIY colourful wall decoration
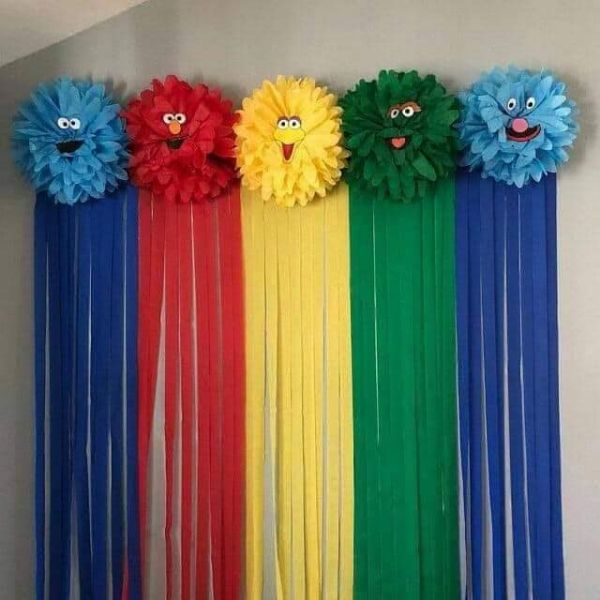
One way to deal with making your room stand apart is to add something many allude to as a colourful wall piece. Hangings are basically whatever you put on your wall that hangs down innovatively and takes up little space. People choose different designs for various rooms of their homes, such as parlours, rooms, homework environments, and event halls.
If chosen carefully, these wall hangings can make your room look classy. Going from various styles, these best DIY artwork ideas are ideal for helping you update your home’s beauty. Such wall hangings can even transform from the richest to even the most uncomplicated of houses. In any case, each new decorative piece is an uncommon way to convey life to the home while keeping up that exceptional style, paying little heed to which sort of design and colour you pick.
You’ll need:
- Colourful paper
- Scissors
- Gluestick
- Sticky eyes
- Black and red paper
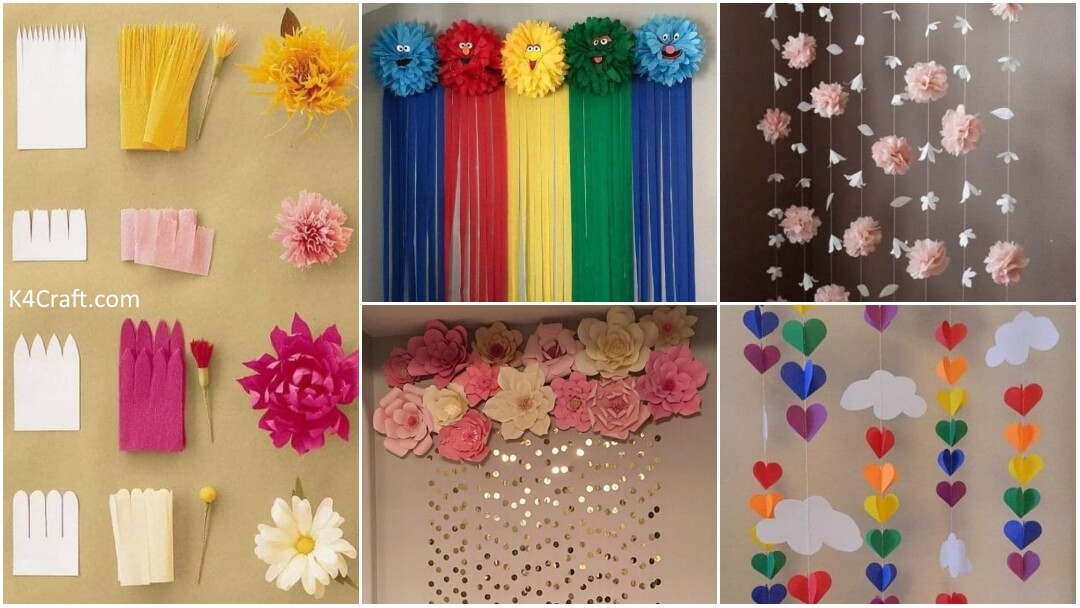
Stack four sheets of paper. Fold the paper in an accordion fold and paste one on the other. Gently separate the first layer of paper from the rest, and move it up to form the top layer of petal. This should now look as shown in the image above. Once done. Cut out an equal length of strips from each colour and attach them to the flower of the same colour. Finish it by pasting eyes and a mouth on the flower to make it more interesting.
Your hanging is all set!!
2. DIY Dining Table Décor
You don’t need to spend a ton on the stylistic layout. Look at these DIY table decorations to discover something stunning. Your guests may not taste the colours, but they will see them with this gathering of splendid colourful coordination. Get innovative and add other such items in different shades.
You’ll need:
- Coloured Kite papers
- Scissors
- Gluestick
First, you need to cut out the shapes. The idea is to first draw and then start cutting it out. You can choose the sharp-edged or the soft-edged one. Then come to the flowers one by one. Take double-folded kite paper and draw the flower shapes on it so that you’ll get the same-shaped cut-outs altogether. Start cutting them out and paste them one by one.
Let it dry for a while, and it’s done!
3. Coloured Paper Wheels
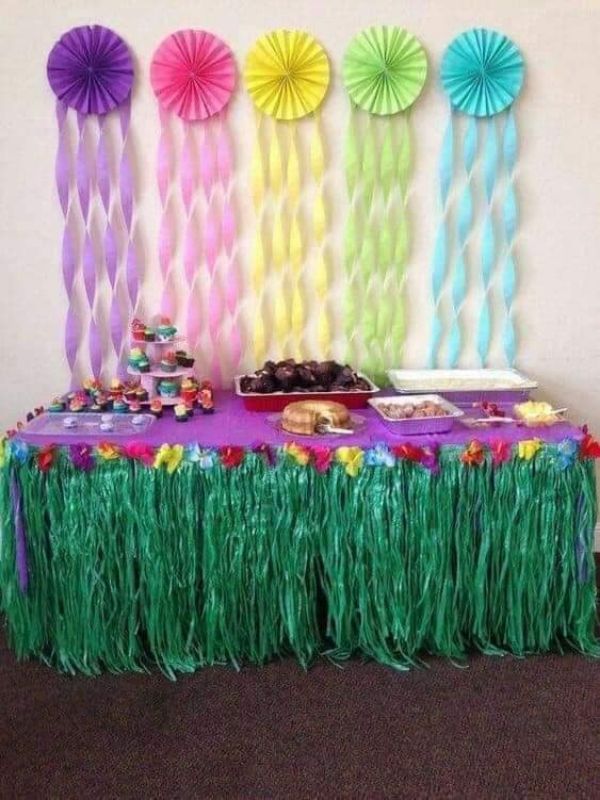
The best part about parties is when they have colourful backgrounds. No matter where you have a party, colours can bring a theme or colour scheme together. This paper fan DIY will make your walls coordinate and bring together the colour palette as a simple yet creative background for your party.
You’ll need:
- Scissors
- Art paper
- Gluestick/tape
- Crepe paper
First, take the art paper and fold it. Flip it over and fold it back over this fold as close to the same size as possible. Continue folding accordion style. Take the folded stack of paper, compress it together, fold it in half and crease it. Use the glue to secure the fans on the ends. The last step is to attach the crepe paper strips, and your paper fans are ready!
4. DIY Balloon Photobooth
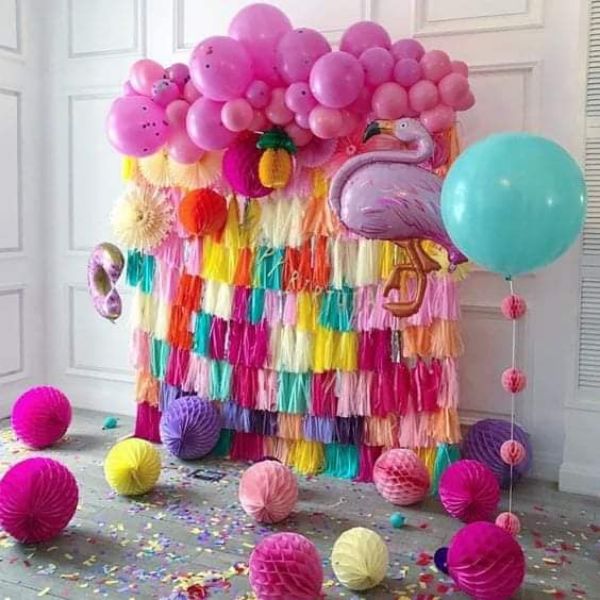
Add additional style to your social affair with a pretty balloon décor. All that is needed is shadBalloonloons, wire, and some colourful paper. You can use it as a photo booth setup or just as a decoration for your party.
Balloons are an incredible addition to any celebration! They lift the style, highlight the house arrangement, and are an ideal technique to put a custom touch on a social event. Balloon décor is similarly a good idea for photos, dessert tables, and that is only the start. In any case, they are not difficult to arrange or cost a lot. This idea will help you to make your very own balloon décor ethically, like the ones made by the experts!
You’ll need:
- Balloons
- Glue gun
- Needle and thread
- Tassels
- Any add-on item that you want
Blow your Layoutoons up at different sizes. Tie knots at the end. Take a needle and thread, then thread through the knot of a balloon. Now, slide each of the balloons down the line one at a time. Be sure that you tie a knot at the photo booth in the fishing line after cutting it so that your balloons stay put. Lay out the frame of the arch by adhering your hooks or nails to the wall or area where you are hanging it. Finish off your balloon décor with tassels, the swan balloon or fresh flowers. Whatever add-on you want to add.
And your photo booth is ready!
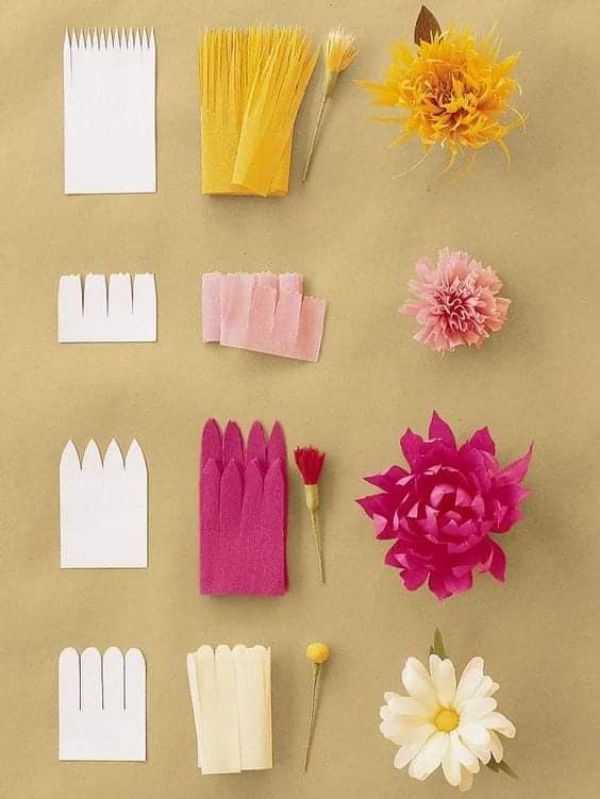
5. Paper Flower Wall Decor
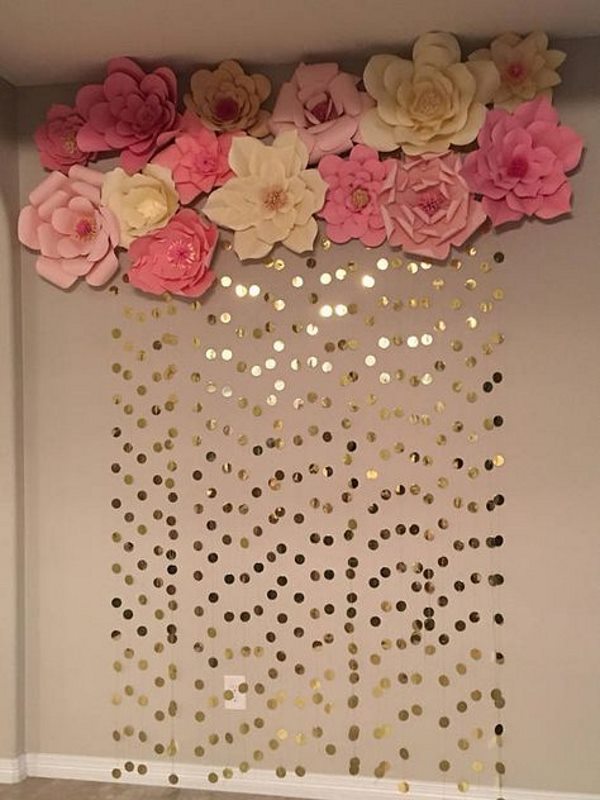
Last-minute plans but no flowers? Why not try making these giant paper flowers? Not only are they easier on the wallet than fresh flowers, but they’ll last much longer. Aren’t they ravishing?! They aren’t costly at all, but they might take some time. The huge flowers might take more time, and the medium and small ones will take less. They will look beautiful on your wall, even if it’s not for a party or a special occasion. These will not only fill your space, but they will also look finely-crafted and artistic.
Everyone would love it!
You’ll need:
- Stock paper/art paper
- Scissors
- Glue
- Golden paper
Start by drawing the petals one by one. Cut them once you’re done. Next step is to cut slits at the bottom centre of each petal, about an inch and slightly less on the smaller petals. Start with the first layer and put glue on the inside edge, and overlap the slit. Do this with all the petals. Curl the petals back. Begin with your first layer base petals, add some glue to the outer edge of one petal and move to overlap another until all the base petals meet together forming a circle in the centre of the flower. Continue making layers by layers until you reach the end, and your flowers are ready!
6. The Unique Paper Stripe Background
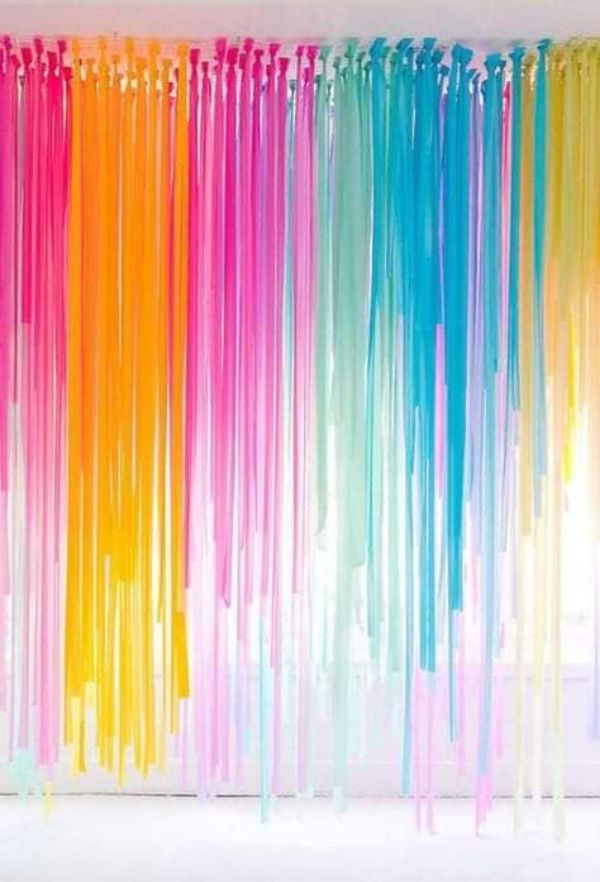
This rainbow paper garland is so easy, and you only need tape and paper to make it. You can manage to put together this colourful party decoration in your laziest state as well. Include this bright and easy rainbow paper garland because it’s such an inexpensive craft.
You’ll need:
- Scissors
- Paper in rainbow colours
- Tape
First, cut the coloured paper into long, equal stripes. Now, line up the same coloured papers in colour order to make an ombre rainbow. The last step is to tape the strips together to form the garland. You can also staple or glue them, whichever you like.
Now you’re ready to hang the rainbow garland!
7. Hanging Flowers DIY
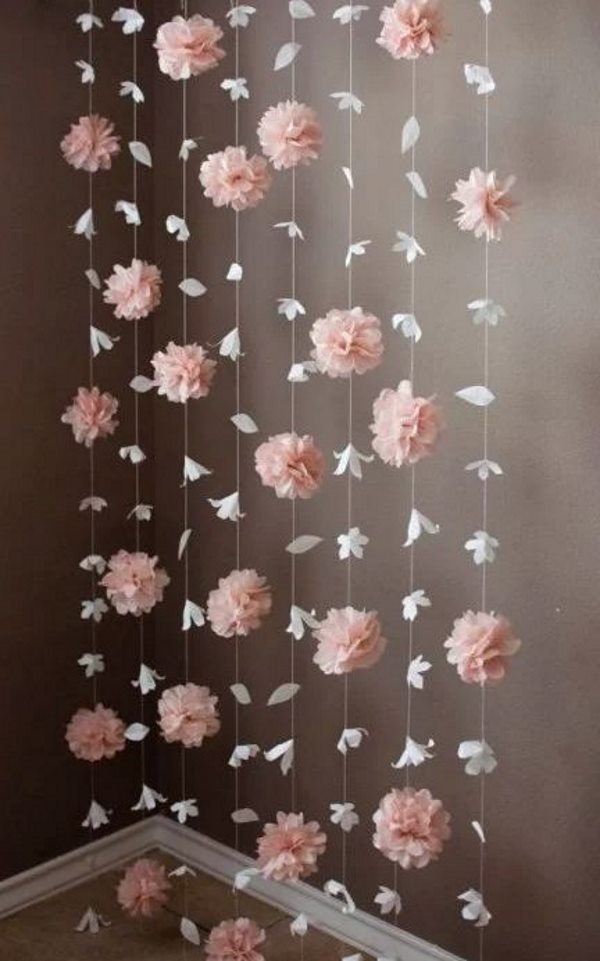
This flower garland is perfect as a backdrop for the photo booth. It’s also perfect for your party or any special event. The possibilities are endless, really! Let’s learn how to make it!
You’ll need:
- Crepe paper in shades of your favourite colours
- Scissors
- Glue
- Strings
Start by wrapping a small piece of paper in a square of pink crepe paper to create the centre of the flower. Glue the petals around the centre stamen, overlapping the petals as you go. Repeat with different flower colours and petal shapes. For the leaves, just fold a piece of white crepe paper in half and cut a leaf shape. Now, glue the string to each flower and twist and glue the flowers and leaves onto the base wire. The last step is to glue each flower and twist the leaves onto the string.
Let it dry for a while, and your garland is ready!
7. Rainbow Hearts Hanging
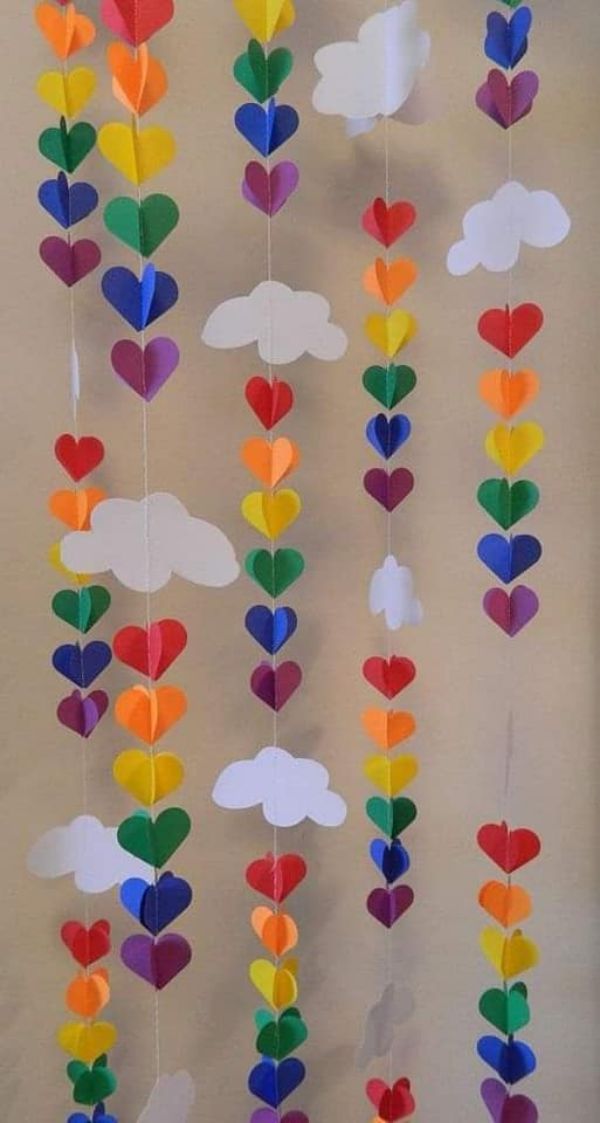
Do you ever get stuck on colours? Do you ever feel difficulty choosing one colour? Do you worship everything rainbow? If yes, then this rainbow coloured creative hanging is for you to make!
Make this easy rainbow heart hanging using coloured papers. This is something different that’d bring colours to your party in no time. It can be made by anyone, be it adults or kids.
You’ll need:
- Art paper/Card stock (alcolours)
- Scissor
- Strings
- Glue
Cortana an inch-thick strip from the length of each colour of paper. Be sure to use thick paper or cardstock for this. Fold each strip in half to form 2 hearts together. Draw the heart shape and cut it out. Stick the same coloured hearts together and use glue to hold the middle portion. You can also use clear tape. Once all the hearts are formed, arrange them so the points of each heart alternate back and forth, from left to right, as shown in the picture above. Make one heart from each colour of the rainbow and put them in order by sticking them to the thread. To secure it, you can tie a small bead or an artificial flower at the bottom of the thread. You can just tie a large knot to keep the hearts from slipping off.
Your colourful wall hanging is ready!
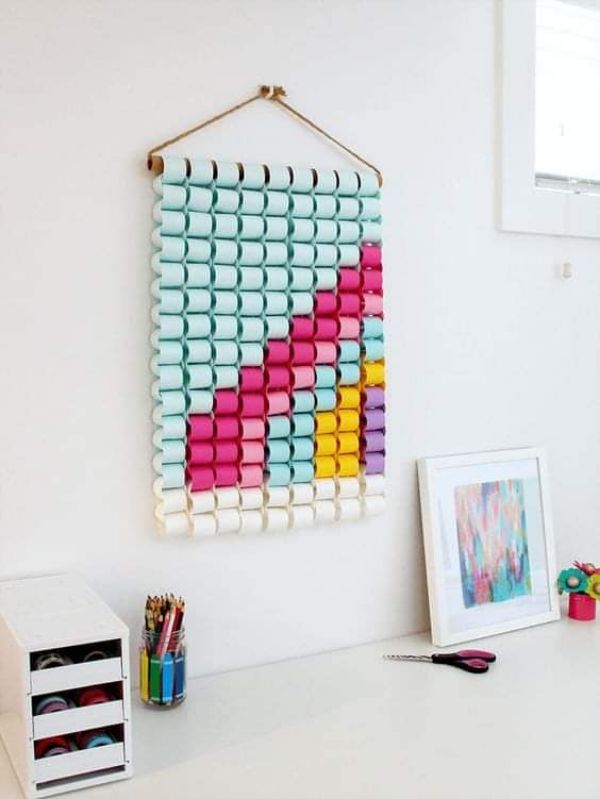
8. Colourful Background DIY
We know it seems complicated, but actually, it couldn’t be any easier! If you can roll and glue paper strips, then you can make this beautiful wall hanging for your home.
You’ll need:
- Coloured sheets
- Glue/stapler
- String
Start by making strips of paper. You can cut 10 strips per sheet of paper. Continue making enough strips for each colour. Starting with the first colour, make a loop and staple it together, or you can use glue. Add a second strip of paper through the loop and staple to make a chain. Continue adding loops of each colour. Slide the chains onto a string or long stick. Arrange the loops so that the stapes are facing the backside of the wall hanging, and you’re done!
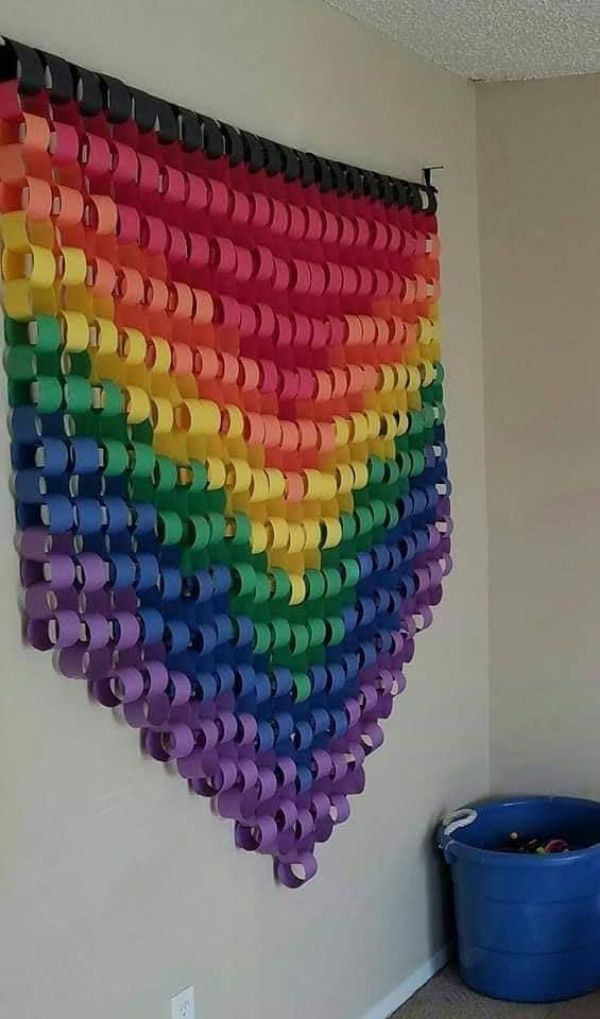
9. DIY Coloured Hanging
Paper chains! Paper chains! Making them can be the best idea for you to decorate your room or your favourite wall.
If you long to cover the walls of your home with wonderful, unique pieces, then this is for you. This paper chain is a straightforward speciality that can have a major effect on tour guests. We made a more unique paper chain art piece by shading and a plan. Here’s how to do it:
You’ll need:
- Coloured sheets
- Glue/stapler
- String
Cut the paper into pieces with equal measurements. Now make strands of each paper piece. Circle the strands evenly and secure them with a stapler or glue. Proceed until you’ve finished a strand, and start with a different colour.
Slide the circles onto a string or wooden stick, and it’s ready to be hung!
10. Paper Wall Décor
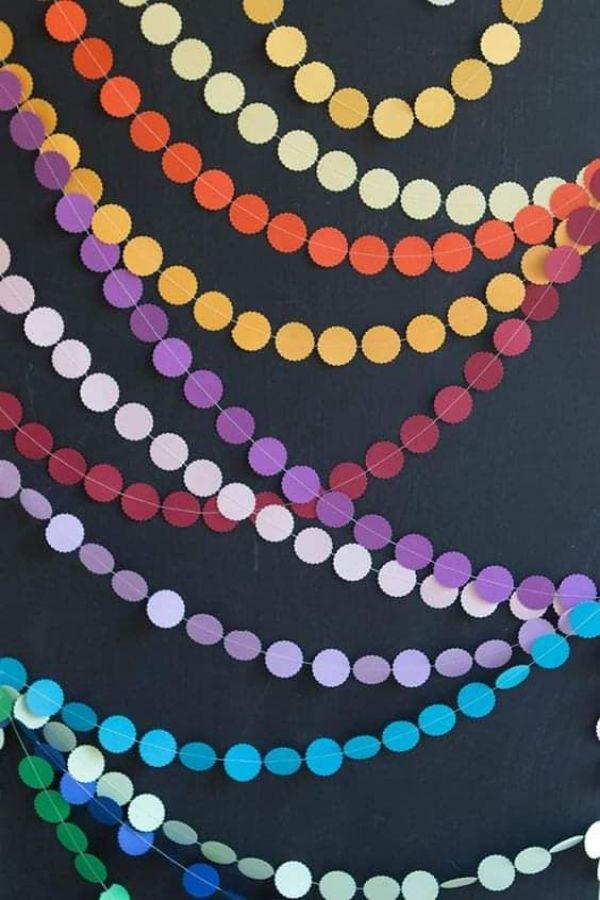
DIY paper hangings are such an incredible method to add some colour to your life. It doesn’t need to be for a gathering. They work incredibly well as a great design in essentially any room of your home. Kids love them over their beds; they look beautiful as a setting against a plain divider, and they work incredibly well for a party as well.
You’ll need:
- Colourful paper
- Scissor
- Glue/tape
- Strings
First, you need to draw some circles. Lots and lots of paper circles, and cut them out using the scissors. Now paste each one of them on the string or a thread using the tape on the backside. Keep going until you have a string of circles to your desired length. Make as many strings of circle garland as you need.
Circles are ready to be hanged!
11. Starry Night With Balloons
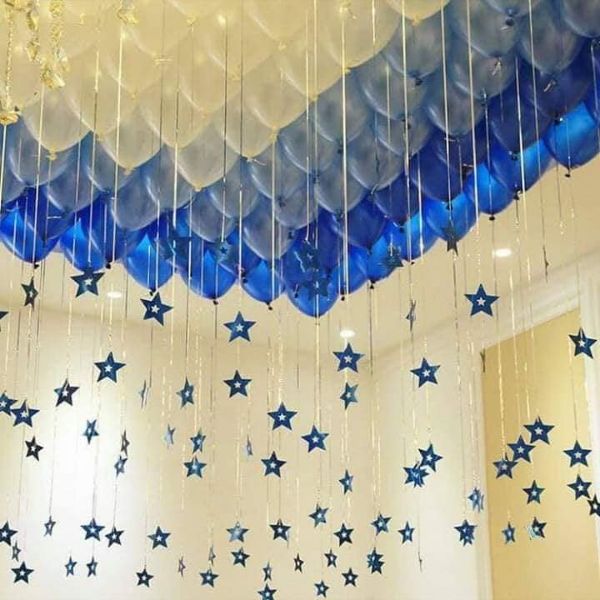
Balloons can become the best or the worst part of your get-together’s plan. It all depends on you. So you should figure out an innovative and exceptional way to deal with setting them up. If you are out of ideas or need a little lift in inspiration, we are here for you with this simple yet beautiful idea.
You’ll need:
- Blue, white and transparent balloons
- Blue stars
- Balloon cylinder
- Clear tape/Gluestick
First, you need to blow up all the 3 types or whichever you’ve chosen. Try to use the gas cylinder because it’ll save you time. If you don’t have it available, then using the clear tape would work. After blowing the balloons, the next step is to attach the blue stars to the balloon thread. Once you’re done, cut small pieces of clear tape and stick them on top of the balloons. The last step is to use a ladder or something to stand on to paste them on the ceiling.
Your decor is ready!
12. Simple Party Décor With Balloons
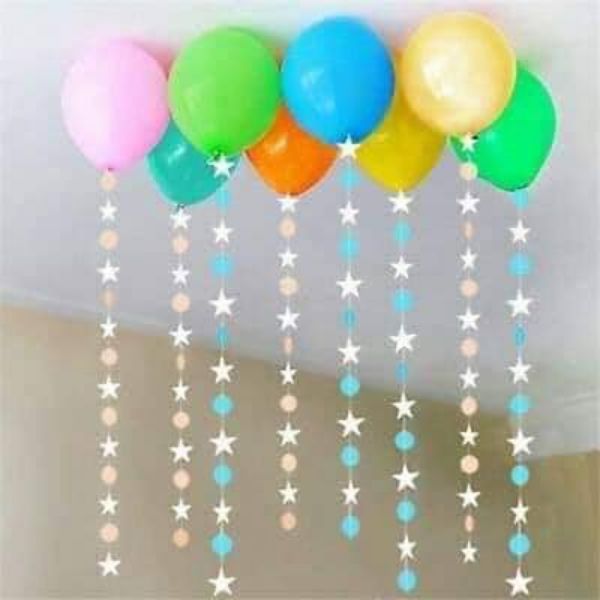
There’s one praiseworthy sort of decoration that never gets outdated – Balloons! There’s just something about mind-blowing colours that brings out the kid in every one of us. So, paying little attention to the function, having balloons as a segment of your social affair is a reliable idea.
You’ll need:
- Balloons
- Strings
- Blue and white paper
- Scissor
- Gluestick/Tape
The first step is to blow the balloons and keep them aside. Now trace the stars and circles on the white and blue sheet. The next step is to cut them out with the help of a pair of scissors and start pasting them on the balloon strings one by one using glue or tape. Leave them for a while and then start putting tape on the top of each balloon and paste it on your ceiling.
13. The Sunflower Décor
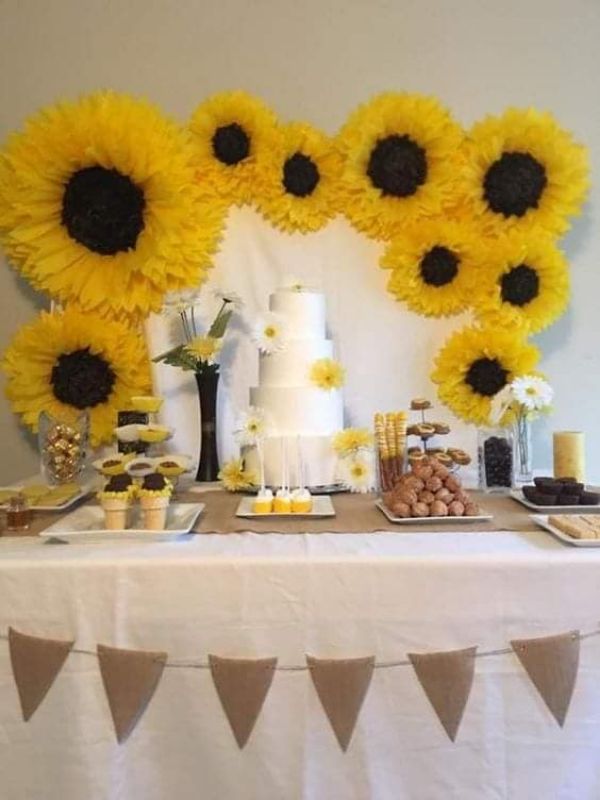
We all agree that flowers make space all the more inviting. Whether or not a high-profile gathering or an essential low arrangement on a candlelit table, they add a touch of trademark grandness with beauty. This sunflower decoration will add beauty and grandness to your party! Here’s how to do it
You’ll need:
- Yellow kite paper
- Brown kite paper
- Scissor
- Gluestick
- White chart for the background
Trace the petals and the flower shape on the yellow kite paper. Use the brown kite paper to trace the middle portion of the flower. They would look more intriguing if you kept the sizes different. The next step is to cut all of them and keep them separated. Paste a petal on the other and overlap them with each other. The last step would be to paste the brown part in the middle. Follow the same cycle with each set, and once you’re done, put a piece of transparent tape or glue on the backside of your flowers and stick them on your wall.
Your yellow bright sunflowers are ready to bloom!
14. The coloured backdrop
This simple decor idea can be made quickly with colours that coordinate with your party theme or any other special occasion. You can put these on your walls, near the table, halls or anywhere when you want a pop of colour.
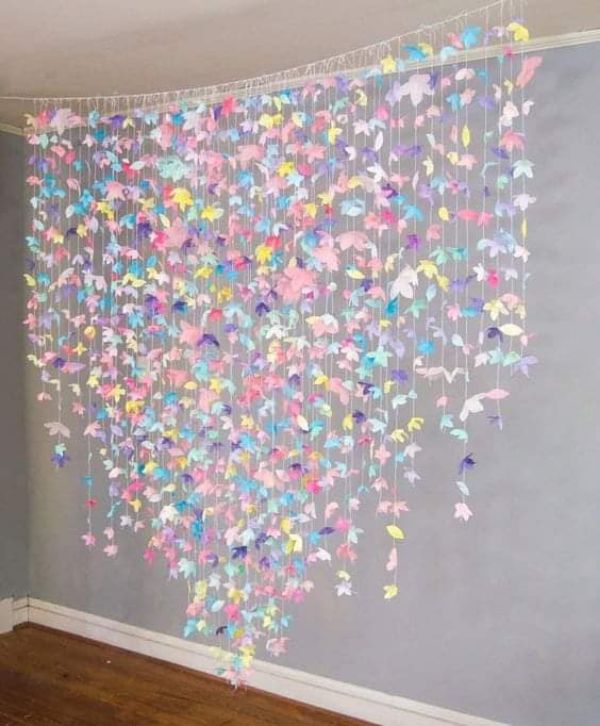
Step-by-Step How to Decorate a Party with Paper Crafts Tutorial – Easy DIY Party Decorations
Learn how to decorate a party with paper crafts in this step-by-step tutorial! Discover easy DIY paper decoration ideas, simple folding and cutting techniques, and creative party décor tips perfect for birthdays, celebrations, and special events. Great for beginners, kids, and craft lovers looking for fun festive inspiration!
Your kid will love it too!
Creating this easy craft is both fun and easy! Let’s learn how to make it!
You’ll need:
- Coloured cardstock
- Yarns/Threads
- Scissors
- Glue/Tape
Begin by cutting the coloured sheets in the shape of a leaf, but in different sizes to make it look more attractive. The next step would be to take the thread or yarn and start pasting the leaves one by one with the help of the tape or a glue stick. You can change colours or shape sizes to create different patterns and colour sets. Continue until your garland has reached the desired length and let it sit for a while.
Once it’s dry, hang it on your favourite spot!
Expert Tips for Decorating a Party with Paper Crafts
- Choose a theme first: Matching colours and designs (like jungle, princess, or rainbow) creates a cohesive look.
- Use layered decorations: Combine wall hangings, table décor, and ceiling elements for depth.
- Mix textures: Use crepe paper, cardstock, and tissue paper for variety.
- Plan: Handmade crafts take time—prepare at least 1–2 days before the event.
- Use eco-friendly materials: Recycled paper and old magazines can reduce waste and cost.
More Creative Paper Craft Decoration Ideas
1. Paper Flower Backdrop
Create a stunning photo booth area using large paper flowers. These are perfect for birthdays and baby showers.
2. Paper Chain Garlands
Paper chains are classic, easy, and budget-friendly decorations that can be hung across walls or ceilings.
They are made by linking paper loops together and are widely used for festive décor.
3. Origami Hanging Decorations
Make cranes, butterflies, or stars and hang them with threads for a floating effect.
4. Paper Lanterns
Fold colored sheets into lantern shapes and place LED lights inside for a glowing ambience.
5. Confetti Balloons with Paper Fillings
Fill transparent balloons with paper confetti for a fun and colourful party vibe.
Benefits of Using Paper Crafts for Party Decoration
- Cost-effective: Ideal for budget-friendly parties
- Creative expression: Encourages kids and adults to participate
- Eco-friendly: Can be made using recycled materials
- Skill-building: Improves motor skills, creativity, and focus in children
- Customizable: Easily match any party theme
Basic Materials You’ll Need
- Colored paper/craft paper
- Scissors
- Glue or tape
- String or thread
- Markers and crayons
- Stapler
- Decorative items (glitter, stickers, beads)
Related Crafts
- Easy Paper Crafts for Kids
- Birthday Decoration Ideas
FAQs
Q1. What materials do I need to make paper crafts?
Answer: You can use a variety of different materials, such as colored paper, cardstock, markers, scissors, glue, and other decorative items.
Q2. What type of paper should I use for paper crafts?
Answer: You can use any type of paper you like for paper crafting. Cardstock is typically the best option for most projects since it is thicker and sturdier than regular paper.
Q3. How do I make paper flowers?
Answer: Making paper flowers is easy! You can find a variety of tutorials online that will show you step by step how to make paper flowers.
Q4. Can I use paper crafts to decorate a party?
Answer: Absolutely! Paper crafts are a great way to add a unique and personal touch to any party.
Q5. What kind of paper crafts can I make for a party?
Answer: You can make all sorts of paper crafts for a party, including paper flowers, paper decorations, banners, centrepieces, and more.
Q6. What is the best way to store paper crafts?
Answer: Paper crafts should be stored flat in a cool, dry place. Make sure to use acid-free materials whenever possible to help preserve your paper crafts over time.
Q7. Do I need to use special tools to make paper crafts?
Answer: Not necessarily. You can make paper crafts with just scissors and glue. However, if you want to make more intricate projects, you may need tools such as a paper cutter and other craft supplies.
Q8. Do I need to use special paper for paper crafts?
Answer: It depends on the project. You can use regular copy paper for some paper crafts, but for more intricate projects, you may need to use cardstock or speciality paper.
Q9. How long do paper crafts last?
Answer: Paper crafts can last for a long time if they are stored properly. Acid-free materials and storage can help preserve paper crafts for years.
Q10. Are paper crafts safe for children?
Answer: Yes, paper crafts are generally safe for children. However, it is important to supervise children while they are crafting to make sure they do not put any small pieces in their mouths.
Decorating a party with paper crafts is not only affordable but also a fun and creative activity for the whole family.
With a little planning and imagination, you can transform any space into a vibrant celebration area using simple materials. Try mixing different craft ideas, colours, and themes to make your party truly unforgettable. Stay updated with our newest content—join our Telegram group today! Don’t forget to follow us on YouTube & Facebook for creative art and craft tutorials, fun ideas, and much more.
Comment down below and tell us if you found these ideas helpful. We would love to hear. You can try these with your kid and keep your inner child younger than ever!
For more such creative, easy yet simple ideas, you can visit our website and check our posts, where you can find the best DIY Ideas to save your day.
Check the amazing collection of Craft Ideas for Kids at K4 Craft.
Reviewed by Yash Sharma
You’ll Also Like
- Funny Food Decoration Ideas for Kids
- Cardboard Christmas Crafts for Home Decoration
- Christmas Classroom Door Decoration Ideas for Preschool
- New Year’s Eve Craft Decoration Ideas
- 20+ Creative Ways to Decorate Old Tin Cans for Your Home


