Fall & Autumn
DIY Easy Lion Craft Using Fall Leaves At Home

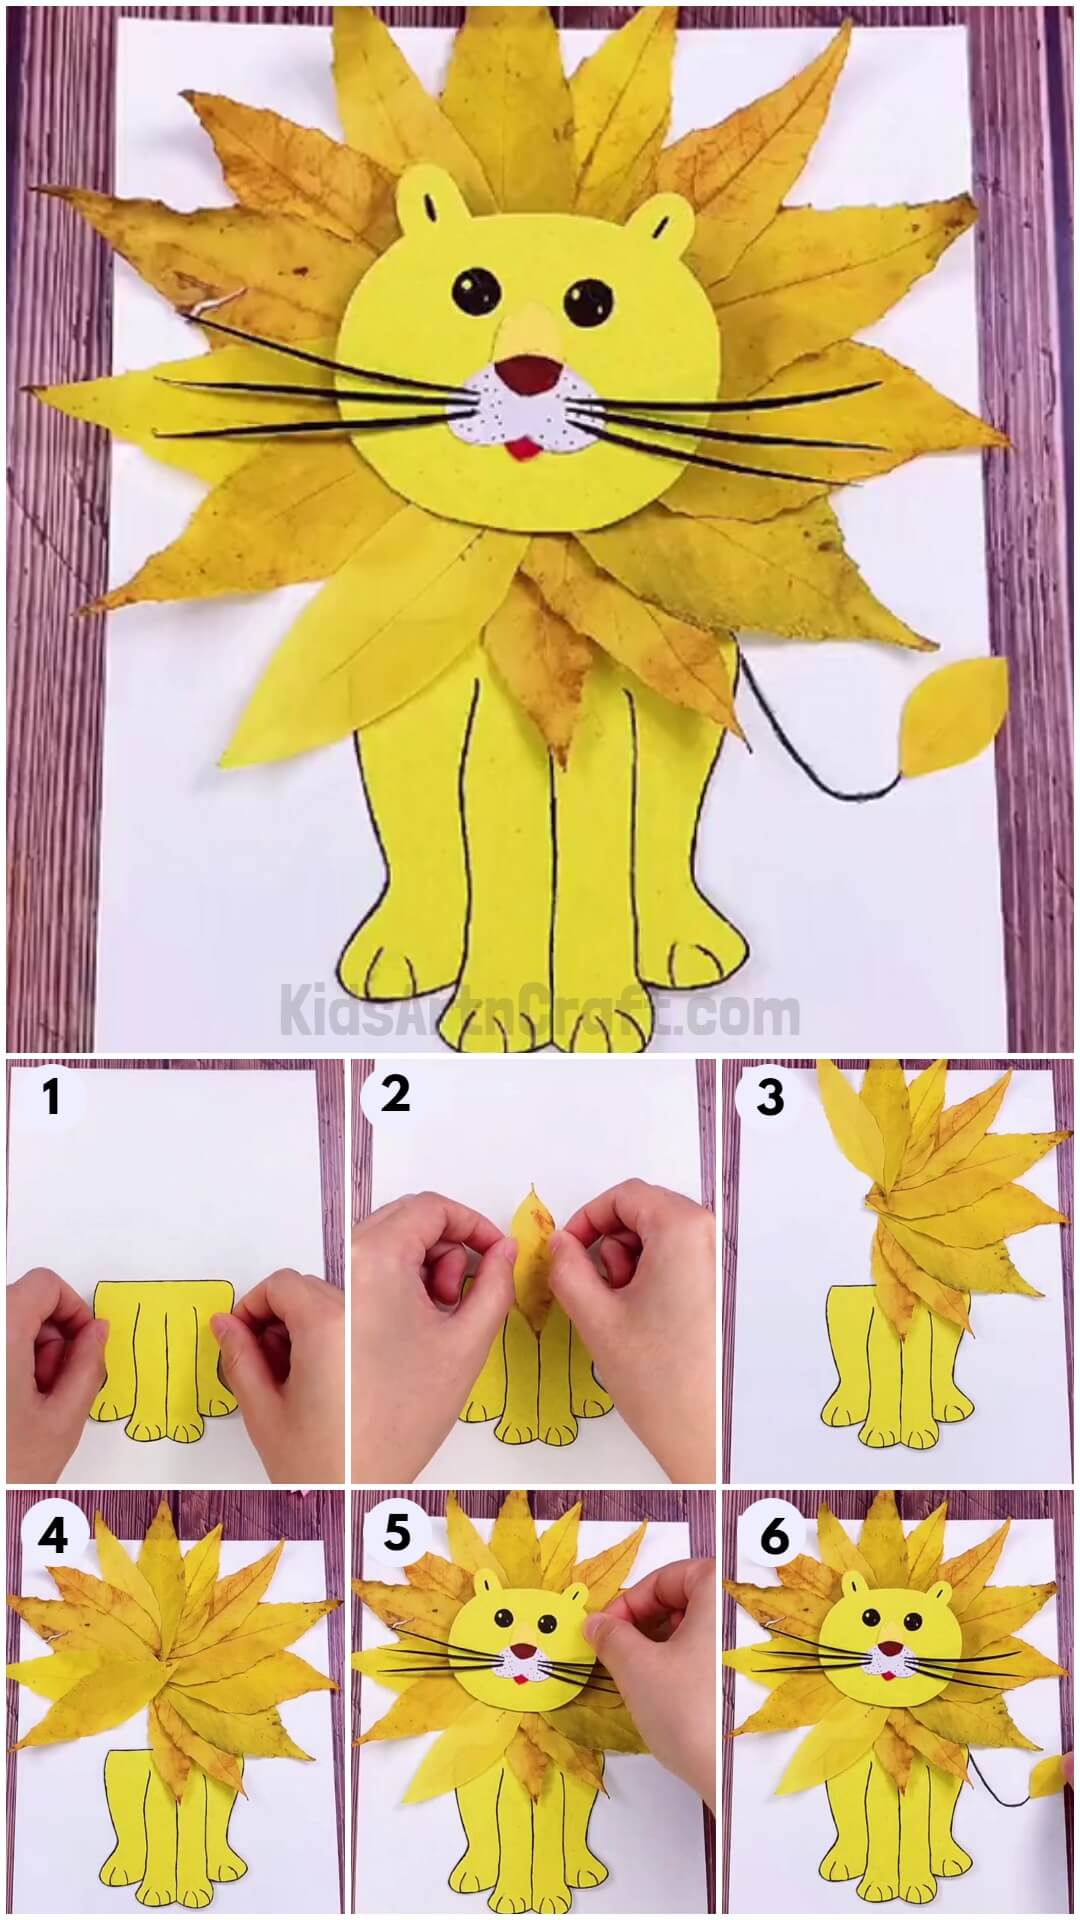
Make this easy and fun lion craft using fall leaves in the comfort of your own home! Get creative and make your unique lion with just a few simple supplies. Perfect for kids of all ages to enjoy.
Welcome to this lion craft tutorial! This is an easy lion craft using fall leaves, kids will enjoy creating this lion craft, not only kids, but anyone can also create this craft it is an interesting craft to create and when you get bored just give it a try, you can also use this lion craft to decorate your room. In this tutorial, we give you some step-by-step instructions to create this cute lion craft using some simple essentials.
DIY Lion Craft Using Fall Leaves
Read More: DIY Flying House Using Leaves Up Movie Inspo
Materials Required
- Colored Paper (Yellow, White)
- Yellow Leaves
- Double Side Tape
- Glue
- Scissors
- Pencil
- Sketch Pens (Black, Brown, Red)
Procedure
Step 1: Creating A Lion’s Structure
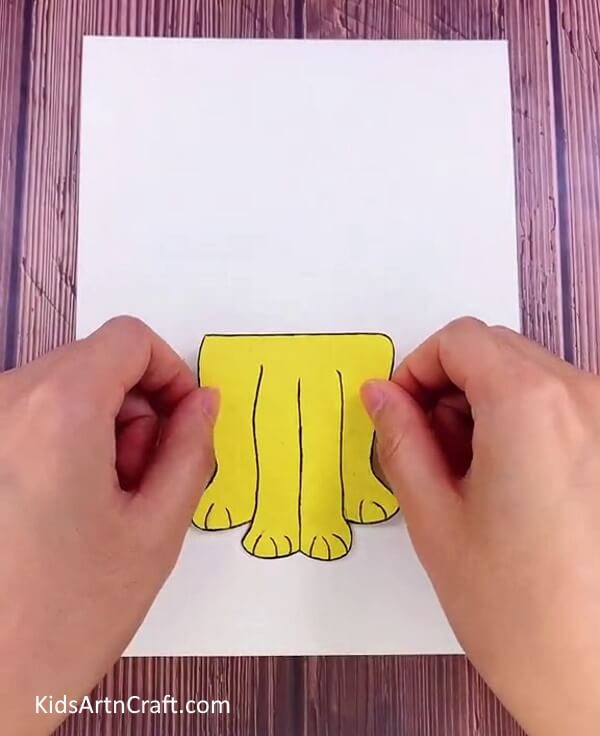
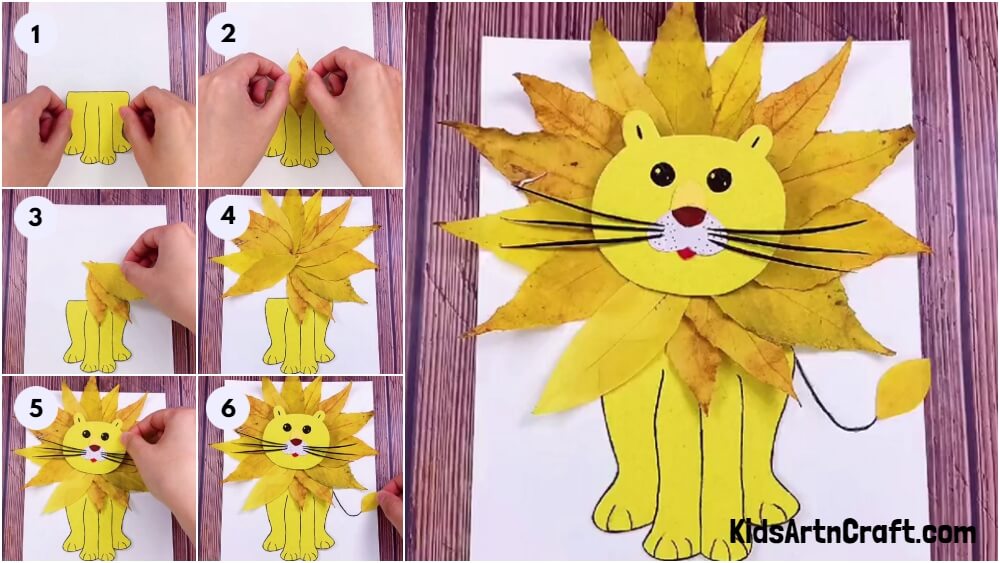
Draw a lion’s legs on the yellow chart using a pencil, draw three straight and two curvy lines in the middle of the yellow chart as shown in the image and at the top of those lines joint two lines as shown, and at the bottom, draw paws and highlight your drawing with a black sketch and cut it, paste it on the white sheet.
Step 2: Pasting The Yellow Leaves
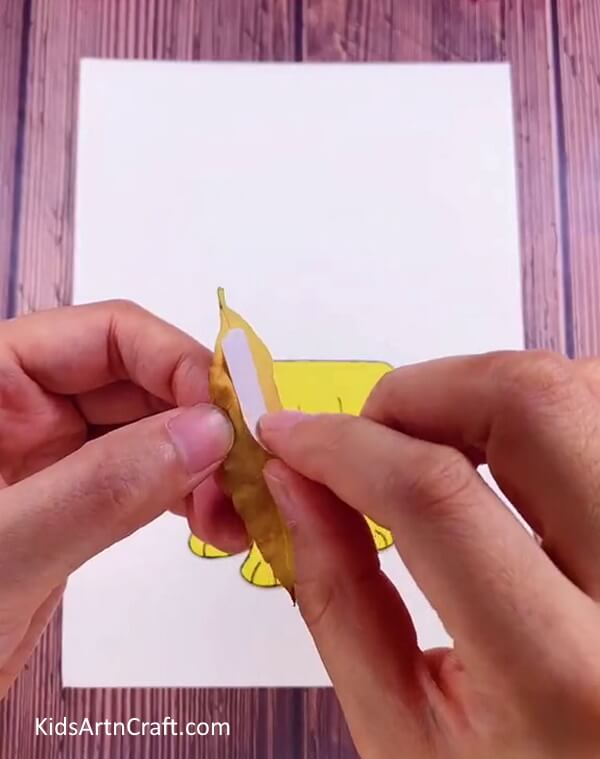
Take dried yellow leaves. Use double side tape to paste them. Paste the leaves at the top of the drawing as shown.
Step 3: Pasting Leaves In The Middle Of The Drawing
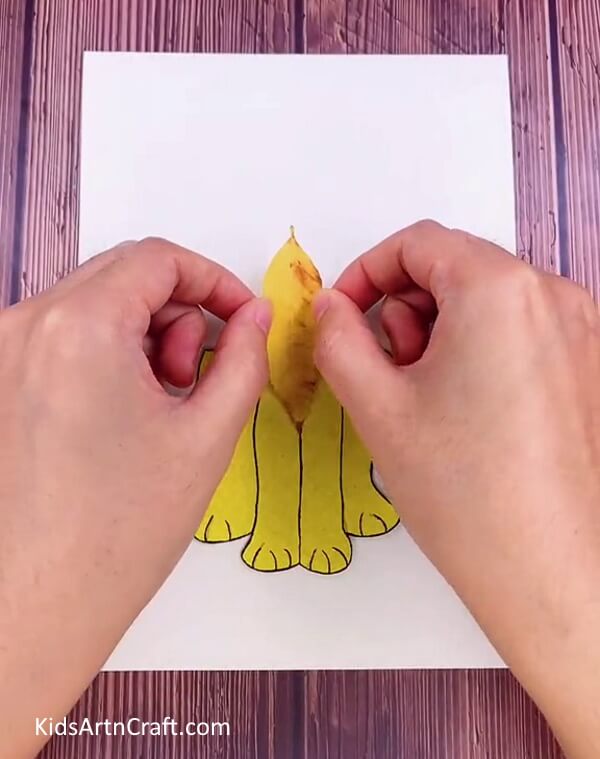
Paste the leaf with its stem pointing upwards. Paste the leaf on top of the lion’s legs in the center as shown in the image.
Step 4: Pasting The Second Leaf
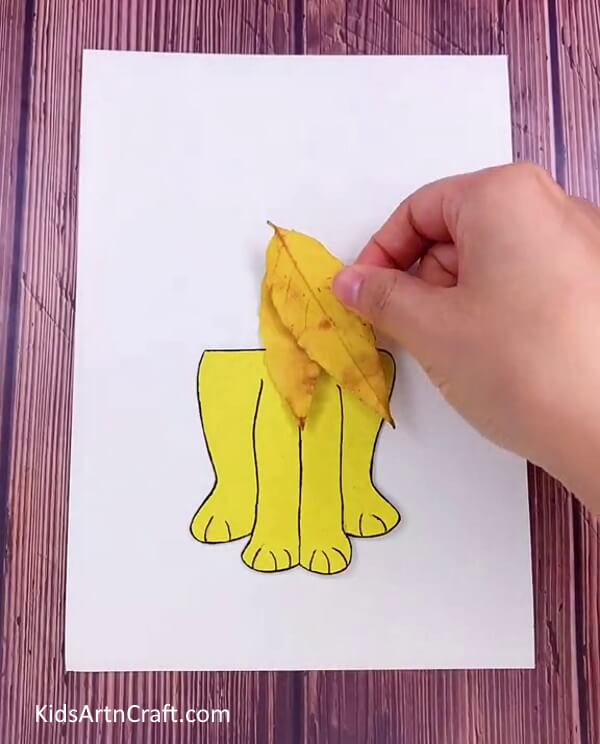
Then, paste another leaf at the top, slightly tilted towards the right.
Step 5: Pasting The Third Leaf
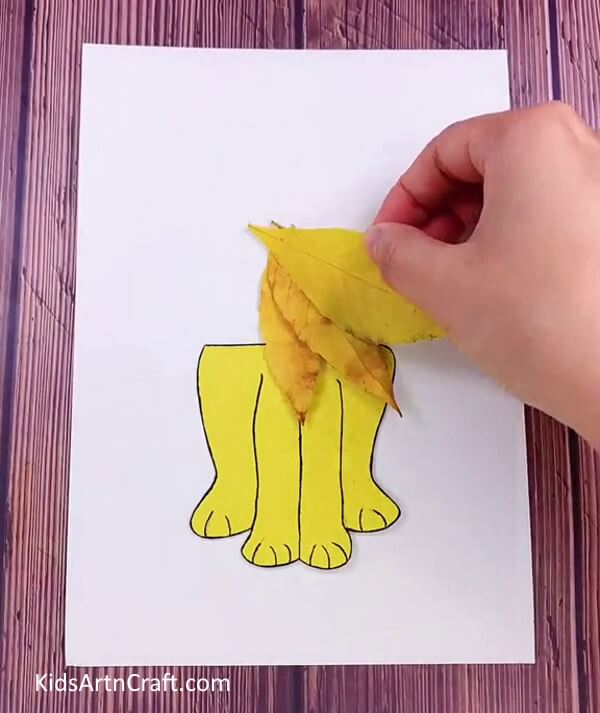
Again, paste the third leaf at the top of the second leaf and continue the process.
Step 6: Pasting More Leaves In A Circular Manner
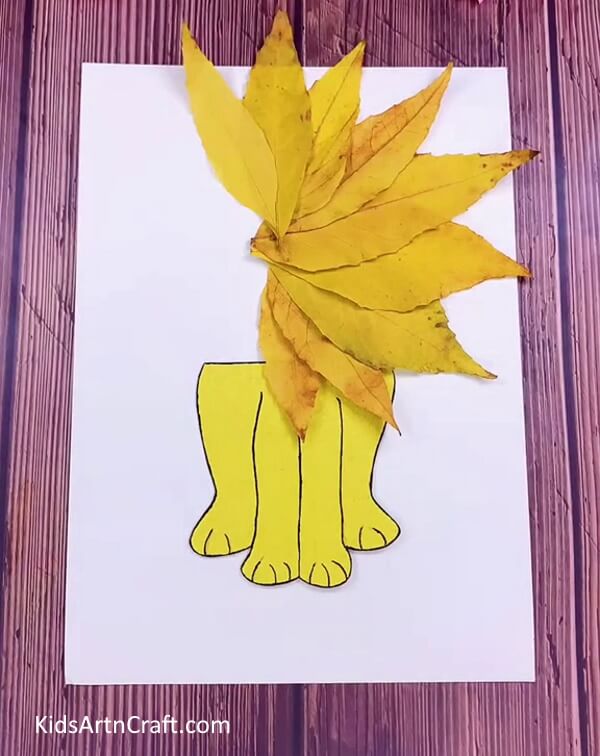
Circularly paste more leaves as shown in the image.
Step 7: Pasting All Leaves
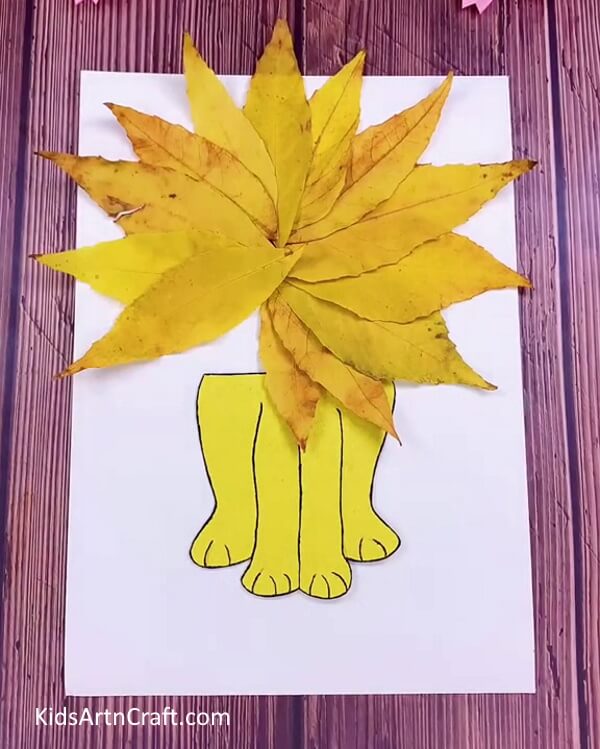
Paste all the leaves until you reach the first leaf. You should paste it circularly.
Step 8: Making The Lion’s Head
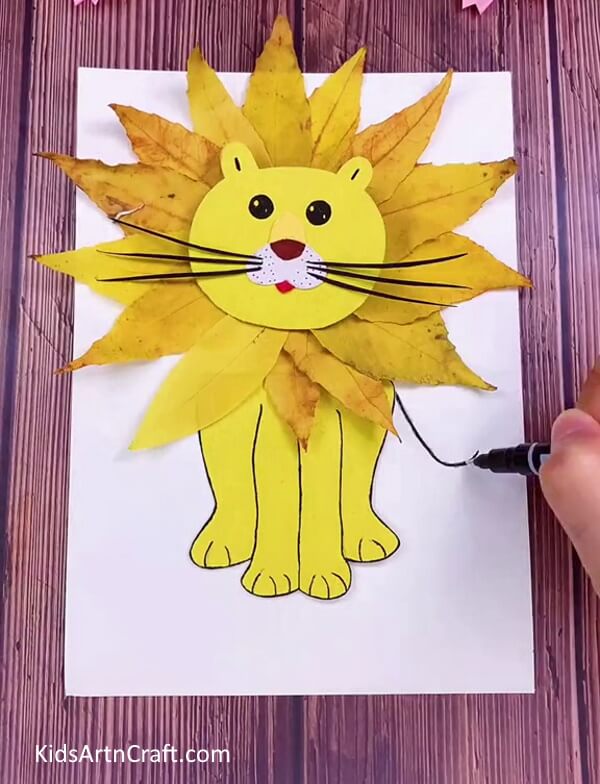
Then take another piece of the yellow chart and cut it into a round shape for the lion’s head. After you make the head, cut two pieces of yellow sheets for the ears and draw small lines on them and paste them with the head, then draw the eyes. Then create and paste the nose as shown, and use brown and black pens to highlight it. Draw the mouth using the red sketch.
Step 9: Making A Mustache And Draw A Tail For The Lion

Paste all those six pieces of paper one by one under the nose just like a mustache. Now paste the head part of the lion at the center of the leaves that we paste for the lion’s fur. Then take your black pen, it is time for you to draw the tail. Start to draw a long curvy line behind the leg on the right side as shown.
Step 10: Adding A Leaf To The Tail
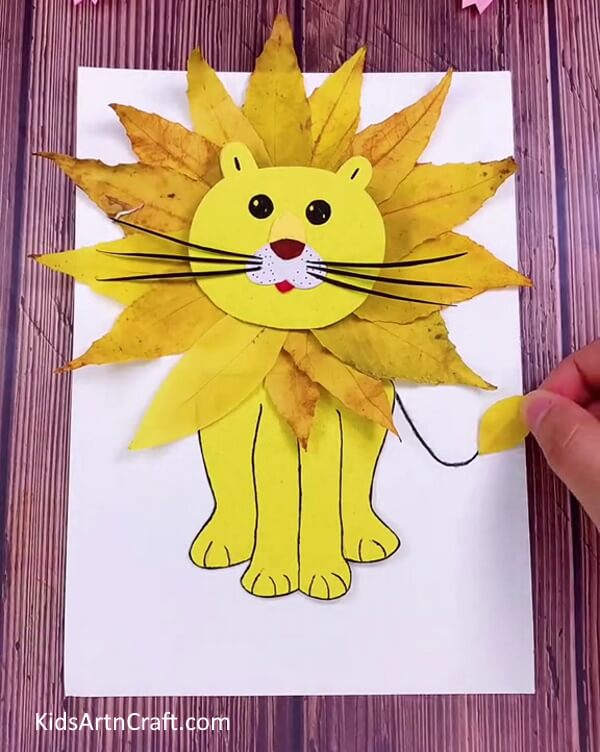
At the end of the tail part, you have to paste a small round shape yellow leaf.
Our Easy Lion Craft With Fall Leaves Is Ready!
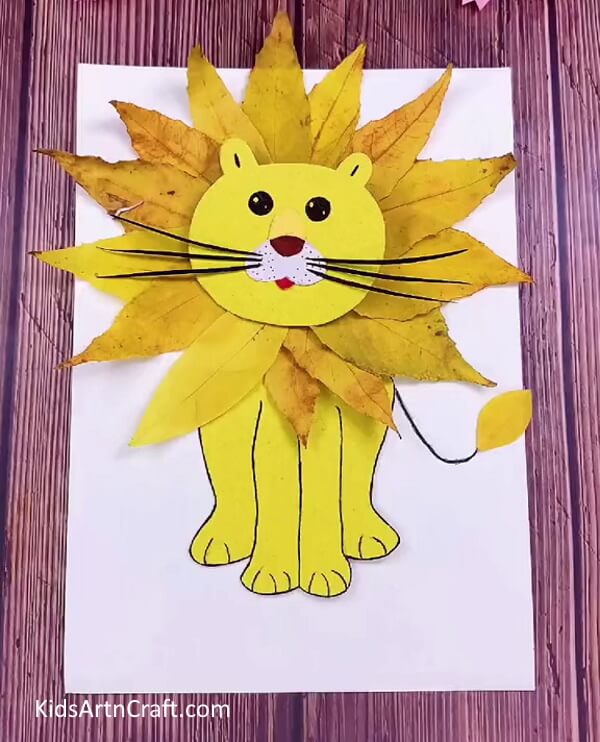
That’s it, you have completed your lion craft. You can hang it on your wall as beautiful home decor for the upcoming fall season.
We have presented to you an easy step-by-step tutorial to make a yellow lion craft using fall leaves. We hope this tutorial will help you to make this craft easily. Don’t forget to leave a comment, your comment will help us to improve and make more wonderful crafts like this.
Thank you for visiting our website!
Follow us on Youtube for art and craft tutorials and much more.
More Articles from Kids Art & Craft
- Easy Leaf Art And Craft Tutorial for Kids
- Easy Egg Carton Pigs Step by Step Tutorial For Kids
- Fan Shaped Paper Cup Craft Activity For Kids
- How to Make a Paper Bunny Easy Tutorial for Kids
- DIY Bird Nest Paper Craft For Kids


